
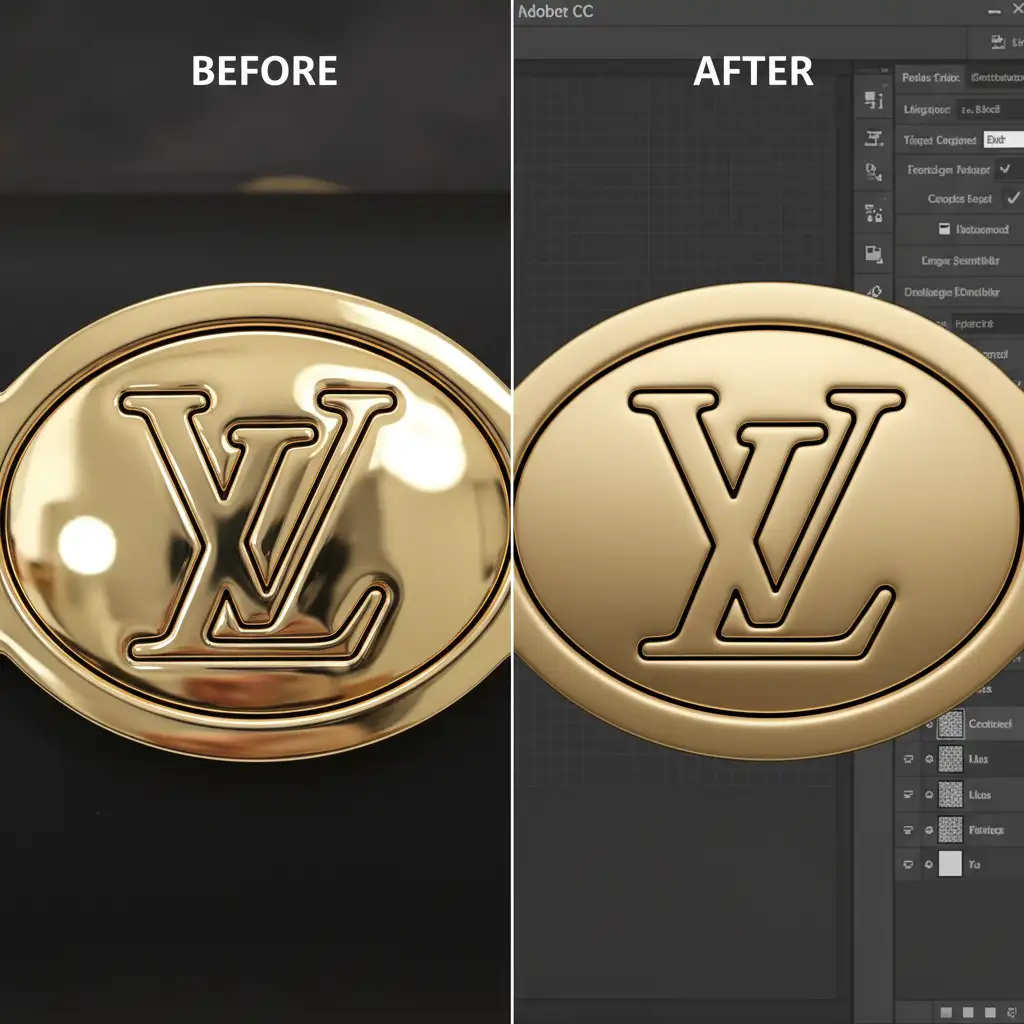
You have just wrapped a high-end product shoot. The leather looks flawless, but the polished metal buckles and zippers are a disaster. Because polished metals act like mirrors, they capture every studio strobe, softbox, and even the camera lens silhouette. When you try to paint out these harsh white blowouts and dark specular highlights, you inevitably destroy the natural metallic gradient and erase the engraved brand logos.
If you are struggling with removing studio reflections from luxury bag hardware without ruining the underlying texture, you are not alone. This is one of the most common pain points in e-commerce photography. Let’s explore three professional, non-destructive retouching techniques in Adobe Photoshop CC v25.x to restore that premium, high dynamic range shine.
Why Metallic Hardware is a Retoucher’s Nightmare
Luxury bag hardware—like brass locks, chrome zippers, and gold logos—has an incredibly high dynamic range. During a shoot, these surfaces reflect the exact layout of your studio. The result? Distracting black blocks (the dark room) and blown-out white squares (your softboxes).
Amateur retouchers often try to blur or smudge these out, resulting in flat, plastic-looking metal. Professional retouching requires preserving the micro-scratches, the engraved branding, and the sweeping gradient that tells the human eye, “This is solid metal.”
Here is exactly how to fix it, ranging from a quick patch to a high-end composite rebuild.
Method 1: The Quick Fix Using Clone Stamp Blending Modes
If the reflections are minor and the hardware is relatively small, you don’t need a complex rebuild. You can use targeted cloning to neutralize the extremes.
- Create a new blank layer to ensure non-destructive retouching.
- Select the Clone Stamp Tool (S).
- In the top toolbar, change the Blending Mode to Lighten (to fix dark room reflections) or Darken (to fix harsh white softbox blowouts).
- Drop your Opacity to 20%.
- Sample a clean area of the metallic gradient and gently brush over the distracting reflection.
Because of the blending modes, the Clone Stamp will only affect pixels darker or lighter than your sample, leaving the mid-tones and underlying texture intact.
Method 2: The Pro Workaround with Vector Masks and Gradients
When the hardware is large, highly reflective, and completely ruined by studio lights, cloning won’t save it. You need to manually reconstruct the metal’s surface.
Step 1: Isolate the Hardware
Use the Pen Tool (P) to trace a precise clipping path around the hardware. Convert this path into a selection, create a new layer group, and apply it as a vector mask. This ensures your new metallic gradients will not bleed onto the leather of the bag.
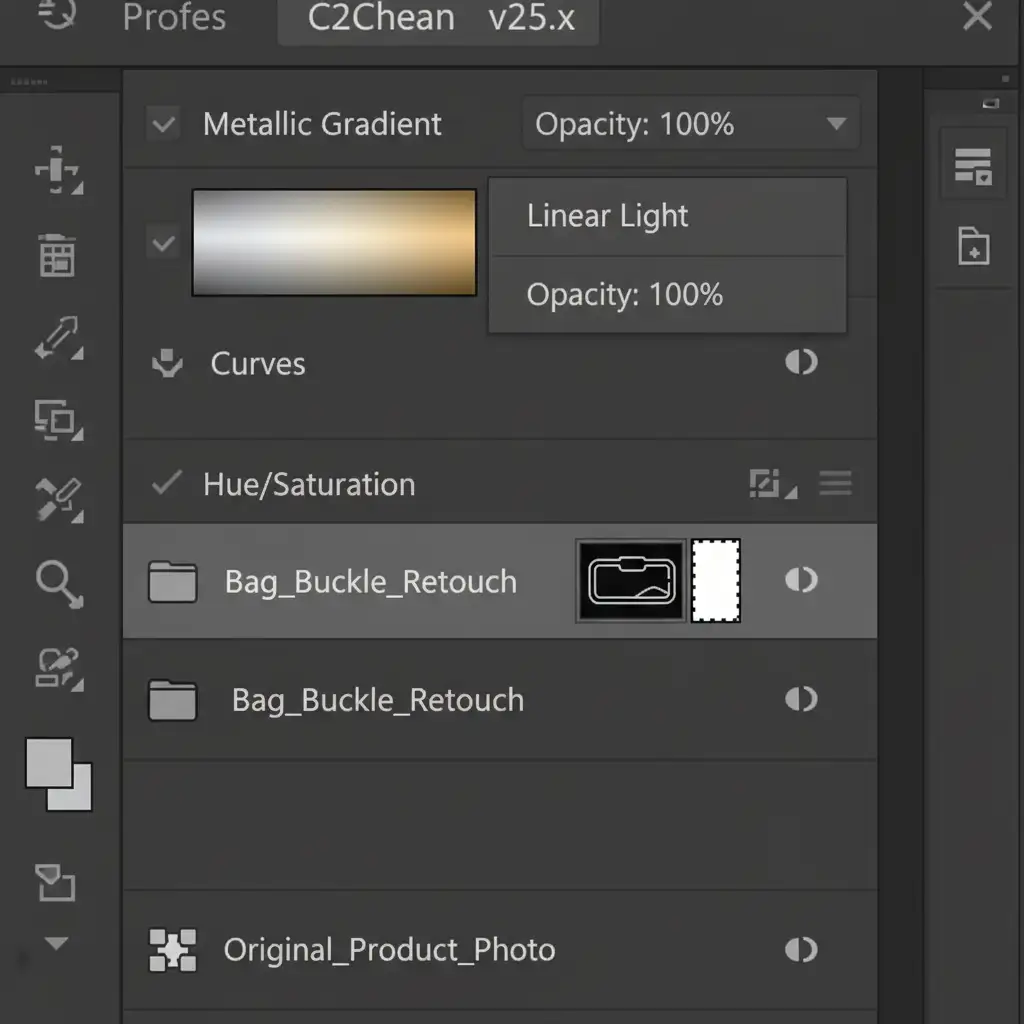
Step 2: Rebuild the Shine
Inside your masked group, create a new blank layer. Use the Brush Tool (B) with a soft edge, or apply a gradient map, to manually draw a new, clean metallic reflection. Sample the original colors of the metal (dark bronze, mid-gold, bright highlight) and recreate the cylindrical or flat gradient.
Step 3: Rescue the Logo
Your new gradient will cover any engraved logos. To fix this, add a Layer Mask to your gradient layer. Use a soft black brush to carefully mask out the gradient directly over the logo, allowing the original engraving to show through. You can further refine this using luminosity masks to ensure only the darkest parts of the engraving are visible.
Method 3: The Technical Deep-Dive into Frequency Separation
For the ultimate high-end e-commerce finish, frequency separation is the gold standard. This technique separates your image’s color/light data from its texture data, allowing you to manipulate the reflections without destroying the metal’s physical characteristics.
Step 1: Run the Separation
Duplicate your background layer twice. Name the bottom layer “Low-Frequency Color” and the top layer “High-Frequency Texture.” Apply a Gaussian Blur to the Low layer until the scratches and logo disappear. Then, apply the “Apply Image” command to the High layer (Subtract mode) to extract the texture. Change the High layer’s blending mode to Linear Light.
Step 2: Blend the Reflections
Select the Mixer Brush tool. This is where the magic happens.
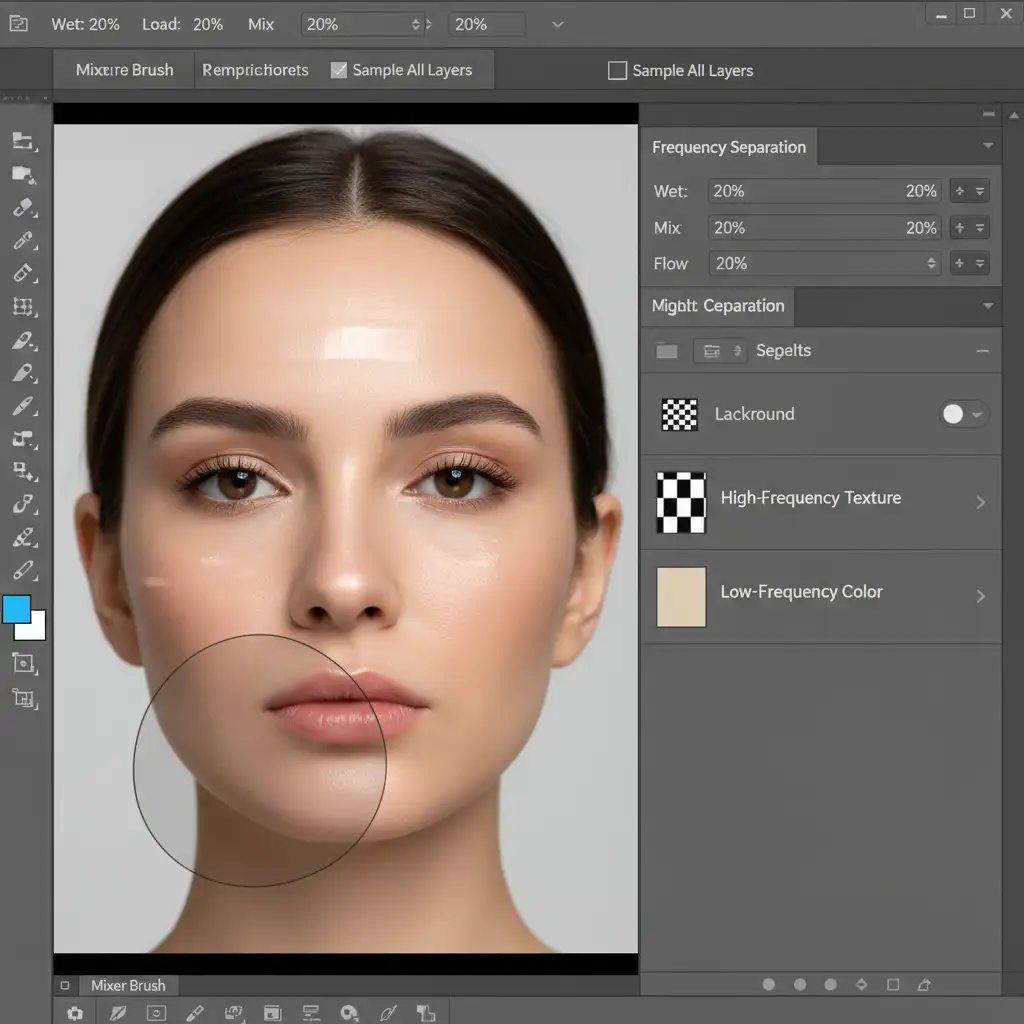
Target your “Low-Frequency Color” layer. Set your Mixer Brush to a clean brush with Wet, Load, Mix, and Flow all set around 20%. Gently paint over the harsh edges of the softbox reflections.
Because you are only moving color and light on the Low layer, the micro-scratches, metal grain, and deep logo engravings on the High layer remain 100% untouched. Finish the process with a subtle dodge and burn layer to enhance the micro-contrast of the engraving.
Elevate Your E-Commerce Retouching with Image Work India
Removing studio reflections from luxury bag hardware requires a deep understanding of light, texture, and advanced Photoshop mechanics. While techniques like frequency separation and vector masking yield incredible results, they are incredibly time-consuming—especially when you are processing hundreds of SKUs for a seasonal catalog launch.
Struggling with complex product reflections? Don’t let harsh studio glares devalue your premium products. Hire Image Work India and Cloud Retouch for flawless, high-end e-commerce retouching. Our team of expert retouchers specializes in complex clipping paths, metallic gradient reconstruction, and meticulous color correction.
Focus on shooting your next luxury campaign, and let us handle the pixels. Contact us today for a custom retouching quote and elevate your luxury brand’s visual standard.


