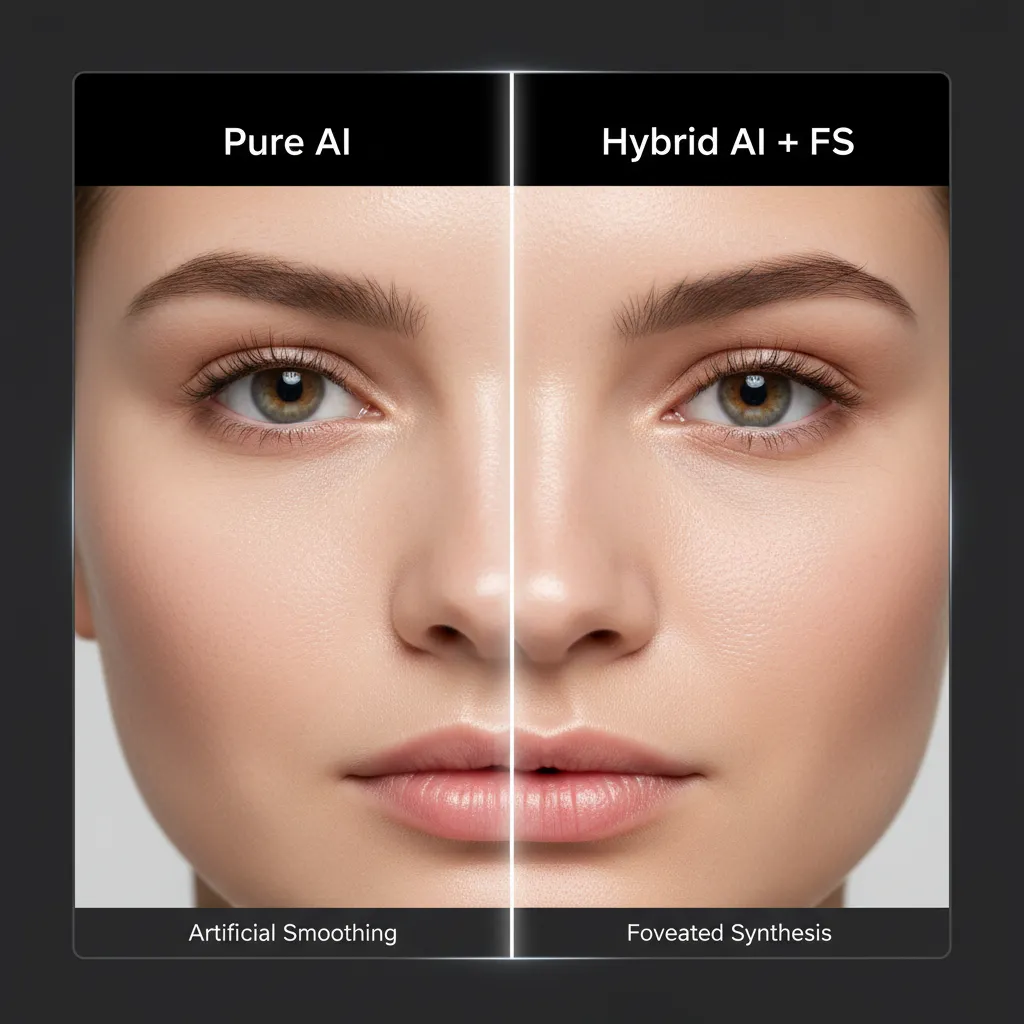
Are you tired of AI retouching tools turning your high-end portraits into plastic, textureless mannequins? While Photoshop’s Generative Fill and Neural Filters process images with incredible speed, they treat photos as flat layers—obliterating micro-contrast, pores, and fine hair. Conversely, manual retouching is mathematically perfect but eats up hours of your day. You shouldn’t have to choose between speed and gallery-quality texture.
The solution is the Hybrid AI Frequency Separation workflow. By forcing Adobe’s AI engine to work exclusively within the tonal layers of a frequency separation stack, you can achieve flawless color transitions while perfectly preserving original skin texture.
Why Pure AI Retouching Fails High-End Portraits
In Photoshop CC 2024 (v25.x) and above, AI tools are revolutionary for composition and object removal. However, when applied to beauty and portrait retouching, pure AI workflows fall short.
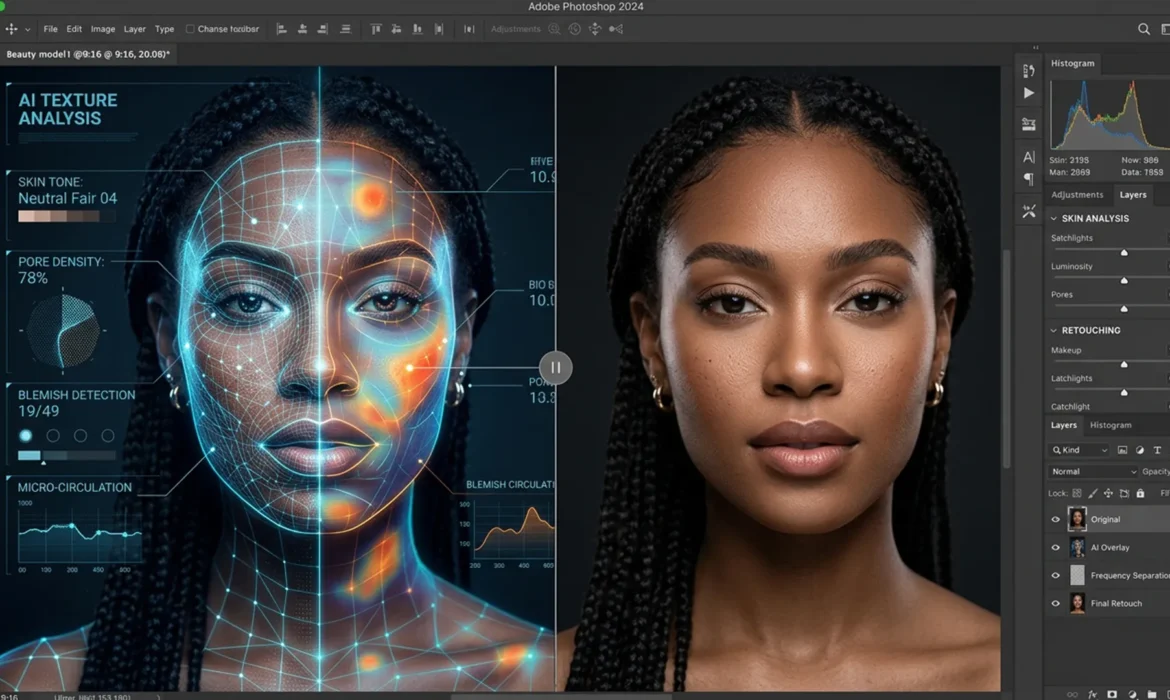
Because Generative Fill and the Skin Smoothing Neural Filter evaluate the image as a single, flattened entity, they inherently blur the structural data. This destroys the high-frequency texture—the microscopic details like pores, fabric weave, and peach fuzz that give an image its photorealistic, high-end gallery feel.
To achieve non-destructive retouching at a commercial scale, we must separate the image’s texture from its underlying color and tone, allowing the AI to do the heavy lifting where it excels: fixing lighting and color transitions.
The Science Behind the Hybrid Workflow
The Hybrid AI Frequency Separation workflow solves the speed-versus-quality dilemma by mathematically dividing your image into two distinct layers:
- Low-Frequency Tone: Contains all the color, shadow, and light transition data.
- High-Frequency Texture: Contains only the sharp, structural details (pores, hair, edge contrast).
By isolating the AI’s operations to the low-frequency layer (using Gaussian Blur or Median), the AI is forced to only evaluate and modify the underlying skin tones. The structural data on the high-frequency layer remains completely untouched, floating above the AI adjustments in Linear Light blend mode.
Step-by-Step: 3 Methods for Hybrid AI Retouching in Photoshop CC 2024+
Depending on your deadline and the required precision, here are three ways to implement this hybrid workflow.
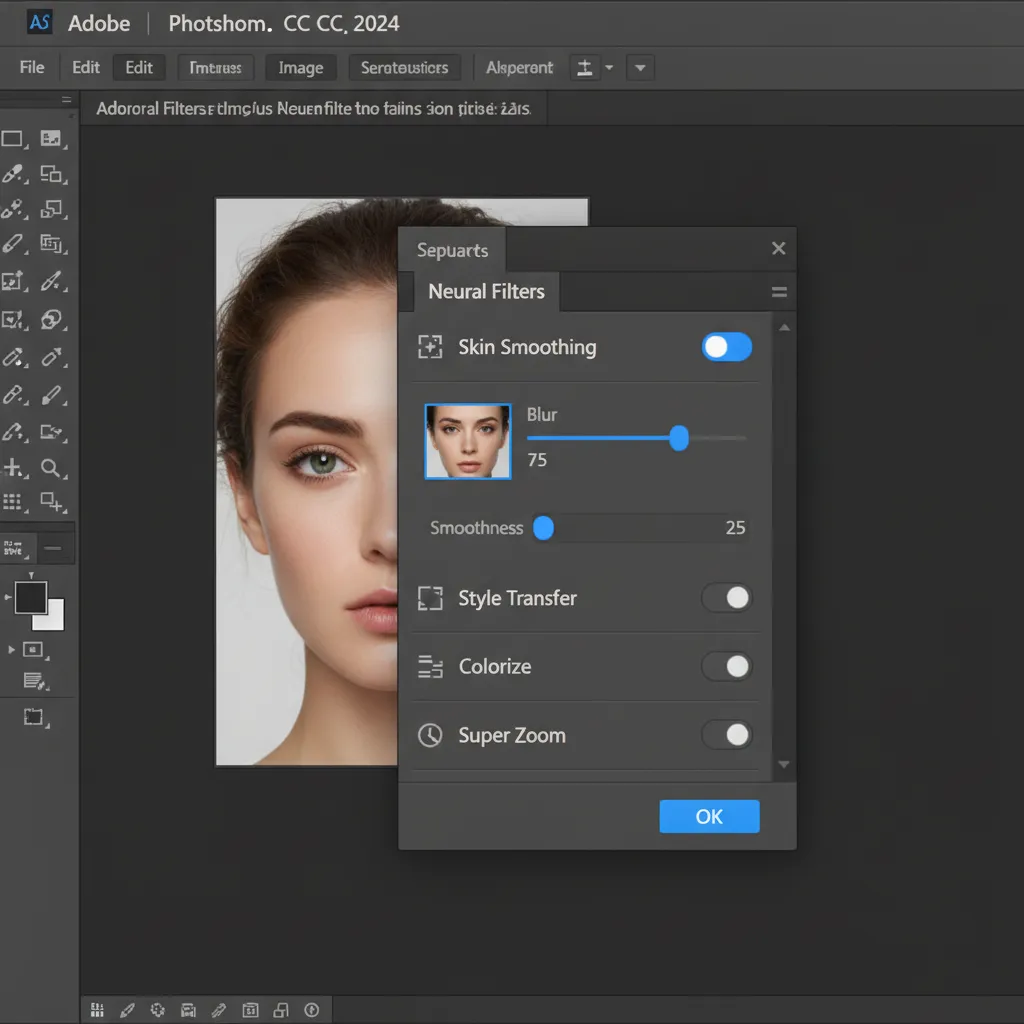
Method 1: The Quick Fix (Neural Filter + High Pass)
This method is ideal for high-volume event or e-commerce photography where speed is the absolute priority.
- Duplicate your background layer and open the Skin Smoothing Neural Filter.
- Apply the filter to quickly even out the skin tones across the face.
- Run your standard Frequency Separation action over this smoothed layer.
- To rescue the texture lost by the Neural Filter, duplicate the original background layer, move it to the top of the stack, and apply a High Pass filter (radius 1.5px – 3.0px).
- Change this High Pass layer to an Overlay or Linear Light blend mode to punch the original, untouched texture back through the AI-smoothed skin.
Method 2: The Pro Workaround (Generative Fill on Low-Frequency)
For professional studio work, this method replaces the tedious Mixer Brush tool with Adobe’s Firefly AI engine.
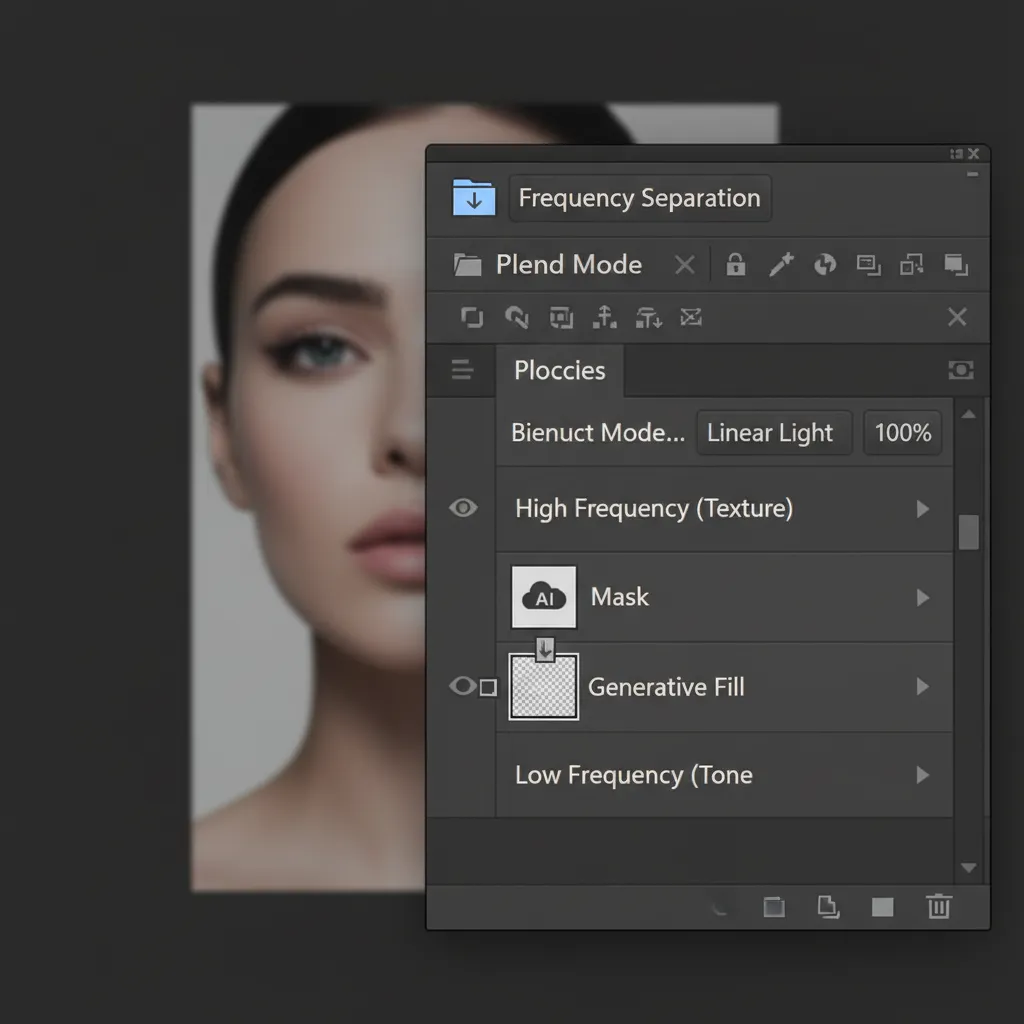
- Set up your standard Frequency Separation layers (High and Low).
- Select your Low-Frequency (Color/Tone) layer.
- Use the Lasso tool (feathered at 10-20px) to select large areas of uneven skin tone, harsh shadows, or blotchy color transitions.
- Click Generative Fill on the contextual taskbar and hit generate without entering any text prompts.
- The AI will instantly calculate perfect light and color transitions to fill the selection. Because this generative layer is sandwiched below your High-Frequency texture layer, the skin pores remain 100% intact.
Method 3: The Technical Deep-Dive (16-Bit Math & AI Masking)
For gallery-quality, 16-bit color depth images, precision is paramount. This method ensures mathematically perfect separation and uses AI for flawless luminosity masking.
- Create two duplicates of your background layer. Name them “Low” and “High”.
- Apply a Gaussian Blur to the “Low” layer until the skin texture disappears.
- Select the “High” layer and navigate to Image > Apply Image.
- The 16-Bit Math: Set the Layer to “Low”, Blending to “Add”, check the “Invert” box, set Scale to 2, and Offset to 0. Change the “High” layer blend mode to Linear Light.
- Apply your AI Generative Fill adjustments to the “Low” layer.
- To prevent these tonal adjustments from bleeding into clothing or background edges, use Photoshop’s AI Select Subject and Select Color Range (targeting skin tones) to automatically generate precise luminosity masks for your entire Frequency Separation group.

Scale Your High-End Retouching with Image Work India
Mastering the Hybrid AI Frequency Separation workflow allows you to merge the unprecedented speed of artificial intelligence with the exacting precision of traditional retouching. However, implementing and executing these 16-bit workflows across hundreds of campaign images still requires significant time and technical expertise.
If you are a professional photographer, agency, or e-commerce studio looking to scale your output without compromising on gallery-quality texture, Image Work India and Cloud Retouch are your dedicated post-production partners.
Our team of expert retouchers utilizes these cutting-edge hybrid AI workflows alongside meticulous manual finishing to deliver flawless, high-volume results. We ensure your images retain their natural, high-frequency details while achieving perfect color and tonal balance.
Stop choosing between speed and quality. Contact Image Work India and Cloud Retouch today for a free trial and let us elevate your high-end commercial retouching.


