
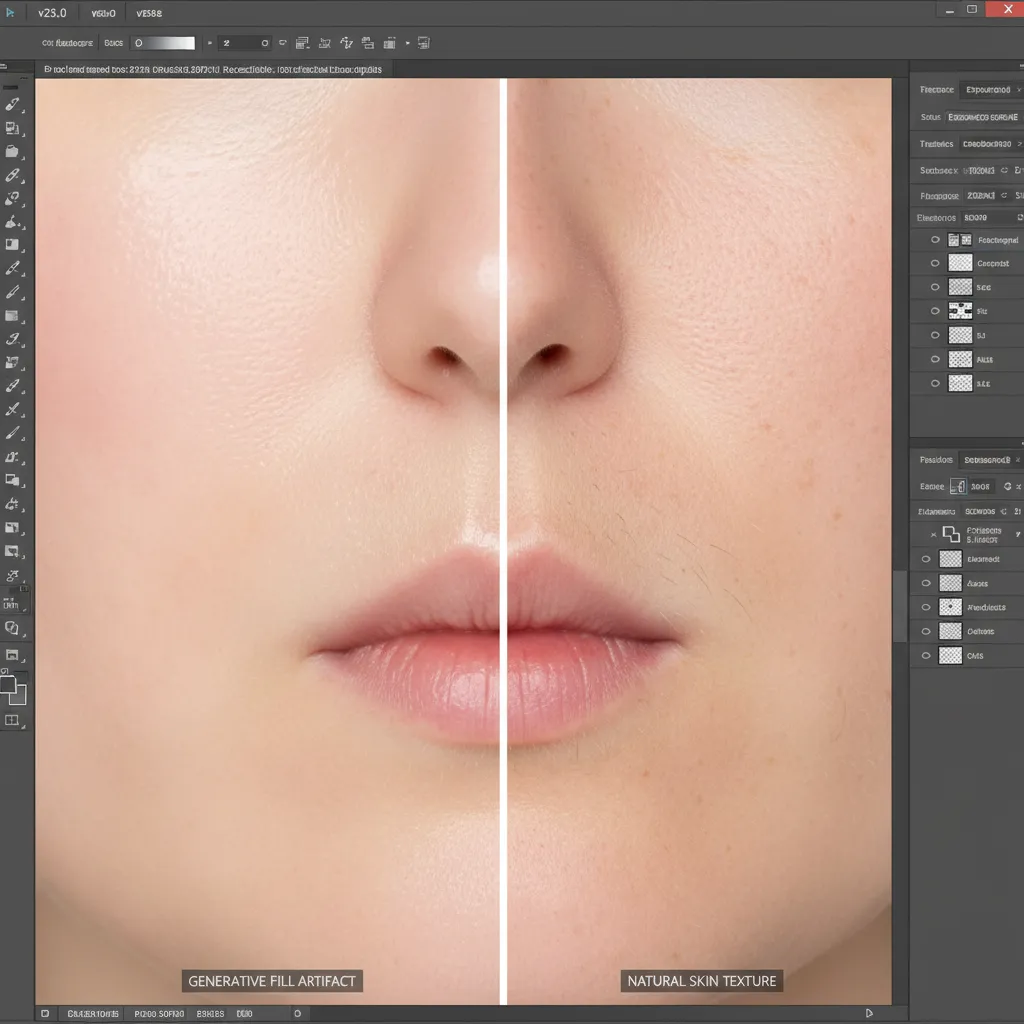
You just spent hours perfectly lighting a portrait, only to find a distracting element you need to remove. You lasso the area, hit Generative Fill in Photoshop, and wait for the magic. The object disappears, but there is a glaring new problem: the AI replaced the area with a smooth, plastic, mannequin-like patch.
If you are struggling with fixing Generative Fill skin texture artifacts, you are not alone. While Photoshop’s AI is revolutionary for structural edits, it routinely destroys the micro-contrast and natural pores required for high-end portraiture.
In this guide, we will break down exactly why this happens and show you three professional, non-destructive editing workflows to restore natural skin texture.
Why Does Generative Fill Destroy Skin Texture?
In Photoshop v25.x and newer, Adobe’s Generative Fill (powered by Firefly Image models) is optimized for speed and general composition, not high-frequency macro details.
When you generate or extend skin, the AI model typically outputs at a capped resolution (often 1024×1024 pixels). Photoshop then stretches this generated patch to fit your high-resolution canvas. This upscaling process obliterates the complex stochastic noise pattern inherent to digital camera sensors and human skin structure. The result is a glaring mismatch between your camera’s sharp, textured capture and the AI’s blurred approximation.
To fix this, we need to manually reintroduce texture. Here are three methods, ranging from a quick fix to an advanced high-end retouching workflow.
Method A: The Quick Fix (Targeted Noise Addition)
If you are on a tight deadline and the affected area is relatively small or in the shadows, simulating grain can visually bridge the gap between the plastic AI skin and the real photograph.
Step-by-Step Workflow:
- Make your Generative Fill edit.
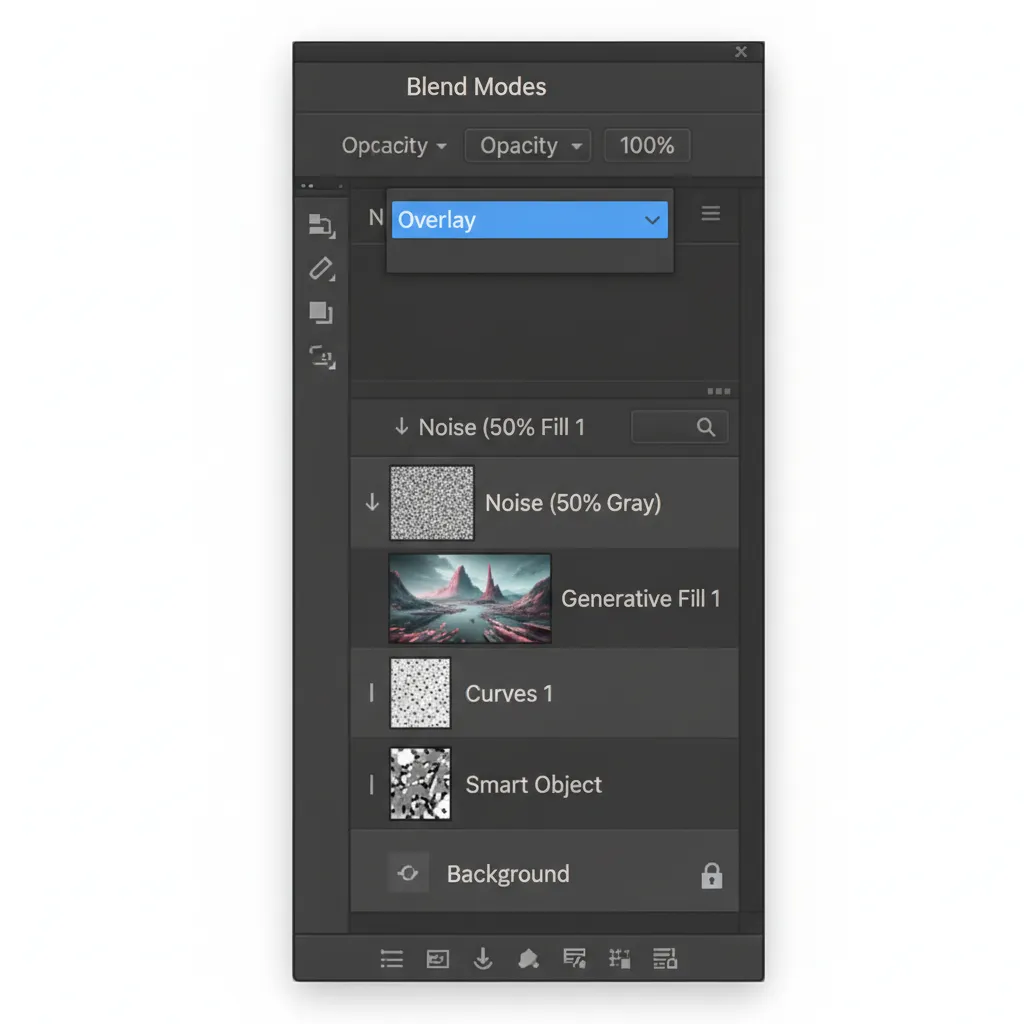
- Create a new blank layer directly above your Generative Fill layer.
- Hold Alt (Windows) or Option (Mac) and click between the layers to clip the new layer to the AI layer.
- Go to Edit > Fill, choose 50% Gray, and click OK.
- Change the layer’s blend mode to Overlay.
- Go to Filter > Noise > Add Noise. Choose Gaussian and check Monochromatic. Adjust the amount until the artificial grain matches the stochastic noise of your original image.
Method B: The Pro Workaround (High Pass Texture Grafting)
Adding uniform noise works for minor fixes, but realistic skin isn’t just noise—it has direction, pores, and micro-contrast. The High Pass filter allows you to “steal” actual skin texture from a clean part of your image and graft it over the AI-generated patch.
Step-by-Step Workflow:
- Find a clean, well-textured area of skin on your original image that matches the lighting of the AI-patched area.
- Use the Lasso tool to select it, and press Ctrl+J (Windows) or Cmd+J (Mac) to duplicate it onto a new layer.
- Drag this new layer above your Generative Fill layer.
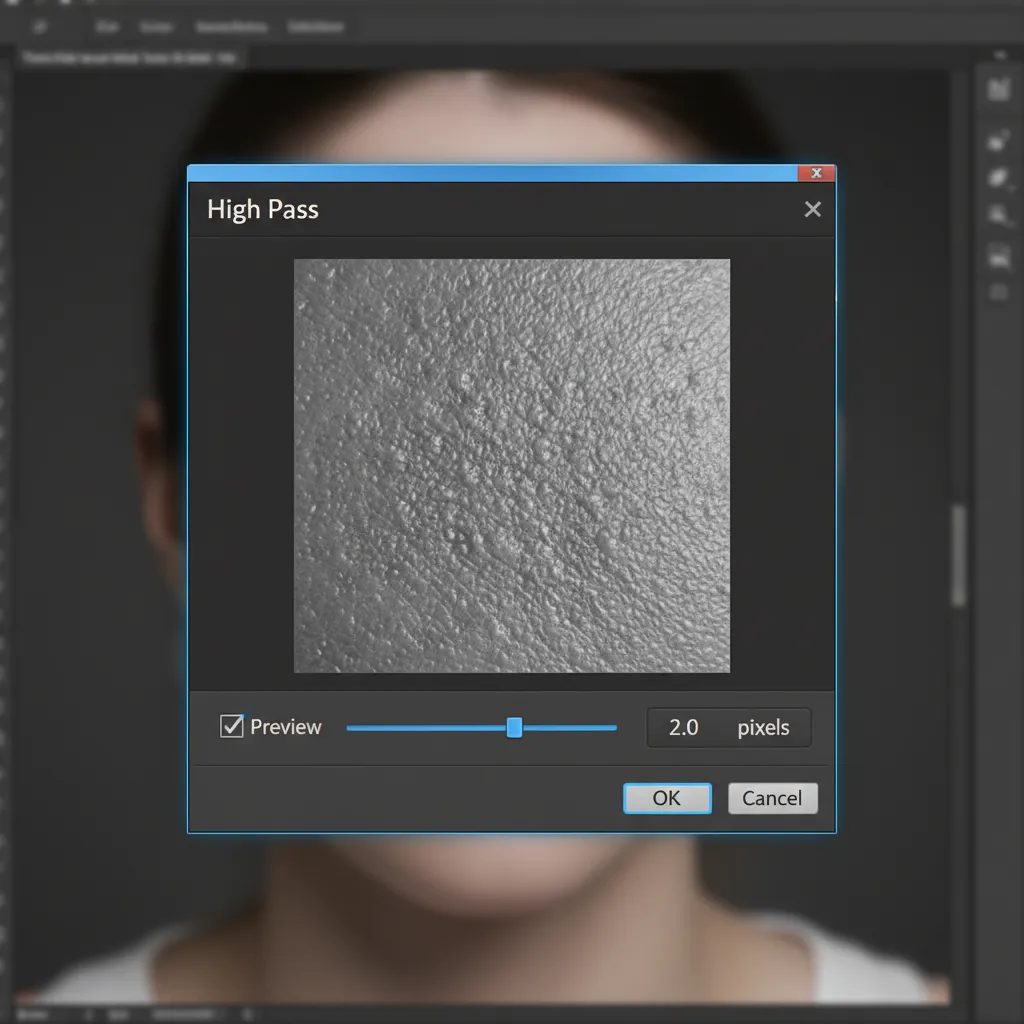
- Go to Filter > Other > High Pass. Set the radius between 1.5 to 3.0 pixels. You want to see only the sharp pores and fine lines, not the underlying color.
- Change the layer’s blend mode to Linear Light.
- Use Layer Masking (add a black mask and paint with a soft white brush) to seamlessly blend this grafted texture exclusively over the plastic AI skin.
Method C: The Technical Deep-Dive (Frequency Separation Integration)
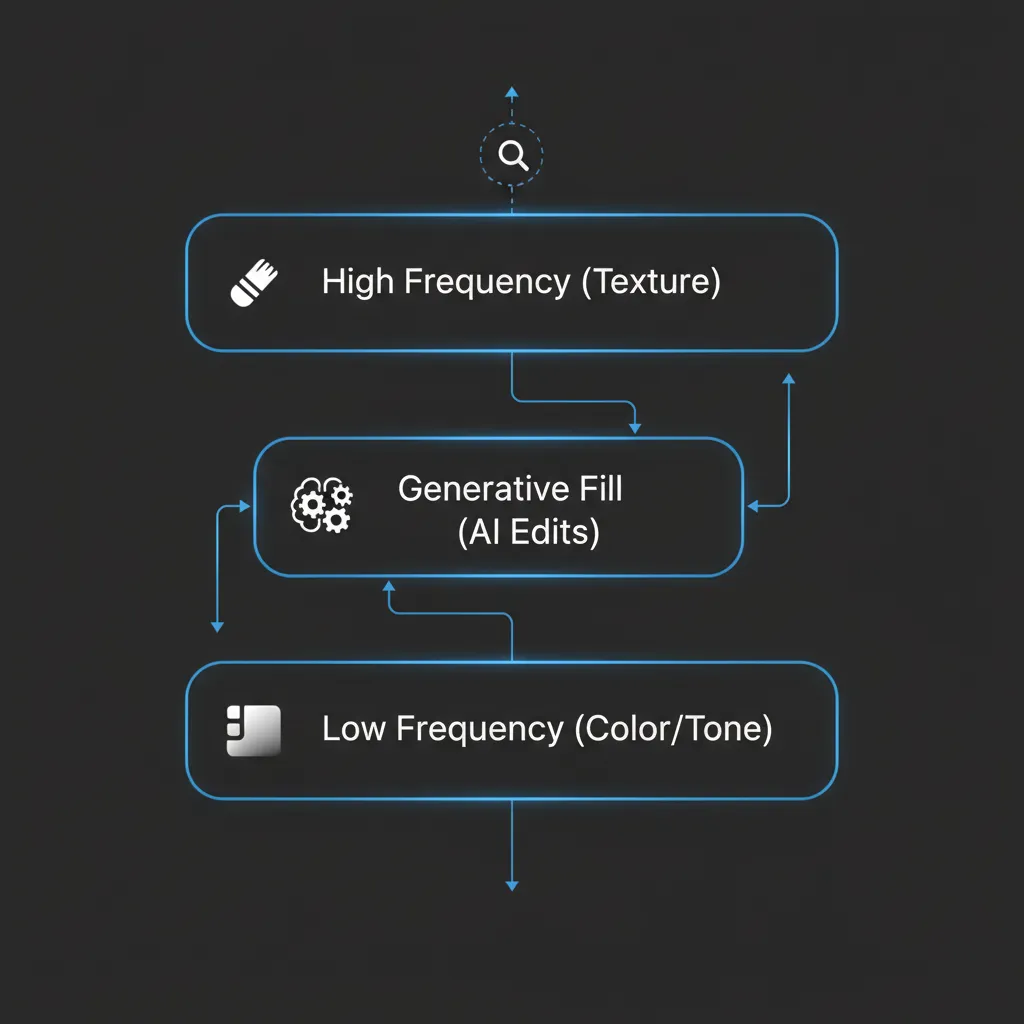
For high-end beauty, fashion, and commercial retouching, editors rely on Frequency Separation. This technique splits your image into two layers: Low Frequency (Color and Tone) and High Frequency (Texture).
By integrating Generative Fill into a Frequency Separation workflow, you force the AI to only alter the underlying color, leaving your original, flawless skin texture perfectly intact on top.
Step-by-Step Workflow:
- Run your standard Frequency Separation action (creating your Low/Tone layer and High/Texture layer).
- Select the Low Frequency (Tone) layer.
- Use the Lasso tool to select the blemish or object you want to remove.
- Apply Generative Fill.
- Because the Generative Fill layer is generated underneath your High Frequency layer, the AI only changes the color and shadow transitions. Your original pores, fine hairs, and micro-contrast remain perfectly preserved on the High Frequency layer above it.
Pro Tip: You can further refine this by using Luminosity masks to ensure the AI’s tonal shifts blend perfectly into the highlights and shadows of the original file.
Elevate Your Workflow with Video Guidance
Seeing these techniques in action is the best way to master them. Watch how we transition from a plastic AI patch to a flawless, magazine-ready portrait.
Stop Fighting AI—Let the Professionals Handle It
Fixing Generative Fill skin texture artifacts requires patience, a deep understanding of blending modes, and a meticulous eye for detail. While these workflows are highly effective, they are also incredibly time-consuming. If you are processing a 500-image wedding gallery or a high-volume commercial fashion shoot, manually grafting pores onto every AI edit will destroy your profit margins.
That is where Image Work India and Cloud Retouch step in.
Our team of expert retouchers specializes in high-end, pixel-perfect editing that AI simply cannot replicate. From advanced Frequency Separation to flawless composite blending, we preserve the natural beauty and micro-contrast of your photography while removing unwanted elements with absolute precision.
Don’t let plastic AI skin ruin your portfolio. [Contact Image Work India and Cloud Retouch today] for professional, scalable retouching services that deliver magazine-quality results every single time.


