
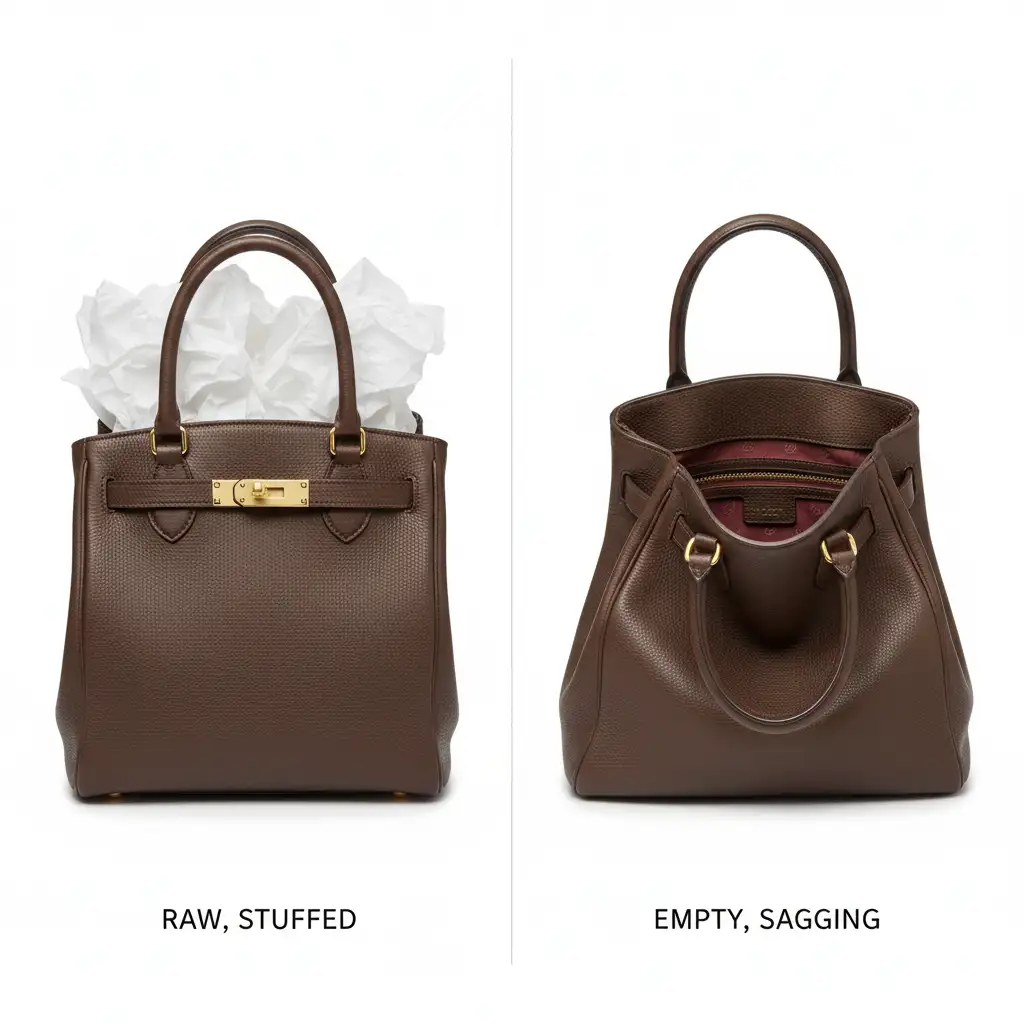
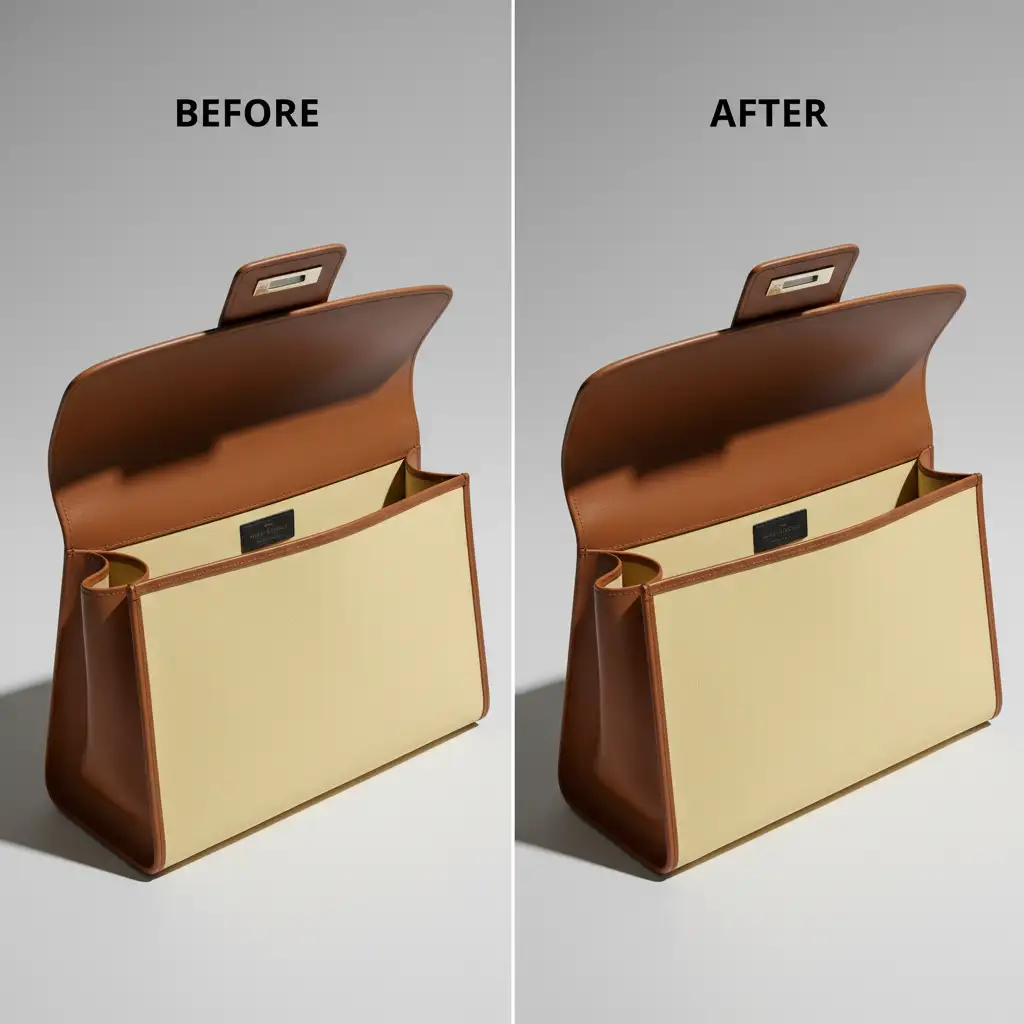
Photographing high-end handbags for e-commerce presents a frustrating catch-22. If you shoot the bag empty, the leather sags, ruining the premium silhouette. If you stuff it to maintain that rigid, luxurious shape, your final images are cluttered with unsightly tissue paper, foam, or silica packets.
While automated AI tools might seem tempting, they frequently fail here—destroying brand-accurate lining textures, warping logos, and hallucinating incorrect fabric patterns. The definitive solution for flawless presentation requires a manual, non-destructive editing approach. By adapting the traditional apparel ghost mannequin effect specifically for leather goods, you can achieve a perfect exterior shape with a pristine interior.
Here is the step-by-step guide to mastering the handbag interior ghost mannequin technique using Adobe Photoshop CC v24.x – v25.x.
Why High-End E-Commerce Requires a Two-Shot Composite
Automated generative fills cannot accurately guess the precise monogram patterns or specific fabric weaves hidden behind tissue paper. To maintain absolute brand accuracy, professional retouchers use a two-shot composite image workflow.
This involves merging ‘Shot 1’ (the stuffed bag for perfect exterior shape) with ‘Shot 2’ (the empty interior shot).
Method A: The Quick Fix for Small Openings
If you are working with a clutch or a tightly structured bag where only a tiny fraction of the stuffing is visible, a full composite might not be necessary.
For these minor corrections, utilize the Remove Tool or the Clone Stamp Tool.
- Create a new blank layer above your base image to ensure non-destructive editing.
- Sample the adjacent clean lining and carefully paint out the visible edges of the silica packets or tissue paper.
- Keep your brush hardness around 50% to blend the textures seamlessly.
However, for tote bags, satchels, and open-top designs, you must move to Method B.
Method B: The Professional Workaround (Two-Shot Composite)
To execute the true handbag interior ghost mannequin technique, you need to combine your two source images with surgical precision.
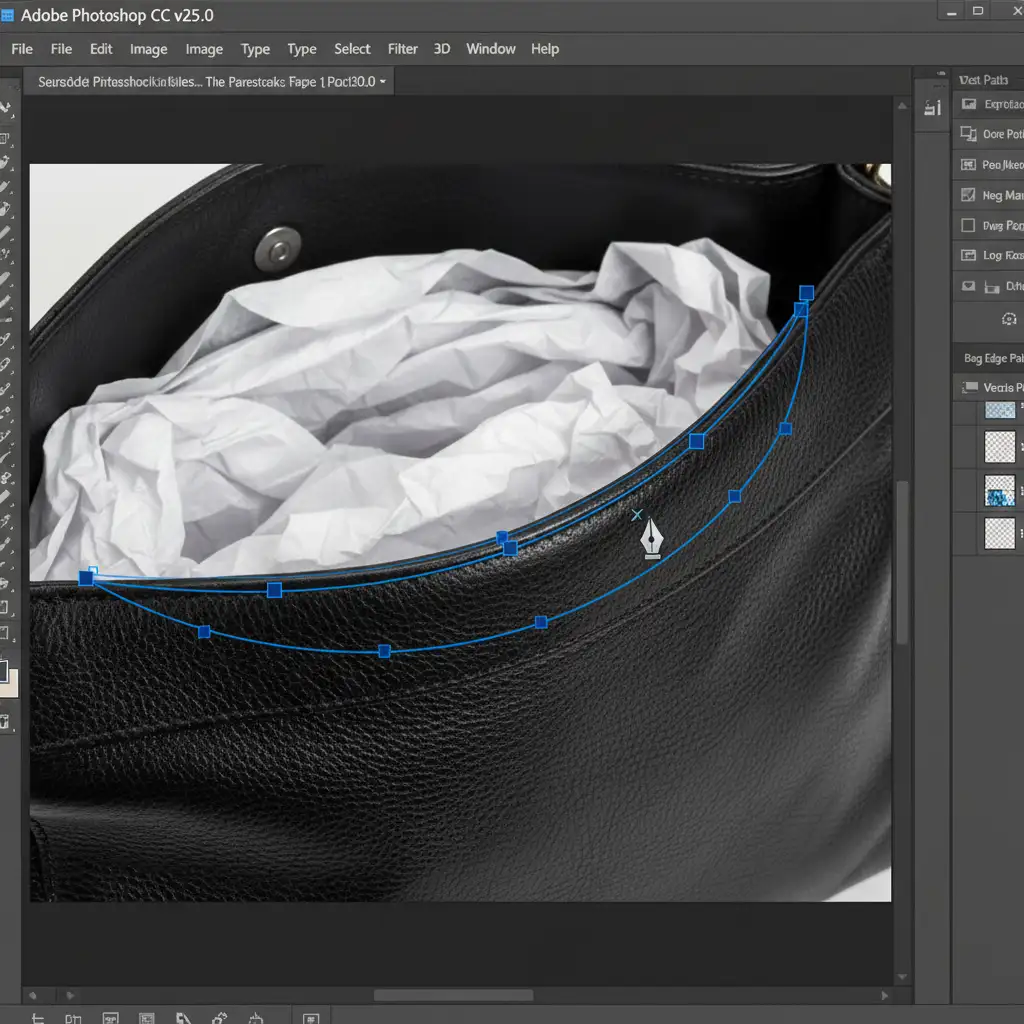
Step 1: Creating the Clipping Path
Bring both images into a single Photoshop document. Place the stuffed exterior shot (Shot 1) on top of the empty interior shot (Shot 2).
Select the Pen Tool (P). Zoom in to at least 200% and draw a precise clipping path along the inner front lip of the stuffed handbag, carefully tracing where the exterior leather meets the interior stuffing.
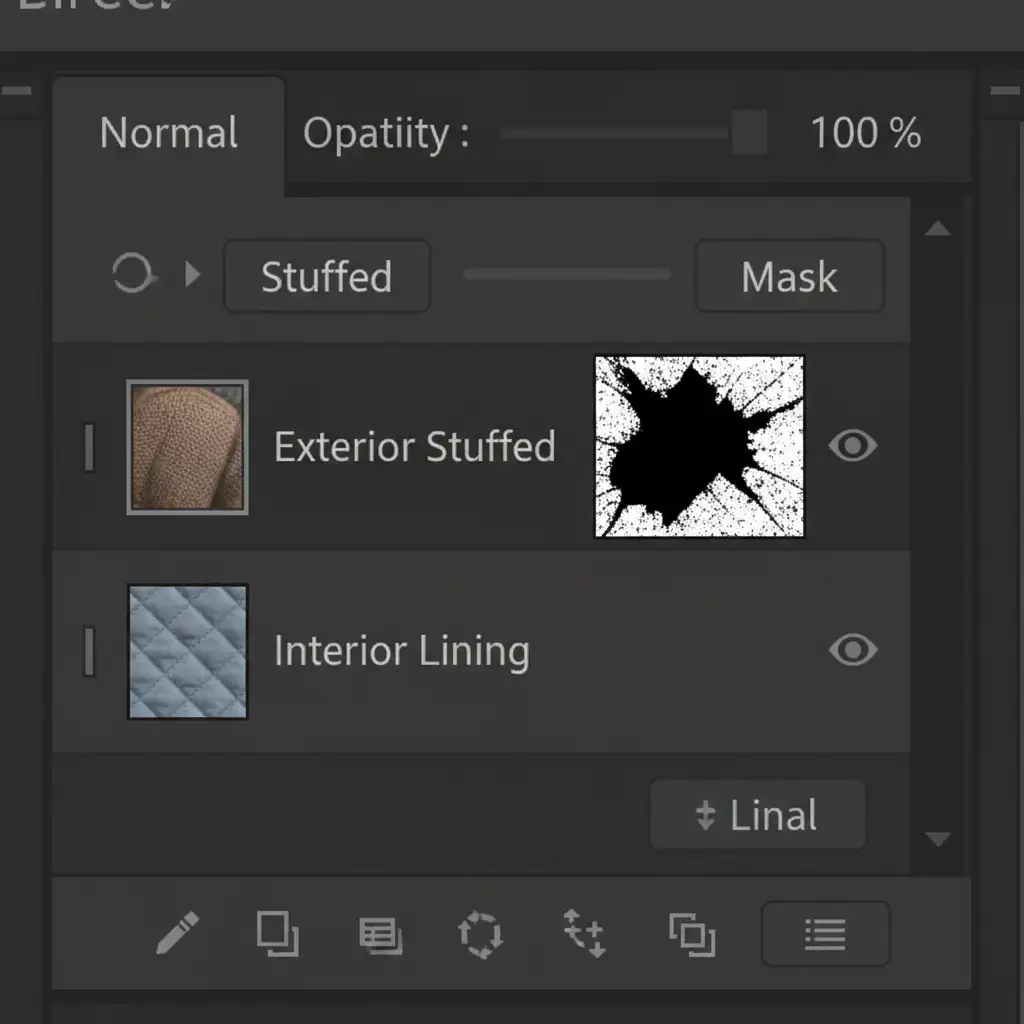
Step 2: Applying the Layer Mask
Once your path is complete, right-click and choose “Make Selection” (feather radius: 0.5 pixels to avoid harsh, jagged edges).
With the selection active, apply a Layer Mask to the top layer. Invert the mask if necessary so that the stuffing is completely hidden, revealing the clean interior lining from Shot 2 underneath.
Method C: Technical Deep-Dive into Perspective and Depth
Simply revealing the interior layer isn’t enough. Because the empty bag was sitting differently on the studio table, the geometric plane of the lining likely won’t match the viewing angle of the stuffed exterior.
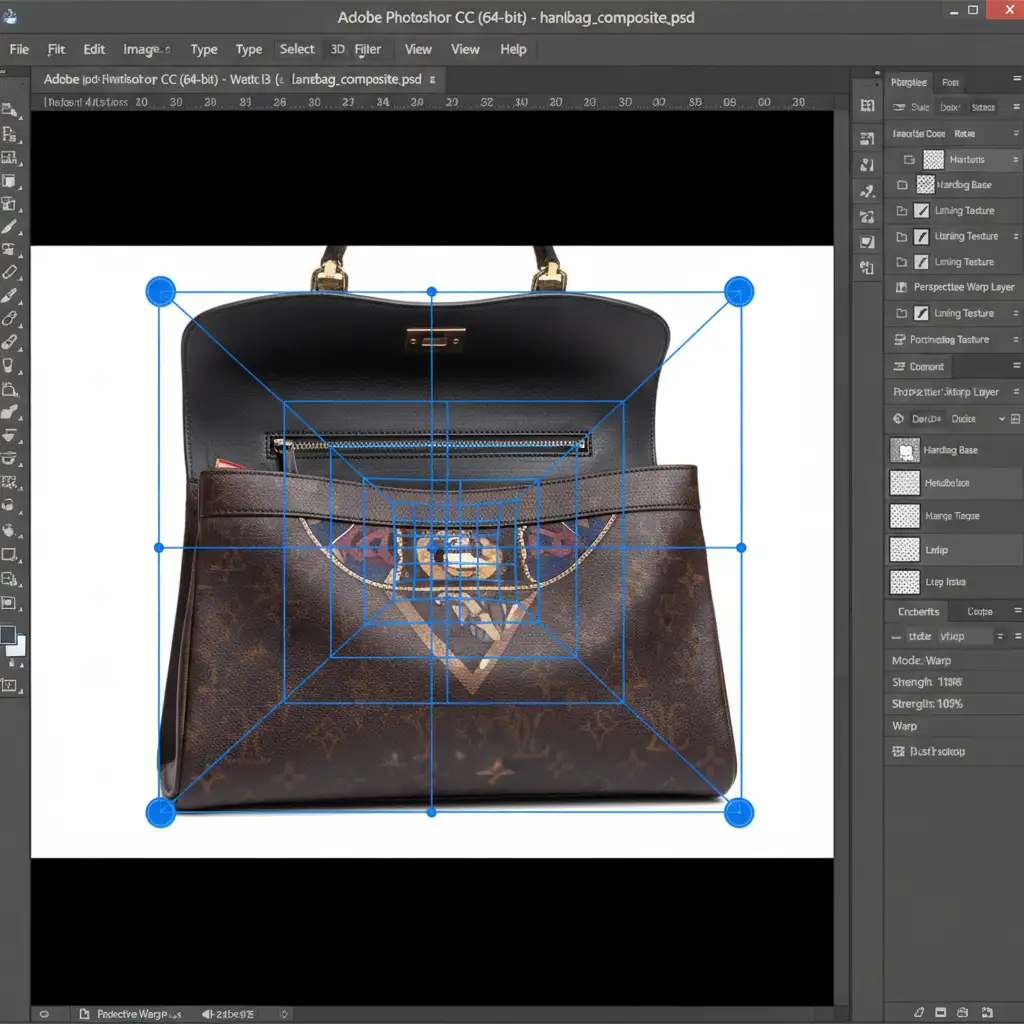
Correcting Angles with Perspective Warp
Select your interior lining layer. Navigate to Edit > Perspective Warp.
Draw the layout grid over the visible interior lining, matching the natural planes of the fabric. Switch to ‘Warp’ mode and drag the corner pins until the angle of the interior perfectly aligns with the opening of the exterior bag. Hit Enter to commit the changes.
Painting Realistic Drop Shadows
The final step is grounding the composite. A perfectly lit interior inside a deep bag looks fake. You must recreate the natural light falloff.
- Create a new layer above the interior lining and clip it to the lining layer (Alt/Option + Click between the layers).
- Change the blending mode to Multiply.
- Select a soft round brush at 10% opacity. Sample a dark color from the bag’s actual shadows.
- Manually paint a drop shadow and inner depth just below the front inner lip and deep into the corners of the bag where light naturally wouldn’t reach.
Achieve Flawless Luxury Presentation with Image Work India
Mastering the handbag interior ghost mannequin technique requires a deep understanding of spatial perspective, lighting, and advanced masking. When you are processing hundreds of SKUs for a seasonal catalog, executing this two-shot composite manually on every single item drains your studio’s time and resources.
You don’t have to compromise on quality or speed. Let the expert retouchers at Image Work India and Cloud Retouch handle your complex handbag composites and ghost mannequin editing. Our teams specialize in high-volume, pixel-perfect e-commerce product retouching, ensuring your luxury accessories always hold their perfect shape—inside and out.
Contact Image Work India today to elevate your product photography and streamline your post-production workflow.


