
Are your real estate photos suffering from glowing halos, flattened midtones, and muddy shadows? In the rush to automate workflows, many photographers rely heavily on basic AI tools and automated HDR plugins in Lightroom and Photoshop. The result? An “over-baked,” artificial appearance that instantly cheapens high-end property listings.
Luxury buyers expect authenticity. They want to see true color accuracy and dimensional lighting-not a cartoonish, heavily manipulated rendering of a living room. If you want to elevate your portfolio and attract premium agents, mastering natural real estate HDR photo editing is non-negotiable.
Here is exactly how to bypass aggressive algorithms, ditch the AI look, and achieve editorial-quality results using professional blending techniques.
The Problem with Automated Tone Mapping
Current automated AI tools and basic HDR plugins in software like Lightroom (v13.x) and Photoshop (v25.x) struggle with high-contrast architectural scenes. When an algorithm attempts to compress a massive dynamic range into a single image, it relies on aggressive tone mapping.
This automated process often fails, resulting in:
- A noticeable halo effect around high-contrast edges (like window frames and furniture).
- Loss of natural shadows, making the room look flat and two-dimensional.
- Exaggerated chromatic aberration in the corners of the frame.
High-end real estate listings require a natural look that preserves the true atmosphere of the home. To achieve this, you must take manual control over your exposure blending.
3 Professional Methods for Natural Real Estate HDR Photo Editing
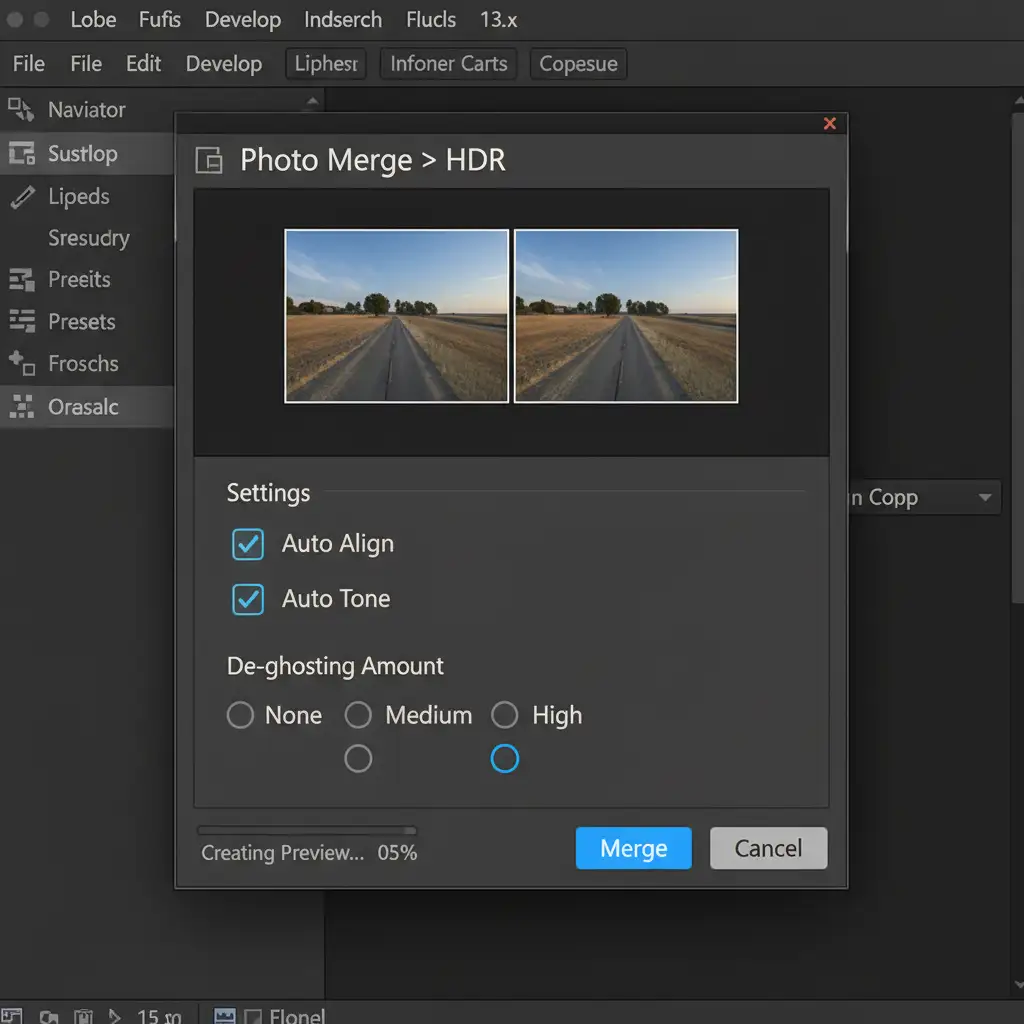
Method A: The Quick Fix in Lightroom Classic (v13.x)
If you are processing a high volume of standard listings and need a fast workflow, you can still use Lightroom’s built-in tools-provided you dial back the automation.
- Select your bracketed shots in the Library or Develop module.
- Navigate to Photo Merge > HDR.
- In the dialog box, enable Auto Align to ensure crisp edges.
- Set De-ghosting to Low (high de-ghosting often introduces artifacts).
- Once merged, avoid the “Auto Settings” button. Instead, manually reduce the Shadows and Highlights recovery in the Basic panel. This restores natural contrast and prevents the flat, muddy look typical of bad HDR.
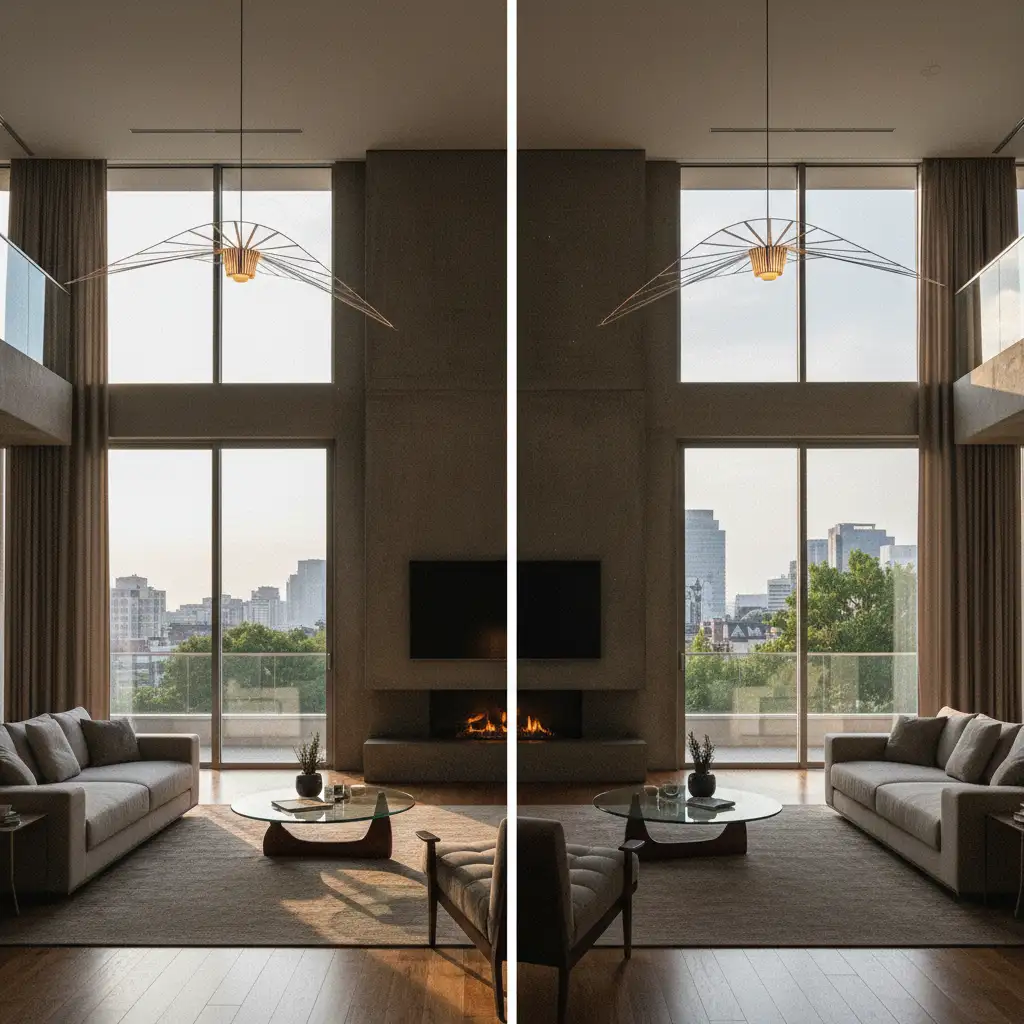
Method B: The Pro Workaround (Flambient Blending)
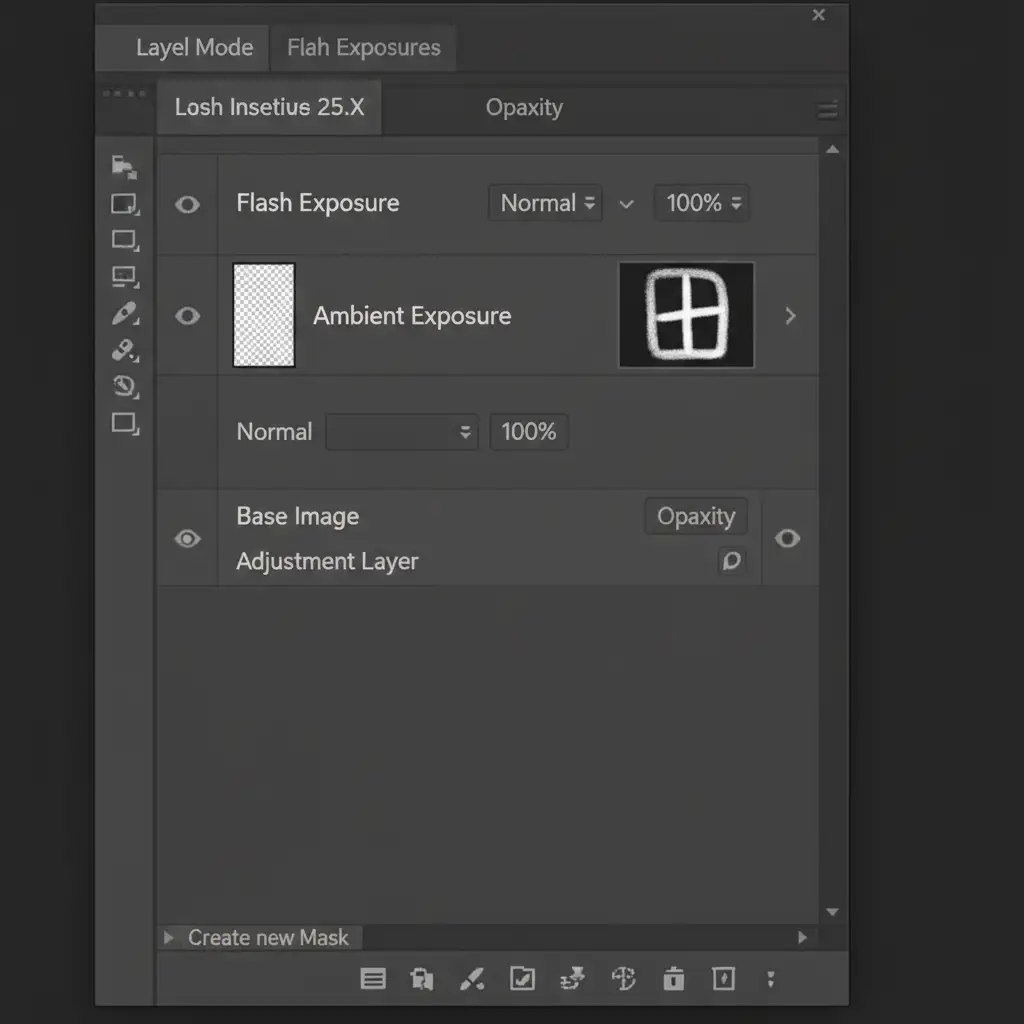
For premium listings, flambient blending (combining flash and ambient light) is the industry standard. This technique requires manual layer masking in Photoshop (v25.x) to retain realistic lighting while perfectly exposing the exterior views.
- Open your ambient exposure (natural room light) and your flash exposure in Photoshop.
- Stack the flash exposure layer on top of the ambient layer.
- Apply a black layer mask to the flash layer to hide it completely.
- Select the Brush Tool. Use a soft white brush set to 30 percent opacity.
- Carefully paint over the windows on the layer mask. This performs manual window pulls, bringing in the crisp exterior view from the flash shot while keeping the room’s natural ambient light intact.

Method C: The Technical Deep-Dive using Luminosity Masks
When dealing with complex lighting scenarios-such as rooms with multiple light sources and intricate window panes-manual brushing isn’t precise enough. This is where luminosity masks come in.
Luminosity masks allow you to blend brackets by targeting specific tonal values, bypassing global contrast compression entirely.
- Open your bracketed exposures as layers in Photoshop.
- Navigate to the Channels panel.
- Ctrl-click (or Cmd-click on Mac) the RGB channel. This selects the brightest pixels in the image (your blown-out windows).
- Save this selection as a new alpha channel.
- Intersect channels to narrow down your selection to precise highlight zones.
- Apply this targeted mask to a darker exposure layer. This brings back detailed window views seamlessly, without introducing halos or affecting the midtones of the interior.
Scale Your Real Estate Photography Business with Image Work India
Achieving natural real estate HDR photo editing requires a meticulous eye for detail, a deep understanding of light, and significant time spent in Photoshop. While mastering window pulls and luminosity masks will elevate your portfolio, editing hundreds of bracketed shots per week is a bottleneck for any growing photography business.
You don’t have to choose between quality and scale.
At Image Work India and Cloud Retouch, our team of specialized retouchers provides pixel-perfect, editorial-quality real estate photo editing. From complex flambient blending to precise manual window pulls, we deliver the natural, high-end results your luxury clients demand-delivered consistently and on time.
Stop settling for automated, over-baked AI edits. [Contact Image Work India and Cloud Retouch today] to outsource your real estate editing and focus on what you do best: shooting stunning properties.


