You just applied the Skin Smoothing Neural Filter in Photoshop v23.0 or newer, expecting a flawless, magazine-cover finish. Instead, your subject looks like a plastic mannequin. Sound familiar?
While Adobe Sensei AI is incredibly powerful at evening out skin tones and blurring blemishes, it has a glaring blind spot: it destroys high-frequency details. When you lose pores, micro-contrast, and natural skin grain, the resulting image screams “fake.”
If you want to fix plastic skin from neural filters, you cannot rely on AI alone. You need a non-destructive workflow that combines machine learning with traditional, high-end retouching techniques. Here are three professional methods to restore natural micro-texture to your portraits.
Why AI Skin Smoothing Creates a “Plastic Doll” Look
To understand the fix, you need to understand the flaw. The AI algorithm powering Photoshop’s Neural Filters struggles to distinguish between unwanted blemishes (like acne or scars) and necessary human textures (like pores and fine lines).
When the slider is pushed too far, the filter aggressively blurs everything, flattening the micro-texture that gives skin its three-dimensional, organic feel. The solution isn’t to abandon the tool, but to control its output and manually reintroduce the high-frequency layer data.
Method 1: The Quick Fix (Opacity Blending)
If you are on a tight deadline and need a fast improvement, opacity blending is your first line of defense. The goal here is to allow the original, unedited skin grain to peek through the AI’s heavy-handed blur.
Step-by-Step Workflow:
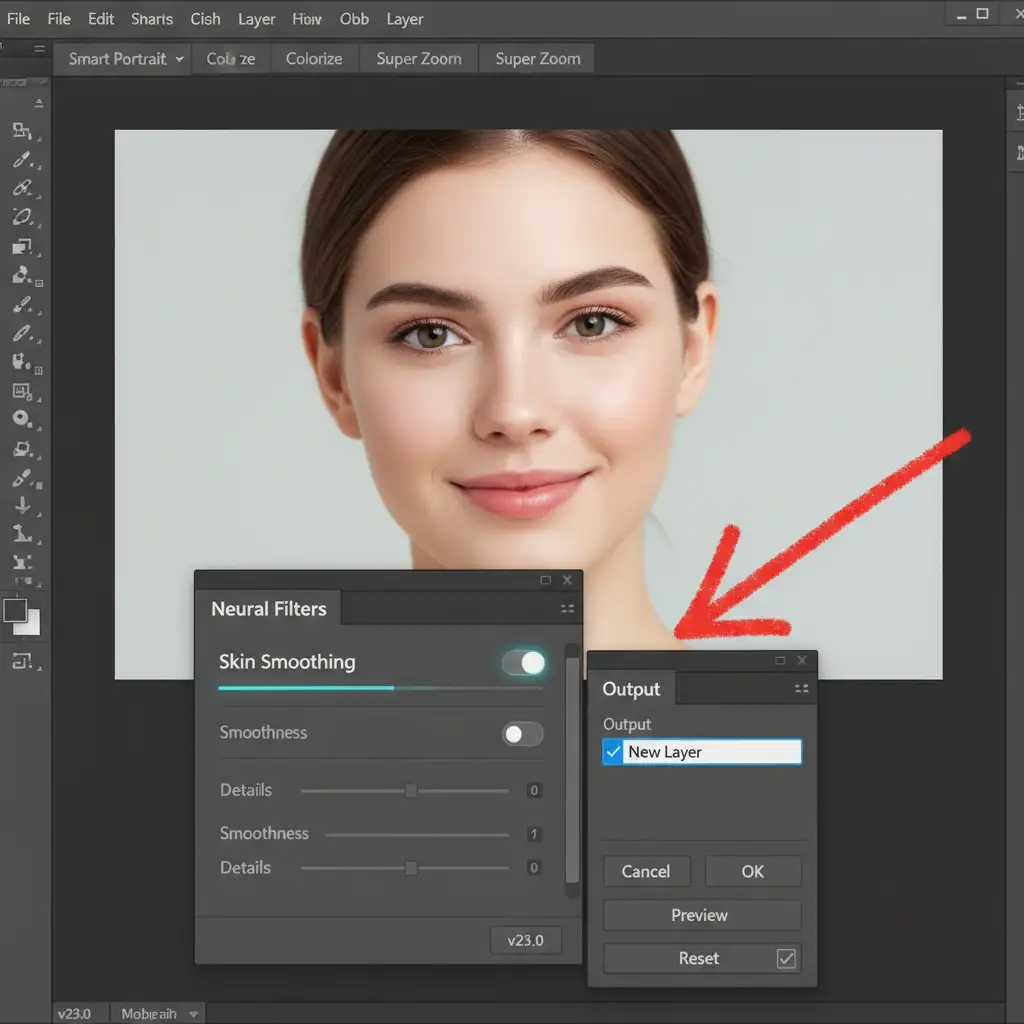
- Open your image and navigate to Filter > Neural Filters.
- Toggle on Skin Smoothing and adjust the Blur and Smoothness sliders to your liking.
- Crucial Step: Before clicking OK, look at the bottom right of the panel. Change the Output setting to New Layer.
- Back in your Layers panel, select this newly created smoothed layer.
- Reduce the layer opacity to 50% – 70%.
This instantly brings back a percentage of the original pores from the background layer beneath, breaking up the plastic appearance.
Method 2: The Pro Workaround (Frequency Separation Integration)
For high-end fashion and beauty retouching, opacity blending isn’t enough. You need absolute control over color and texture. By combining Neural Filters with a classic Frequency Separation workflow, you get the best of both worlds: AI-driven color smoothing and 100% untouched original skin texture.
How to Execute the Hybrid Workflow:
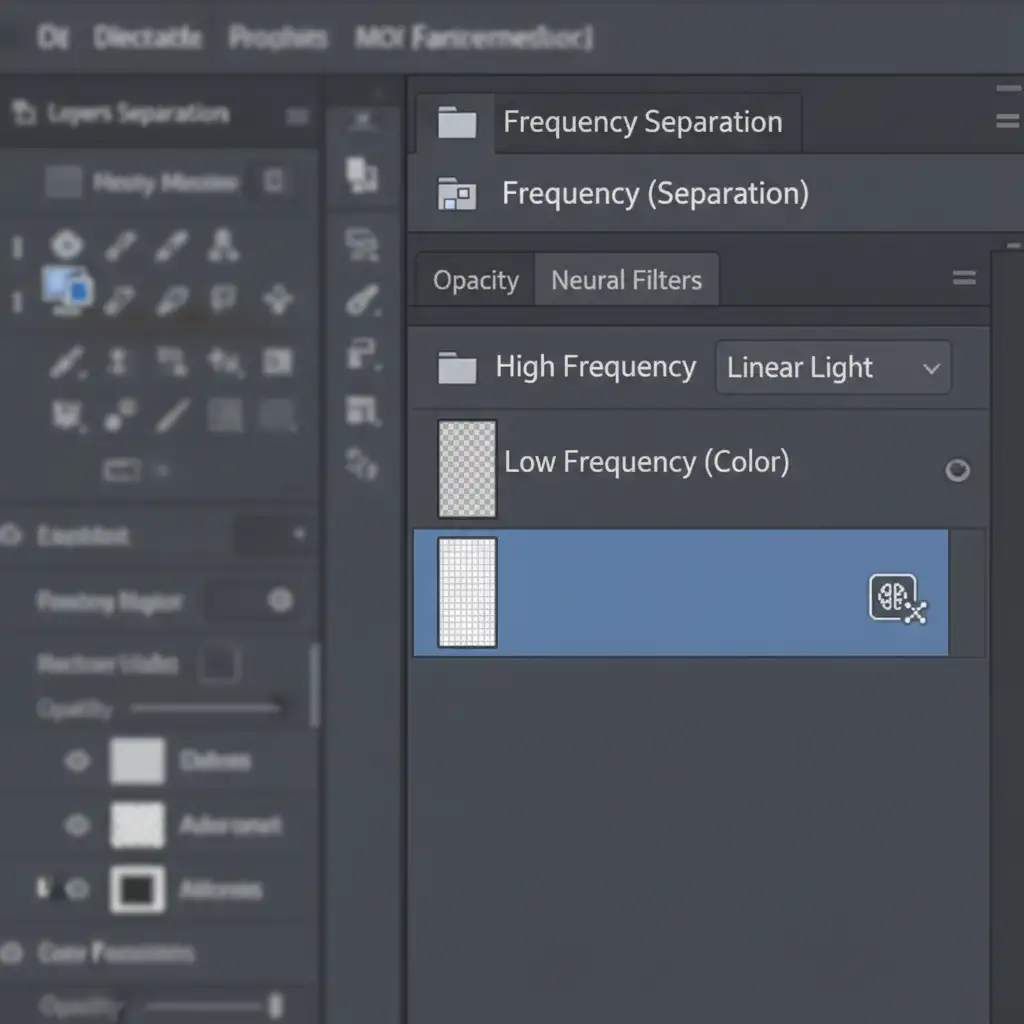
- Duplicate your background layer twice. Name the bottom duplicate Low Frequency (Color) and the top duplicate High Frequency (Texture).
- Apply a subtle Gaussian Blur to the Low Frequency layer (just enough to blur the pores).
- Select the High Frequency layer, go to Image > Apply Image, and subtract the Low Frequency layer to isolate the texture. Change this layer’s blend mode to Linear Light.
- Convert your Low Frequency layer into a Smart Object.
- Select the Low Frequency layer and apply the Skin Smoothing Neural Filter.
Because the AI is only affecting the color layer, your original pores remain completely intact on the High Frequency layer above it. The plastic look is entirely bypassed.
Method 3: The Technical Deep-Dive (Generating Artificial Skin Grain)
Sometimes, the original image is too low-resolution or damaged to salvage the native pores. In these cases, you must generate artificial skin grain from scratch to fix plastic skin from neural filters.
Creating Realistic Pores:
- Create a new blank layer above your smoothed skin layer.
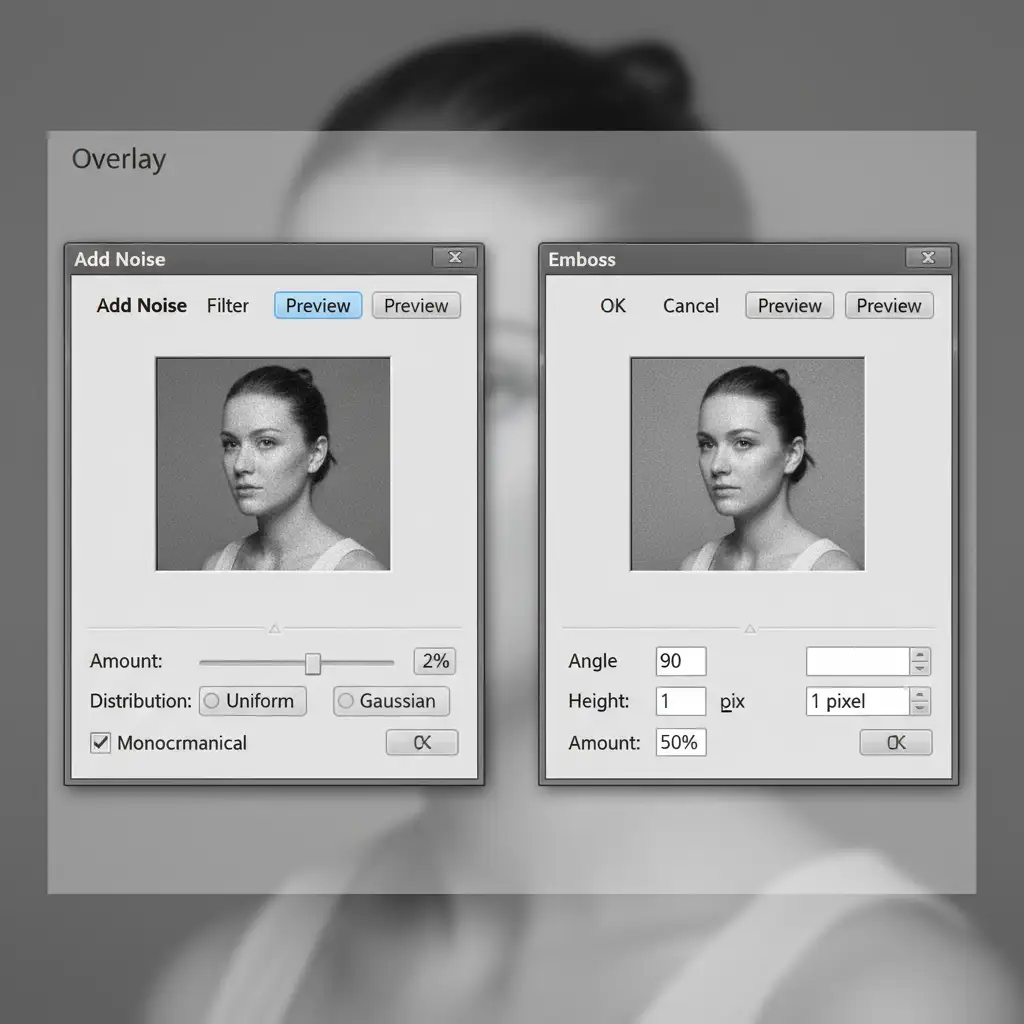
- Fill it with 50% Gray (Shift + F5 > 50% Gray) and set the blending mode to Overlay.
- Navigate to Filter > Noise > Add Noise. Set the amount to 2% – 3%, and ensure Uniform and Monochromatic are checked.
- To prevent the noise from looking like digital static, apply a very subtle Gaussian Blur (around 0.3 to 0.5 pixels).
- For true 3D realism, go to Filter > Stylize > Emboss. Use an Angle of 90 degrees, a Height of 1 pixel, and an Amount of 50%.
- Finally, use Layer Masking to paint this artificial texture only over the areas where the AI smoothed the skin, avoiding the eyes, lips, and hair.
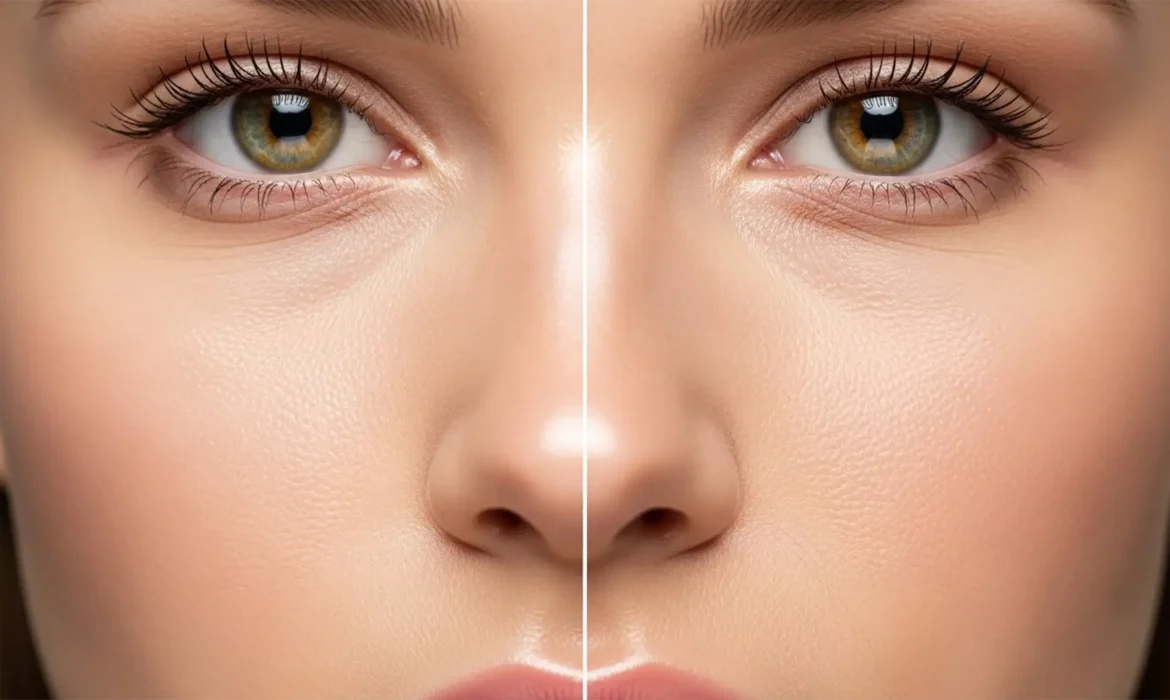
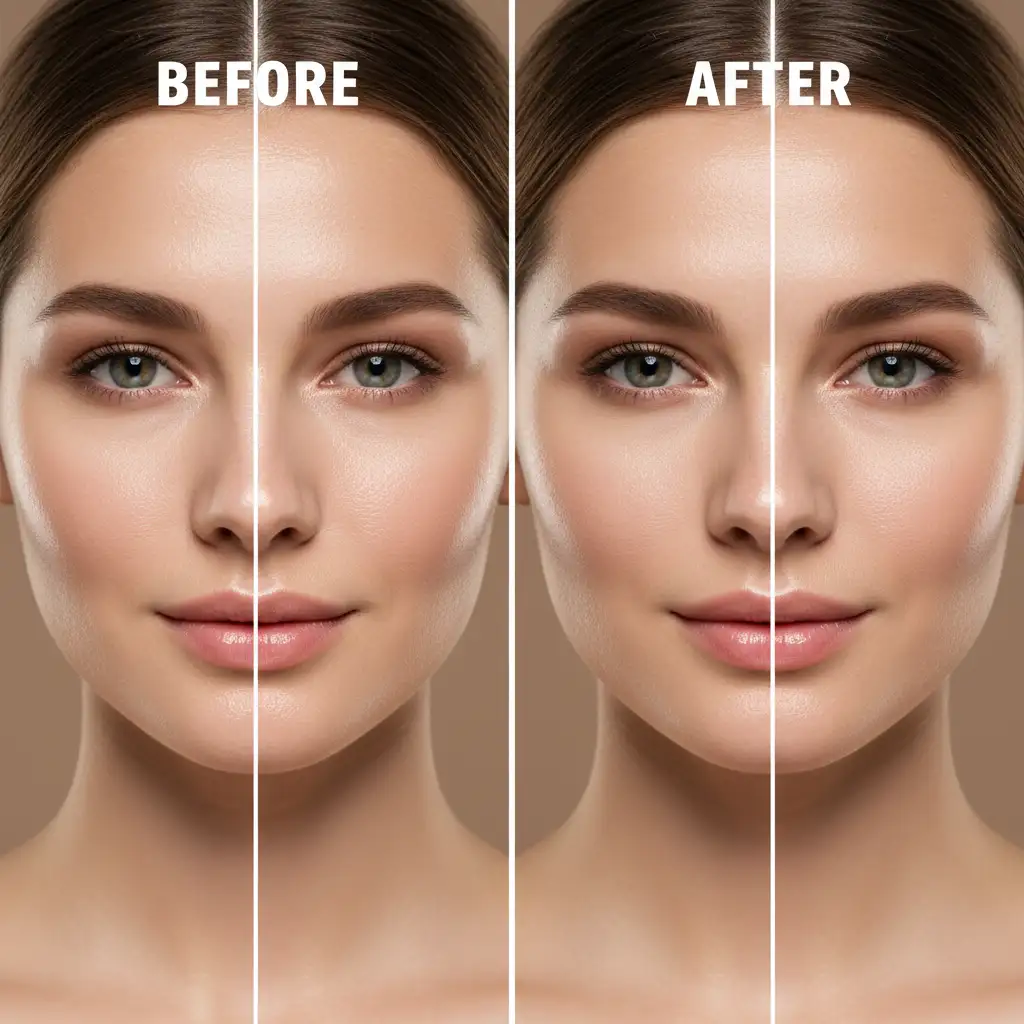
Before and After: The Power of Micro-Texture
When you successfully restore the high-frequency details, the transformation is night and day. The subject retains the flawless, even skin tone provided by the AI, but regains the human element that makes the portrait authentic and professional.
Stop Fighting the AI: Let the Professionals Handle It
Learning to fix plastic skin from neural filters requires a deep understanding of Frequency Separation, Smart Objects, and layer blending. While these hybrid workflows yield incredible results, they are highly time-consuming—especially when you are batch-editing hundreds of wedding, fashion, or editorial photos.
You don’t have to sacrifice quality for speed. If you need pixel-perfect model retouching without the plastic, artificial look, Image Work India and Cloud Retouch are here to help.
Our team of expert retouchers specializes in high-end, non-destructive photo editing. We meticulously preserve natural micro-texture and skin grain while delivering flawless, magazine-ready results. Stop fighting with AI sliders and let us elevate your portfolio. Contact Image Work India and Cloud Retouch today to discuss your next high-end retouching project.


