
You just nailed a 50-megapixel studio portrait session, but the client wants the background expanded. You fire up Photoshop v25.0, select the empty canvas, and hit generate. The result? Fix low res generative fill in portraits (Pro Guide).
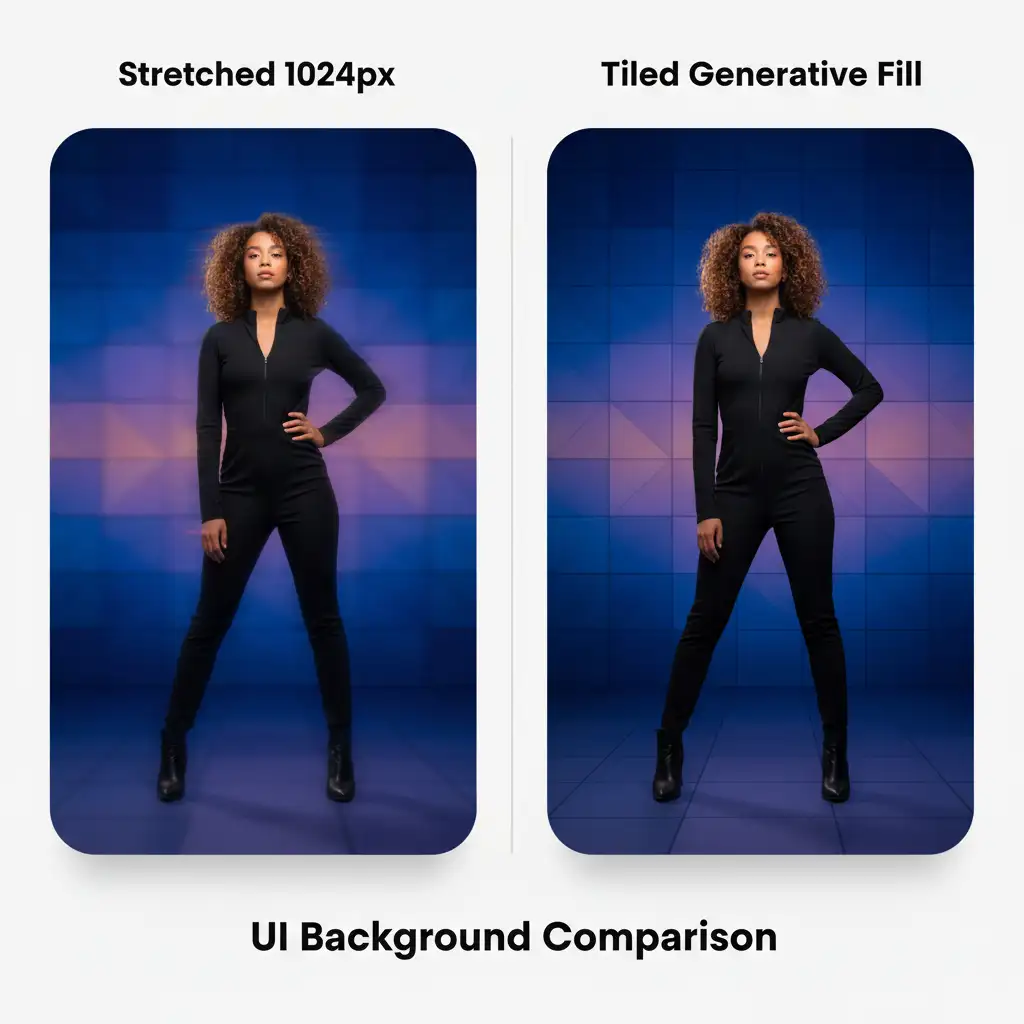
This jarring mismatch happens because Adobe’s Firefly Image Model currently has a hardcoded 1024×1024 limitation. When Photoshop stretches that tiny AI patch to fit a massive high-resolution file, you lose all photographic texture.
If you are tired of compromising your professional standards, you are in the right place. Here is the definitive guide to fixing low resolution generative fill in portraits.
Why Does Photoshop’s Generative Fill Look Blurry?
Before applying a fix, it is crucial to understand the mechanics of the software. The engine powering these AI generations, the Firefly Image Model, is currently capped at rendering images at a maximum size of 1024×1024 pixels per prompt.
When you highlight a large, blank area on a 30 to 50-megapixel studio portrait, Photoshop still only generates a 1024px square. To fill the empty space you selected, the software forcibly stretches that low-resolution patch across the canvas. This destroys the pixel density, resulting in a soft, synthetic-looking background that clashes with your razor-sharp subject.
To achieve professional results, you must bypass this stretching behavior.
3 Workflows for Fixing Low Resolution Generative Fill in Portraits
Depending on your time constraints and quality requirements, there are three distinct ways to solve this resolution gap.
Method 1: The Native Tiling Technique (The Quick Fix)
The easiest way to prevent Photoshop from stretching your AI generation is to force it to render at its native 1:1 pixel resolution. Instead of selecting the entire blank canvas at once, you will generate the background in smaller, overlapping sections.
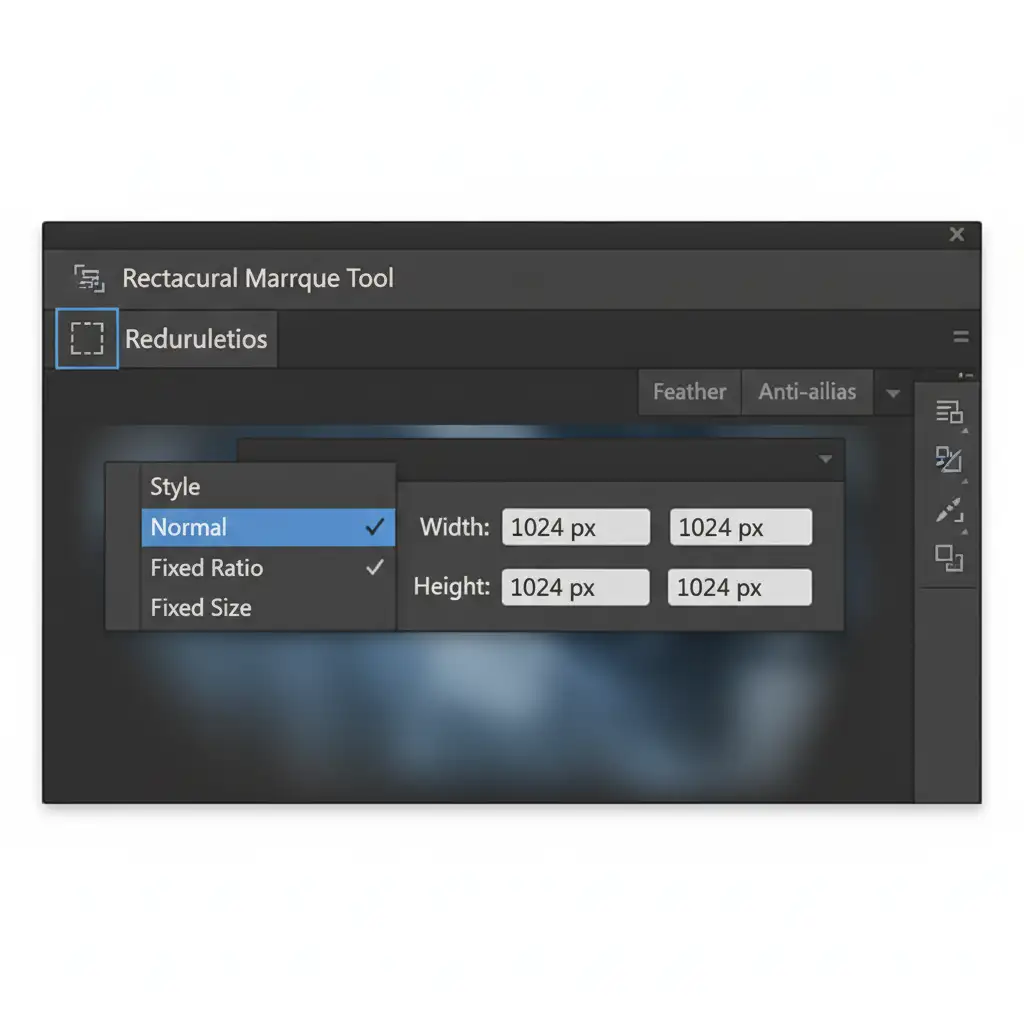
- Select the Rectangular Marquee Tool (M) from your toolbar.
- In the top options bar, change the Style dropdown from Normal to Fixed Size.
- Enter exactly 1024 px for both Width and Height.
- Click on your canvas to create a perfect 1024×1024 selection box.
- Apply your Generative Fill.
- Repeat this process, slightly overlapping the edges of your previous generations, until the background is fully expanded.
Method 2: Smart Object Upscaling and Grain Matching (The Pro Workaround)
If tiling is too tedious for a massive background expansion, you can upscale a stretched generation directly inside Photoshop.
- Generate your background normally (accepting the stretched, blurry result).
- Right-click the Generative Fill layer and select Convert to Smart Object. This protects the layer data for non-destructive editing.
- Navigate to Filter > Neural Filters and toggle on Super Zoom. Use this tool for AI upscaling to enhance the details of the blurry background.
- Apply the filter. You will notice the background is sharper, but it likely looks too “clean” compared to your original photograph.
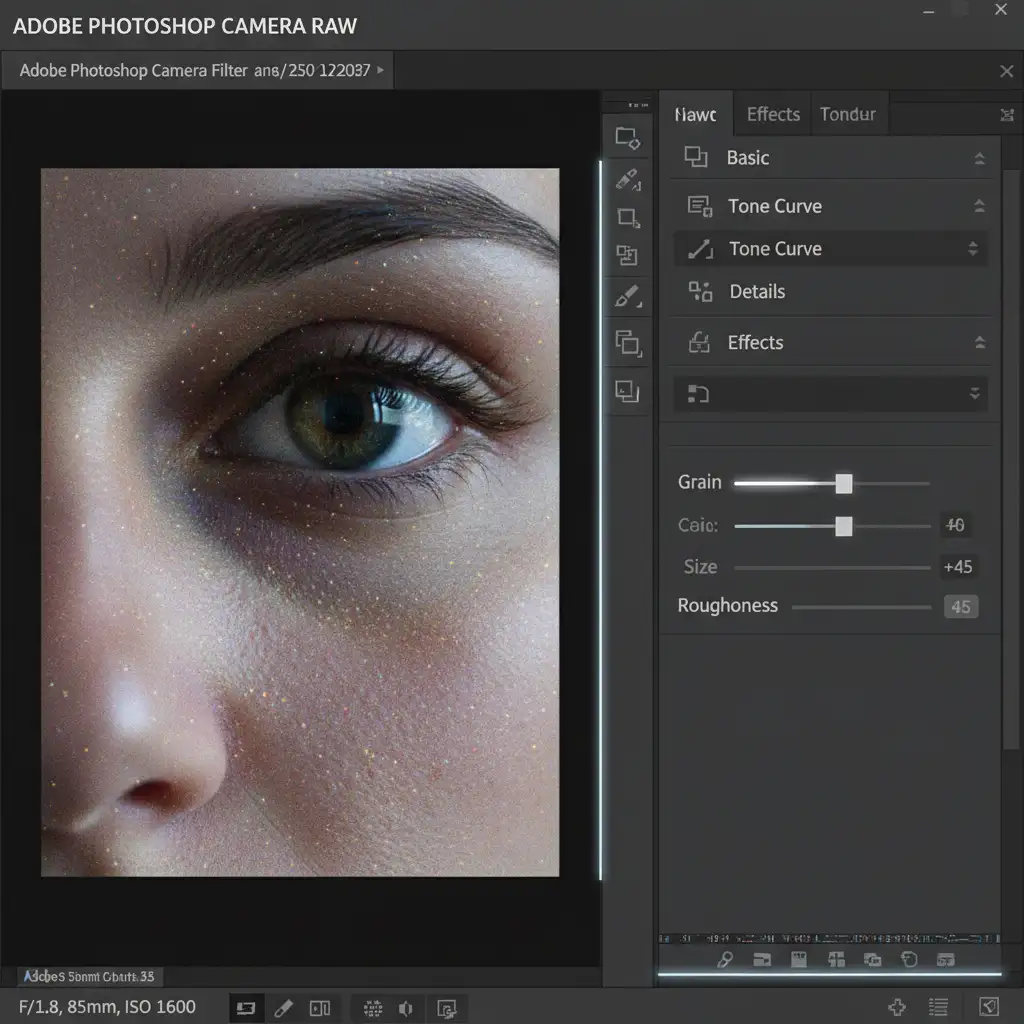
- With your Smart Object selected, go to Filter > Camera Raw Filter.
- Open the Effects panel and use the Grain slider. Adjust the size and roughness to execute perfect grain matching, ensuring the digital noise of the AI background replicates the film grain of the original portrait file.
Method 3: External AI & Frequency Separation (The Technical Deep-Dive)
For high-end commercial retouching where flawless texture is mandatory, you must rely on dedicated external upscalers and advanced blending techniques.
- Generate your expanded background in Photoshop.
- Export only the blurry AI generation mask as a flat JPEG or TIFF.
- Run this file through a dedicated AI upscaling software like Topaz Photo AI or Magnific AI to rebuild the lost resolution.
- Import the newly upscaled, high-resolution background back into your Photoshop document.
- Use precise Layer Masking to isolate the background.
- To ensure the transition between your sharp subject and the new background is undetectable, utilize a Frequency Separation workflow. Blend the high-frequency texture layer of the original portrait into the edges of the new upscaled background. This critical step prevents any unnatural haloing around the subject’s hair or clothing.
Streamline Your Studio’s Retouching Workflow
Fixing low resolution generative fill in portraits requires a deep understanding of pixel density, texture matching, and advanced masking. While these workflows guarantee a pristine final image, they also add significant time to your post-production schedule.
If you are struggling to scale your portrait editing while maintaining flawless, high-resolution quality, you do not have to do it alone. Outsource your post-production to Image Work India and Cloud Retouch. Our expert retouchers utilize industry-leading workflows to deliver pixel-perfect, professional results every time—allowing you to step away from the screen and focus on shooting. Contact us today to elevate your studio’s output.


