
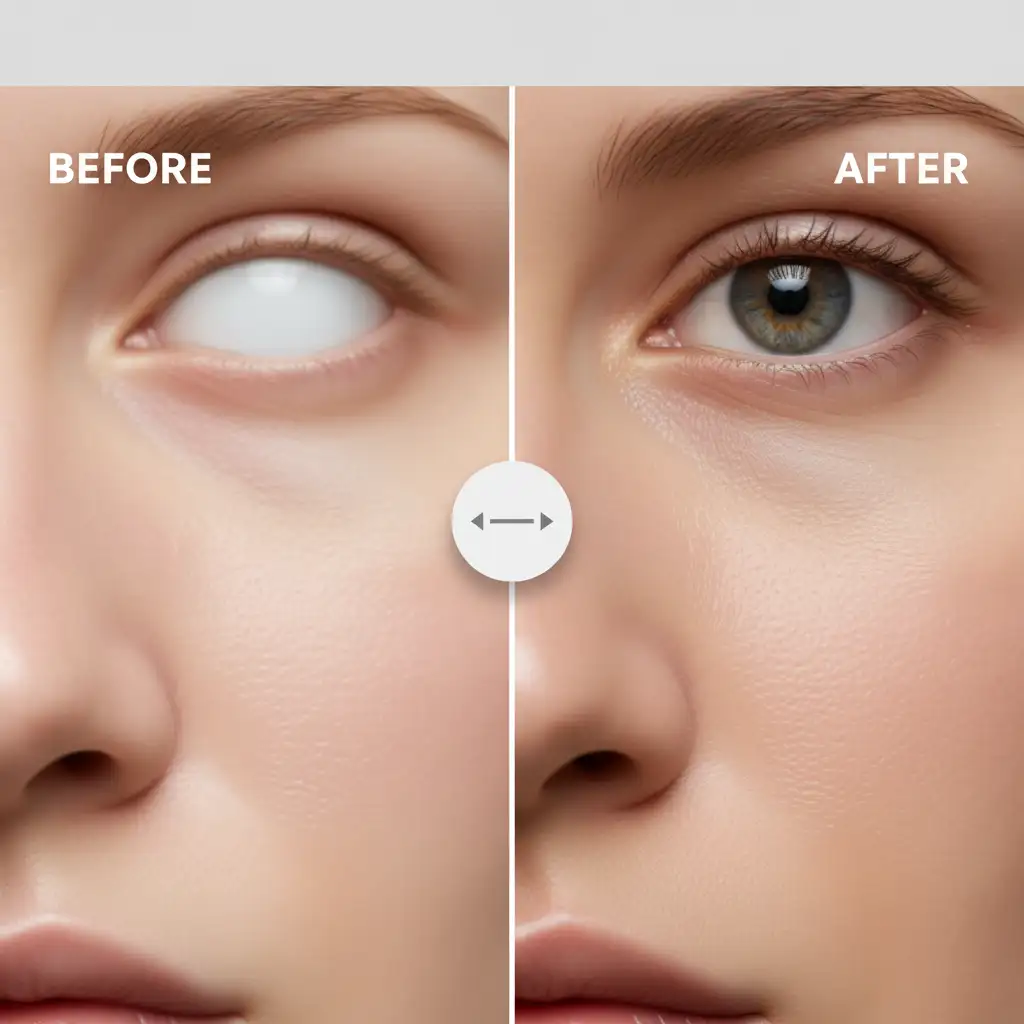
You have just applied Photoshop’s preserving Skin Smoothing Neural Filter, hoping to save hours on a batch of portrait retouching. But instead of a magazine-quality finish, your subject looks like a plastic mannequin.
This is the core pain point of Adobe Sensei AI in Photoshop v24.x and v25.x. While the algorithm is incredible at automatically masking faces and blurring blemishes, it struggles to distinguish between unwanted acne and highly desirable micro-textures. When pushed past a smoothness value of 30, it aggressively destroys detail, plunging your portrait into the uncanny valley.
To achieve high-end results, professionals must intercept the AI’s output. Here is your definitive guide to preserving skin pores with Photoshop neural filters using structural texture retention techniques.
The Problem with the Skin Smoothing Neural Filter
The Skin Smoothing Neural Filter relies on machine learning to map facial topography and apply what is essentially an intelligent surface blur. However, natural skin requires micro-contrast—the tiny variations in shadow and highlight created by pores—to look human.
When you lose that high-frequency texture, the image immediately looks amateurish. The solution isn’t to stop using AI; the solution is to blend the speed of AI tonal smoothing with manual, non-destructive editing techniques to bring the original pores back.
3 Professional Methods for Texture Recovery
Depending on your deadline and the required quality of the final image, there are three distinct ways to restore natural skin texture over an AI-smoothed base.
Method 1: The Smart Object Opacity Trick (The Quick Fix)
If you are processing high-volume event photography or standard headshots, you need a fast, non-destructive workflow.
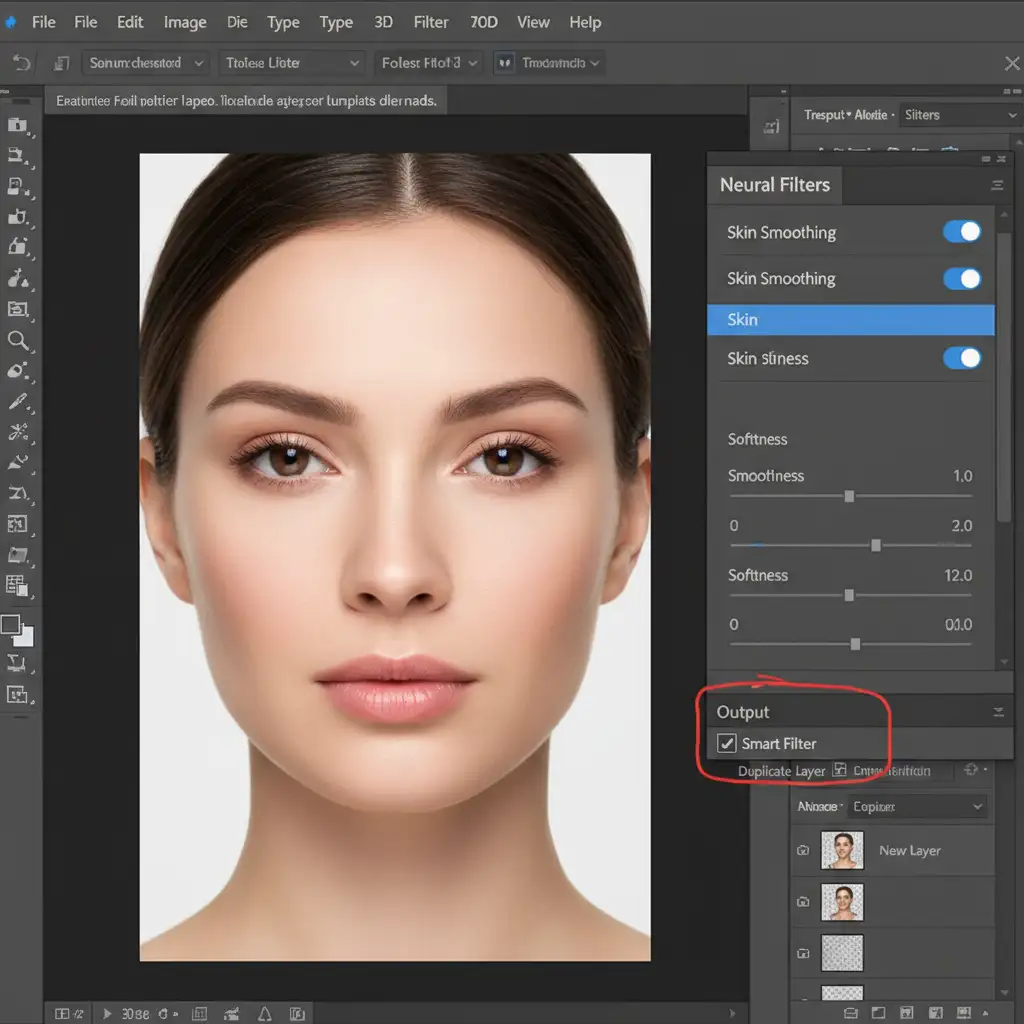
- Convert your background layer to a Smart Object.
- Navigate to Filter > Neural Filters and toggle on Skin Smoothing.
- Set your Blur and Smoothness parameters to your liking.
- Crucially, in the Neural Filters panel, set your output to Smart Filter.
- Once applied, double-click the blending options icon (the two small sliders) next to the Smart Filter in your Layers panel.
- Drop the opacity to 50–60 percent.
This simple step allows the original pore texture from the Smart Object to bleed through the AI smoothing, instantly reducing the plastic effect.
Method 2: High Pass Texture Recovery (The Pro Workaround)
For editorial and beauty portraits, simply lowering opacity isn’t enough. You need to explicitly extract the pores and overlay them onto the smoothed skin using a High Pass filter.
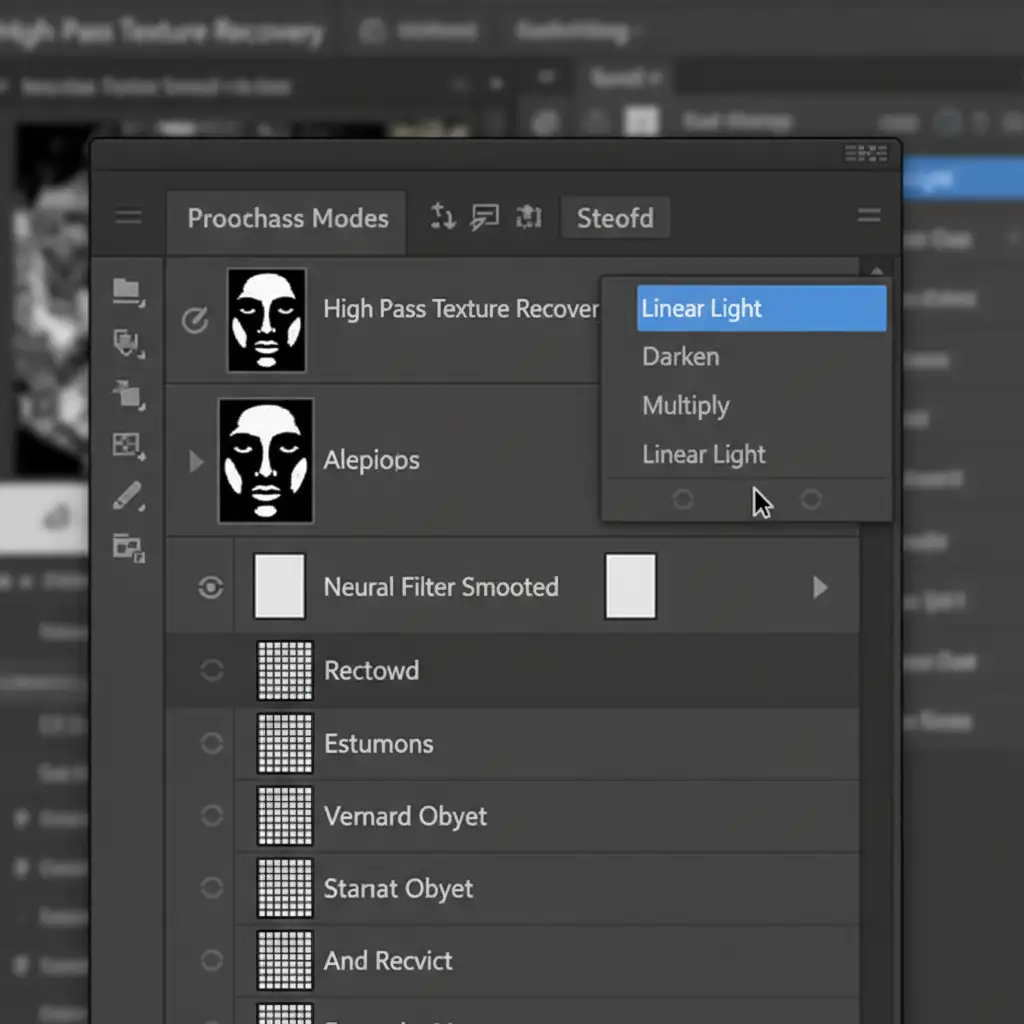
- Duplicate your original, untouched background layer. Move this duplicate above your Neural Filter smoothed layer.
- With the top layer selected, go to Filter > Other > High Pass.
- Zoom in to 100%. Adjust the radius between 1.5px and 3.0px until only the pores and fine hairs are visible against the gray background. Do not let broader tonal transitions show through.
- Change this layer’s blend mode to Linear Light (or Overlay for a softer effect).
- Add a black layer mask and paint with a soft white brush only over the areas of the face where you want the pores to snap back into focus.
By using the Linear Light blend mode, you are mathematically adding the original micro-texture directly on top of the AI’s smoothed color transitions.
Method 3: Frequency Separation Integration (The Technical Deep-Dive)
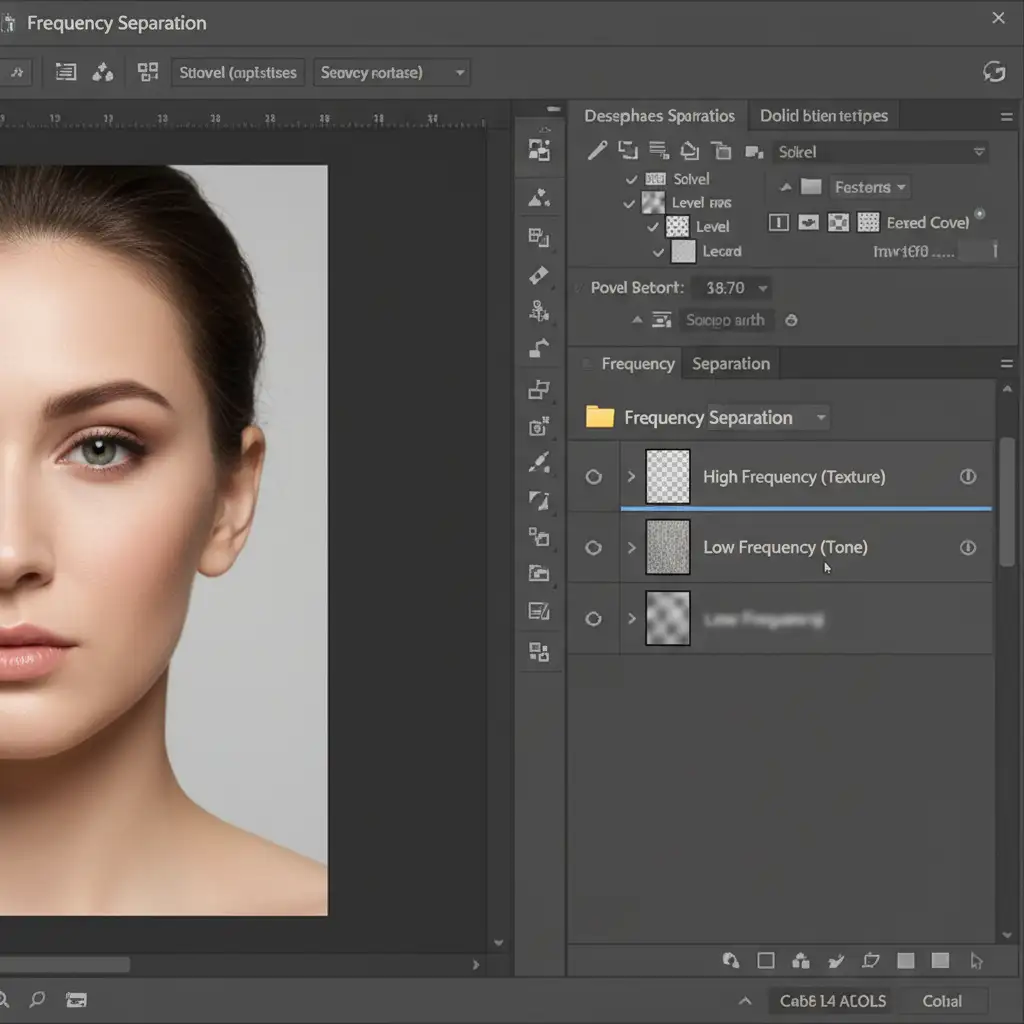
The absolute highest standard of retouching involves frequency separation. This technique separates your image into two layers: a Low-frequency layer for color and tone, and a High-frequency layer for texture.
Instead of manually painting out blotchy skin tones using a Mixer Brush or Gaussian Blur, you can force the AI to do the heavy lifting.
- Set up your standard Frequency Separation folder structure (Low layer for tone, High layer for texture).
- Select only the Low-frequency layer.
- Apply the Skin Smoothing Neural Filter directly to this layer.
Because the AI is only affecting the Low-frequency layer, it perfectly smooths the patchy colors, redness, and uneven lighting. Meanwhile, your High-frequency layer—which holds 100 percent of the original pore data—remains entirely untouched at the top of your layer stack. The result is flawless skin tone with zero loss of natural texture.
Stop Fighting the AI: Let the Experts Handle Your Portraits
Mastering the balance between automated AI tools and manual texture recovery takes significant time and technical expertise. If you are pushing the Skin Smoothing Neural Filter past its limits and struggling to avoid the plastic mannequin look, it might be time to scale your workflow.
Are you struggling to balance high-volume portrait edits with magazine-quality results? Outsource to the experts at Image Work India and Cloud Retouch. Our team of professional retouchers specializes in advanced frequency separation, micro-contrast recovery, and non-destructive workflows. We ensure your subjects look flawless, radiant, and most importantly—human.
Contact Cloud Retouch today for high-end photo retouching services that preserve every natural detail while perfectly elevating your photography.


