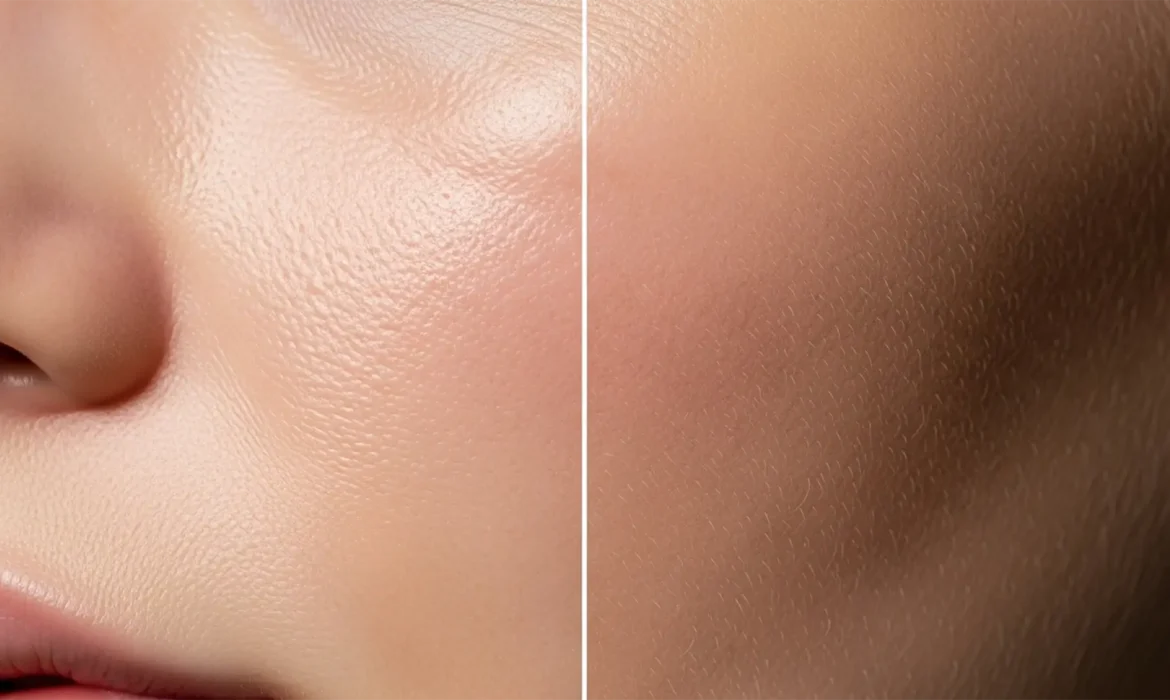
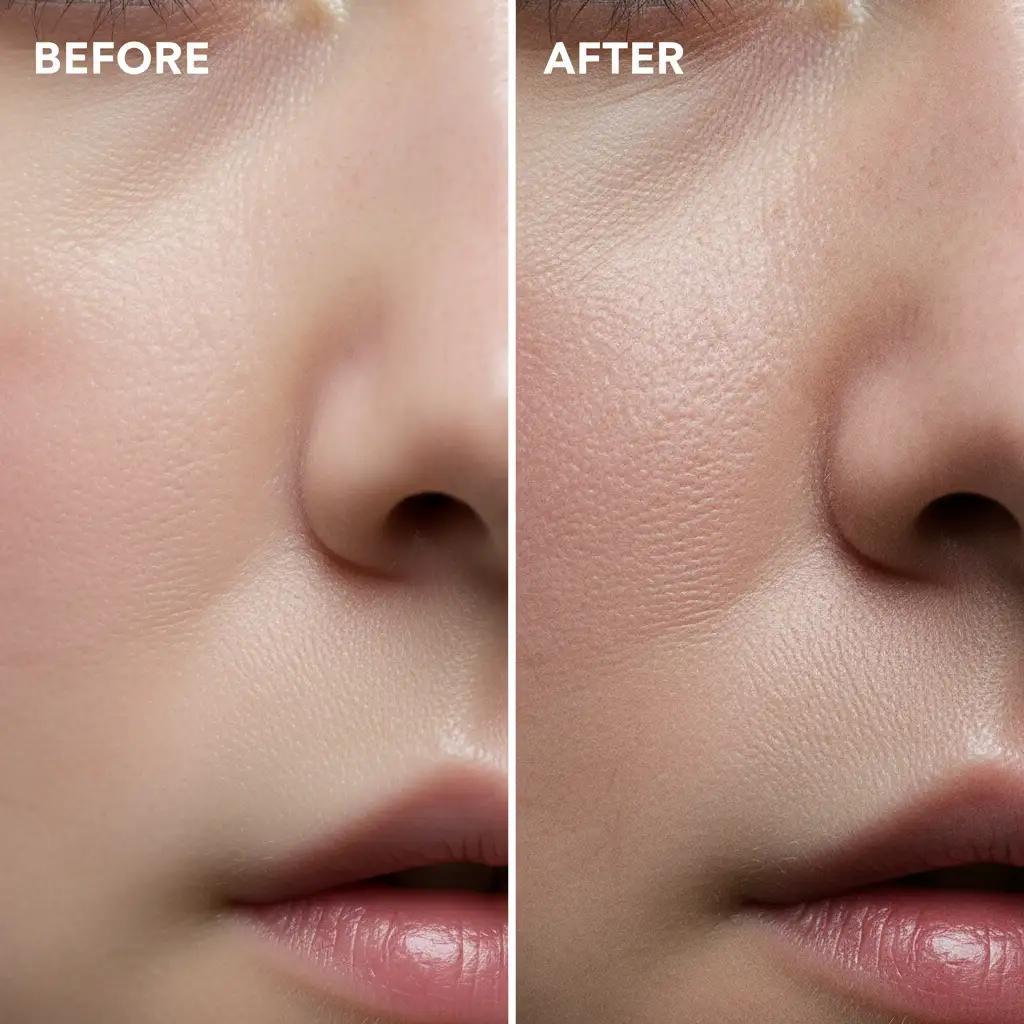
You finally generated the perfect commercial portrait using Midjourney v6 or DALL-E 3, but there is a glaring problem: the subject looks like a mannequin. Modern diffusion models are incredible at rendering lighting and composition, but their denoising algorithms inherently average out micro-ai skin textures. The result is a hyper-smooth, waxy appearance that plunges your image straight into the uncanny valley.
For commercial composites, this lack of high-frequency spatial data—specifically epidermal pores and fine vellus hair—is a massive pain point. If you want your digital campaigns to look authentically human, you need to master the art of de-plasticizing AI skin texture.
In this guide, we will break down three professional workflows in Photoshop v25.x to reconstruct organic skin properties and defeat the plastic look.
The Science Behind the AI “Plastic” Look
Before diving into Photoshop, it is crucial to understand why AI skin looks fake. AI image generators struggle to render genuine micro-contrast—the tiny variations in light and shadow that define organic human tissue. Because diffusion models prioritize overall image coherence, they smooth over the microscopic imperfections that signal real skin to the human eye.
To fix this, we have to manually reintroduce those imperfections using noise generation, texture grafting, and targeted sharpening.
3 Methods for De-Plasticizing AI Skin Texture in Photoshop v25.x
Method 1: The Quick Fix (Monochromatic Noise)
If you are on a tight deadline and need a fast way to break up a plastic gradient, a simple noise overlay can work wonders. This method establishes a baseline digital noise floor that mimics camera grain.
- Create a new blank layer above your AI portrait.
- Go to Edit > Fill and select 50% Gray.
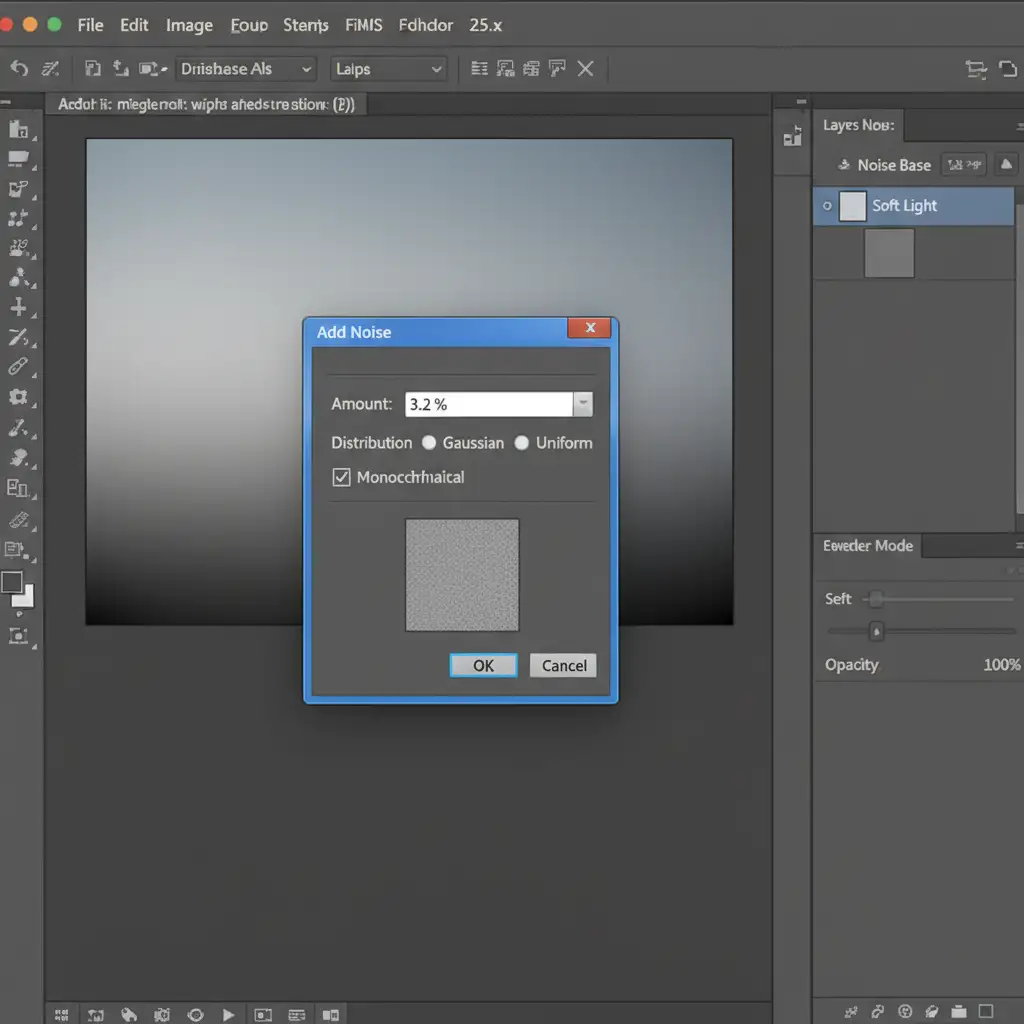
- Change the layer’s blending mode to Soft Light blending mode.
- Navigate to Filter > Noise > Add Noise.
- Dial in a low Amount (2-4%), select Gaussian distribution, and ensure Monochromatic noise is checked.
Method 2: The Pro Workaround (Pore Reconstruction)
For high-end commercial retouching, simple noise isn’t enough. You need actual pore reconstruction. This method utilizes a frequency separation workflow to graft genuine skin texture onto your AI image.
- Source a high-resolution photograph of real skin (ideally matching the lighting and angle of your AI subject).
- Extract the texture by placing the real skin sample on a new layer above your AI image.
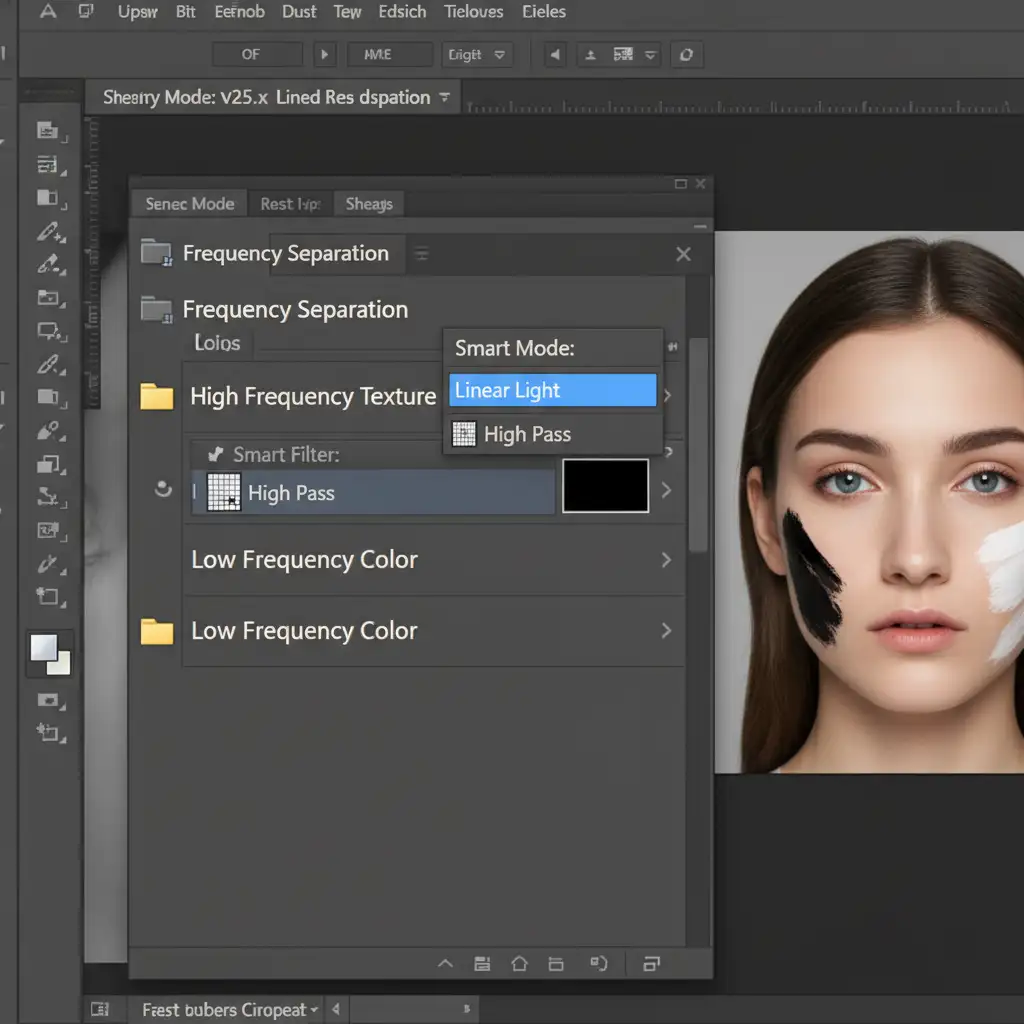
- Apply a High Pass filter (Filter > Other > High Pass) with a radius of 2-4px. This isolates the high-frequency layer (the pores and fine lines) from the color data.
- Change the blending mode of this texture layer to Linear Light.
- Add a black layer mask to hide the texture. Using a soft white brush, carefully paint the texture back in exclusively over the highlights and midtones of the AI skin, avoiding the eyes and lips.
Method 3: The Technical Deep-Dive (Micro-Contrast & Blend If)
To achieve the ultimate photorealistic finish, we combine Smart Object sharpening with advanced layer blending to protect the image’s tonal range.
- Convert your AI image layer into a Smart Object. This allows for non-destructive editing.
- Apply a Smart Sharpen filter (Filter > Sharpen > Smart Sharpen) with the Amount set to 50% and the Radius at 1.5px. This forces the software to enhance any existing micro-details the AI managed to generate.
- Add your custom noise grain (using Method 1).
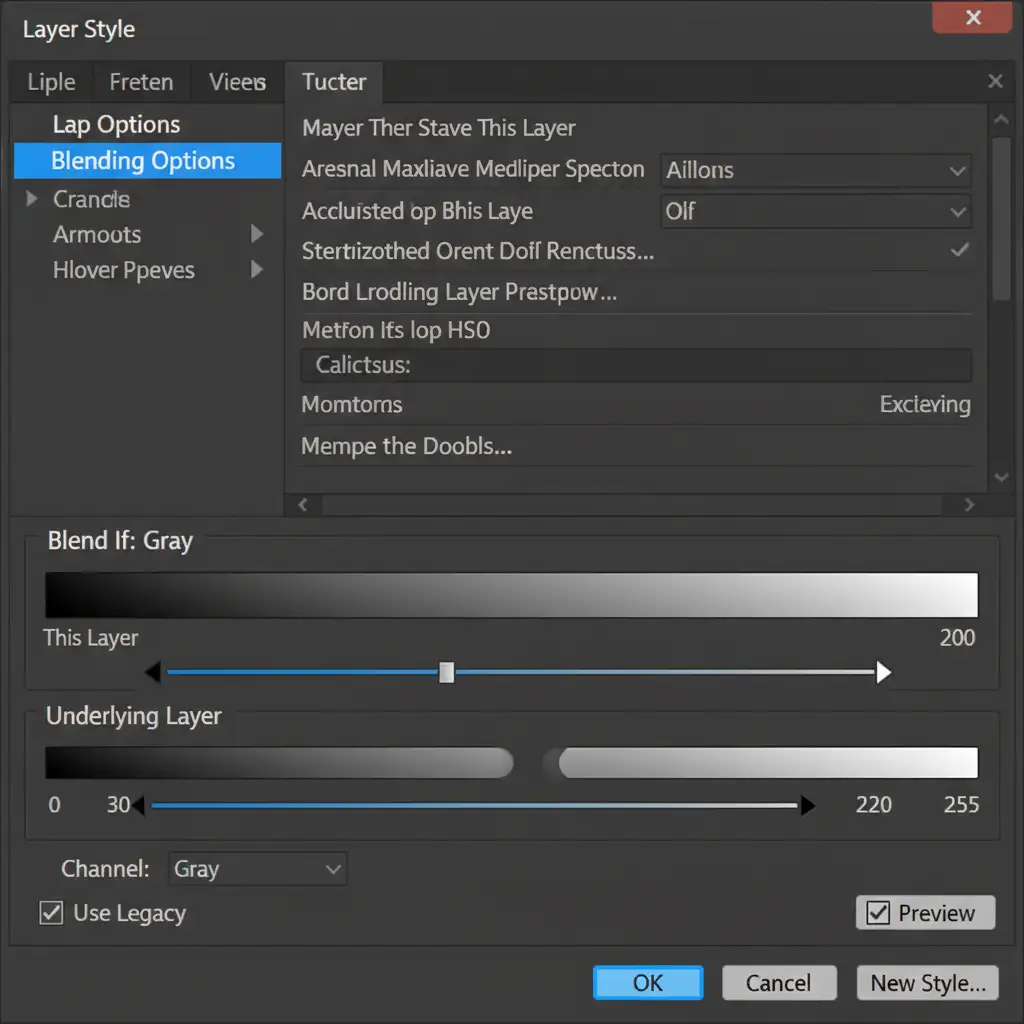
- To prevent the grain from making the deep shadows look muddy or the extreme highlights look dirty, double-click the noise layer to open the Layer Style dialog box.
- Use the Blend If sliders at the bottom. Hold Alt (or Option on Mac) to split the underlying layer sliders, dragging the shadow slider to the right and the highlight slider to the left. This seamlessly protects extreme tonal values from unwanted grain accumulation.
Let the Experts Handle Your Commercial Retouching
De-plasticizing AI skin texture requires a trained eye, a deep understanding of human anatomy, and advanced Photoshop proficiency. While these techniques will dramatically improve your AI outputs, executing them flawlessly across a massive commercial campaign can be incredibly time-consuming.
Struggling to make your AI-generated commercial portraits look authentically human? You don’t have to do it alone. Hire the high-end retouching experts at Image Work India and Cloud Retouch. Our team specializes in bridging the gap between AI generation and photorealistic commercial standards. We seamlessly integrate realistic skin textures, handle complex frequency separation workflows, and ensure your digital campaigns look flawless, organic, and ready for print.
Contact Image Work India and Cloud Retouch today to elevate your AI imagery to professional, high-end standards.


