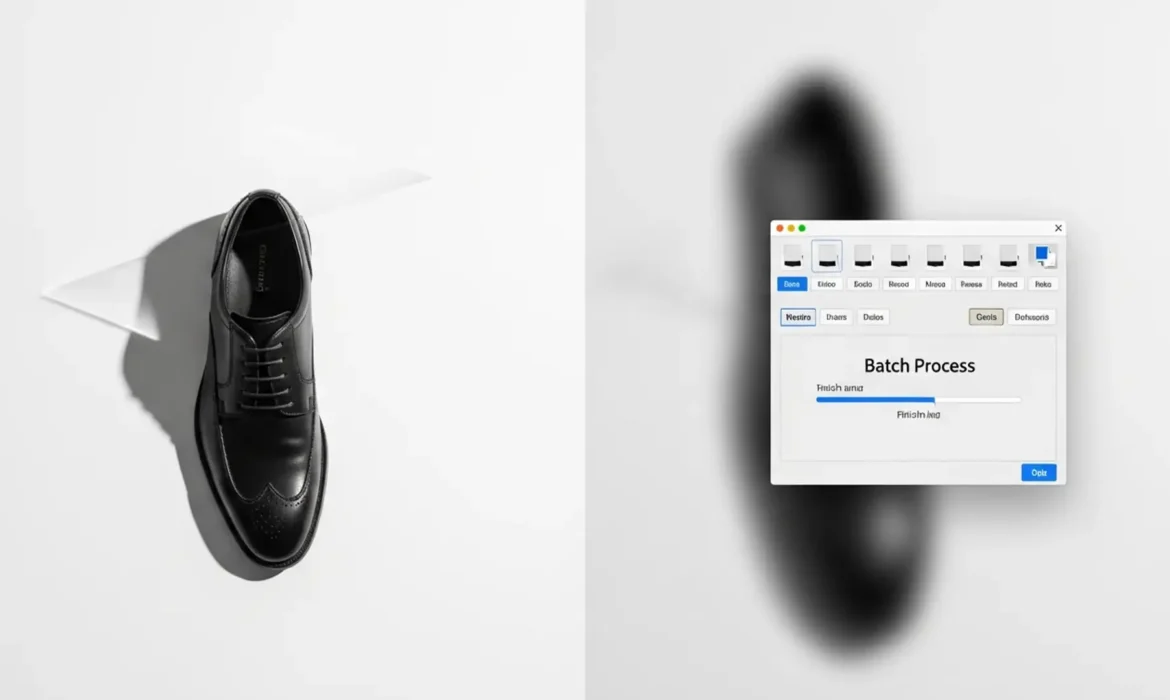
If you run an e-commerce studio, you already know the nightmare of processing thousands of product images on a tight deadline. You fire up a batch script in Adobe Photoshop v24.x or v25.x, walk away, and return to a disaster: thousands of “floating” products.
While automated AI tools like the ‘Remove Background’ Quick Action or ‘Select Subject’ algorithms are fast, they consistently clip semi-transparent data. Cast shadows, drop shadows, and product reflections are completely destroyed, leaving you with hard, unnatural edges.
To achieve batch product photo background removal with natural shadows, simple edge detection isn’t enough. You need a workflow built on luminosity selection and tonal extraction. Here is exactly how to automate your high-volume editing without sacrificing the premium realism of your product photography.
The Problem with AI Background Removal in High-Volume Workflows
When dealing with high-volume e-commerce editing, speed is critical. However, relying purely on one-click AI background removal tools creates a massive quality assurance headache. These algorithms are trained to find the solid edge of an object. They do not understand the subtle opacity manipulation required to separate a solid product from its semi-transparent shadow footprint.
To preserve natural shadows in a batch automation workflow, we have to separate the product from the shadow, process them differently, and blend them back together seamlessly.
3 Methods for Automated Shadow Preservation
Here are three technical workflows you can record into Photoshop Actions to process thousands of images flawlessly.
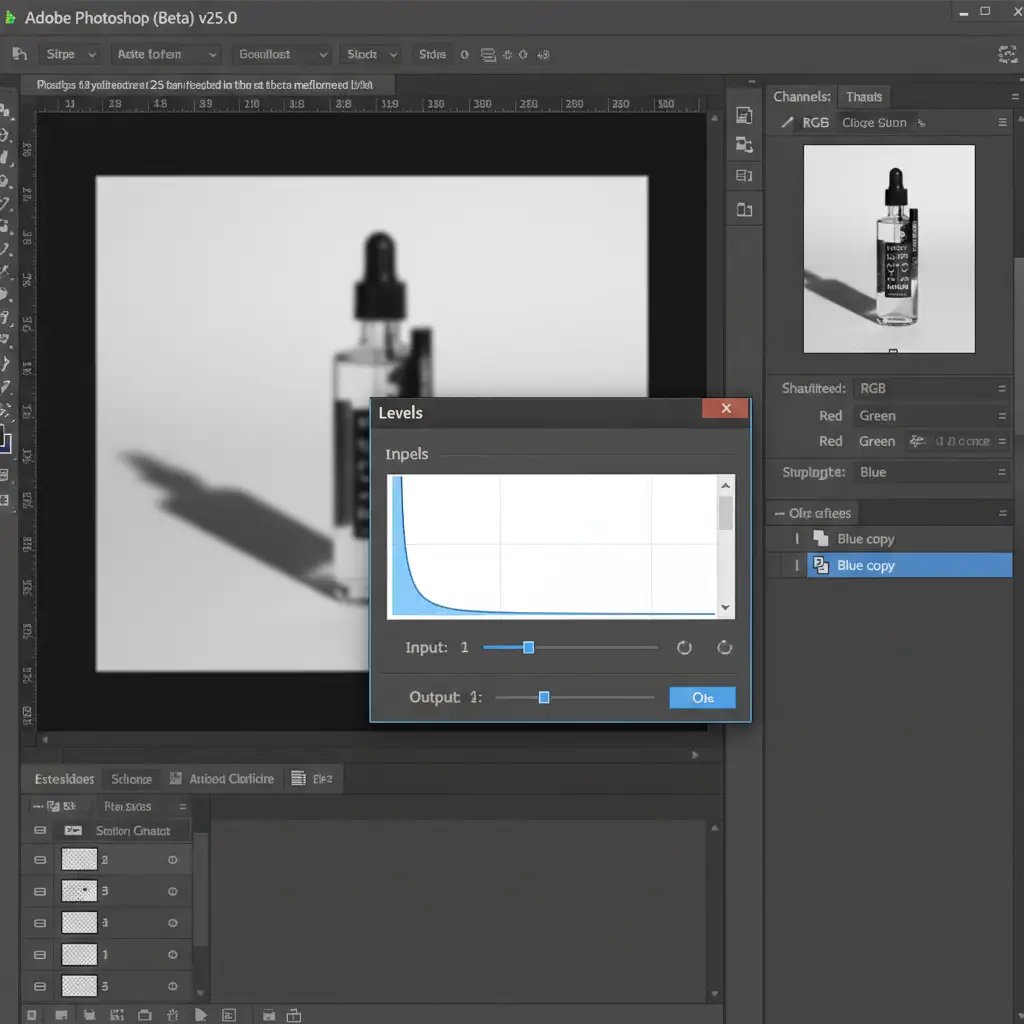
Method A: The Quick Fix (Multiply Blend Mode Action)
This is the most reliable method for products shot on clean, white studio backgrounds. By recording this sequence into an Action, you can easily apply it across a massive batch of images.
- Duplicate the Background Layer: Start by duplicating your base layer twice.
- Isolate the Product: On the top layer, use the Select Subject tool to isolate the product. Mask out the background completely (this layer will have no shadow).
- Extract the Shadow: Select the middle layer. Desaturate the layer completely (Cmd/Ctrl + Shift + U).
- Adjust Luminosity: Apply a Levels Adjustment to this middle layer. Push the white slider to the left until the studio background becomes pure white, leaving only the dark shadow footprint.
- Set the Blend Mode: Change this middle layer’s blend mode to Multiply.
The Multiply blend mode effectively makes the pure white pixels transparent while keeping the dark shadow pixels, seamlessly blending the natural shadow onto whatever background color you place beneath it.
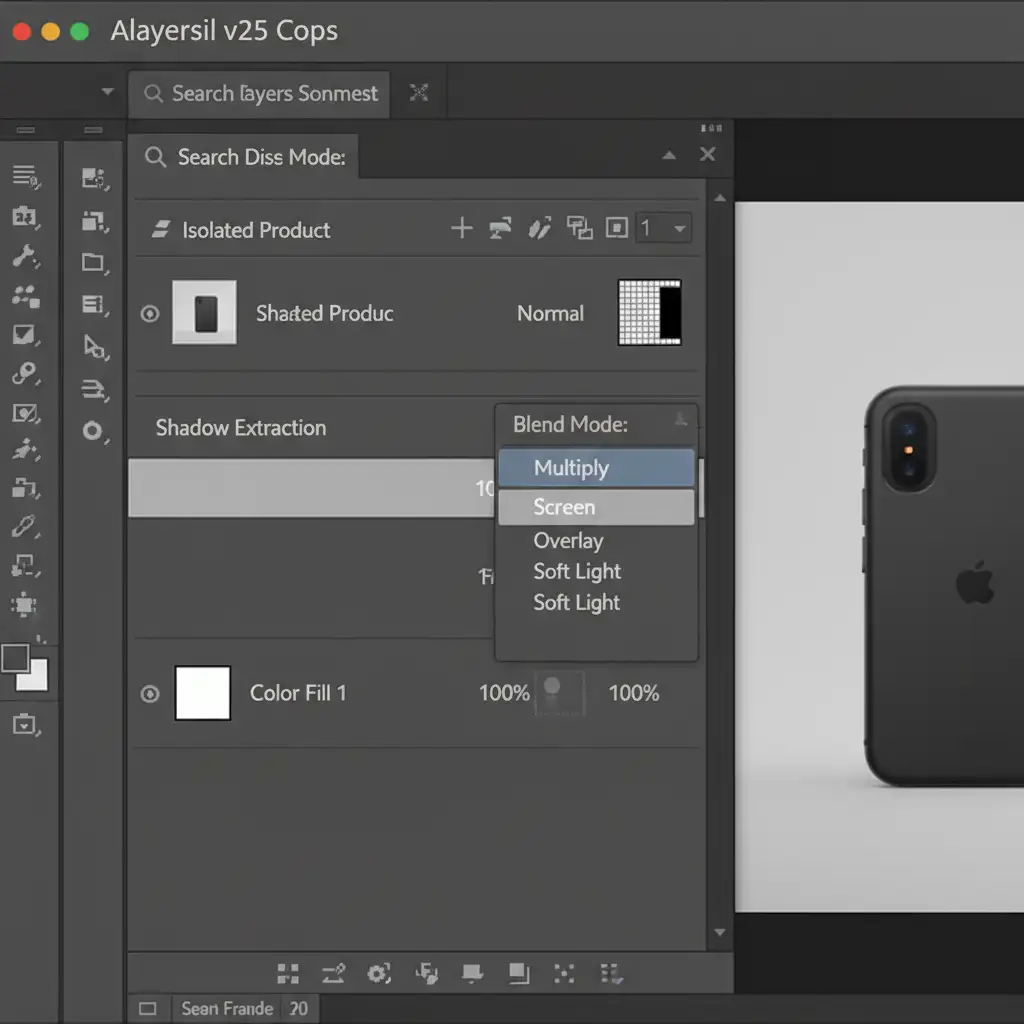
Method B: The Pro Workaround (Channel Masking)
For more complex lighting scenarios where Multiply blending causes color shifts, Channel Masking is the professional standard. This method extracts the exact opacity values of the shadow.
- Find the Highest Contrast: Open the Channels panel and find the channel with the most contrast between the shadow and the background (often the Blue Channel).
- Duplicate and Adjust: Duplicate that channel. Apply an extreme Levels adjustment to this duplicated channel to isolate the dark shadow pixels from the background.
- Create the Alpha Channel: Invert the channel (Cmd/Ctrl + I). The shadow should now be white, and the background black. This is your new Alpha Channel mask.
- Load the Mask: Load this Alpha Channel as a selection and apply it as a layer mask to a solid color layer (usually black or dark gray) placed beneath your isolated product layer.
This method preserves partial transparency perfectly and can be easily recorded into a batch action.
Method C: The Technical Deep-Dive (Automated Droplets and Memory Management)
Once you have recorded Method A or Method B into an Action, you need to deploy it at scale. Running thousands of high-res images through Photoshop can cause memory leaks and crashes. To prevent this, you must optimize your batch automation.
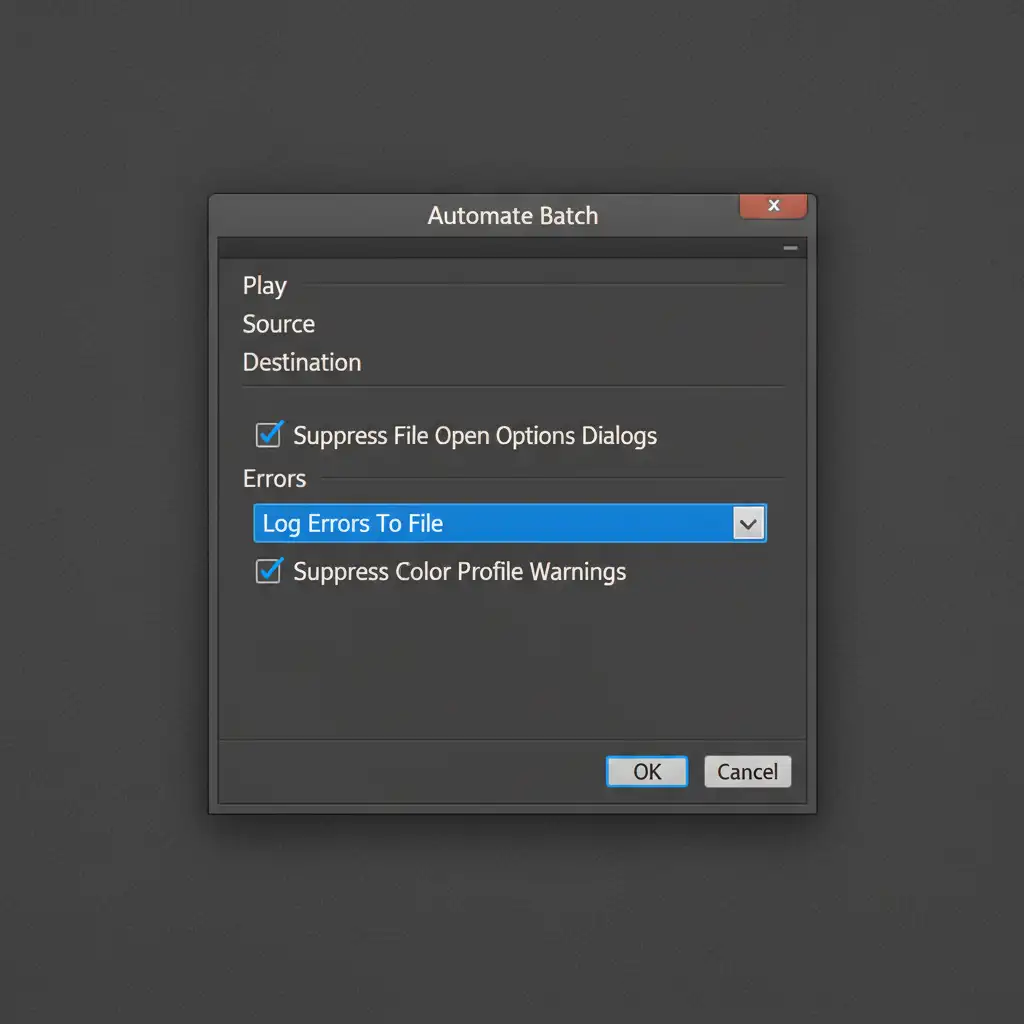
- Create an Action Droplet: Go to File > Automate > Create Droplet. This creates a standalone application on your desktop. You can simply drag and drop a folder of 5,000 images onto this Droplet to process them in the background.
- Suppress Warnings: In the Batch or Droplet configuration window, ensure you check ‘Suppress File Open Options Dialogs’ and ‘Suppress Color Profile Warnings’. If you don’t, Photoshop will pause the batch and wait for human input on every single image that has a profile mismatch.
- Optimize Memory: Go to Edit > Preferences > Performance. Increase your memory usage allowance.
- Clear the Clipboard: Edit your recorded Action to include Edit > Purge > Clipboard at the very end of the sequence. This prevents Photoshop’s RAM usage from ballooning as the batch progresses.
When to Outsource Your High-Volume E-Commerce Editing
Even with optimized Action Droplets, automated scripts aren’t perfect. Lighting variations, white balance shifts, and reflective products often confuse automated luminosity selections. When a batch script fails, it requires manual intervention, clipping paths, and meticulous QA—draining your team’s time and resources.
If you are struggling to process thousands of images without losing quality, it’s time to scale smarter.
Image Work India and Cloud Retouch specialize in high-volume, pixel-perfect e-commerce editing. Instead of spending hours managing Photoshop memory crashes and fixing automated mistakes, you can hand off your raw files to our expert retouching teams. We guarantee flawless background removal that perfectly preserves natural shadows, drop shadows, and reflections, ensuring your products always look premium and ready to convert.
Stop sacrificing realism for speed. Contact Image Work India and Cloud Retouch today to streamline your high-volume editing workflow.


