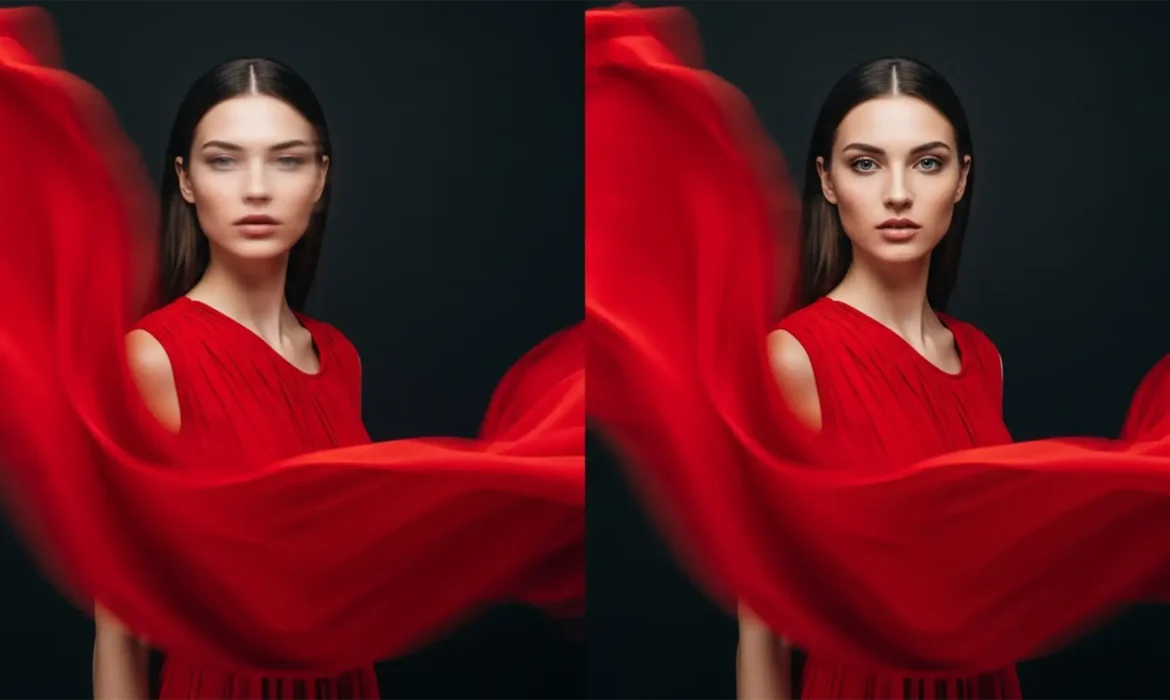
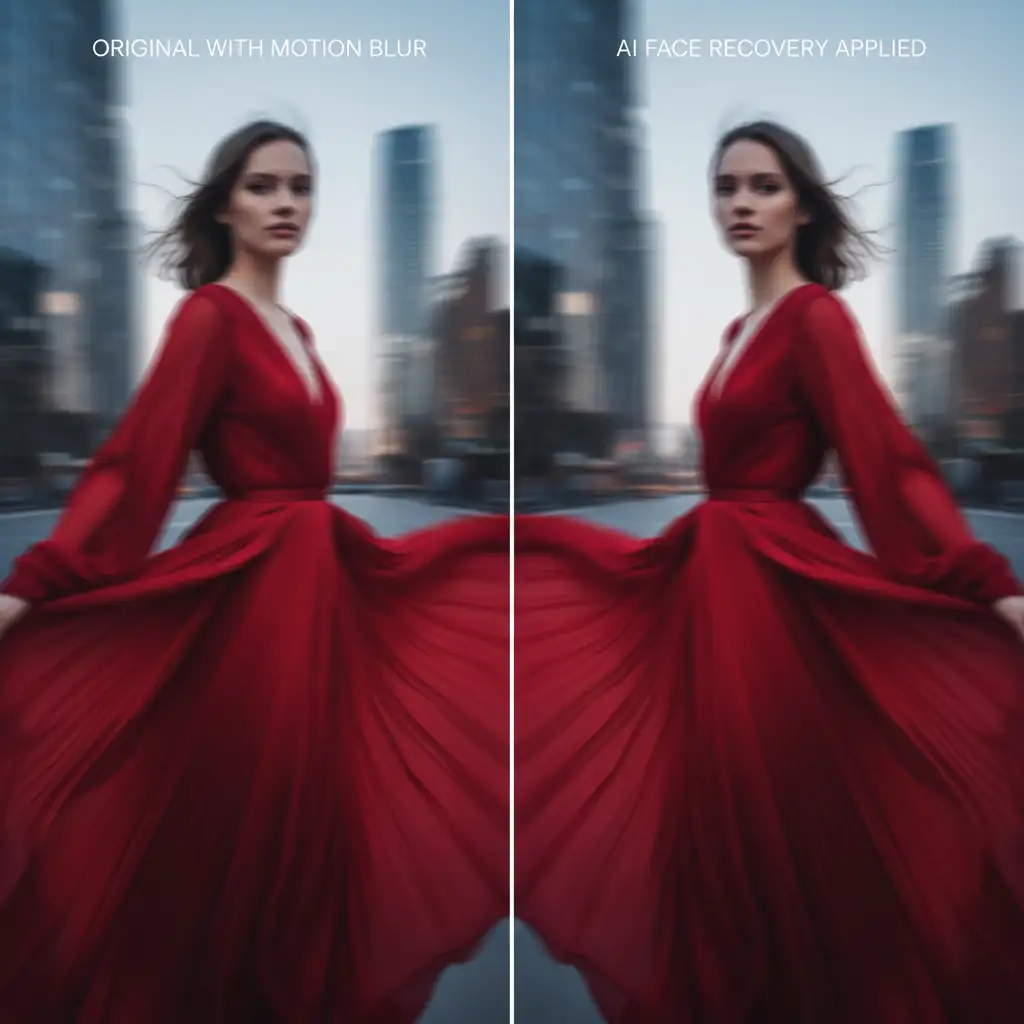
You nailed the perfect high-motion editorial shot. The dress is flowing, the kinetic energy is palpable, but there is a fatal flaw: the model’s face is lost to motion blur. When you run global AI sharpening tools to fix it, the software destroys the intentional artistic movement, making the entire image unnaturally crisp and ruining the aesthetic. How do you fix the face without killing the vibe?
Mastering AI face recovery for motion blur models requires a surgical approach. In this guide, we will break down how to use selective sharpening to isolate facial features while preserving the dynamic motion of your high-end fashion photography.
The Challenge of High-Motion Editorial Photography
Editorial photographers intentionally use motion blur to create dynamic, kinetic fashion shots. However, a blurry face disconnects the viewer from the subject. While Photoshop v25.x and standalone tools like Topaz Photo AI v2.x have introduced powerful AI Face Recovery algorithms, they are designed for global application. Applying them blindly results in a heavily processed image where the artistic blur is completely lost.
The technical solution relies on isolating the facial features—specifically the eyes, nose, and mouth—and blending the recovered data seamlessly with the original kinetic energy of the shot. Here are three professional workflows to achieve this.
Method A: The Quick Fix Using Photoshop Neural Filters
For a fast, native solution, Photoshop’s Neural Filters offer an excellent starting point, provided you utilize non-destructive editing techniques.
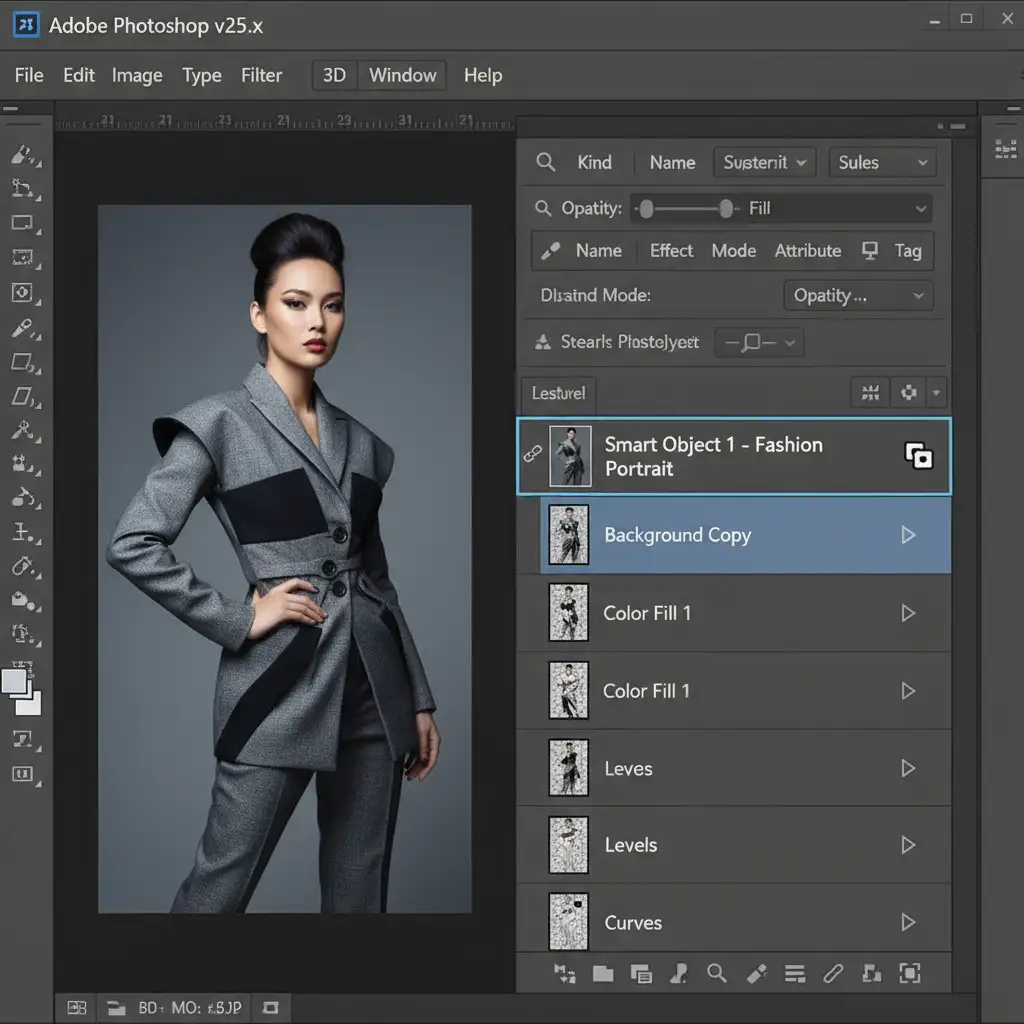
Step 1: Smart Object Conversion
Never apply AI filters directly to your rasterized layer. Right-click your image layer and select “Convert to Smart Object.” This ensures the AI filter acts as an editable Smart Filter, giving you access to its built-in layer mask.
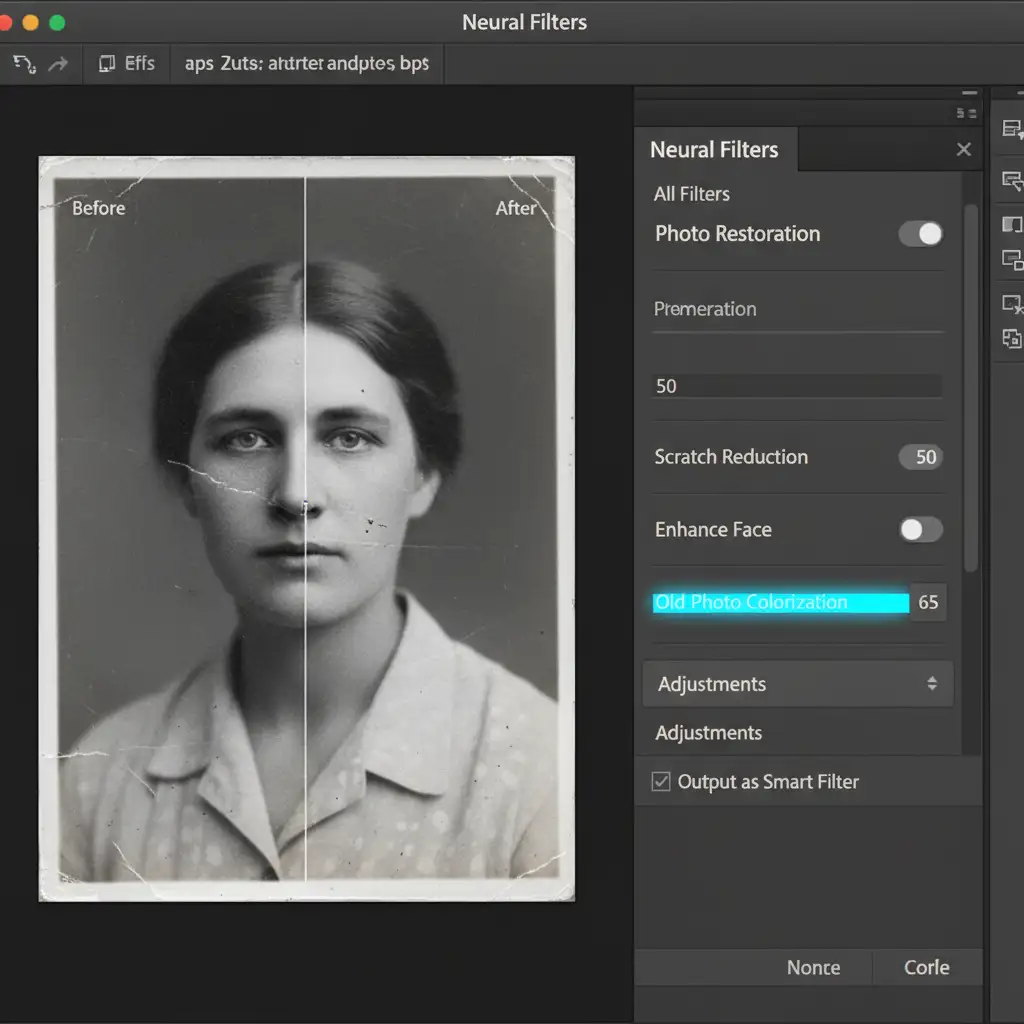
Step 2: Apply Photo Restoration
Navigate to Filter > Neural Filters. Toggle on the Photo Restoration filter. The default settings might be too aggressive, so focus entirely on the Enhance Face slider. Push this slider until the model’s features are sharp, ignoring what it does to the background or clothing.
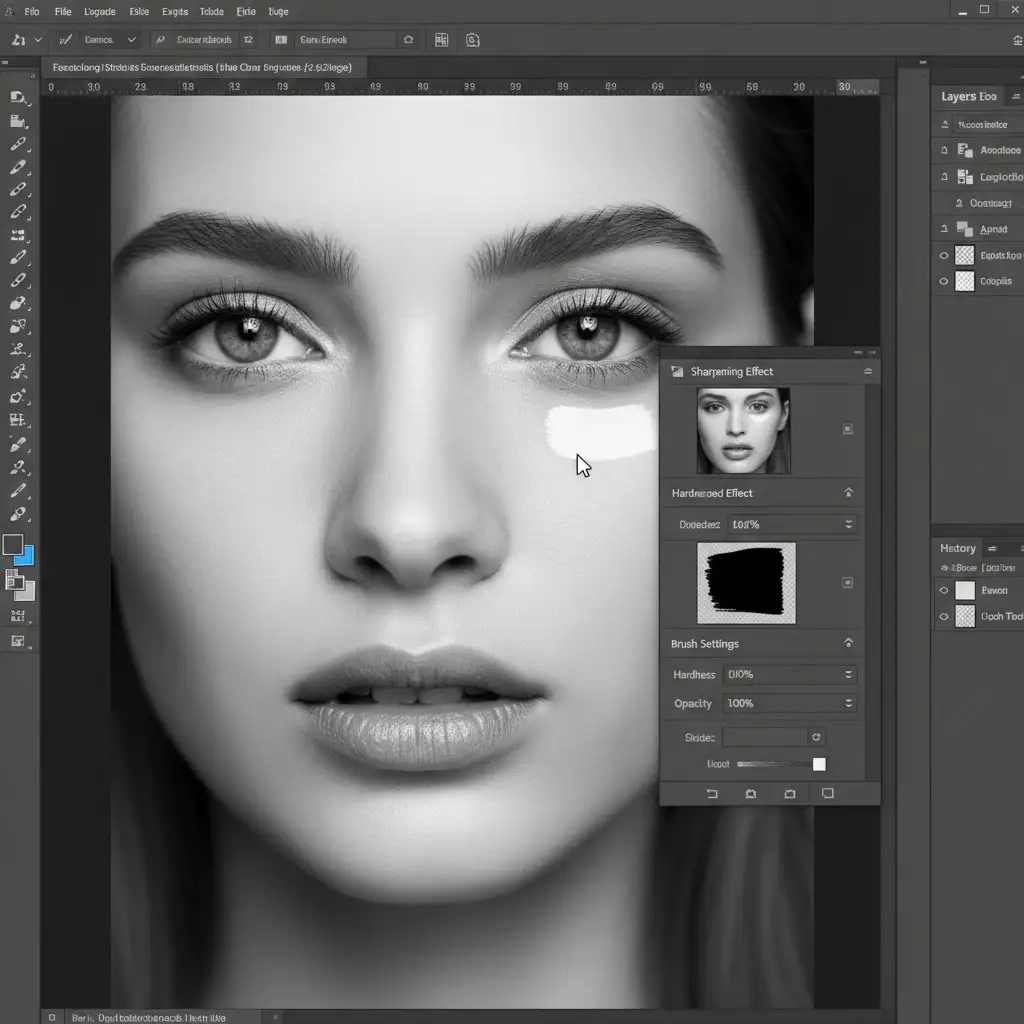
Step 3: Selective Layer Masking
Click OK. In your Layers panel, click the white Smart Filter mask. Press Cmd/Ctrl + I to invert the mask to black, hiding the sharpening effect entirely. Select a soft-edged brush, set your foreground color to white, and carefully paint over the model’s eyes, nose, and lips. This selective sharpening ensures the face is recovered while the motion blur of the hair and dress remains untouched.
Method B: The Pro Workaround with Topaz Photo AI
Topaz Photo AI often handles severe blur better than native Photoshop tools, but its autopilot feature will aggressively sharpen everything. Here is how to control it.
- Duplicate and Launch: Duplicate your background layer (Cmd/Ctrl + J). Go to Filter > Topaz Labs > Topaz Photo AI.
- Recover Faces: Let the autopilot detect the subject, but manually disable global sharpening. Toggle on Recover Faces. Ensure the AI is only calculating the facial geometry.
- Apply and Mask: Apply the filter to return to Photoshop. Add a black layer mask to this Topaz layer (Option/Alt + Click the Layer Mask icon).
- Blend the Transition: Use a low-flow white brush (around 10-15% flow) to selectively paint in the recovered facial details. Building the effect slowly ensures the transition between the tack-sharp eyes and the blurred hair remains seamless and photorealistic.
Method C: The Technical Deep-Dive – Frequency Separation & Generative AI
When standard AI Face Recovery fails due to extreme motion blur, you must rebuild the facial texture from scratch using Generative Fill integrated with Frequency Separation.
Step 1: Split the Frequencies
Run your standard Frequency Separation action to split the image into a High-Frequency Layer (texture/details) and a Low-Frequency Layer (color/tone).
Step 2: AI Texture Generation
Select the High-Frequency layer. Use the Lasso tool to draw a loose selection around the model’s blurred facial features. Click Generative Fill and use the prompt: “sharp editorial face features”.
Step 3: Blend and Refine
The AI will generate a new face, but the colors will likely mismatch. Change the blend mode of the new Generative AI layer to Luminosity Blend Mode. This forces the AI layer to only affect the contrast and texture, inheriting the original skin tones from your Low-Frequency layer. Mask heavily to retain the original skin texture at the edges of the face.
Scale Your Editorial Retouching Workflow
Balancing artistic motion with sharp editorial details is a time-consuming, highly technical process. If you are handling large batches of high-motion campaign images, manual masking and AI recovery can severely bottleneck your post-production pipeline.
Struggling to balance artistic motion and sharp editorial details? Hire Image Work India and Cloud Retouch for flawless, high-end fashion retouching that preserves your creative vision. Our expert retouchers specialize in complex masking, frequency separation, and selective AI applications, ensuring your models look flawless while maintaining the kinetic energy of your photography. Contact us today to streamline your editorial workflow.


