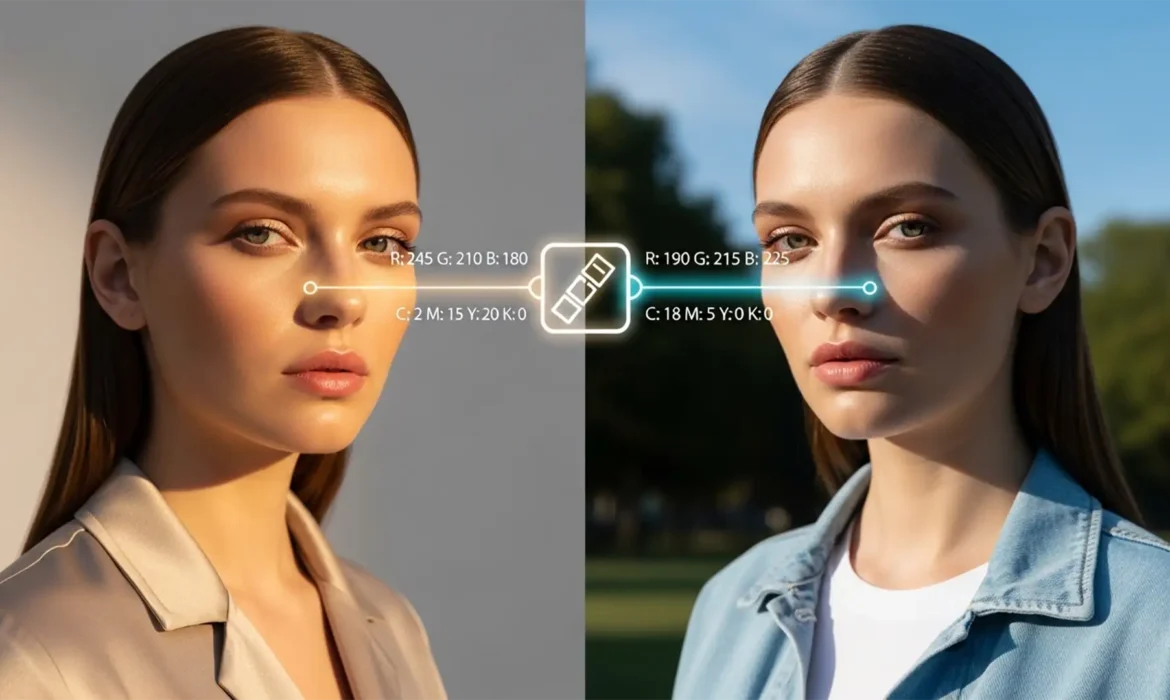
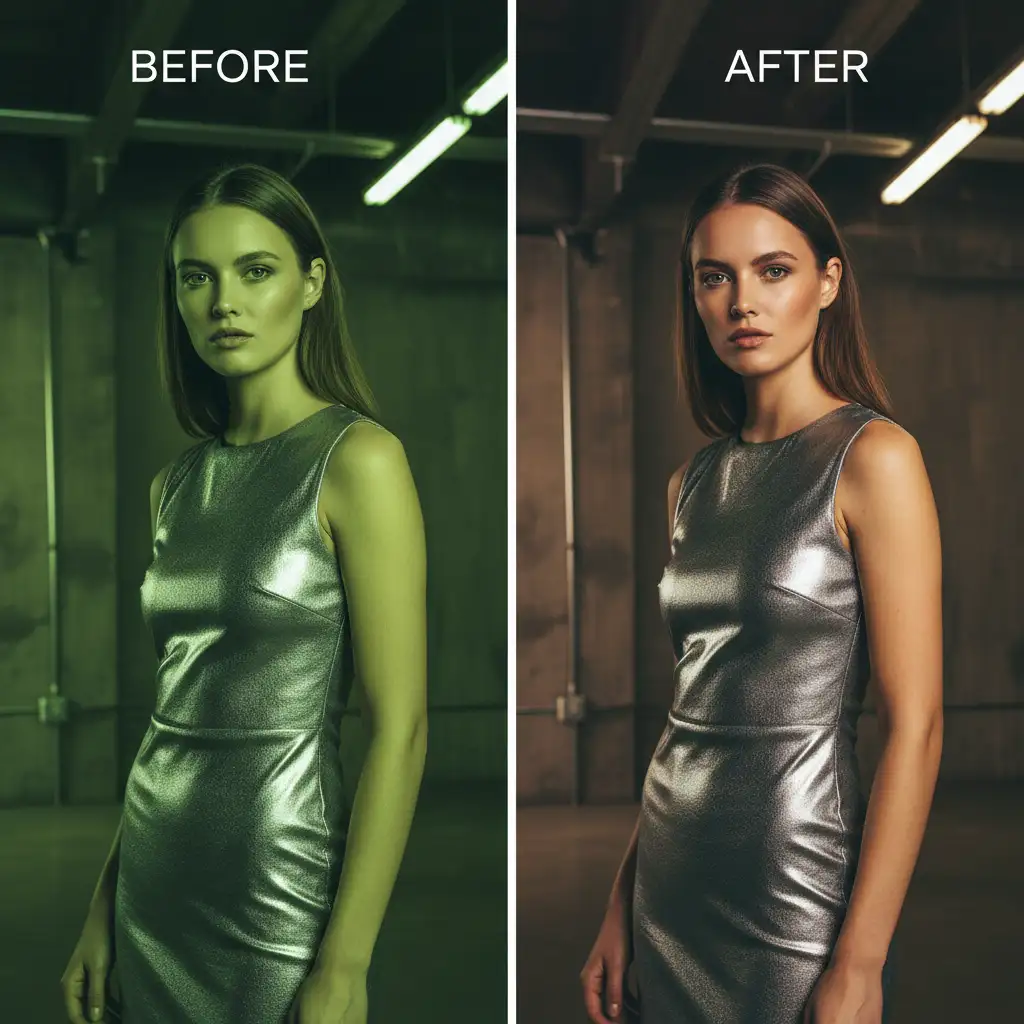
Have you ever reviewed an e-commerce catalog only to find your model’s skin shifting from golden-hour warmth to sickly fluorescent green across different shots? Matching model skin tones across different lighting is one of the biggest hurdles in editorial retouching. Ambient light contamination inherently alters the RGB values of the skin, creating jarring luminance and tint discrepancies that destroy brand consistency. You simply cannot rely on your monitor alone. In this guide, we will show you how to use numeric validation in Photoshop v24.x to v25.x+ to mathematically synchronize skin tones across any lighting environment.
Why Lighting Shifts Destroy Catalog Consistency
When a fashion or e-commerce shoot moves from a controlled studio to an outdoor location, the color temperature (Kelvin) and tint shift dramatically. Even with initial white balance correction in Camera Raw or Lightroom, ambient light reflects off surrounding environments (like green foliage or blue walls) directly onto the subject.
This contamination means that visual guessing is no longer enough for high-end color grading. To achieve true consistency, professional retouchers rely on numeric data and non-destructive adjustment layers.
Method 1: The Quick Fix Using the Match Color Tool
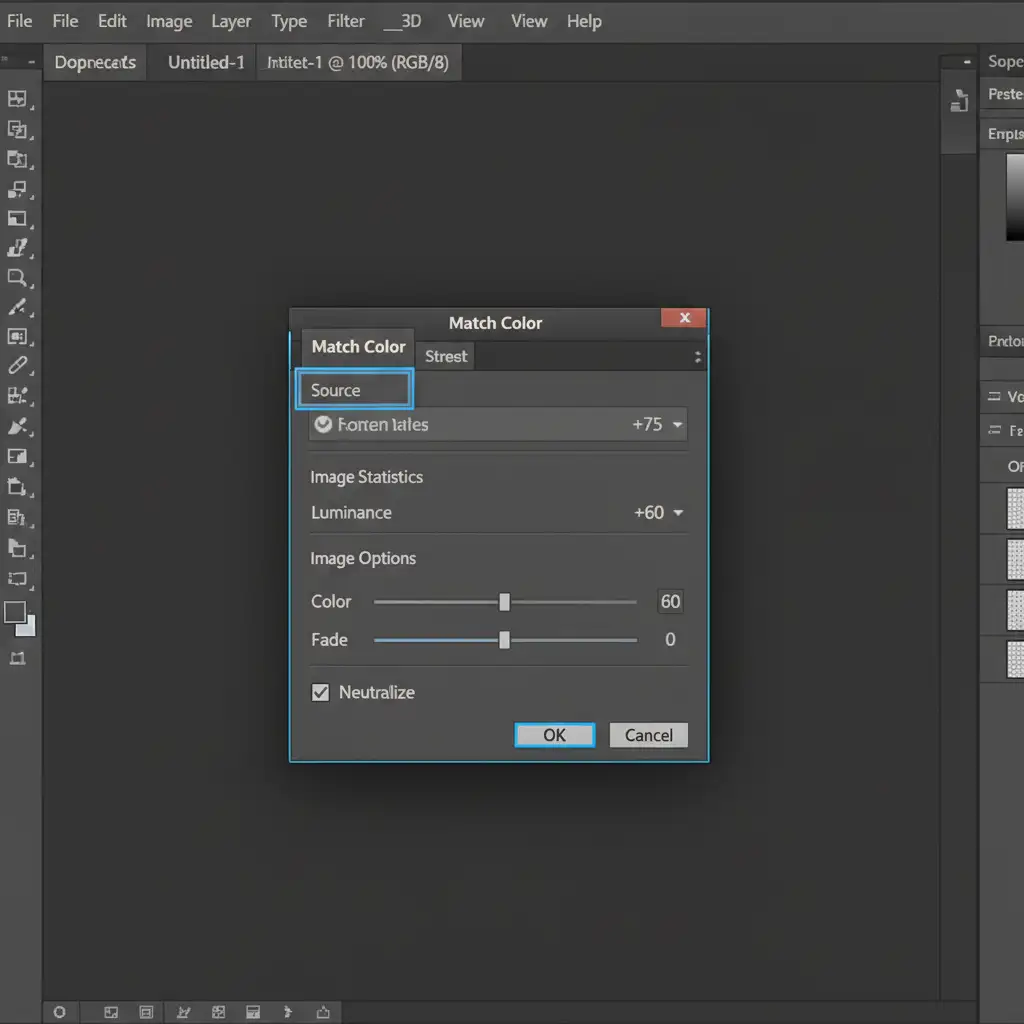
If you are dealing with minor lighting shifts and need a rapid baseline adjustment, Photoshop’s native Match Color tool is your best starting point.
- Open both your reference image (the ideal skin tone) and your target image (the one needing correction) in Photoshop.
- Navigate to Image > Adjustments > Match Color.
- In the dialog box, select your reference document from the Source dropdown menu.
- Carefully tweak the Luminance and Color Intensity sliders. Luminance will correct exposure discrepancies, while Color Intensity handles the saturation shifts caused by mixed lighting.
Method 2: The Pro Workaround with the Color Sampler Tool
For precise, catalog-level consistency, you must abandon visual estimation and use the Color Sampler Tool. This method ensures the exact numeric values of your reference image are mapped to your target image.
Step 1: Sample the Midtones
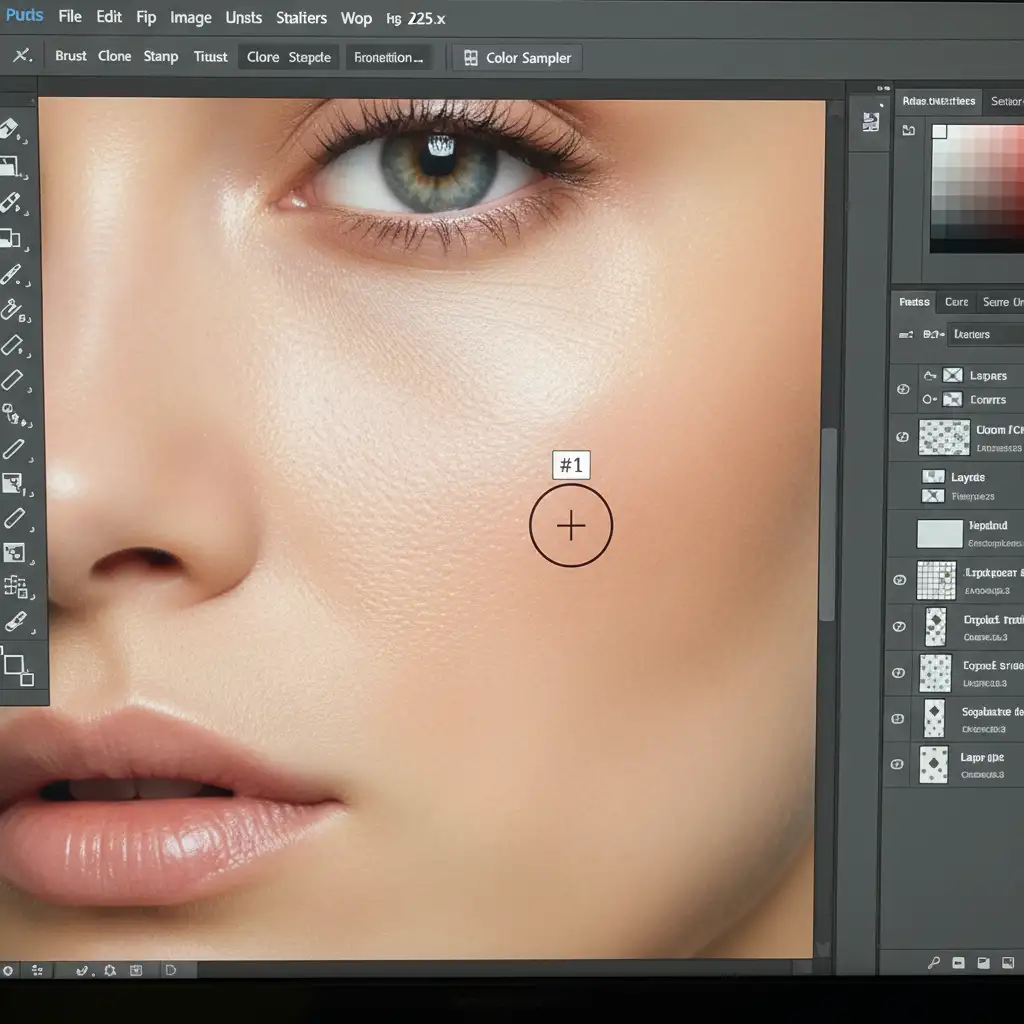
Select the Color Sampler Tool (nested under the Eyedropper). In the top options bar, set the sample size to a 3 by 3 Average to avoid picking up a stray pore or highlight. Drop a sample point on a clean midtone area of the skin on your reference image, and do the same on the exact corresponding area (like the cheek) of your target image.
Step 2: Harmonize via Curves
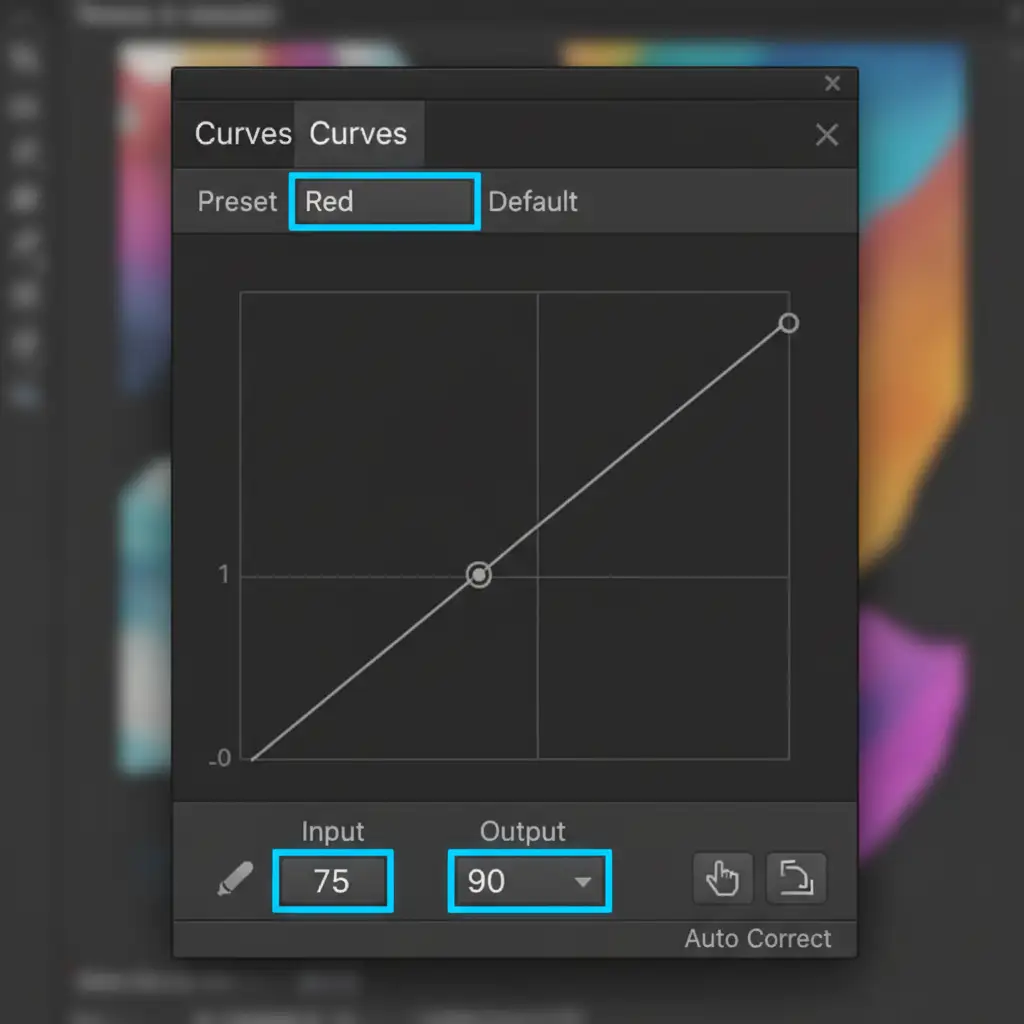
Create a Curves Adjustment Layer on your target image. Instead of adjusting the master RGB curve, you will adjust the Red, Green, and Blue channels individually.
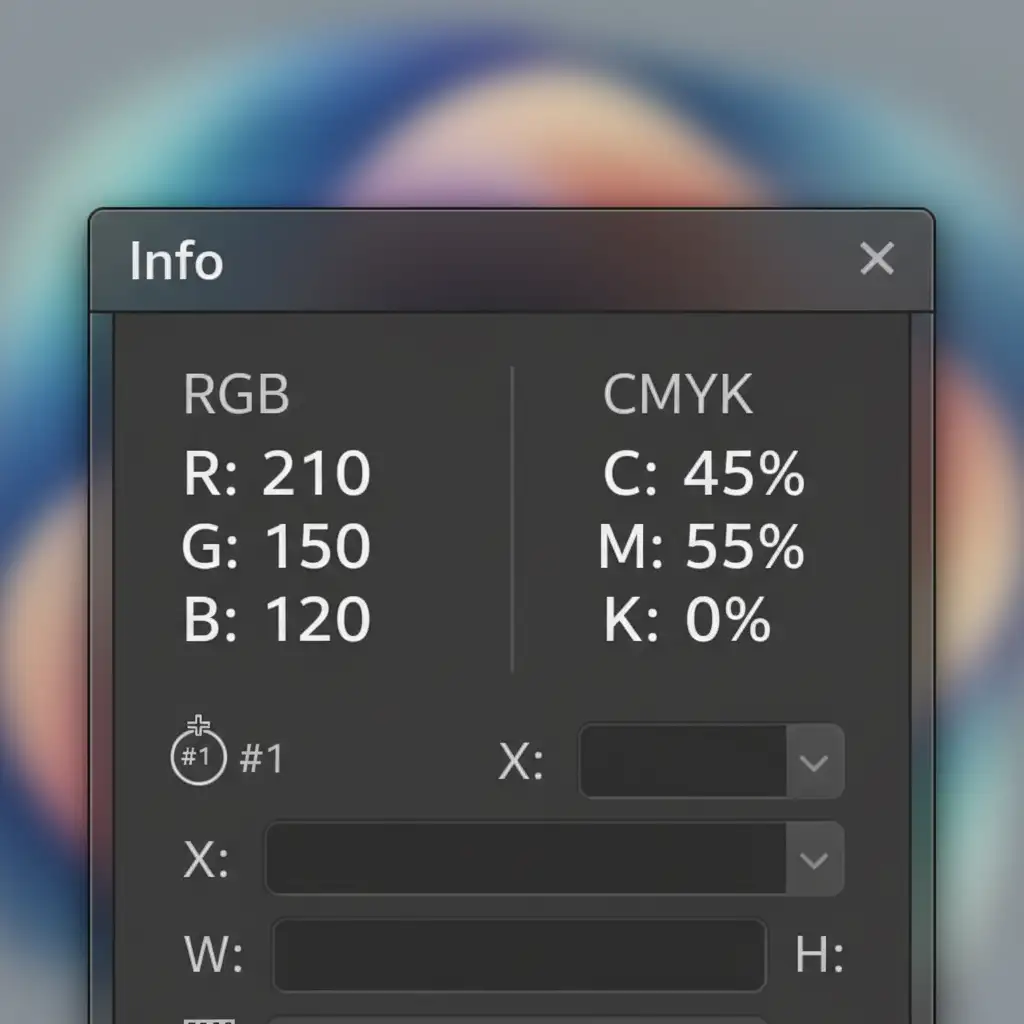
Look at your Info Panel. Your goal is to drag the curve points on the target image until the RGB numeric values perfectly match the reference sample point.
Method 3: The Technical Deep-Dive Using CMYK Numeric Validation
Even if you are working in an RGB workspace for digital delivery, CMYK numeric values provide the most foolproof method for reading human skin tones.
Setting Up the Info Panel
Open your Info Panel and set the readout for your color samplers to CMYK. Regardless of ethnicity or lighting, healthy human skin follows a strict mathematical rule in CMYK: Yellow must always be proportionally higher than Magenta. If Magenta exceeds Yellow, the skin will look sunburned or magenta-cast from poor lighting. If Cyan is too high, the skin looks lifeless or contaminated by cool ambient light.
Correcting with Selective Color
To fix these numeric imbalances without destroying the background lighting:
- Add a Selective Color adjustment layer.
- Target the Reds and Yellows channels.
- Adjust the Magenta and Yellow sliders until your Info Panel dictates that Yellow is safely higher than Magenta.
- Apply a Clipping Mask or paint on the layer mask so this adjustment is strictly limited to the model’s skin, leaving the environmental lighting intact.
Note: While Adobe’s newer Harmonization Neural Filter attempts to automate subject-to-background blending, it lacks the surgical precision of CMYK numeric validation for high-end beauty and fashion retouching.
Before and After: The Power of Numeric Color Grading
When you switch from visual guessing to numeric validation, the results are undeniable. Models look like the same person, regardless of whether they were shot under a studio strobe or a cloudy sky.
Flawless Catalog Consistency with Image Work India
Matching model skin tones across different lighting is a meticulous, time-consuming process. When you are managing an e-commerce catalog with thousands of images, spending 15 minutes per photo on numeric color grading simply isn’t scalable.
Ensure flawless catalog consistency without the bottleneck. Outsource your high-volume retouching to Image Work India and Cloud Retouch. Our expert teams specialize in pixel-perfect skin tone matching, advanced color grading, and complex masking. Focus on shooting your next campaign, and let us handle the technical heavy lifting. Contact us today to streamline your post-production workflow.


