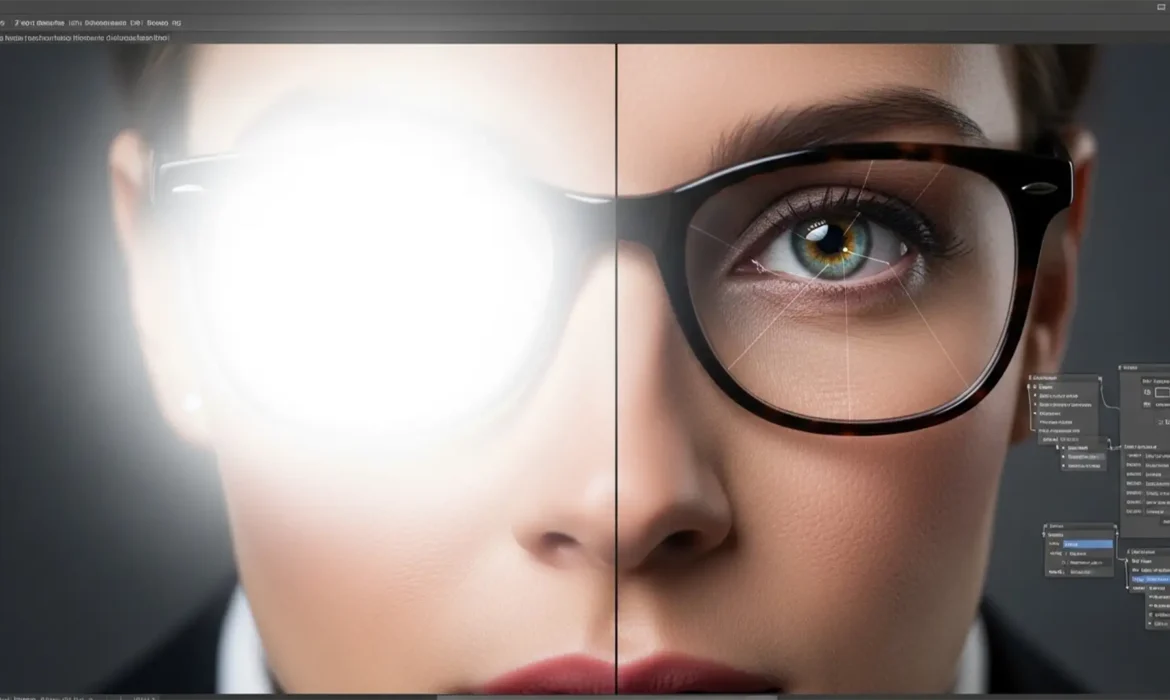
You’ve just nailed a corporate headshot session, but there’s a glaring problem: dense, opaque flash reflection completely obscuring your subject’s eyes. If you’ve ever tried fixing this with basic tools, you know the dreaded result—a smudged, cloudy mess that destroys natural iris striations and delicate catchlights. High-end clients demand absolute photorealism, not artificial-looking eyes. If you are looking for realistic glasses glare removal 2025 techniques, you’ve found the definitive guide. We’ll show you how to eliminate severe glare in Photoshop v25.x and v26.x without degrading the underlying raw pixel data.
The Challenge of Glasses Glare in Modern Retouching
In professional retouching, the primary pain point with glasses glare is managing localized exposure gradients and high-frequency textures simultaneously. Flash glare essentially wipes out the raw pixel data where the reflection hits. When you attempt to patch it, you risk losing the sharp details of the eye.
To achieve true photorealism, we must utilize advanced workflows that separate color from texture or rebuild the missing data entirely. Here are the three industry-standard methods for 2025.
Method 1: The Quick AI Fix (Photoshop 2025 Generative Fill)
For minor to moderate glare, Adobe’s latest AI updates offer a rapid solution. Thanks to improved GPU acceleration in Photoshop v25.x and v26.x, the localized rendering of AI-generated patches is faster and more accurate than ever.
Step-by-Step Workflow:
- Select the Lasso Tool (L).
- Draw a selection around the glare area, leaving a small margin to give the AI context.
- Click the Generative Fill button on the contextual taskbar.
- Type the specific prompt: ‘remove glare preserve iris’.
- Generate and cycle through the variations until you find the most realistic match.
Note: While Generative Fill is excellent for quick fixes, severe glare often requires manual intervention to maintain the exact likeness of the subject.
Method 2: The Pro Workaround (Frequency Separation)
When AI fails to perfectly match the subject’s unique eye structure, Frequency Separation is the gold standard. This technique allows you to fix the blown-out white color of the glare without destroying the texture of the eye beneath it.
Setting Up the Layers
- Duplicate your background layer twice.
- Name the bottom duplicate “Low Frequency” (Color) and the top duplicate “High Frequency” (Texture).
- Apply a Gaussian Blur to the Low Frequency layer until the fine details disappear.
Rebuilding the Eye
Next, select the High Frequency layer and open the Apply Image dialog.
Once your layers are set:
- Select the Clone Stamp Tool on the High Frequency layer to carefully rebuild the eye texture (like eyelashes and iris striations). You can also use a High-pass filter technique to extract texture from another part of the image if needed.
- Select a soft-edged Brush on the Low Frequency layer. Sample the natural skin or eye color near the glare and gently paint over the bright, blown-out reflection.
Method 3: The Technical Deep-Dive (Composite Donor Masking)
For the most severe cases where the glare is pure white and no underlying data exists, you must perform a full Iris reconstruction using a donor eye.
The Donor Workflow
- Find a donor eye—either the subject’s opposite eye (if visible) or an eye from another frame in the same shoot.
- Copy and paste the donor eye onto a new layer. Rasterize the layer if you brought it in as a Smart Object but need to run destructive pixel-level cloning later.
- Transform and Warp the donor eye to match the exact perspective and curvature of the glasses lens.
- Change the layer’s Blend Modes to Darken or Multiply. Because the glare is pure white, these blend modes will instantly drop out the white reflection, allowing the donor iris to show through perfectly.
- Create precise Luminosity Masks to blend the edges of the reconstructed iris seamlessly into the shadows of the original eye socket.
Achieving Flawless Iris Reconstruction and Catchlights
The hallmark of realistic glasses glare removal 2025 is the preservation of Catchlights. An eye without a reflection looks dead. When you remove the flash glare, you must ensure the natural window light or softbox reflection remains intact.
Scale Your Corporate Headshot Retouching
Mastering realistic glasses glare removal requires deep technical knowledge of Photoshop’s blending algorithms, masking, and high-frequency texture management. When you’re managing a massive volume of corporate headshots, spending 20 minutes reconstructing a single eye simply isn’t scalable.
Struggling with bulk corporate headshot editing? Outsource your complex glare removal and high-end retouching to Image Work India and Cloud Retouch. Our team of expert retouchers specializes in flawless, studio-grade results, ensuring every iris is sharp, every catchlight is natural, and every client is thrilled. Focus on shooting your next campaign, and let us handle the pixels. Contact Cloud Retouch today to streamline your post-production workflow.


