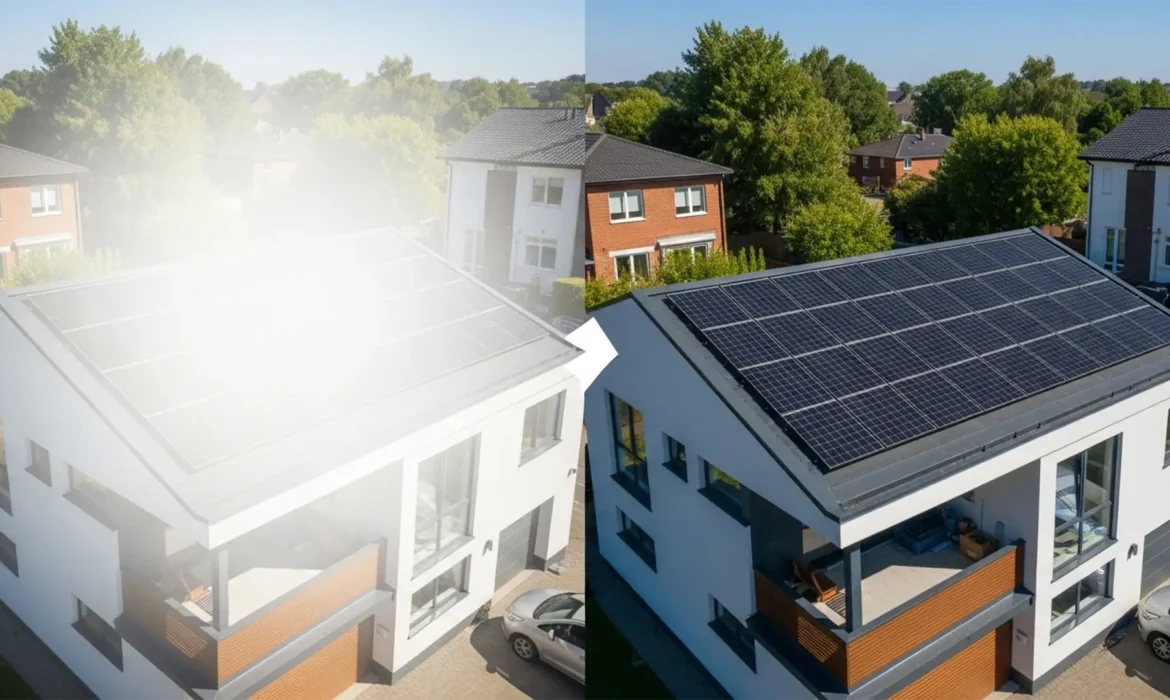
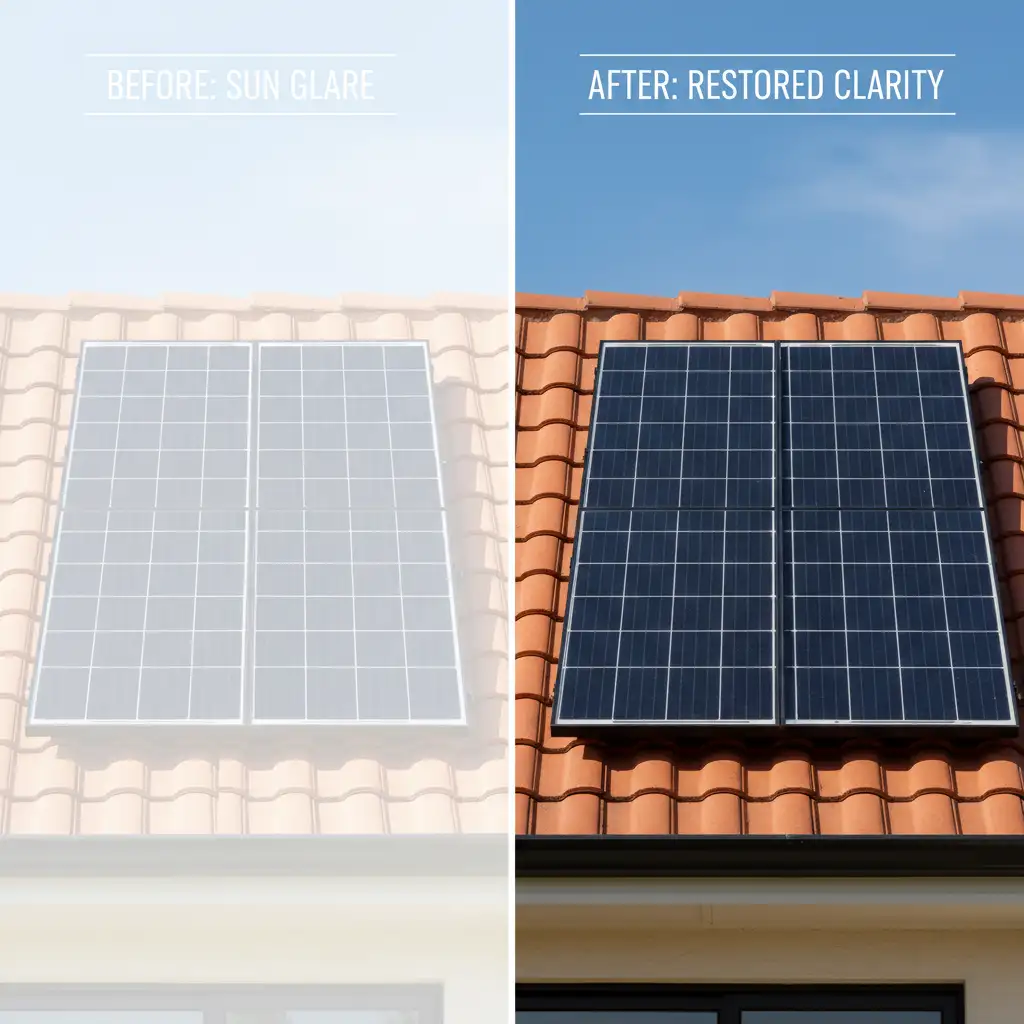
You are editing a stunning drone shot of a luxury property, but there is a glaring issue-literally. The sun has hit the roof at the exact wrong angle, turning the solar panels into an ugly,remove solar panel reflections real estate retouching. When RGB values are clipped at pure white (255,255,255), standard exposure sliders in Camera Raw completely fail because the pixel data is gone. You cannot simply paint over it, or you will destroy the geometric grid pattern that makes it look realistic. If you want to remove solar panel reflections in real estate retouching without ruining the roof texture, you need non-destructive retouching techniques.
Here is exactly how to fix clipped solar panel highlights in Adobe Photoshop v24.x and v25.x.
Why Standard Adjustments Fail on Solar Glare
In real estate exterior photography, blown-out highlights on reflective surfaces are common. While a basic color blending mode or lowering the highlights slider might recover a slightly overexposed sky, it will not work on solar panels. The primary technical hurdle is the grid.
A successful resolution requires a non-destructive workflow utilizing luminosity masking, targeted blending modes, or texture-separating algorithms to reconstruct the lost high-frequency details (the grid) while flattening the low-frequency data (the bright glare).
Here are three professional methods to restore your solar panels, ranging from a quick AI fix to a technical manual rebuild.
Method A: The Quick Fix Using Generative Fill
For users on Photoshop v24.x and newer, Adobe’s AI tools offer a rapid solution for replacing missing pixel data. While older tools like content-aware fill often struggle with geometric patterns, Generative Fill excels at structural recreation.
- Select the Glare: Select the Polygonal Lasso Tool (L). Carefully click to trace the exact geometric boundary of the glared solar panel. Keep your selection tight to the edges.
- Access Generative Fill: Locate the Contextual Task Bar floating on your screen and click Generative Fill.
- Prompting: You can leave the text prompt completely blank, or for more precise control, type “clean solar panel grid”.
- Generate and Choose: Hit Generate. Photoshop will provide three variations in the Properties panel. Choose the variation where the grid lines align perfectly with the surrounding un-glared panels.

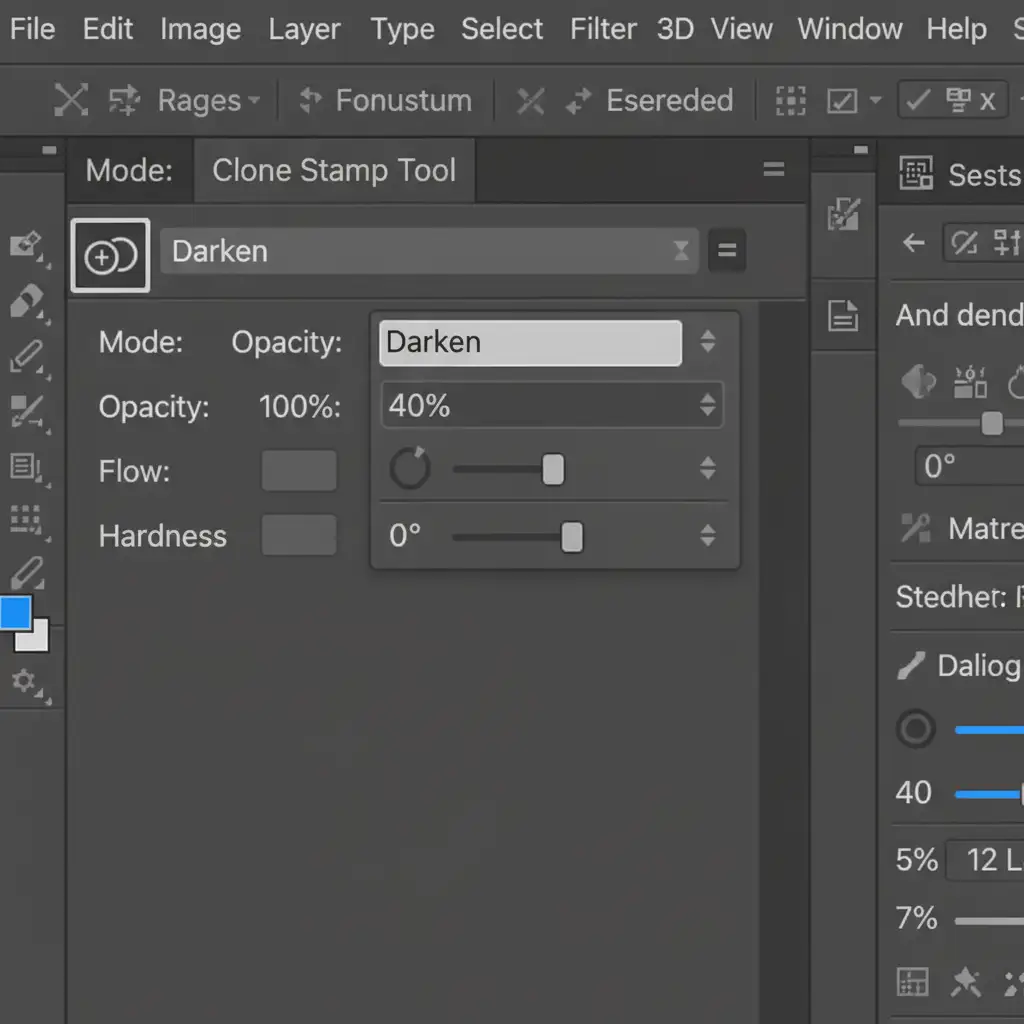
Method B: The Pro Workaround (Clone Stamp Darken Mode)
When AI generates unnatural results, manual control is necessary. The “Darken” blend mode is a real estate retoucher’s secret weapon. Because Darken mode only replaces pixels that are lighter than your sampled area, it will easily paint over the bright white glare while leaving the dark, structural grid lines completely untouched.
- Create a New Layer: Always practice non-destructive retouching. Create a blank layer above your background layer.
- Set Up the Clone Stamp Tool: Select the Clone Stamp Tool (S).
- Configure the Top Menu: In the top options bar, change the Blend Mode to ‘Darken’. Set your Opacity to roughly 40 percent. Ensure “Sample: Current & Below” is selected.
- Sample and Paint: Alt-click (Option-click on Mac) to sample a clean, glare-free section of the solar panel. Carefully paint over the blown-out highlights.
You will watch the bright white glare vanish, replaced by the dark blue panel color, while the original grid geometry remains perfectly intact.
Method C: The Technical Deep-Dive (Frequency Separation)
For extreme glare where the grid lines themselves are completely obliterated, you must separate your image data into two distinct layers: Color (Low-Frequency) and Texture (High-Frequency).
Step 1: Set Up the Separation
Run your standard Frequency Separation action to split the image. You should now have a Low-Frequency layer (containing only the blue/black color of the panel) and a High-Frequency layer (containing only the sharp grid lines).
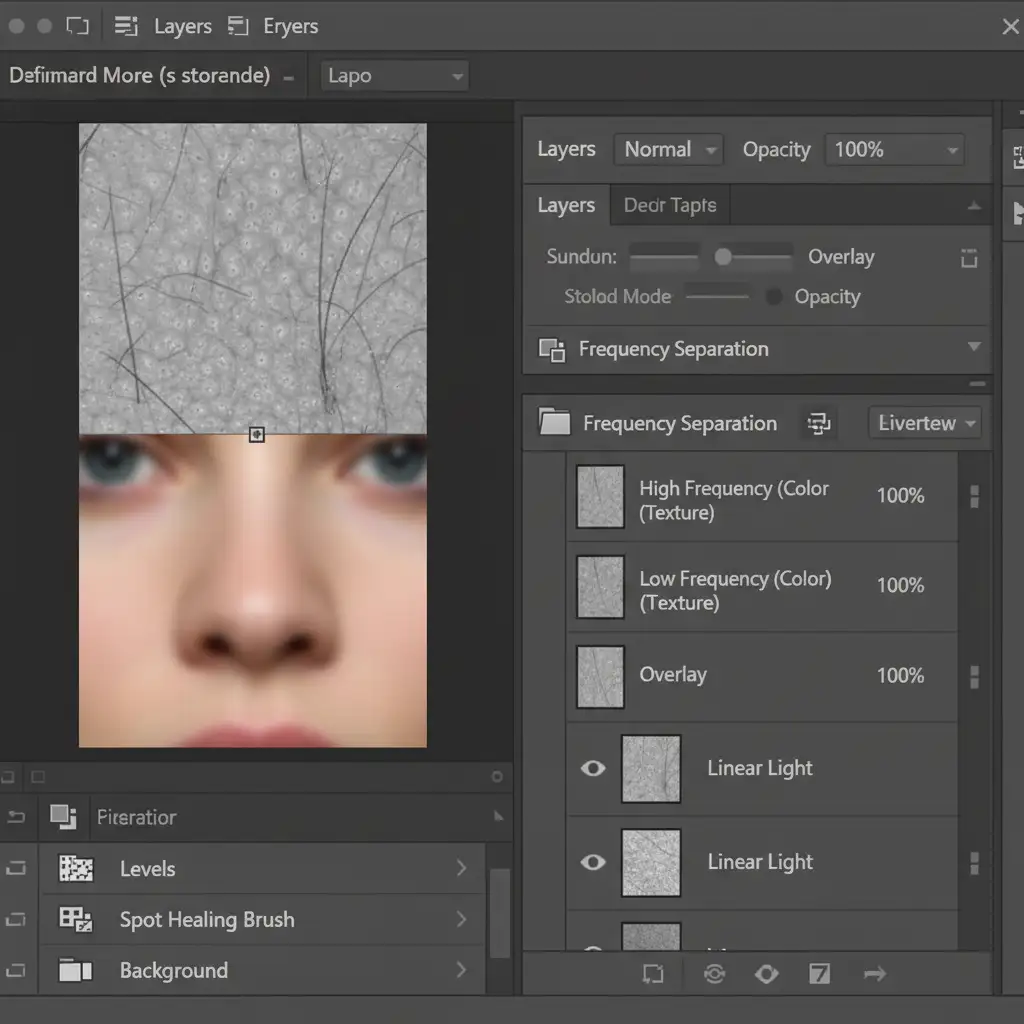
Step 2: Fix the Color
Select the Low-Frequency (Color) layer. Using a soft Brush Tool (or the Mixer Brush Tool for smoother gradients), sample the dark blue/black tones from an un-glared section of the panel. Paint directly over the white glare. You can also use a clipping mask to restrict your painting purely to the panel area.
Step 3: Rebuild the Texture
Select the High-Frequency (Texture) layer. Select the Clone Stamp Tool (set back to ‘Normal’ blend mode, 100% opacity). Alt-click to sample the crisp grid texture from a clean panel, and carefully stamp it over the area where the grid was destroyed by the sun. Align the geometric lines carefully.
Streamline Your Real Estate Photo Retouching
Learning how to remove solar panel reflections in real estate retouching is essential for delivering high-end exterior and drone photography. However, dealing with blown-out highlights, complex luminosity masking, and tedious frequency separation takes valuable time away from shooting new properties.
Struggling with complex real estate exterior edits? Save time and impress your clients by outsourcing your glare removal, sky replacements, and exterior retouching to the experts at Image Work India and Cloud Retouch. Our professional retouching team specializes in pixel-perfect, non-destructive editing that guarantees your properties look flawless. Contact us today to streamline your workflow and elevate your real estate portfolio.


