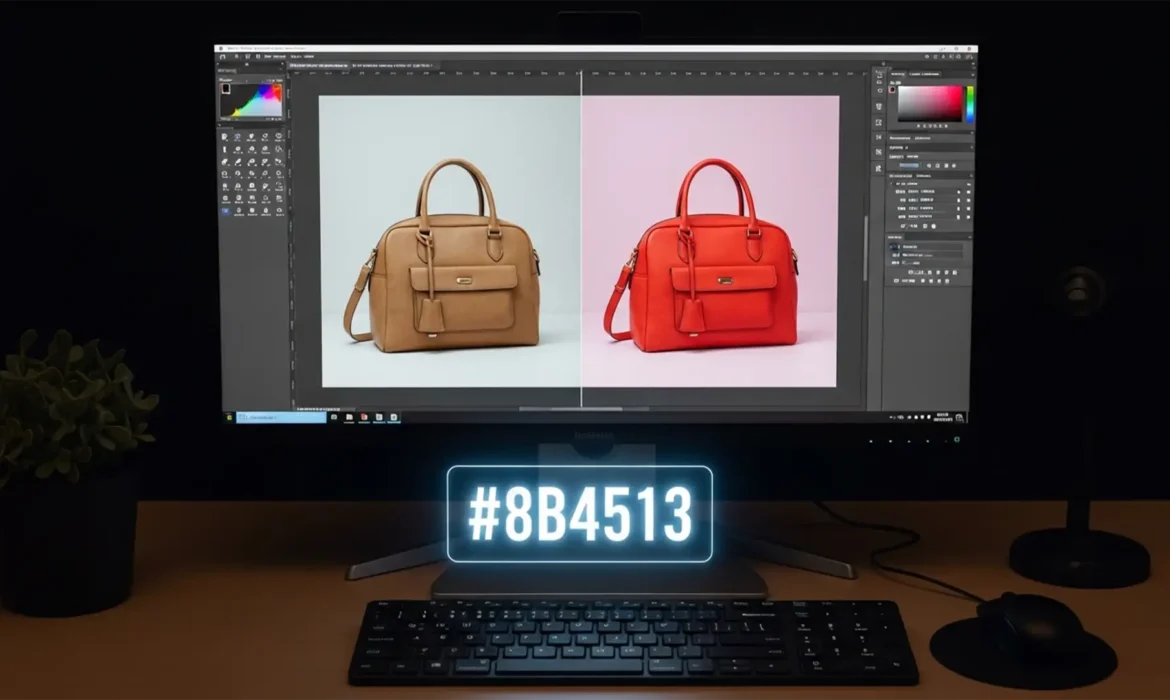
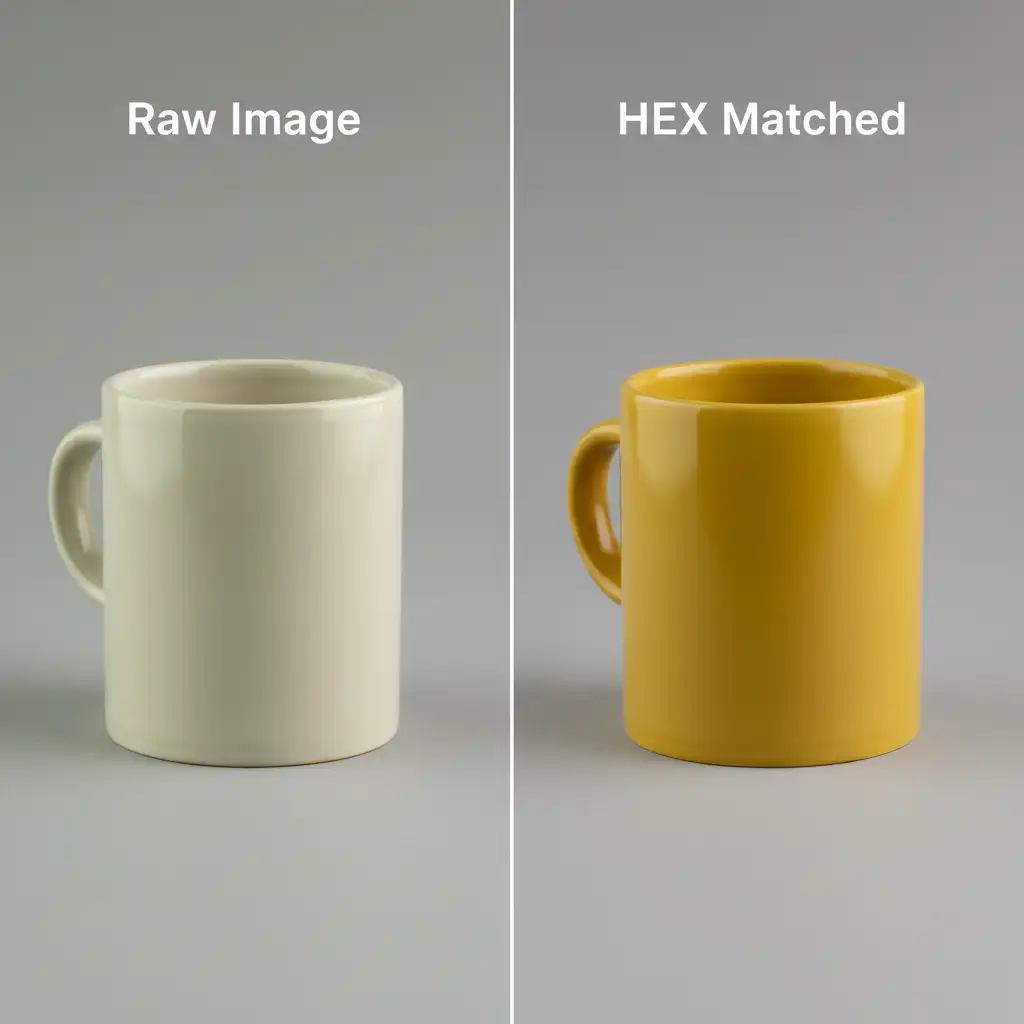
Here is exactly how to match a product photo to a HEX code in Photoshop (versions CC v24.x – v25.x) while perfectly preserving its 3D realism.
It is the most dreaded feedback for any e-commerce seller. Manufacturers provide exact color codes, but translating those into a raw product photo is notoriously difficult. Studio flash reflections, ambient lighting temperatures, and camera sensor processing inevitably shift the true color.
If you try to simply paint over the product to fix it, you destroy the natural highlights and shadows, leaving a flat, fake-looking image. To do this correctly, you must separate the image’s color data (chrominance) from its texture and brightness data (luminance).
Why Product Photos Rarely Match Manufacturer HEX Codes
In e-commerce retouching, managing color accuracy is a constant battle. The RGB color space captured by your camera sensor is heavily influenced by the environment. Even with custom white balance, a 3D object interacts with light differently than a flat digital swatch.
To map a manufacturer’s precise HEX code onto a photographed object, you cannot rely on basic hue sliders. You need a mathematical approach using adjustment layers and blend modes.
Here are the three best methods to achieve a flawless color match.
Method 1: The Quick Fix (Solid Color Fill & Blend Modes)
This is the fastest method for simple objects with uniform lighting. It relies on Photoshop’s blend modes to replace the underlying color while keeping the original brightness intact.
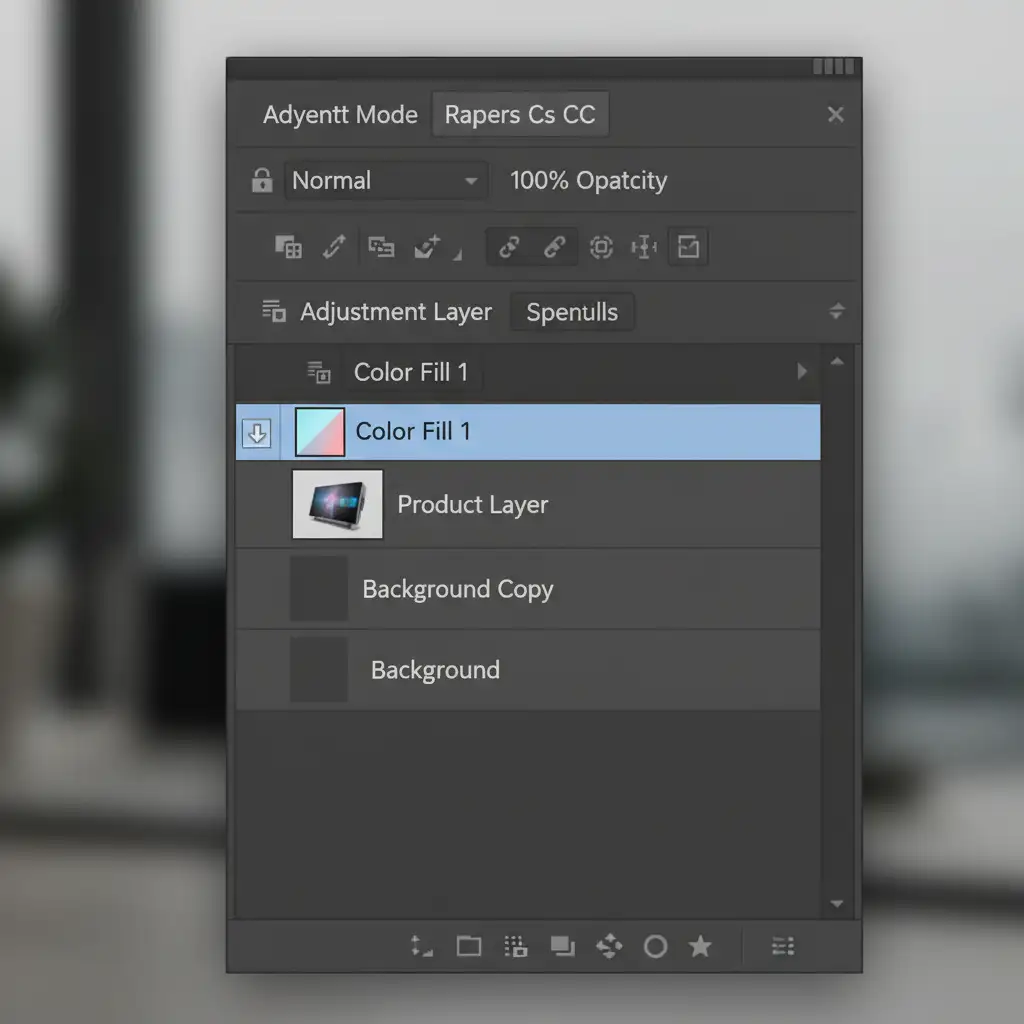
- Isolate the Product: Use the Object Selection Tool or Pen Tool to mask your product out from the background.
- Add a Solid Color Fill: Go to the bottom of the Layers Panel and add a Solid Color Fill adjustment layer.
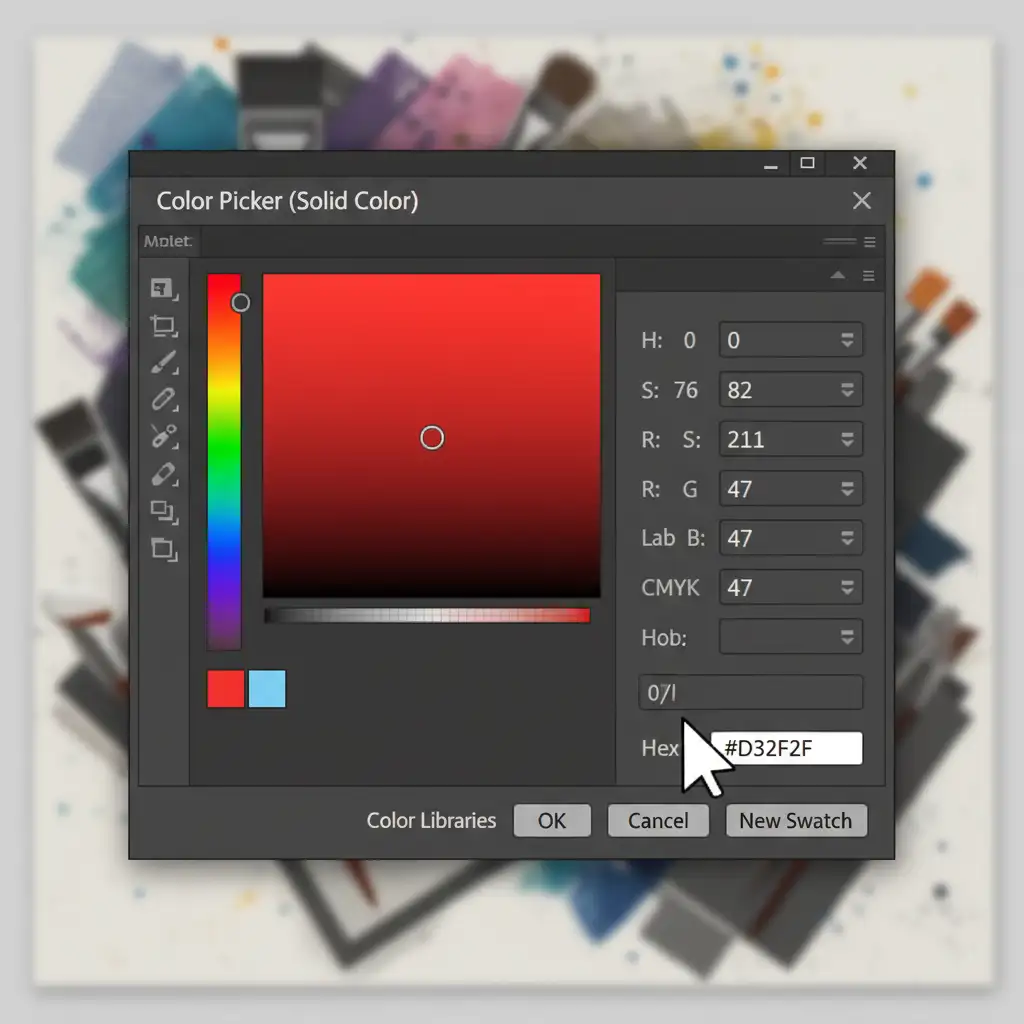
- Paste Your HEX Code: In the Color Picker dialog box, paste your target 6-digit HEX code and click OK.
- Create a Clipping Mask: Right-click the Solid Color layer and select Create Clipping Mask (or hold Alt/Option and click between the layers). This ensures the color only affects the masked product.
- Change the Blend Mode: Change the blend mode of the Solid Color layer from ‘Normal’ to ‘Color’ (or ‘Hue’ if you only want to shift the color cast).
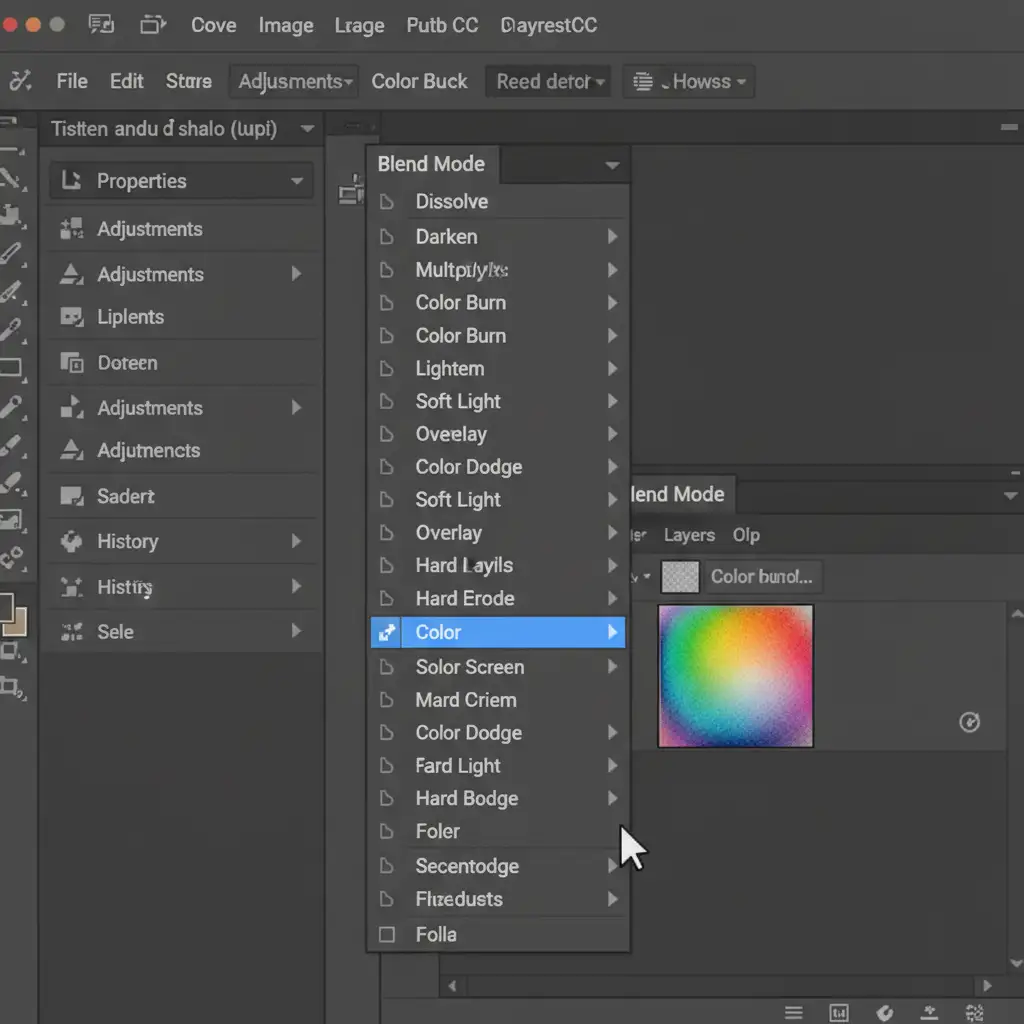
By using the ‘Color’ blend mode, Photoshop applies the exact hue and saturation of your HEX code while borrowing the luminosity (shadows and highlights) from the original photo.
Method 2: The Pro Workaround (Color Overlay & Luminosity Tweaks)
Sometimes, simply applying a color blend isn’t enough. If the original photo is too dark or too bright, the resulting color will look muddy or washed out, even if the HEX code is technically correct. This method fixes the underlying brightness.
- Apply a Color Overlay: Double-click your masked product layer to open the Layer Style panel. Check Color Overlay.
- Input the HEX Code: Click the color swatch, paste your HEX code, and set the Blend Mode within the Layer Style panel to Color.
- Adjust the Underlying Luminosity: Add a Curves Adjustment Layer directly below your product layer (or clipped to the original image if you are using a duplicated layer).
- Tweak the Curve: Adjust the shadows and highlights on the Curves layer. As you brighten or darken the underlying image, you will see the overlaid HEX color become richer and more accurate to the true swatch.
Method 3: The Technical Deep-Dive (Info Panel & Channel Matching)
For absolute perfection—often required by high-end brands—you need to use the Info Panel to mathematically match the target destination’s RGB values.
- Create a Reference Swatch: Create a small square on your canvas and fill it with your exact target HEX code.
- Set Color Samplers: Select the Color Sampler Tool (hidden under the Eyedropper). Click once on a midtone area of your product (Sampler #1) and once on your reference swatch (Sampler #2).
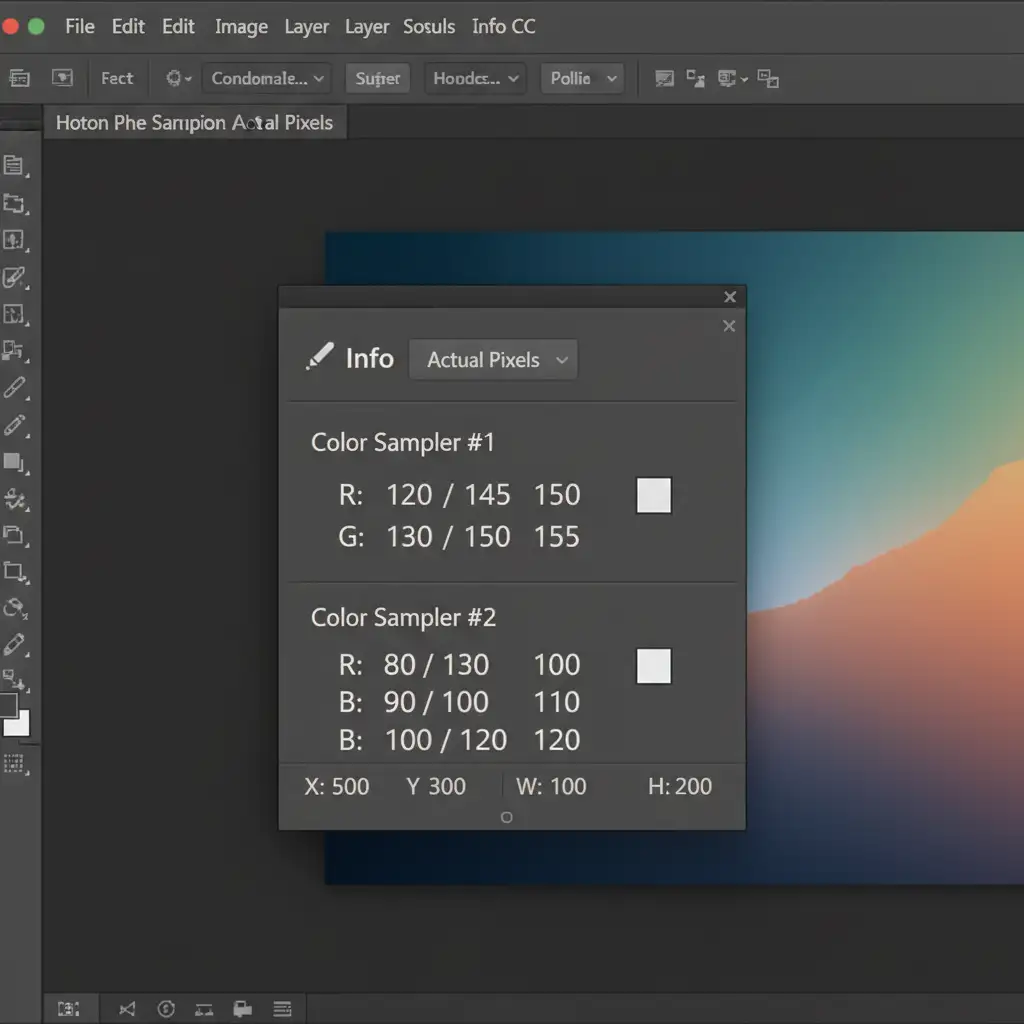
- Open the Info Panel: Press F8 to open the Info Panel. You will see the RGB readouts for both points.
- Add a Curves Adjustment Layer: Clip a Curves layer to your product.
- Match the Channels: Instead of using the master RGB curve, select the individual Red, Green, and Blue channels in the Curves properties. Adjust the points until the RGB numbers for Sampler #1 in your Info Panel perfectly match the RGB numbers of Sampler #2.
This guarantees that the midtones of your product are mathematically identical to the manufacturer’s color code.
Scale Your E-commerce Retouching with Image Work India
Learning how to match a product photo to a HEX code in Photoshop is an essential skill for color correction. However, executing this meticulous process across hundreds or thousands of product SKUs is incredibly time-consuming. When you are preparing for a major seasonal launch, manual channel matching will drain your resources.
If you are struggling to keep up with volume, let the experts handle it.
Image Work India and Cloud Retouch provide world-class, high-volume e-commerce photo retouching services. Our dedicated team of professional retouchers understands the exact science of RGB color spaces, luminosity preservation, and precise HEX code matching. We ensure your product catalogs are 100% brand-accurate, drastically reducing customer return rates and elevating your online store.
Stop losing time to tedious color adjustments. Contact Image Work India today for flawless, scalable color correction services that make your products shine.


