E-commerce sellers love the idea of Adobe Photoshop’s Generative Fill. It promises instant background expansion and effortless prop removal. But when you actually use it in Photoshop v25.0 or newer, reality hits: the AI hallucinates. Instead of a crisp product, you get blurry edges, color bleeding, and a dreadful halo effect around your subject. For strict platforms like Amazon, these AI artifacts guarantee a rejected listing. If you want Firefly AI’s speed but demand pixel-perfect boundaries, raster-based selections aren’t enough. The ultimate workflow requires isolating your product using absolute mathematical vector lines—specifically, a clipping path for generative fill cleanup.
The Problem: AI Edge Degradation in Photoshop v25.0+
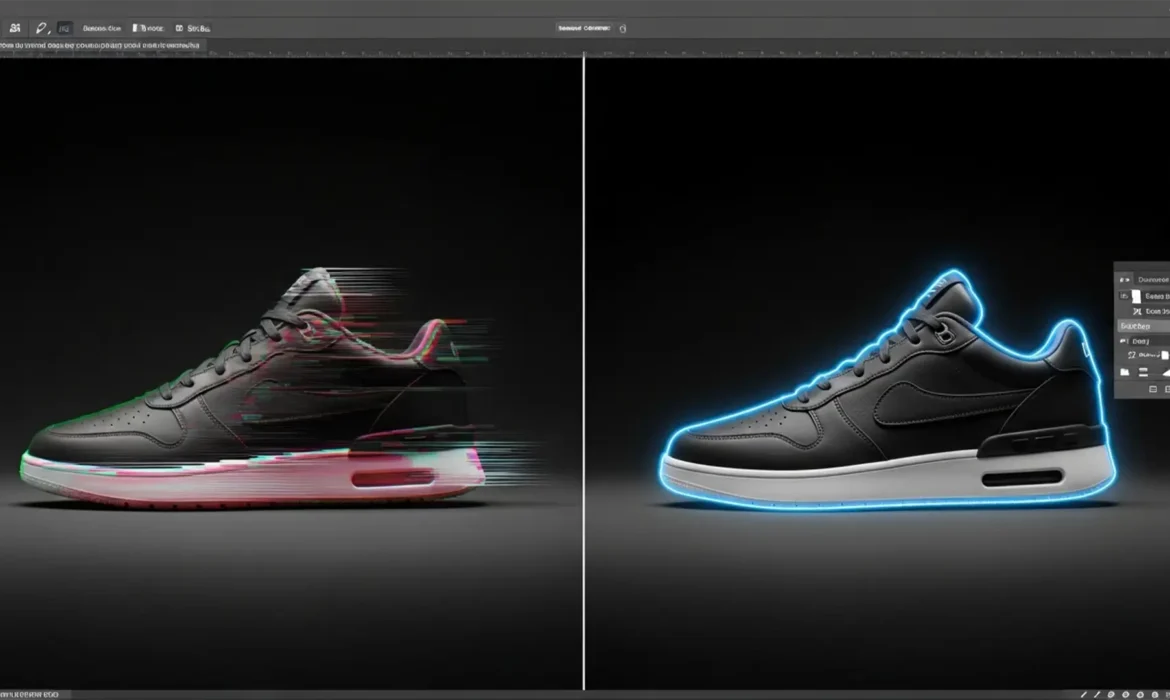
Generative Fill utilizes Firefly AI to synthesize new pixels based on surrounding context. However, because the AI generates raster data (pixels) rather than vector data (math), it struggles to understand exactly where a hard product edge ends and the background begins.
This results in edge degradation. When expanding backgrounds or removing props near a product, the AI often blends the subject’s colors into the new background, creating a soft, muddy border known as the halo effect.
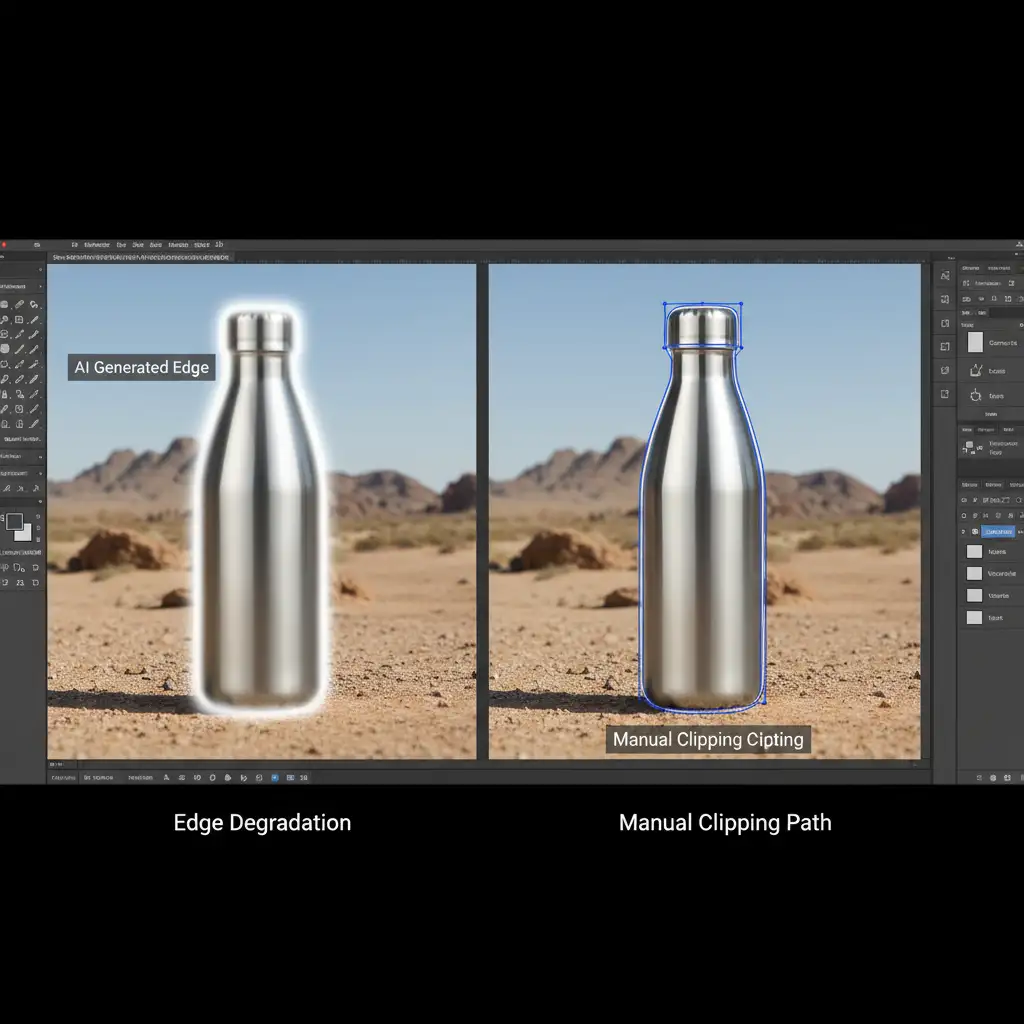
To meet strict Amazon image standards, you must protect the core product before allowing the AI to generate surrounding pixels.
How to Fix Blurry Generative Fill Edges
Here are three distinct workflows to combine the speed of AI with the precision of manual clipping paths, ranging from a quick fix to a professional, non-destructive setup.
Method A: The Quick Fix (Layer Mask Blending)
If you are dealing with a minor halo effect and need a rapid solution, you can use basic selection tools and manual masking.
- Use the Select Subject tool to grab your product.
- Go to Select > Modify > Expand and expand the selection by 2 pixels to capture the bleeding edges.
- Apply Generative Fill to generate your new background.
- Select the Layer Mask attached to your Generative Fill layer.
- Use a soft-edged brush painted black to manually blend and mask out any AI edge bleeding that overlaps your product.
Note: While fast, this method relies on raster selections and manual brushing, which can still leave minor imperfections.
Method B: The Pro Workaround (Inverted Selection)
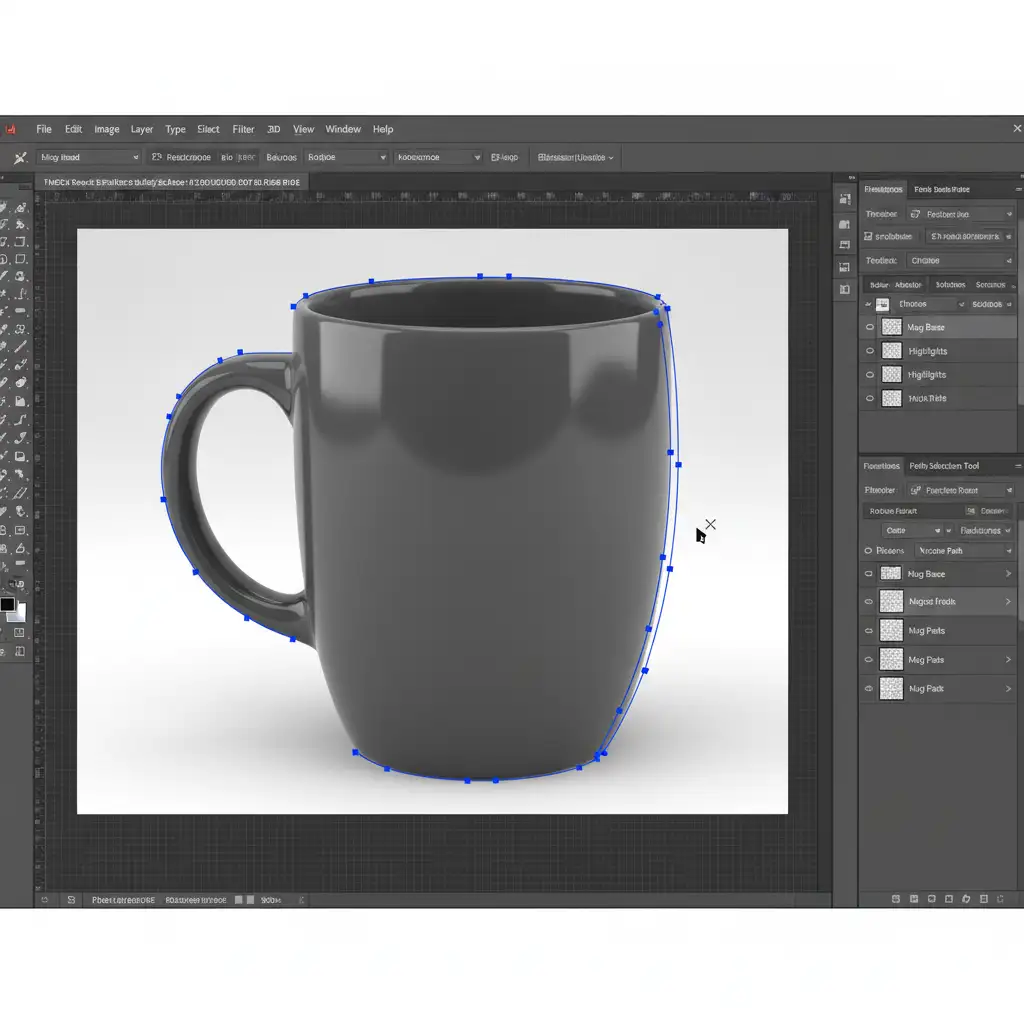
To force the AI to respect your product’s boundaries, you need the absolute precision of the Pen Tool. This method ensures the AI only generates pixels strictly outside the product boundary.
- Select the Pen Tool (P) and draw a strict manual Clipping Path around your product. Keep your anchor points slightly inside the product edge to avoid capturing background pixels.
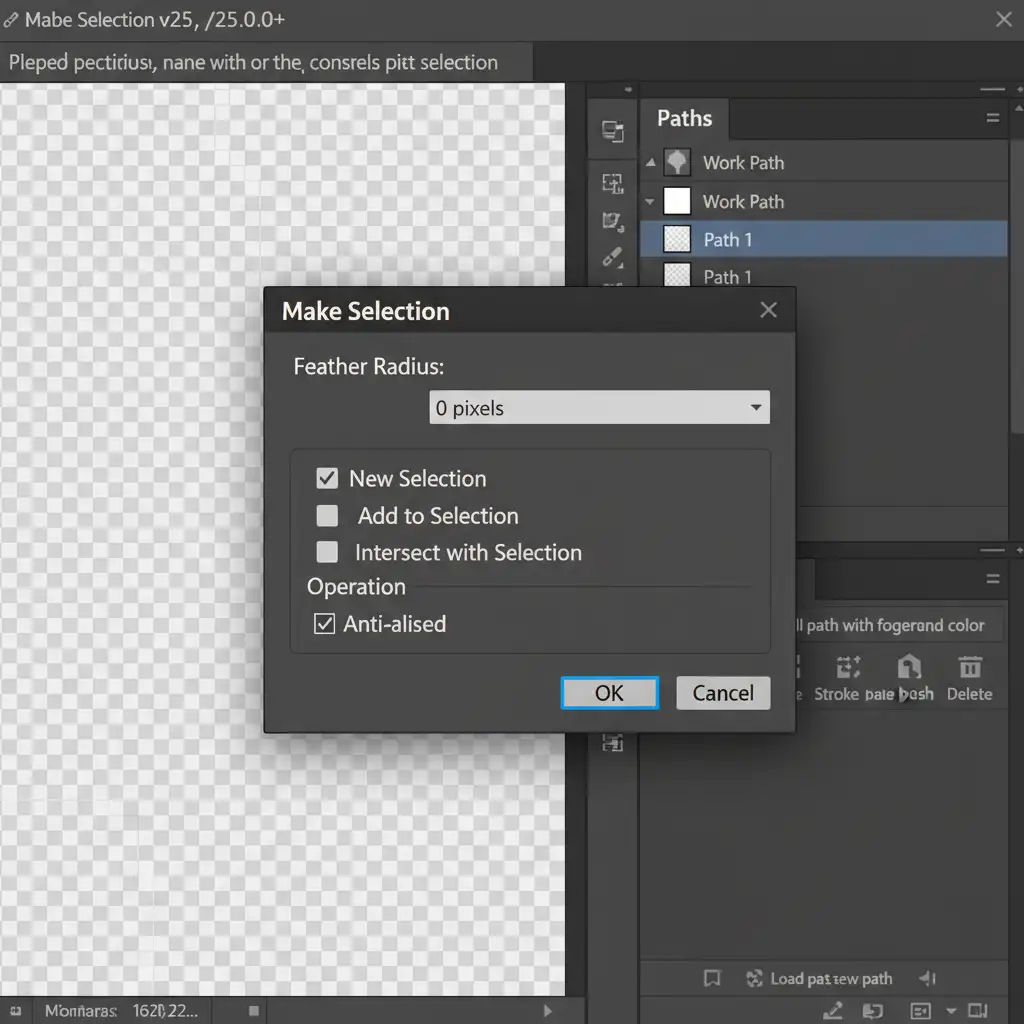
- Open the Paths Panel, right-click your Work Path, and choose Make Selection.
- In the dialog box, ensure Anti-aliased is checked and set the Feather Radius to exactly 0 pixels. This prevents the marching ants from creating a soft edge.
- Press Ctrl+Shift+I (Windows) or Cmd+Shift+I (Mac) to invert the selection.
- Run Generative Fill. The AI is now restricted from touching your product.
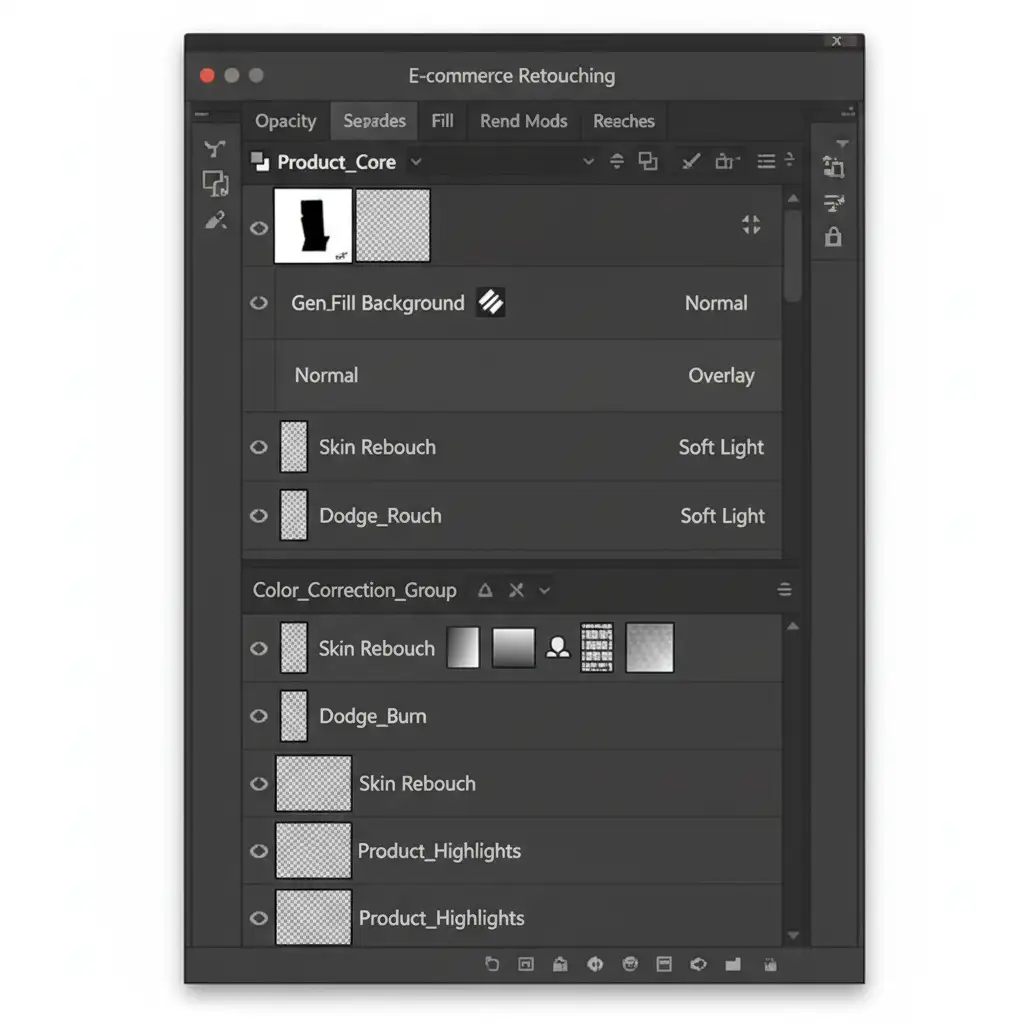
Method C: The Technical Deep-Dive (Smart Objects & Vector Masks)
For high-end e-commerce retouching, destructive workflows are unacceptable. This technical deep-dive completely separates the AI-generated pixels from the product layer, ensuring zero edge destruction.
- Right-click your original product layer and select Convert to Smart Object.
- Select the Pen Tool and draw your precise Clipping Path.
- With the path active, go to Layer > Vector Mask > Current Path. Your Smart Object is now perfectly isolated by a mathematical boundary.
- Create a completely separate, blank layer below your Smart Object.
- Make your selections on this lower layer and run Generative Fill to expand the background or remove props.
Because the Generative Fill layer sits underneath a perfectly masked Smart Object, the AI can generate whatever it wants without ever degrading the product’s edges. You maintain 100 percent original, crisp boundaries and retain the ability to apply non-destructive raw edits to the Smart Object later.
Why E-Commerce Demands Manual Clipping Paths
Algorithms are built to guess; e-commerce platforms are built on rules. Amazon’s strict image requirements dictate pure white backgrounds and sharp, realistic product representations.
Relying solely on AI for object isolation introduces unpredictable feathering and anti-aliasing issues. A manual clipping path acts as an insurance policy for your generative AI workflows. By combining the rapid ideation and background generation of Firefly AI with the flawless, mathematical precision of hand-drawn vector paths, you achieve the perfect balance of speed and professional quality.
Need Pixel-Perfect Product Photos Without AI Artifacts?
Mastering the clipping path for generative fill cleanup takes time, patience, and serious Pen Tool skills. If you are processing hundreds of SKUs, fighting with blurry AI edges will destroy your margins and your sanity.
You don’t have to do it yourself. Image Work India and Cloud Retouch specialize in high-volume, pixel-perfect e-commerce photo editing. Our professional retouchers hand-draw flawless clipping paths, ensuring your products meet strict Amazon standards while utilizing the latest technology for background cleanup—without the halo effects or edge degradation.
Stop letting AI ruin your product edges. Contact Image Work India and Cloud Retouch today for professional, hand-drawn clipping paths and flawless e-commerce retouching.


