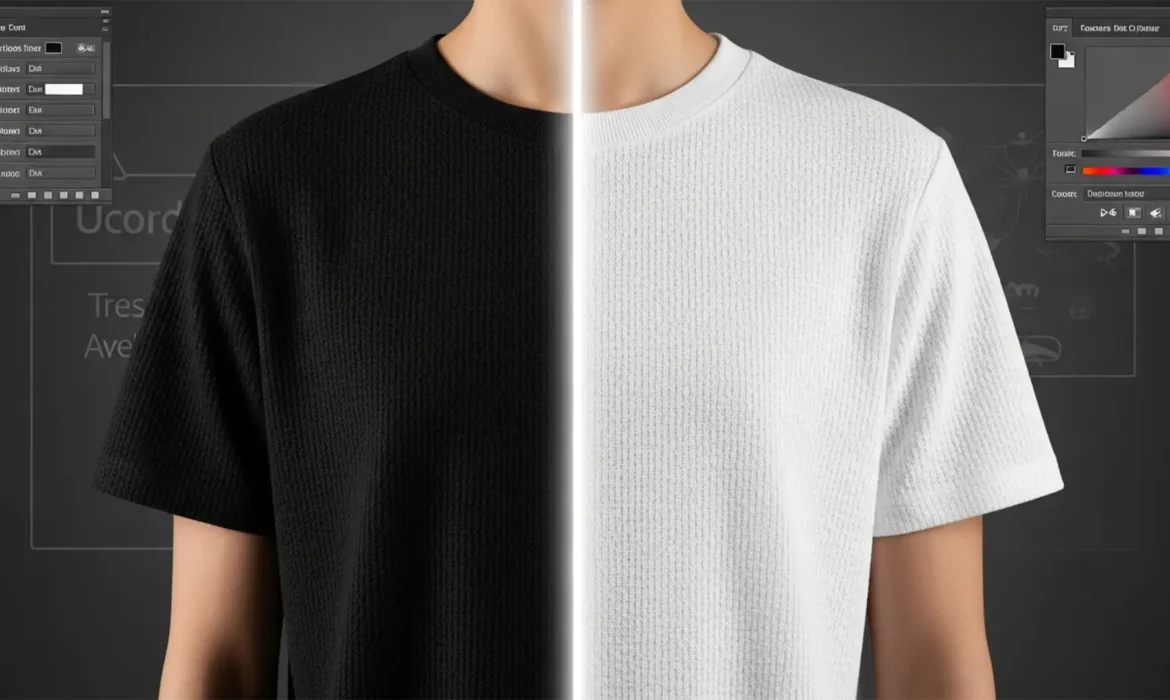
If you’ve ever tried to change black clothing to white in Photoshop 2024, you already know the nightmare. Because true black pixels lack luminance and color data, standard hue and saturation adjustments do absolutely nothing. Try a simple ‘Invert’ command, and you’re left with a glowing, radioactive negative that completely destroys the realistic texture, shadows, and folds of the clothing.
To do this professionally, you need a workflow that remaps the tonal range from deep blacks (0-10) to crisp whites (240-255) without sacrificing the micro-contrast of the fabric weave or introducing severe color banding. In this technical guide, we will break down three proven methods to execute this flawless transformation.
Why Changing Black to White in Photoshop is So Difficult
When photographing black clothing, the camera captures very little dynamic range in those specific areas. You cannot simply “brighten” an area that has no light data. Pushing the exposure usually results in a flat, unrealistic gray or a blown-out white patch.
The secret to a realistic color swap lies in protecting the original shadow details while completely inverting the highlights and midtones. Let’s look at how to achieve this using standard and advanced Photoshop tools.
Method 1: The Quick Fix (Invert & Screen)
If you are working with simple garments without complex folds, this method provides a rapid turnaround.
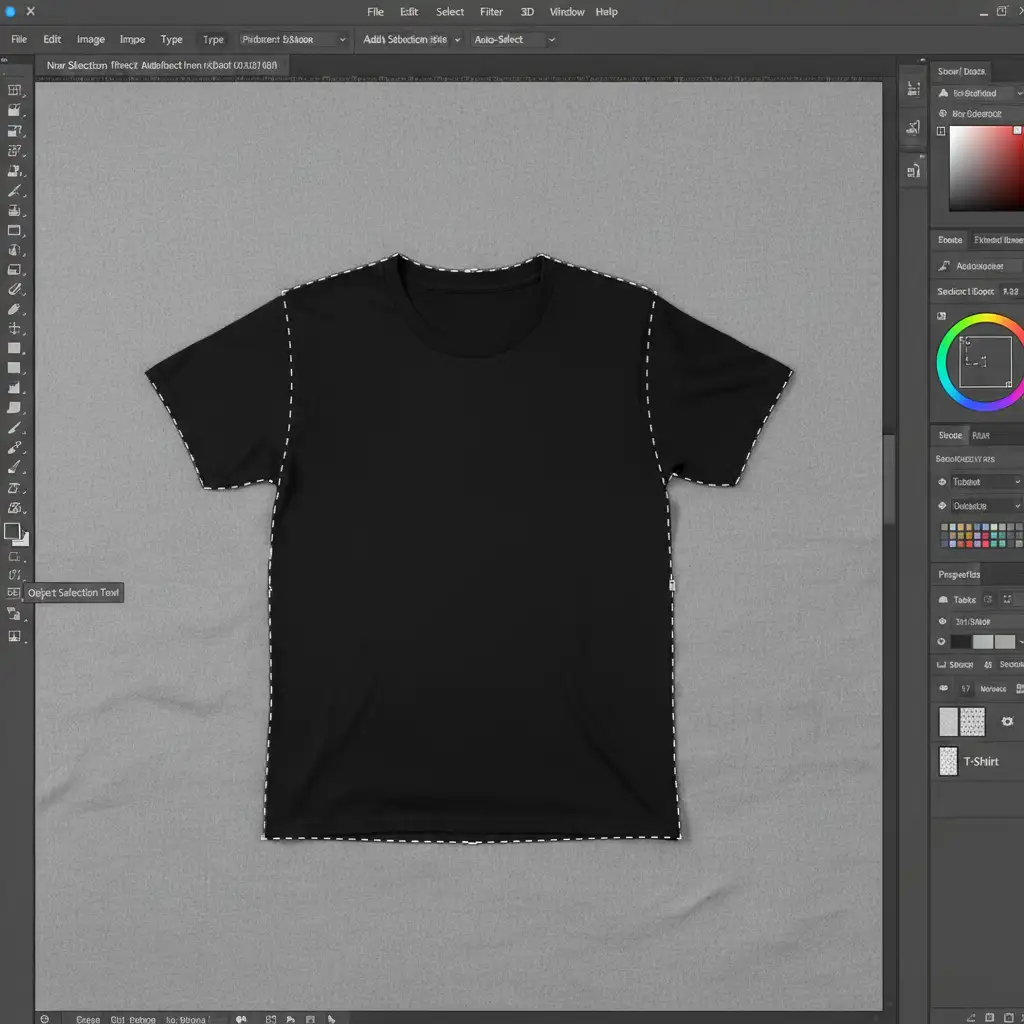
Step 1: Isolate the Clothing
Select the Object Selection Tool from your toolbar. Hover over the black garment and click to select it. You should see the classic marching ants outlining the fabric perfectly.
Step 2: Invert and Blend
- Press Ctrl + J (Windows) or Cmd + J (Mac) to duplicate the selected clothing onto a new layer.
- Press Ctrl + I (or Cmd + I) to Invert the layer. The black fabric will instantly turn into a harsh, x-ray-like white.
- Change the layer blend mode from Normal to Screen. This instantly removes the harsh negative effect and brings back some natural shading.
Step 3: Restore Midtone Contrast
To fix the washed-out look, add a Levels adjustment layer. Right-click the Levels layer and choose Create Clipping Mask so it only affects the clothing. Drag the midtone slider to the right to restore the depth of the folds.
Method 2: The Pro Workaround (Curves & Blend If)
For eCommerce fashion photography, preserving the exact fabric weave is non-negotiable. This method uses a steep Curves adjustment paired with advanced layer blending.
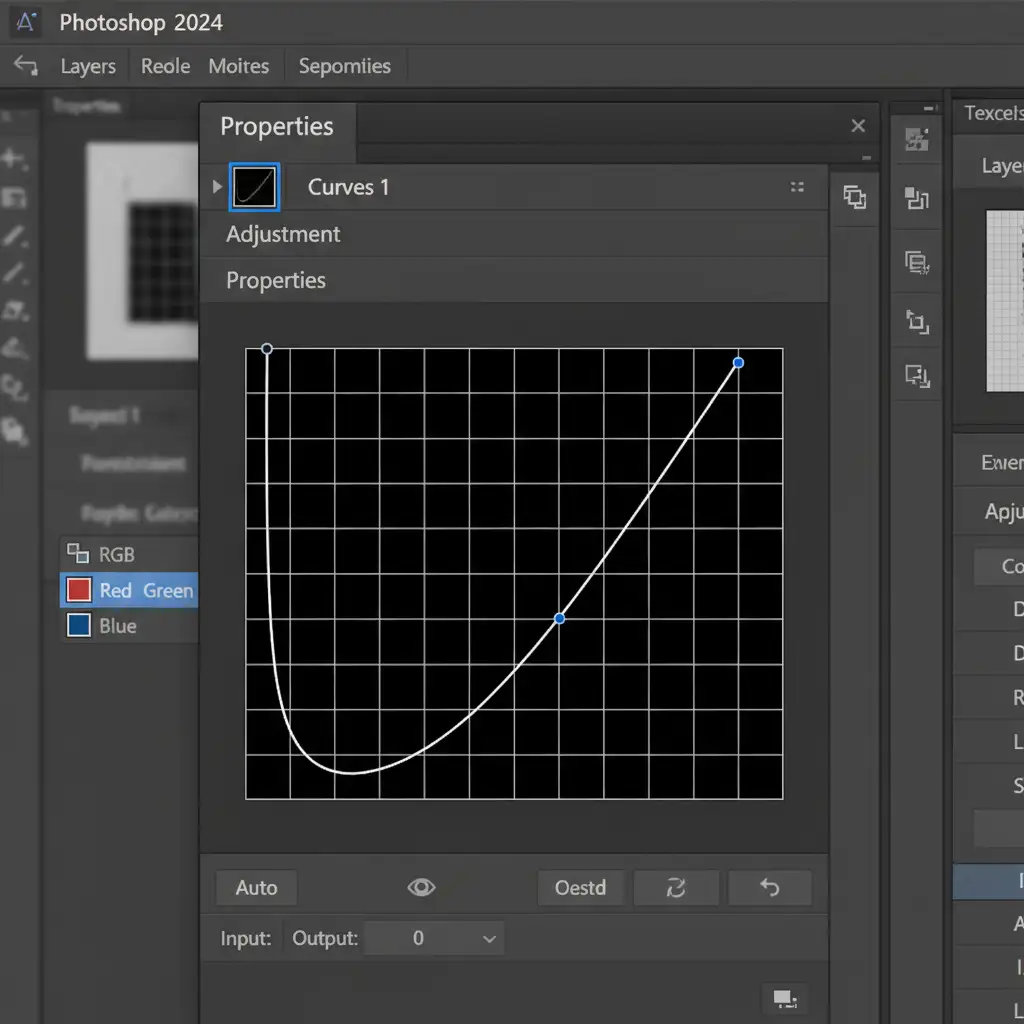
Step 1: The Extreme Curves Adjustment
Make a selection of your black fabric and apply a Curves adjustment layer. This automatically creates a layer mask based on your selection.
In the Properties panel, grab the bottom-left point of the curve (which represents pure black) and drag it all the way to the top-left (pure white). The garment will turn completely white, but it will look flat. To restore the folds, click the middle of the curve line and pull the midtones down slightly.
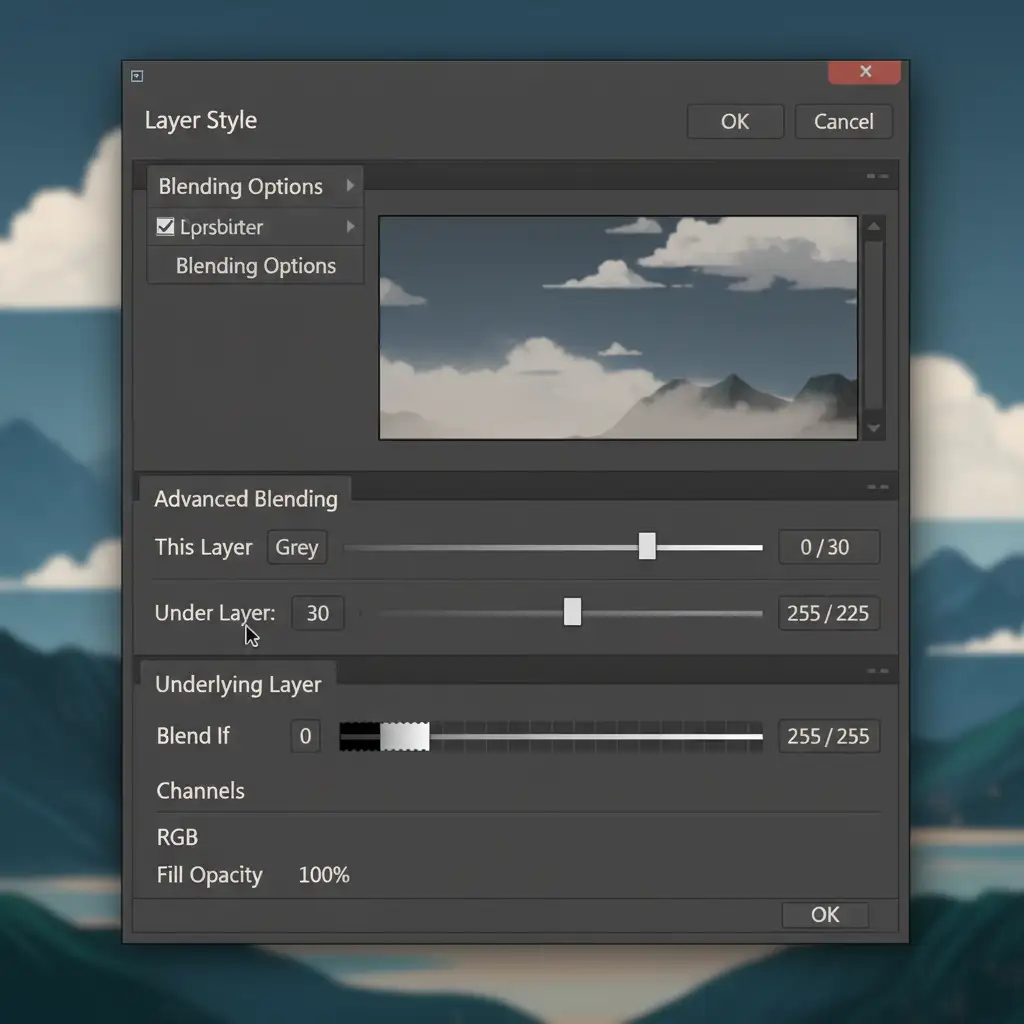
Step 2: Protecting Shadows with Blend If
Right now, the deepest shadows in the folds are likely glowing white. We need to protect them.
- Double-click the empty space next to your Curves layer name to open the Layer Style dialog box.
- Look at the bottom for the Blend If section, specifically the Underlying Layer slider.
- Hold Alt (Windows) or Option (Mac) and click the black slider on the left. This splits the slider in half.
- Drag the right half of the split slider toward the right. This forces Photoshop to reveal the original dark shadows from the layer underneath, giving your new white fabric realistic depth.
Method 3: The Technical Deep-Dive (Camera Raw Filter)
When you need maximum control over micro-contrast, the Camera Raw Filter is your best tool.
Step 1: Smart Objects and Masking
First, convert your image layer into a Smart Object so you can edit non-destructively. Go to Filter > Camera Raw Filter. Use the Masking panel (the dotted circle icon) and choose Select Object or use the brush to paint over the clothing.
Step 2: Pushing the Dynamic Range
With the mask active, go to the Light panel. Drastically push the Shadows, Exposure, and Whites sliders to the right. Because Camera Raw processes data differently than standard adjustment layers, you will get less pixelation.
Step 3: Recovering Micro-Contrast
Pushing the exposure this hard softens the image. To fix this, navigate to the Effects panel within your mask and increase the Texture and Clarity sliders. This forces the software to enhance the micro-contrast, bringing the intricate weave of the fabric back to life.

Need Flawless Color Correction at Scale?
Learning how to change black fabric to white in Photoshop 2024 is a great skill, but executing this complex Curves and Blend If workflow on hundreds of product photos is incredibly time-consuming. If you are prepping an eCommerce catalog, inconsistent color swapping can lead to flat, unrealistic product images that hurt your conversion rates.
Image Work India and Cloud Retouch specialize in high-volume, pixel-perfect color correction. Whether you need to change a single black t-shirt to a dozen different colorways or require bulk retouching that preserves every ounce of fabric texture, our expert team delivers flawless results.
Stop wrestling with dynamic range and layer masks. Contact Image Work India and Cloud Retouch today and let our professional retouchers handle your eCommerce image editing at scale!


