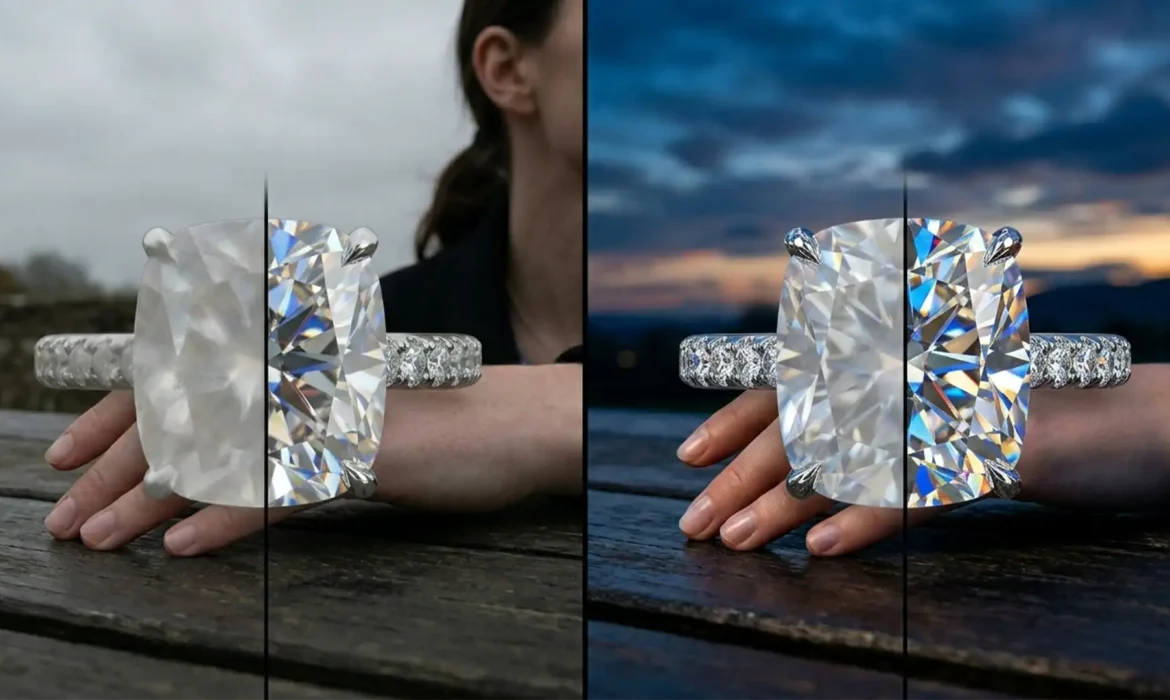
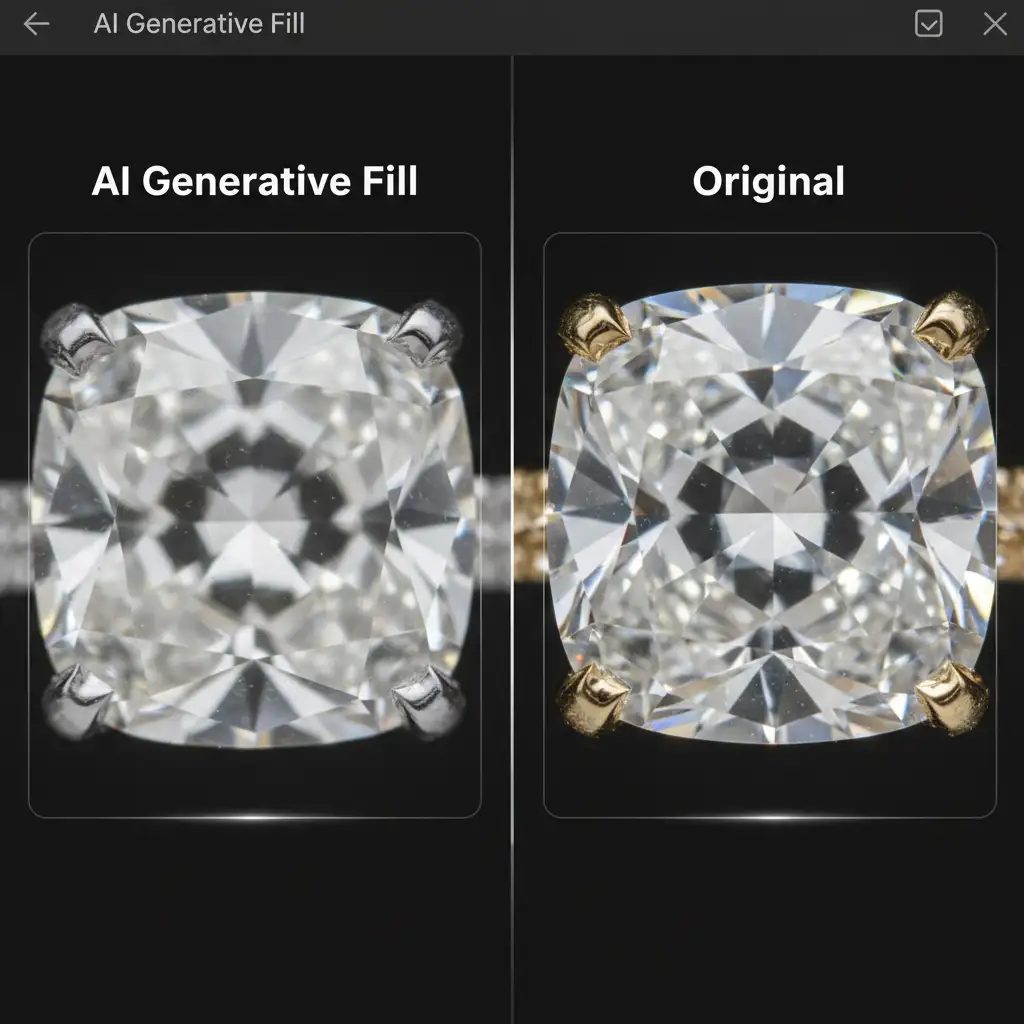
You applied Adobe Photoshop’s Generative Fill to clean up a distracting reflection on a luxury product shot, but now your brilliant diamond looks like a piece of cloudy plastic. This is the ultimate frustration for e-commerce photographers. While artificial intelligence has revolutionized basic photo editing, jewelry retouching AI artifacts removal remains a major pain point for professionals. AI tools frequently destroy the micro-contrast and crisp high-frequency texture necessary to make metals shine and diamonds sparkle.
If your AI edits are ruining the commercial viability of your jewelry photography, you aren’t alone. In this technical guide, we will break down exactly why these diffusion models fail on high-end jewelry and show you three professional compositing techniques to fix the blur and restore your gemstone facets.
Why AI Fails at High-End Jewelry Photography
In Adobe Photoshop v25.x and newer, AI-based neural filters and Generative Fill are incredibly powerful for background removal and broad stroke clean-up. However, they consistently fail to comprehend the microscopic precision inherent to jewelry photography.
Current diffusion models are trained on massive, generalized datasets. When faced with the complex light dispersion of a diamond, sharp gemstone facets, or brushed metal textures, the AI attempts to “guess” the pattern by averaging out the pixels. This averaging destroys the image’s micro-contrast, resulting in a cloudy, smudged, or overly plastic appearance.
3 Pro Methods for Jewelry Retouching AI Artifacts Removal
To achieve a flawless, commercial-grade finish, you must combine the color-correcting power of AI with the textural integrity of your original raw file. Here are three professional workflows to eliminate cloudy AI artifacts.
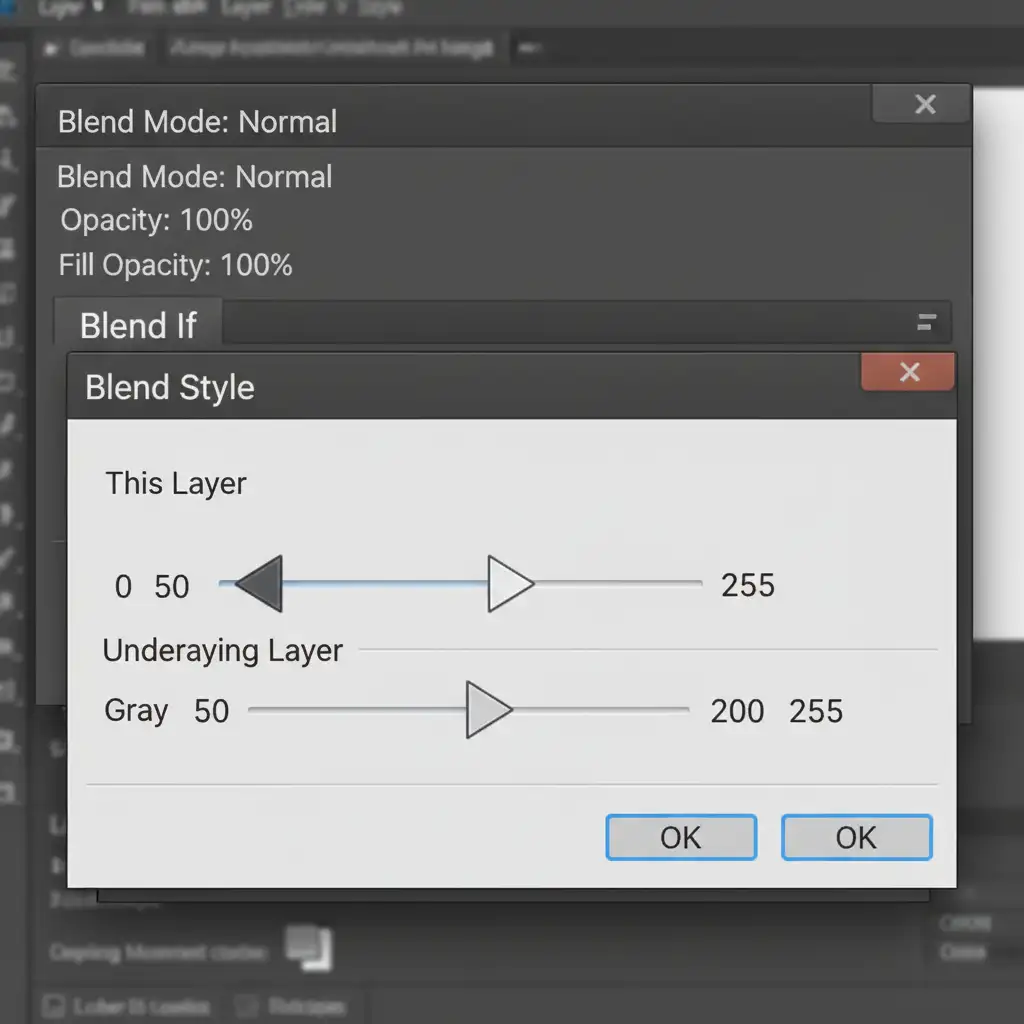
Method 1: The Quick Fix Using “Blend If” Sliders
If your Generative Fill layer successfully fixed a color cast but ruined the sparkle of the jewelry, the Blend If sliders are your fastest path to recovery. This technique forces the AI layer to ignore the brightest highlights and darkest shadows, instantly restoring the original metallic shine and deep contrast.
- Double-click your AI Generative layer in the Layers Panel to open the Layer Style dialog box.
- Navigate to the Blend If section at the bottom and ensure it is set to “Gray”.
- Look at the Underlying Layer slider.
- Hold Alt (Windows) or Option (Mac) and click the white slider to split it. Drag the left half toward the center to reveal the original highlights.
- Repeat the process with the black slider to bring back the original deep shadows.
Method 2: The Pro Workaround with Frequency Separation
For comprehensive jewelry retouching AI artifacts removal, Frequency Separation is the industry standard. By separating your image into color and texture, you can safely apply AI fixes without ever touching the sharp details of the gemstone.
- Duplicate your base image twice. Name the bottom layer Low (Color/Tone) and the top layer High (Texture).
- Apply a Gaussian Blur to the Low layer (just enough to blur the scratches and facets).
- Select the High layer, go to Image > Apply Image, and subtract the Low layer to isolate the high-frequency texture. Change the High layer’s blend mode to Linear Light.
- Now, generate your AI fixes only on or directly above the Low-frequency layer.
Because the AI is sandwiched beneath the High-frequency layer, it can correct color shifts and broad reflections while leaving the original metallic scratches and gemstone facets completely intact.

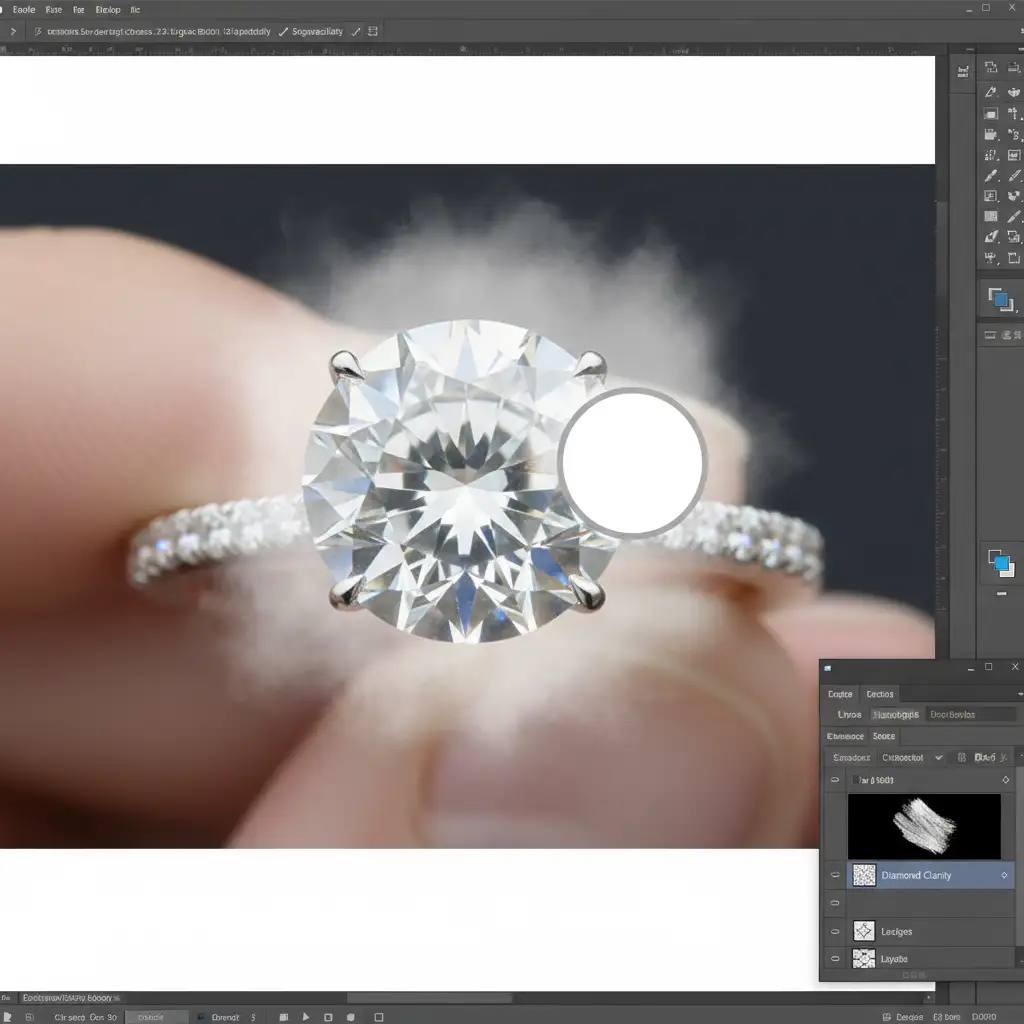
Method 3: Edge-Masked High Pass Sharpening
When AI blurring has completely destroyed edge contrast on a specific part of a ring or necklace, you need a targeted approach. This technical deep-dive uses a High Pass filter to force the original sharp edges back through the cloudy AI edit.
- Duplicate your original, unedited background layer and move it to the very top of your layer stack, above your AI edits.
- Go to Filter > Other > High Pass. Set the radius between 1.5px and 3.0px to isolate the crisp edges of the jewelry.
- Change this layer’s blend mode to Linear Light.
- Add an inverted (black) Layer Mask to hide the effect.
- Select a soft white brush and selectively paint over the cloudy AI artifacts.
This process acts as a localized form of layer masking, painting the original crisp facets and precise metal edges directly over the AI’s mistakes.
Flawless Retouching Requires a Human Touch
Mastering jewelry retouching AI artifacts removal takes time, patience, and a deep understanding of advanced compositing techniques like Frequency Separation and High Pass filtering. While AI is a fantastic starting point, it simply cannot replicate the microscopic precision required for luxury e-commerce and editorial jewelry photography.
If you are spending hours fighting with Generative Fill to restore gemstone facets, it’s time to scale your workflow. Image Work India or Cloud Retouch specialize in high-end, commercially viable jewelry retouching. Our team of expert retouchers understands how to preserve every reflection, facet, and high-frequency texture to make your products shine.
Stop settling for cloudy, plastic-looking AI edits. Contact Image Work India and Cloud Retouch today to outsource your high-end editing and deliver flawless imagery to your clients every single time.


