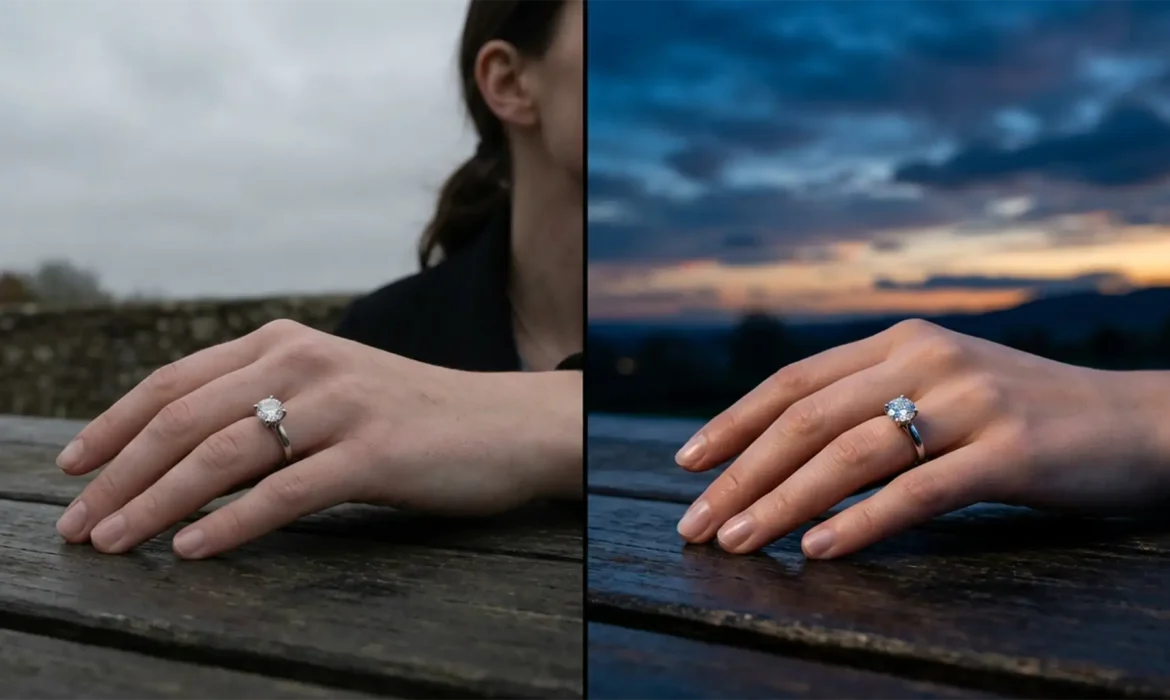
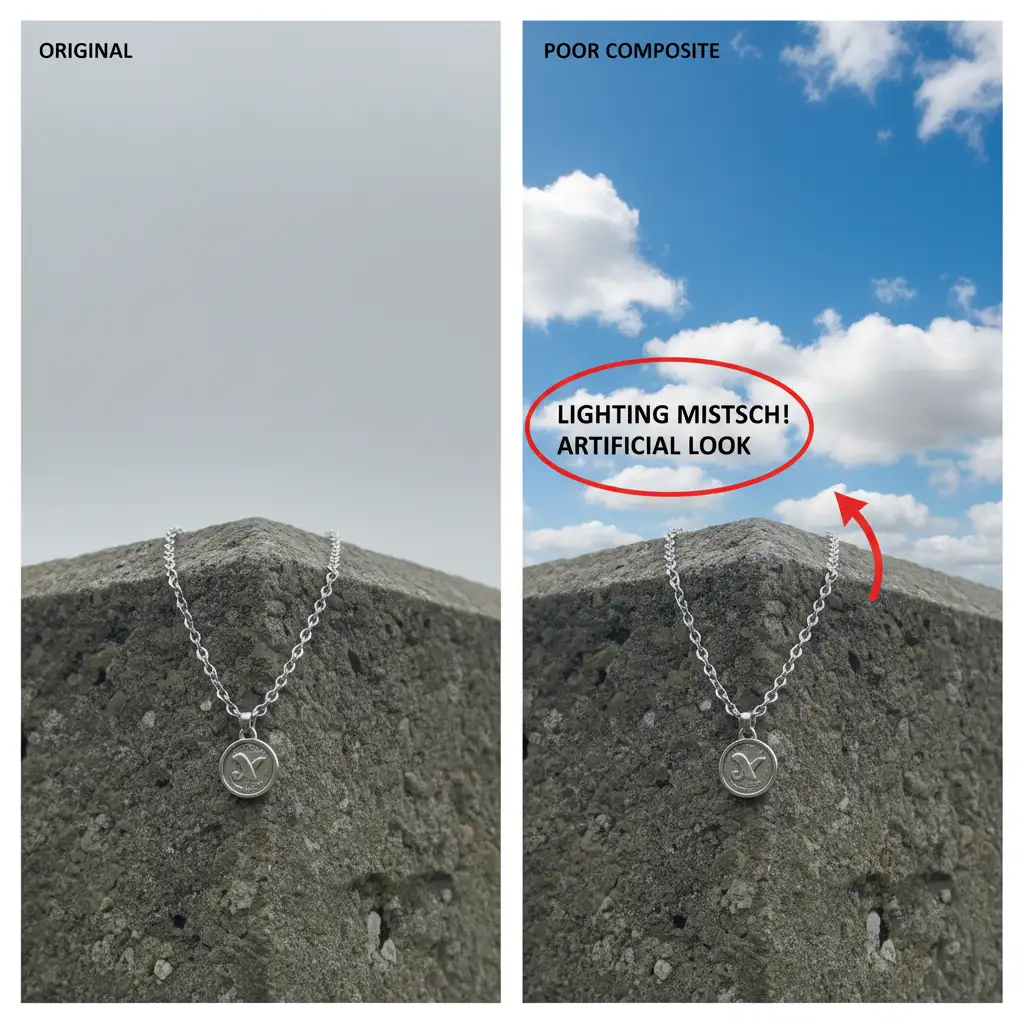
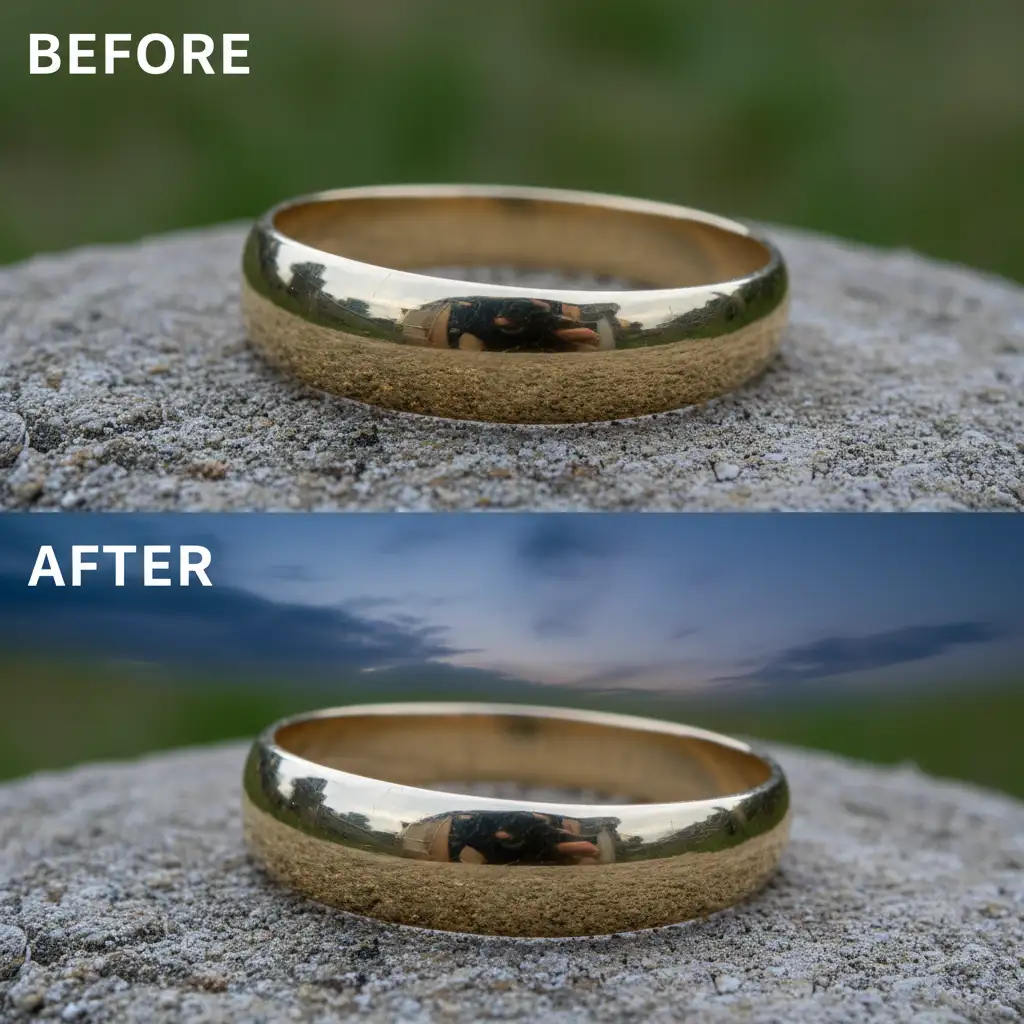
You’ve captured a stunning outdoor jewelry lifestyle shot, but the drab, gray sky is ruining the mood. So, you drop in a vibrant sunset using Photoshop. The result? A jarring, artificial mess. The harsh lighting of the new sky clashes violently with the soft, diffuse shadows of your original overcast setup, making the piece look like a cheap composite.
If you are struggling with matching sky replacement to overcast jewelry lifestyle shots, you aren’t alone. Achieving a photorealistic blend demands precise control over ambient light falloff, color temperature, and metallic reflections. Let’s fix that fake look and ground your composites in reality.
Why Photoshop’s Native Tool Fails Overcast Lighting
In Photoshop v24.x and newer, the native Sky Replacement tool is a massive time-saver, but it fundamentally misunderstands the physics of flat lighting.
When shooting under an overcast sky, the clouds act as a giant softbox. This creates a low contrast ratio and incredibly soft, diffuse shadows. When you forcibly inject a bright, high-contrast sky into this environment, the ambient light falloff no longer matches the foreground. Your jewelry piece will look pasted on because the background implies directional sunlight, while the foreground shows flat, omnidirectional light.
To fix this, we need to manipulate the blending modes, edge contrast, and environmental reflections to align the new sky with the existing overcast constraints.
Method A: The Quick Fix Using the Sky Replacement Tool
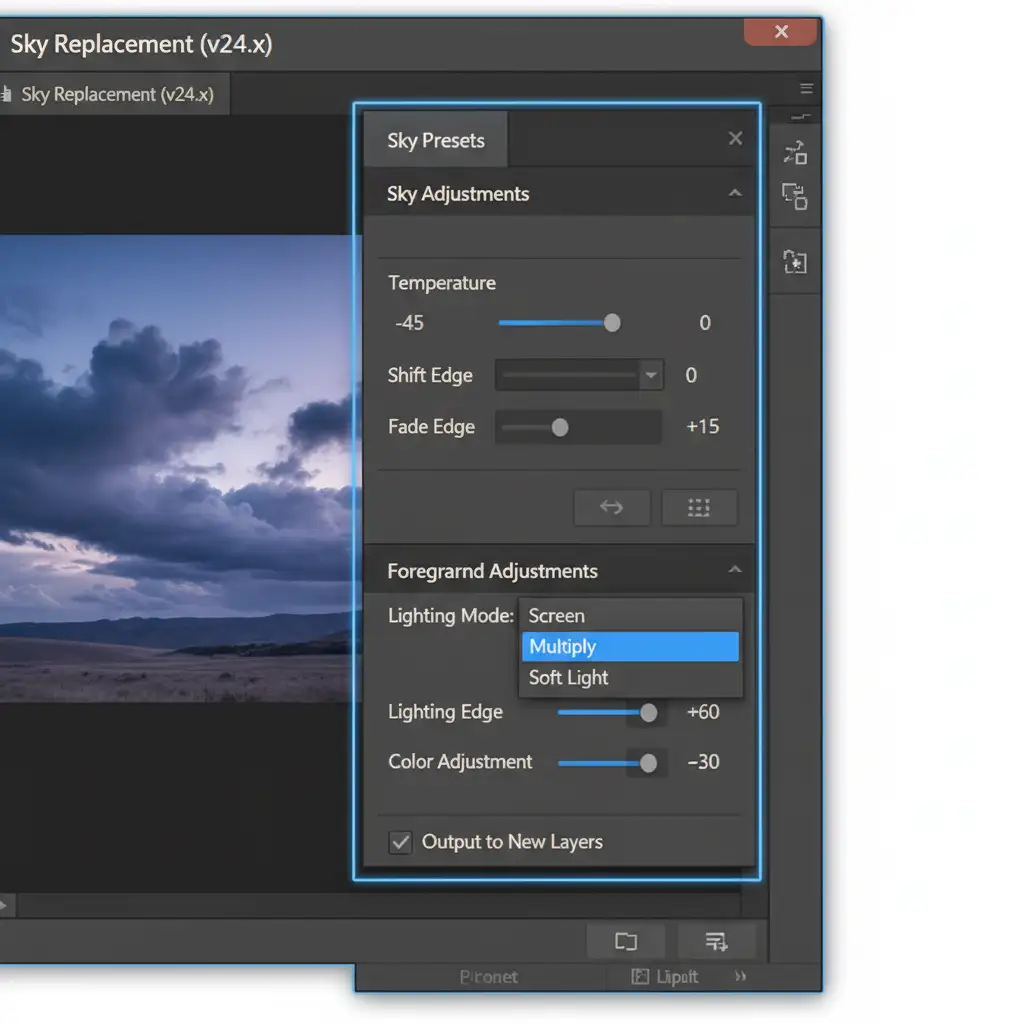
If you need a fast turnaround, you can still use the native Edit > Sky Replacement tool by overriding its default blending behaviors. The goal here is to match the cooler color temperature of an overcast day while softening the transition edges.
Step-by-Step Workflow:
- Navigate to Edit > Sky Replacement.
- Select a sky that isn’t overly sunny. Look for moody, cloudy, or twilight skies that logically fit a softer lighting scenario.
- Change the Lighting Mode from Screen to Multiply. The Multiply blend mode ensures the sky darkens the underlying gray pixels rather than blowing them out, grounding the sky in the darker overcast atmosphere.
- Decrease the Lighting Edge slider to soften the transitions around the jewelry and the model.
- Shift the Temperature slider to the left to introduce cooler blue tones, matching the natural color temperature of shaded, overcast environments.
Method B: The Pro Workaround for Perfect Depth and Color
For high-end jewelry campaigns, automated tools rarely cut it. You need manual control over the color grading and depth of field to make the composite invisible.
Building the Manual Composite
Instead of relying on the automated sliders, manually composite your sky using a Layer Mask.
Once your sky is masked in, you need to address the midtones. Overcast light pushes cyan and blue into the shadows and midtones of an image. To replicate this:
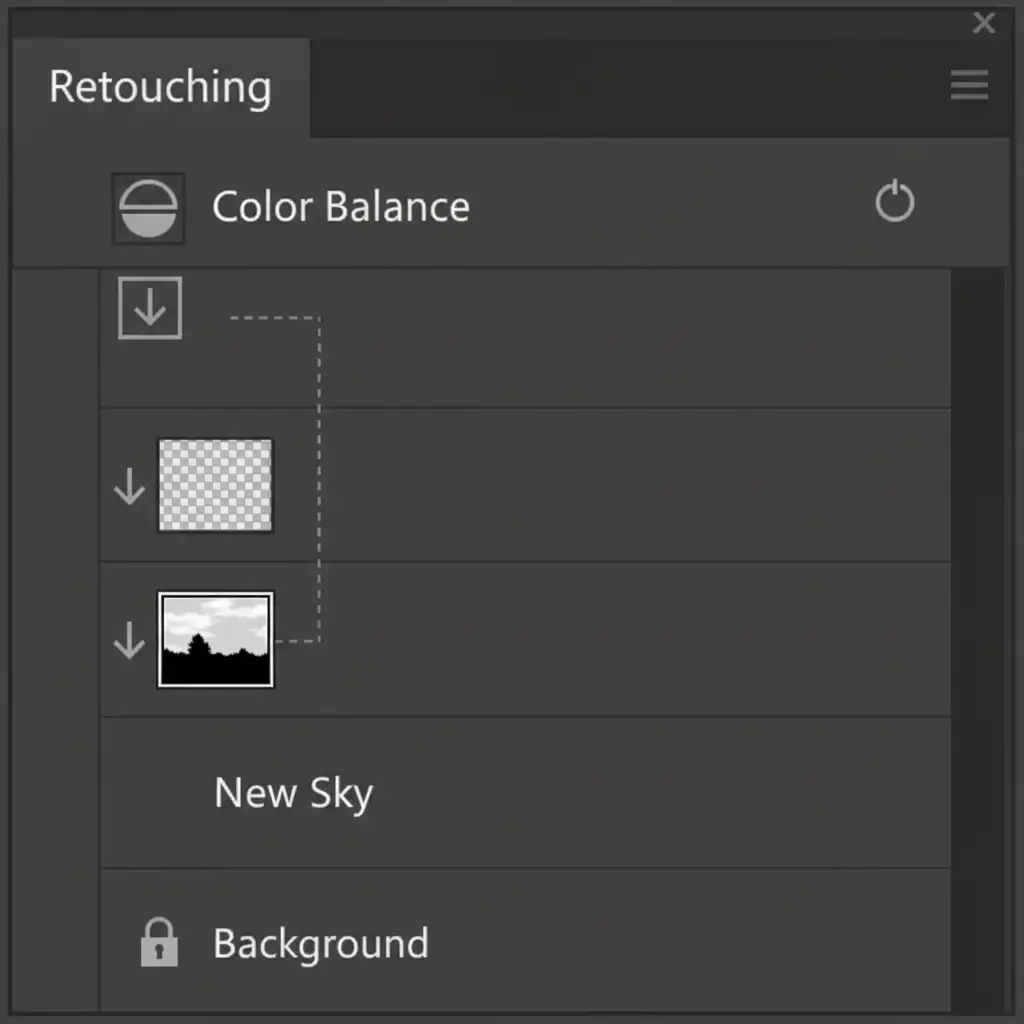
- Create a Color Balance Adjustment layer.
- Create a Clipping mask by holding Alt/Option and clicking between the Color Balance layer and your Sky layer.
- Push the midtones slightly toward Cyan and Blue to integrate the sky’s color palette with the flat foreground.
- Finally, apply a subtle Gaussian blur to the sky layer. Overcast skies lack sharp, defined cloud edges, and a slight blur mimics the shallow depth of field typical in macro jewelry photography.
Method C: The Technical Deep-Dive into Environmental Reflections
This is the secret step that separates amateur composites from professional retouching. Highly polished metals—like gold, silver, and platinum—are essentially mirrors. If you change the sky behind a ring, the metallic surface must reflect the new sky colors, or the brain will instantly register the image as fake.
Painting Realistic Metal Reflections
You cannot just change the background; you must alter the environmental reflections on the jewelry piece itself.
- Create a new blank layer at the very top of your layer stack, directly above your jewelry piece.
- Set this new layer’s blend mode to either Color or Soft Light (Soft Light works best for silver, Color works best for yellow gold).
- Select the Brush tool and set the opacity to 15 percent. Use a very soft brush.
- Hold Alt/Option to sample the dominant color of your newly placed sky (e.g., a cool twilight blue).
- Gently paint over the upward-facing metallic reflections on the jewelry. This simulates the ambient light of the new sky bouncing off the metal, tying the foreground and background together perfectly.
Let the Retouching Experts Handle Your Jewelry Composites
Matching sky replacement to overcast jewelry lifestyle shots is a highly technical process. From balancing diffuse shadows to meticulously painting in environmental reflections, achieving a natural look requires hours of tedious pixel-pushing.
If you are struggling to make your lifestyle jewelry composites look natural, you don’t have to do it alone. Let the experts at Image Work India or Cloud Retouch handle your advanced compositing and color matching. Our dedicated team of high-end jewelry retouchers understands the complex physics of light, metal, and reflection. We deliver flawless, photorealistic visuals that elevate your brand and drive sales.
Contact Image Work India today to ensure your jewelry campaigns always look brilliant, no matter the weather.


