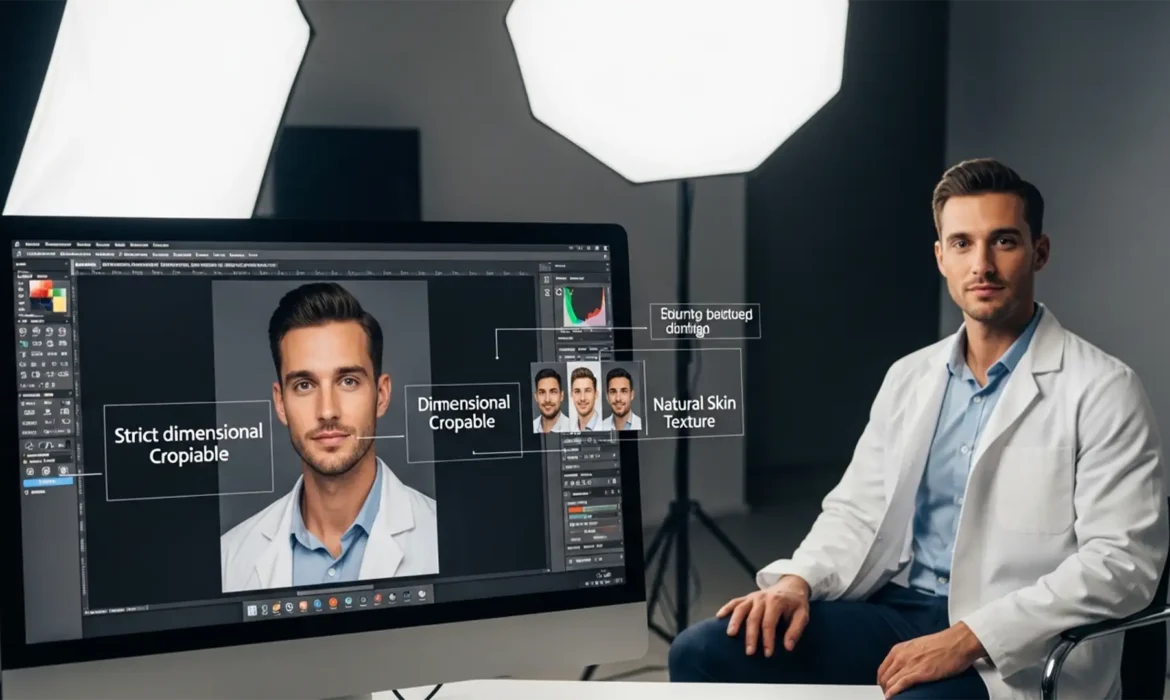
You’ve spent years surviving medical school, crushing your USMLEs, and perfecting your personal statement. But did you know a simple technical error on your headshot could stall your entire residency application?
The 2025 AAMC guidelines for the Electronic Residency Application Service (ERAS) are notoriously strict. If your file is over 100KB, has the wrong aspect ratio, or features heavy, AI-generated skin smoothing, program directors will notice—and not in a good way. In this guide, we break down the exact ERAS residency photo retouching standards for 2025, ensuring your headshot looks professional, authentic, and technically flawless.
Understanding the 2025 ERAS Technical Requirements
Before touching a single pixel of your face, your image must pass the automated checks of the ERAS portal. Failing to meet these baseline technical specifications will result in upload errors.
According to the latest AAMC guidelines, your headshot must meet these exact parameters:
- ERAS Photo Dimensions: Exactly 2.5 by 3.5 inches.
- Image Resolution: Exactly 150 DPI (dots per inch).
- File Size: A maximum of 100 KB.
- Background: Solid light or white background.
The “Natural Look”: AAMC Guidelines on Retouching
Program directors are looking for authenticity. They want to recognize the person walking into the interview room. Because of this, heavy skin smoothing, AI-based facial adjustments, and the digital manipulation of permanent features are heavily discouraged.
Your goal is non-destructive editing. You want to present the best version of yourself on a good day, which means basic blemish removal is acceptable, but erasing your natural skin texture is a red flag.
Here is how to achieve the perfect balance using Photoshop v24.x or v25.x.
Step-by-Step Guide to Perfecting Your ERAS Headshot in Photoshop
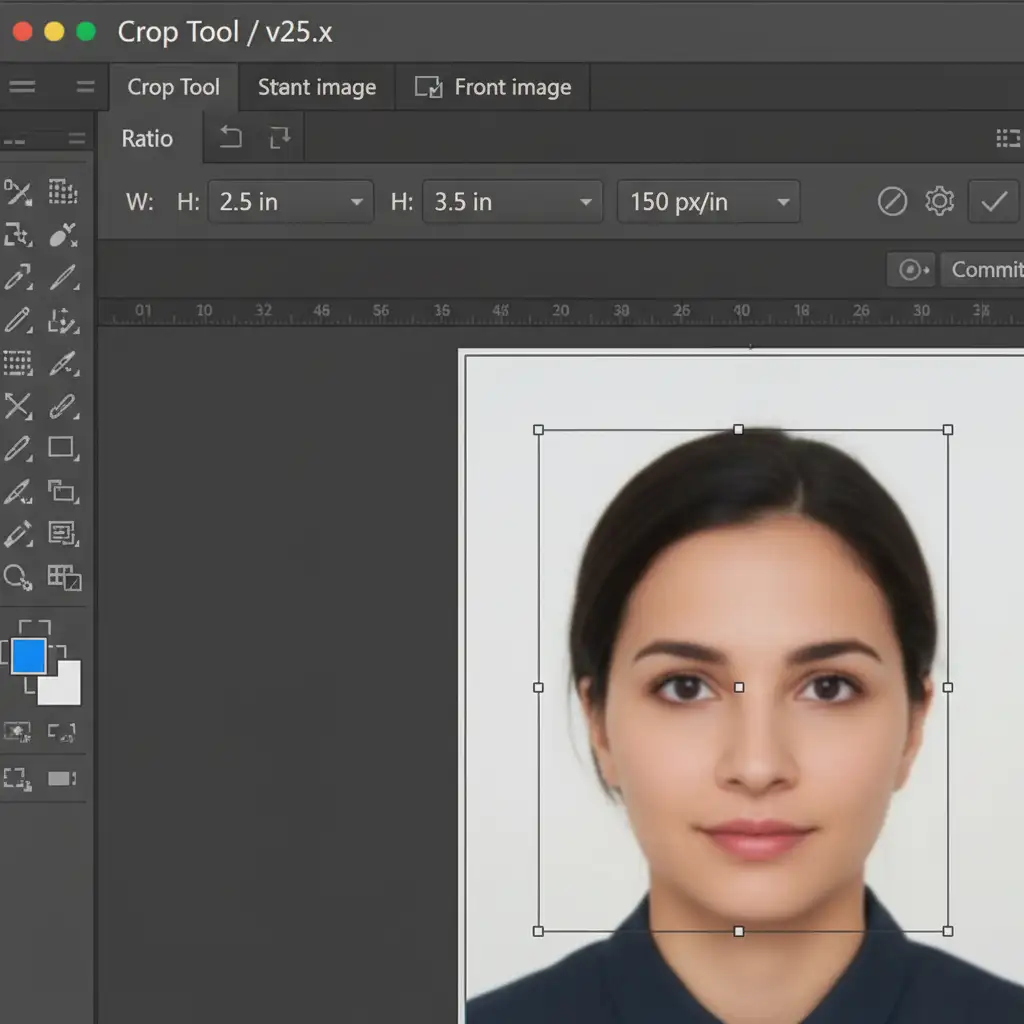
Step 1: Cropping to Exact ERAS Photo Dimensions
The quickest way to fix sizing errors is to force Photoshop to crop and resize your image simultaneously.
- Open your high-resolution headshot in Photoshop.
- Select the Crop Tool (C).
- In the top options bar, change the mode to W x H x Resolution.
- Enter 2.5 in for Width, 3.5 in for Height, and 150 px/in for Resolution.
- Adjust the crop box to frame your head and shoulders nicely, then press Enter.
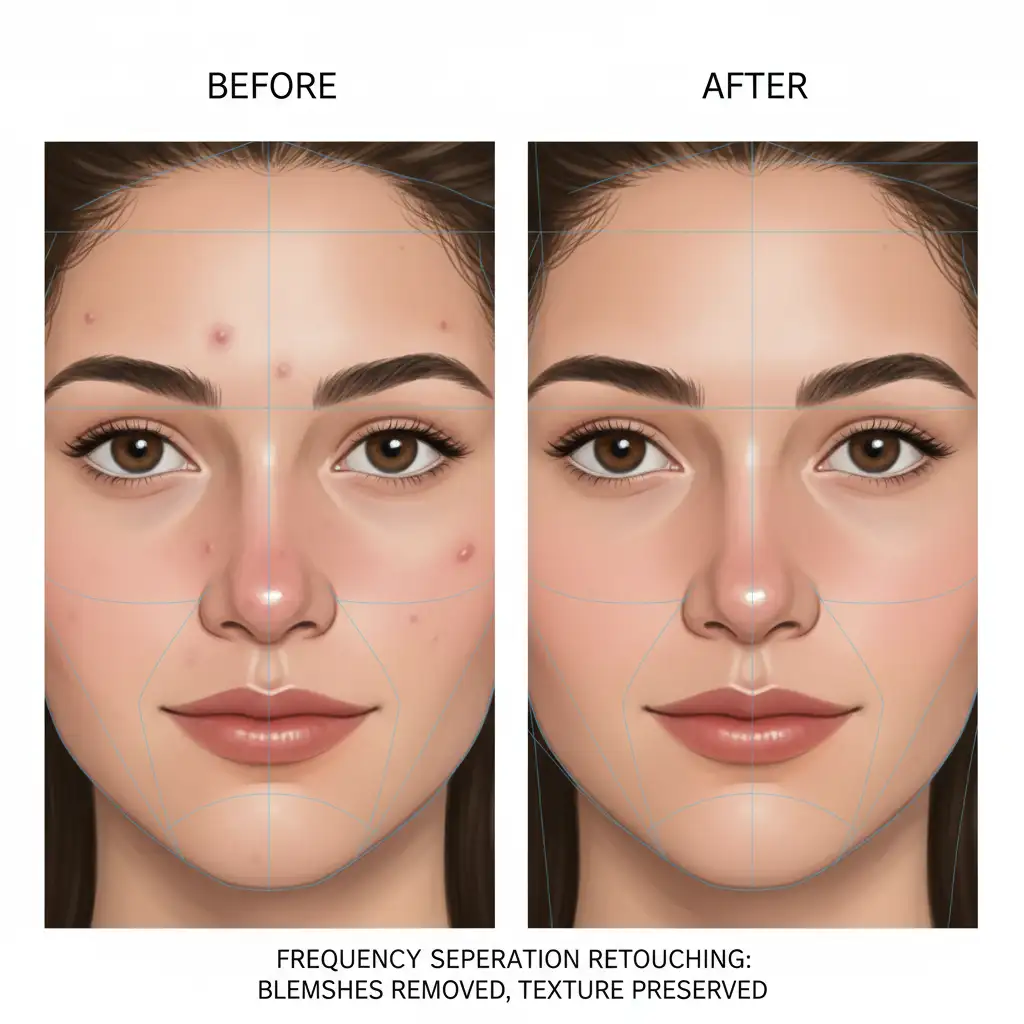
Step 2: Pro Blemish Removal with Frequency Separation
To avoid the synthetic, plastic look that program directors penalize, you must separate your image’s texture from its color. This technique, known as Frequency Separation, allows you to perform blemish removal without blurring natural skin pores.
- Duplicate your background layer twice. Name the middle layer “Color” and the top layer “Texture”.
- Apply a Gaussian Blur to the “Color” layer just until the skin texture disappears.
- Select the “Texture” layer and apply a High-Pass Filter (Filter > Other > High Pass). Set the radius to match the blur you just applied, then set the layer blend mode to Linear Light.
- Use the Clone Stamp or Healing Brush tool only on the Texture layer to remove temporary acne or stray hairs.
Because the color and lighting remain on the layer below, your skin retains its authentic, human texture.
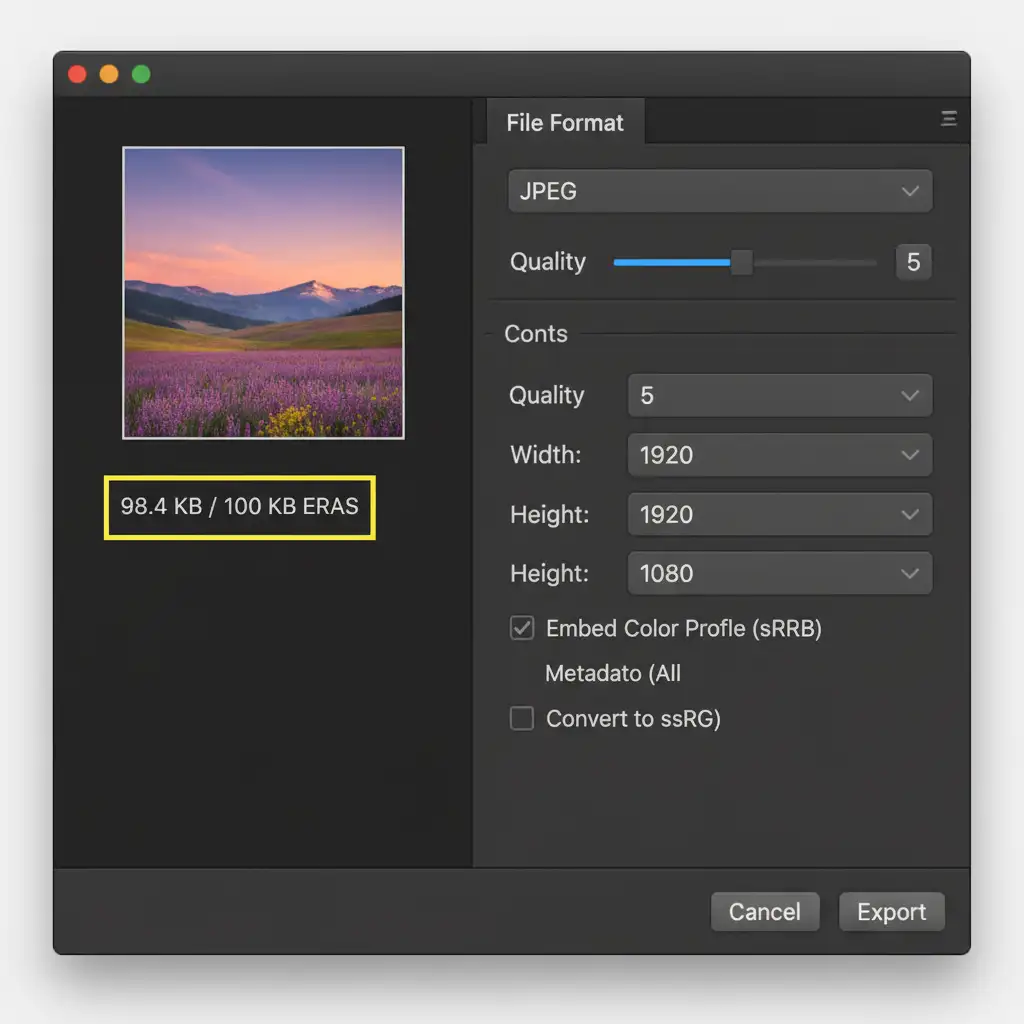
Step 3: Mastering JPEG Compression for the 100KB Limit
The most common hurdle applicants face is the strict 100KB upload limit. Shrinking a high-quality photo this small without creating ugly digital manipulation artifacts requires precise export settings.
- Navigate to File > Export > Export As.
- Set the Format to JPEG.
- Ensure the Embed Color Profile box is checked so your image saves in the sRGB color space. (This guarantees your skin tone looks accurate on any program director’s monitor).
- Carefully toggle the Quality slider (usually between 4 and 6). Watch the estimated file size on the left side of the panel. Adjust the slider until the file size reads 98KB or lower to ensure safe uploading.
Don’t Risk Your Match on a Technical Error
Navigating aspect ratios, high-pass filters, and strict JPEG compression limits can be overwhelming when you should be focusing on your residency interviews. A poorly compressed image or an overly-retouched face can damage your professional first impression before you even shake a program director’s hand.
You don’t have to do this yourself. Hire the professional editing teams at Image Work India and Cloud Retouch. We specialize in high-end, non-destructive portrait editing. We guarantee your headshots will feature flawless, natural retouching and meet every single 2025 AAMC technical requirement perfectly.
Contact Image Work India or Cloud Retouch today, and let us prepare your headshot for a successful match season!


