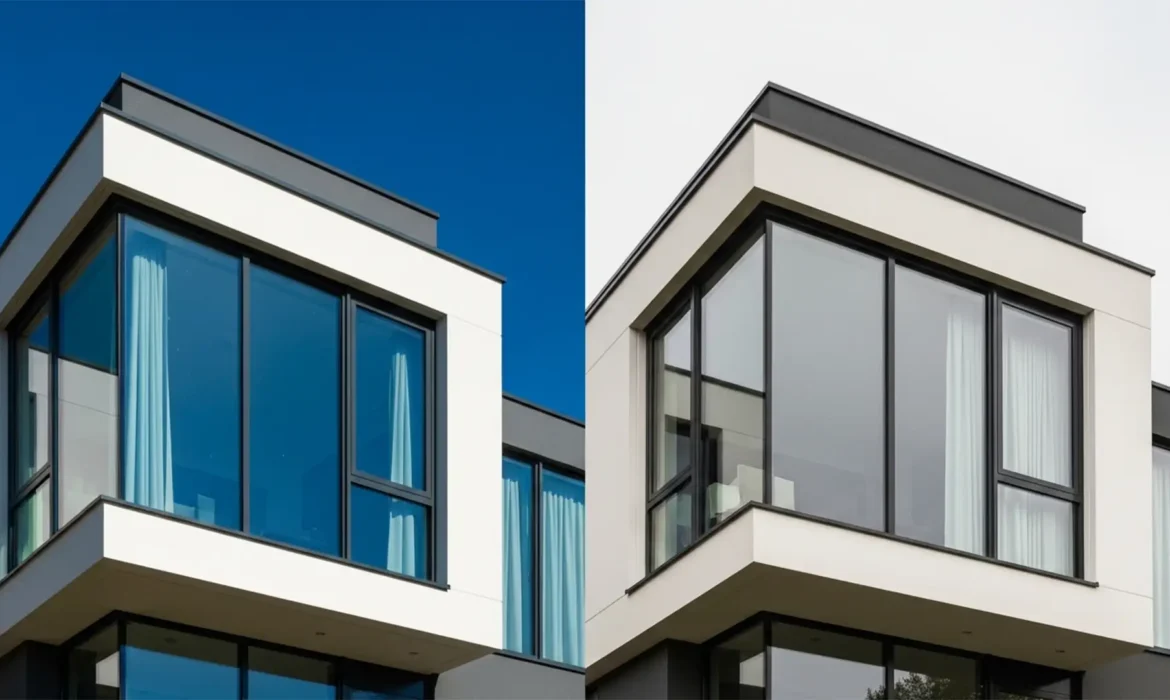
You have just used Photoshop’s AI Sky Replacement to turn a drab, overcast real estate shot into a stunning golden-hour masterpiece. But when you zoom in on the exterior windows, disaster strikes. Instead of natural reflections, the glass is glowing with an unnatural, heavy blue or neon orange color cast.
This happens because Photoshop’s algorithm struggles to differentiate between matte building materials and highly reflective surfaces. If you deliver photos with glowing blue windows, clients will notice. Here is exactly how to fix the AI sky replacement color cast on windows using three proven, non-destructive editing workflows in Photoshop v24 and v25.
Why Photoshop’s AI Sky Replacement Ruins Window Reflections
In Adobe Photoshop v24.x and v25.x, the AI Sky Replacement tool doesn’t just swap the background; it automatically generates a ‘Foreground Lighting’ adjustment layer to blend the new sky with the existing image.
While this is highly effective for overall ambiance, the algorithm frequently misinterprets highly reflective surfaces like exterior real estate windows, glass doors, and pool surfaces. The resulting issue is a baked-in color cast—often heavy blue or orange, depending on the sky you chose.
Fortunately, because the AI outputs these adjustments as a layered group, the color cast is isolated within the ‘Foreground Color’ and ‘Foreground Lighting’ layers. This allows for targeted correction without affecting the actual sky replacement.
3 Ways to Fix AI Sky Replacement Color Casts on Windows
Depending on the complexity of the property and your desired level of control, you can resolve this issue before the sky is even applied, or refine it afterward using layer masks and blend modes.
Method 1: The Quick Fix (Pre-Adjustment)
If you are processing a high volume of real estate images and need the fastest solution, you can stop the color cast from generating in the first place.
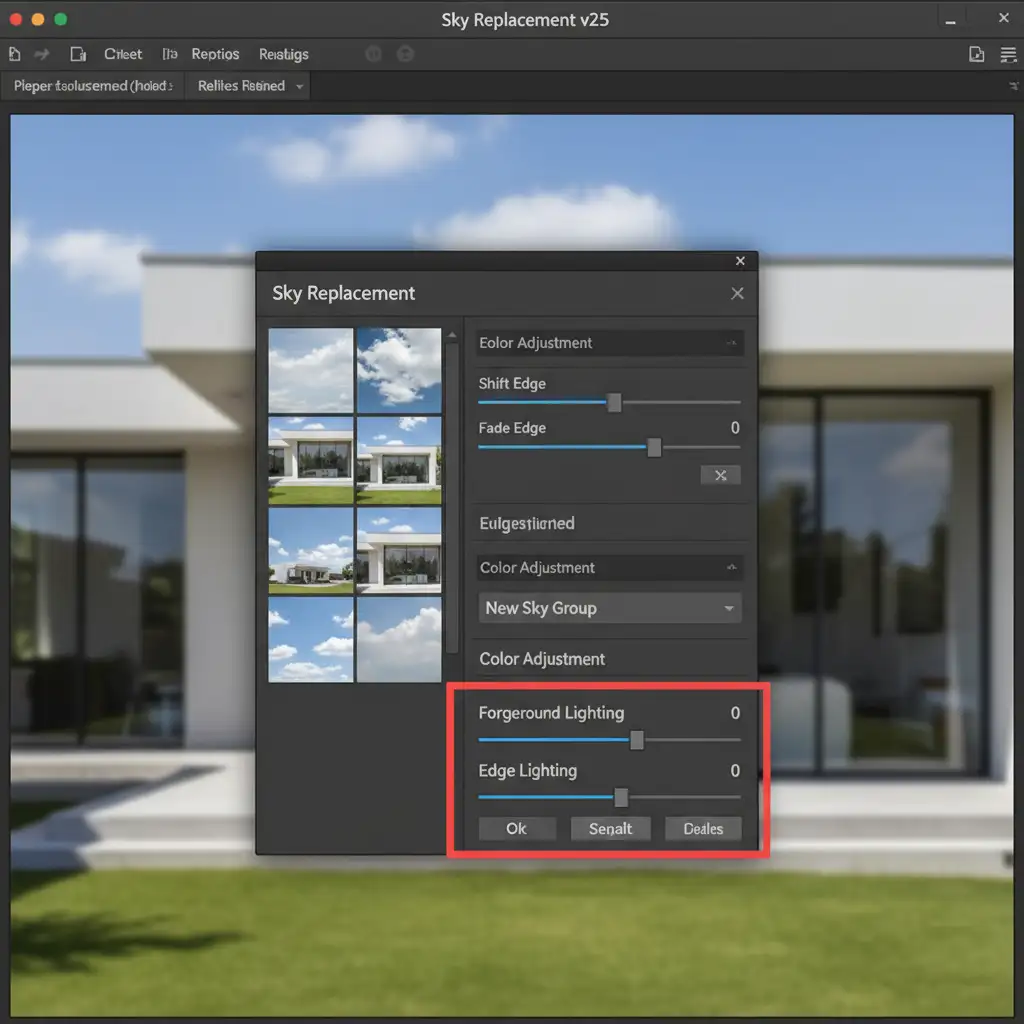
- Open your image and navigate to Edit > Sky Replacement.
- Select your desired sky.
- Before clicking OK, locate the Foreground Lighting and Edge Lighting sliders in the dialog box.
- Reduce both sliders to 0.
This prevents Photoshop from applying any global color cast to the building, eliminating the window spill instantly while still replacing the sky.
Method 2: The Pro Workaround (Layer Masking)
If you want to keep the ambient foreground lighting on the roof and walls but remove it only from the glass, you need to utilize the output layer group masks.
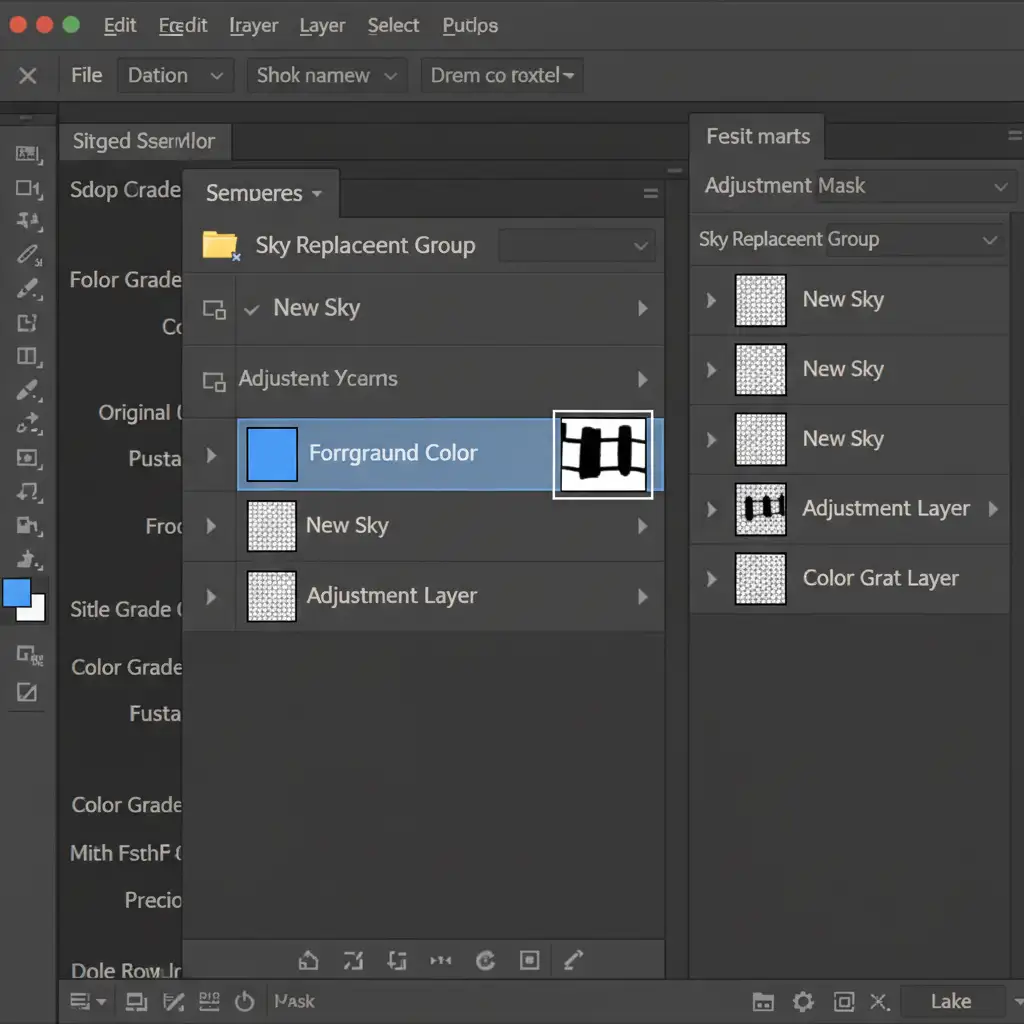
- In the Sky Replacement dialog, ensure your output is set to New Layers, then click OK.
- In your Layers Panel, expand the generated Sky Replacement Group.
- Locate the layer named Foreground Color.
- Click on its attached layer mask (the white rectangle next to the layer thumbnail).
- Select a soft round Brush Tool (shortcut: B) and set your foreground color to black.
- Manually paint over the windows and glass doors. This hides the artificial color cast on the reflective surfaces while keeping the ambient light on the rest of the property.
Method 3: The Technical Deep-Dive (Hue/Saturation Targeting)
For complex architectural shots with dozens of windows, manual masking can be tedious. You can neutralize the reflections automatically by targeting specific color channels.
- Create a Hue/Saturation adjustment layer and place it directly above the ‘Foreground Color’ layer inside the sky replacement group.
- Right-click the Hue/Saturation layer and select Create Clipping Mask (or Alt/Option-click between the layers). This ensures your adjustment only affects the foreground group.
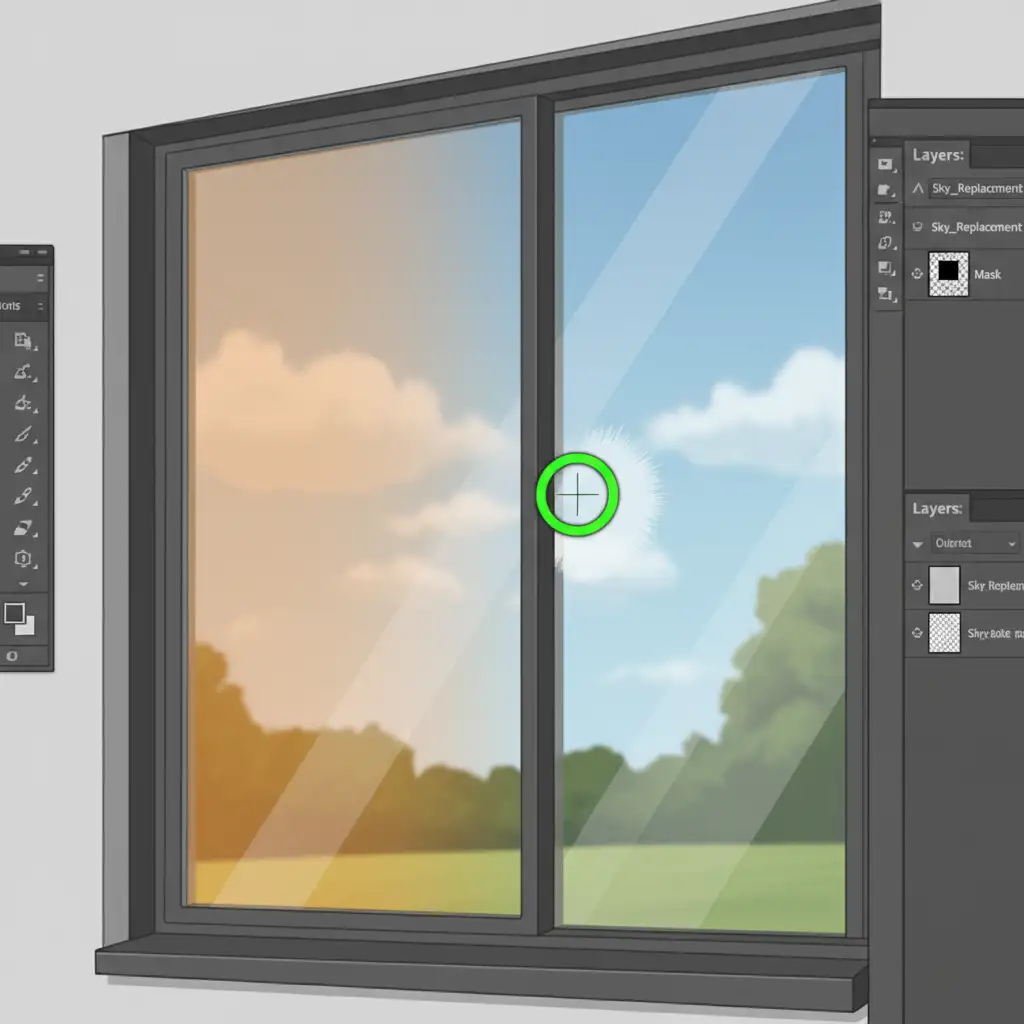
- Open the Hue/Saturation properties and select the targeted adjustment tool (the hand icon with arrows).
- Click directly on the unnatural color cast on the window glass. This will isolate the specific color channel (e.g., Cyans or Blues).
- Reduce the saturation slider for that specific channel until the glass looks natural.
- Finally, change the blend mode of this adjustment layer to Color. This ensures the luminosity and natural reflections remain completely untouched, resulting in a flawless, non-destructive edit.
Automate Your Real Estate Retouching Workflow
Fixing an AI sky replacement color cast on windows is entirely manageable for a single hero shot. But what happens when you have a batch of 50 property photos, all requiring precise layer masking, clipping masks, and color correction?
Time spent masking windows is time taken away from shooting new properties and growing your business.
At Image Work India and Cloud Retouch, our expert retouching teams specialize in high-volume, premium real estate photo editing. From flawless sky replacements and window reflection corrections to HDR blending and virtual staging, we deliver ready-to-publish property images that impress clients and sell homes faster.
Stop struggling with tedious Photoshop masks. Outsource your real estate retouching to Image Work India and Cloud Retouch today, and get your time back.


