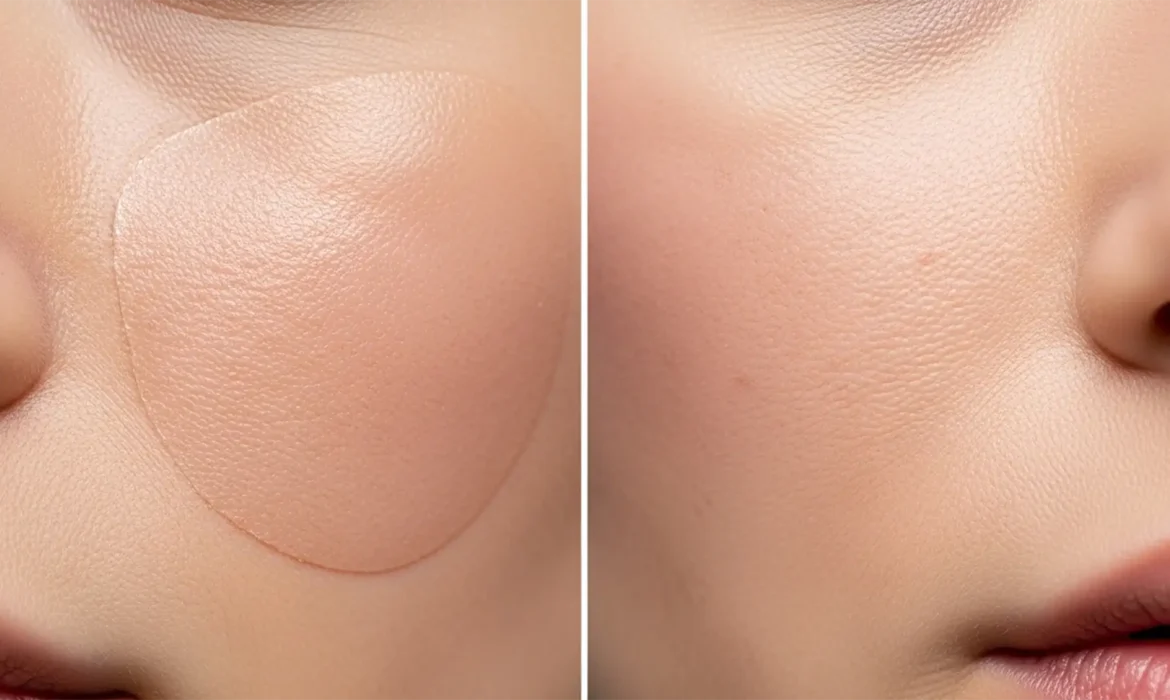
You used Photoshop’s Generative Fill to remove a blemish, stray hair, or distraction on a high-end beauty portrait. The object is gone, but now you are left with a blurry, airbrushed patch of skin texture that looks like plastic.
Generative Fill in Photoshop v25.x and above is incredible for object removal, but it notoriously fails at replicating micro-contrast and the natural human pores of high-resolution skin. The AI algorithm simply cannot bridge the fidelity gap between original photographic pixels and AI-generated pixels.
If you are struggling with this “AI blur” ruining your professional portraits, you aren’t alone. This guide will show you exactly how to restore skin texture after generative fill using three professional texture grafting techniques.
Why Photoshop Generative Fill Ruins Skin Texture
When Adobe Firefly generates new pixels to fill a selected area, it prioritizes color matching and luminosity over high-frequency details. In high-end portraiture, skin is entirely defined by these high-frequency details—pores, fine lines, and microscopic variations in texture.
Applying Generative Fill directly to a model’s face results in a jarring transition between the camera’s natural sensor data and the AI’s smoothed output. To achieve a seamless, non-destructive editing workflow, retouchers must manually reintroduce texture back into these artificial patches.
3 Pro Methods for Restoring Skin Texture After Generative Fill
Depending on the resolution of your image and the severity of the AI-smoothing, you can use one of these three methods to fix the plastic look.
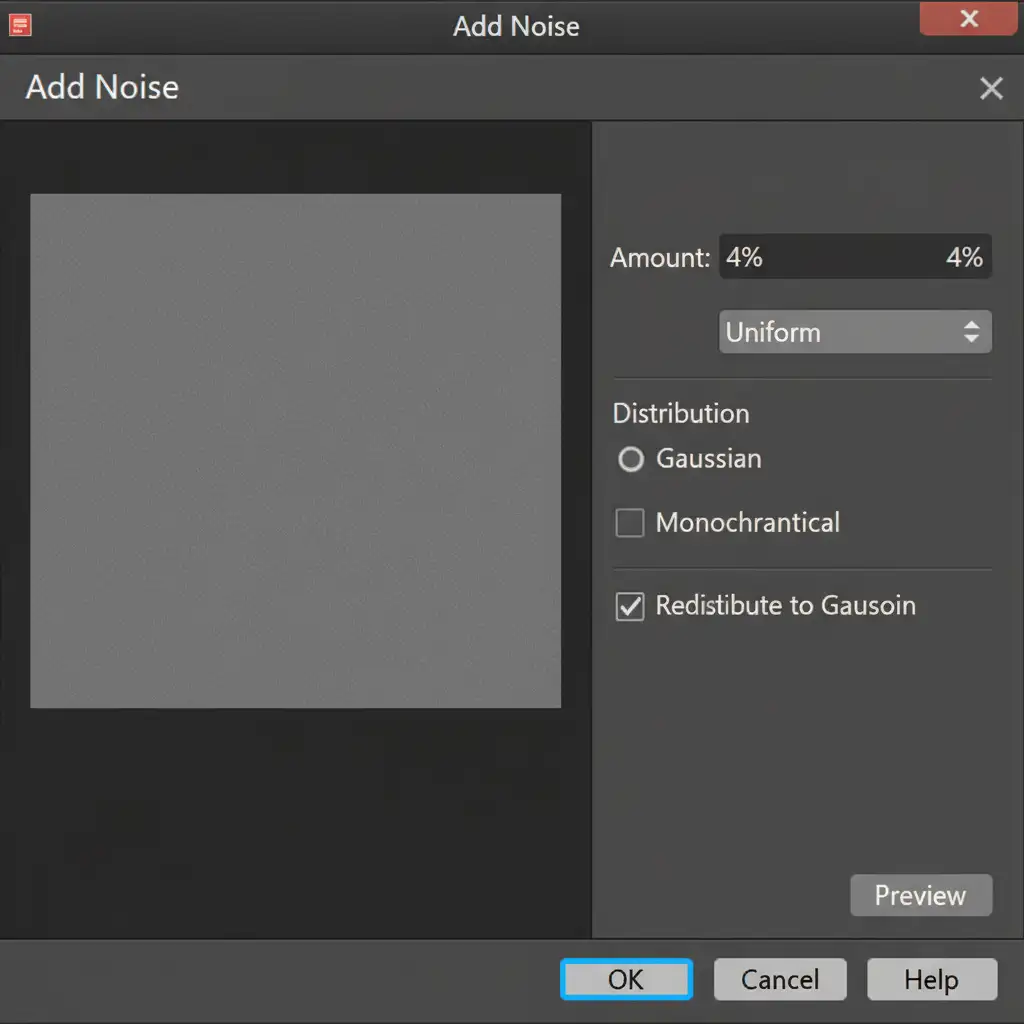
Method 1: The Quick Fix (Noise Overlay)
If you are working on a medium-resolution image or a portrait where the subject is further away from the camera, generating synthetic pores via noise is the fastest solution.
- Create a New Layer: Add a new blank layer directly above your Generative Fill layer.
- Fill with 50% Gray: Go to Edit > Fill, select 50% Gray, and click OK.
- Change Blending Mode: Set this layer’s blending mode to Overlay. This hides the gray while allowing texture to show through.
- Clip to the AI Layer: Right-click the gray layer and select Create Clipping Mask. This ensures the synthetic pores only apply to the AI-generated patch.
- Generate the Pores: Go to Filter > Noise > Add Noise. Choose Uniform and check Monochromatic. Keep the amount low—typically between 3% and 5%.
- Soften the Texture: Raw noise looks like digital grain, not skin. Go to Filter > Blur > Gaussian Blur and apply a slight 0.5px radius to soften the noise so it mimics natural micro-contrast.
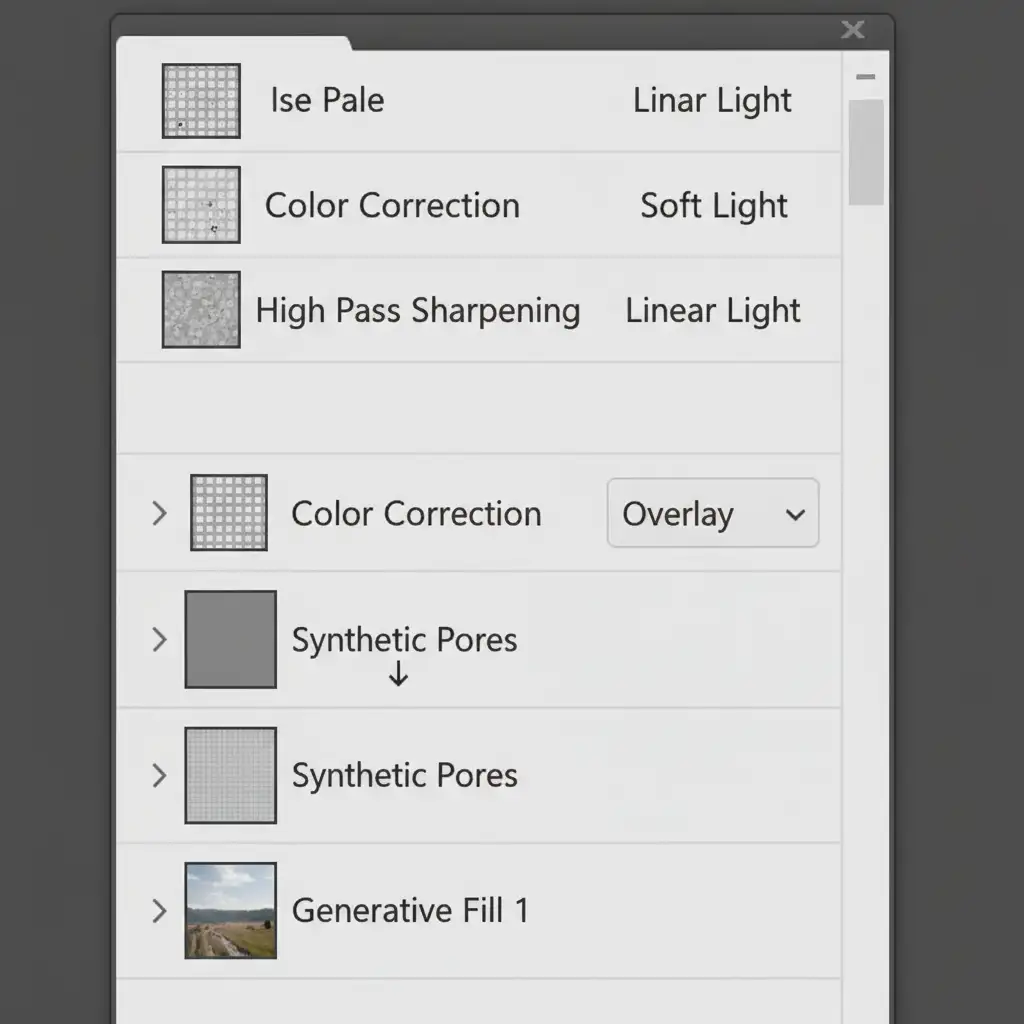
Method 2: The Pro Workaround (Frequency Separation)
For high-end editorial work, synthetic noise won’t pass inspection. You need to graft real pores from the subject’s actual skin using Frequency Separation.
- Pre-AI Setup: Before using Generative Fill, run your standard Frequency Separation action on the original base image to split your color (low frequency) and texture (high frequency) into separate layers.
- Apply Generative Fill: Group your Frequency Separation layers. Apply your Generative Fill edits on a new layer below the high-frequency texture layer.
- Clone the Texture: Select your high-frequency (texture) layer. Select the Clone Stamp Tool and ensure the sample setting is strictly set to Current Layer.
- Graft the Pores: Alt/Opt-click on a clean area of the model’s skin that has healthy, natural pores. Carefully paint those real pores directly over the smooth, AI-generated area. Because you are only cloning texture, the color and lighting generated by the AI remain intact.
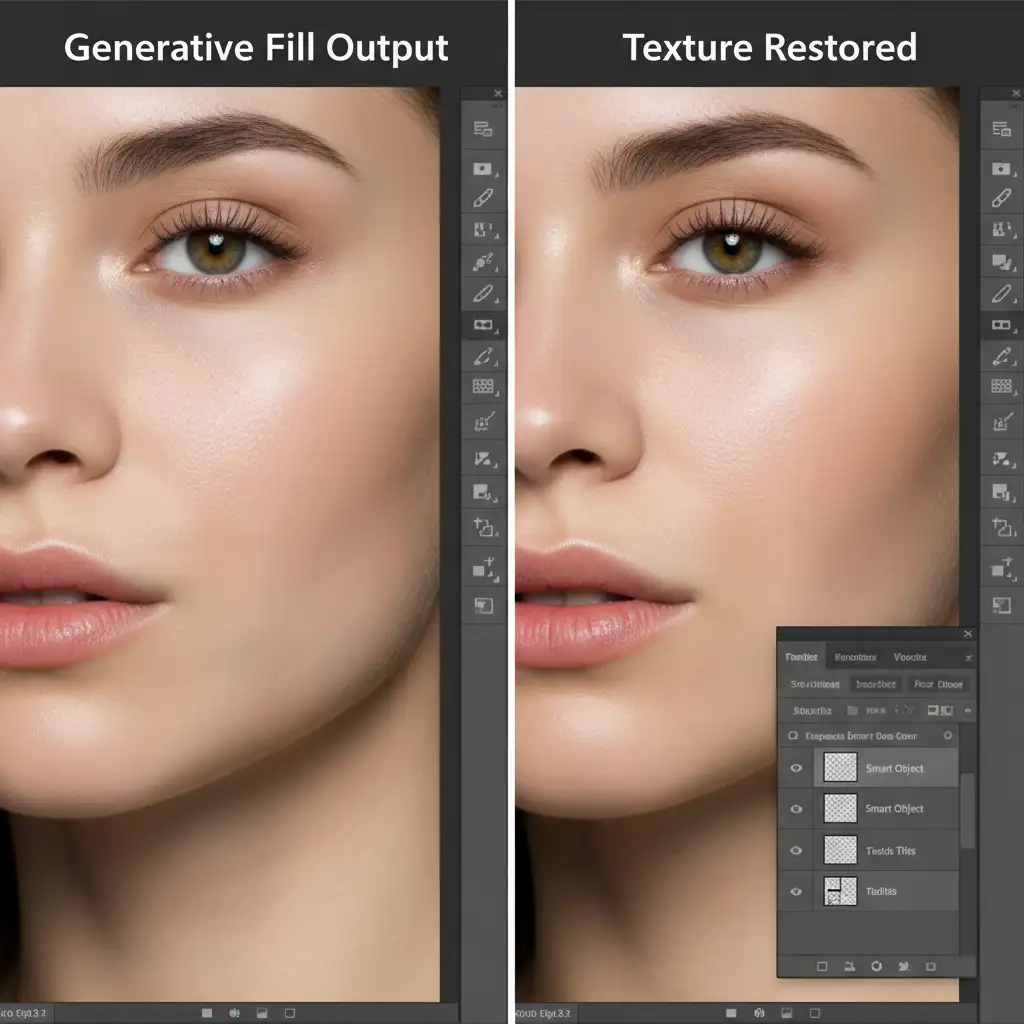
Method 3: The Technical Deep-Dive (High Pass Texture Graft)
If you have already applied Generative Fill and flattened your base layers, or if you prefer a non-destructive texture extraction method, the High Pass Filter graft is the most precise technique.
- Extract Original Texture: Duplicate your original, untouched base image layer and drag it to the very top of your layer stack, above the Generative Fill layer.
- Isolate the Pores: Go to Filter > Other > High Pass. Adjust the radius until you only see the fine skin pores. The sweet spot is usually between 2.0 and 4.0 pixels.

- Neutralize Color: Press Ctrl/Cmd + Shift + U to desaturate this high-pass layer. You do not want to transfer original color data, only texture.
- Blend and Mask: Change the blending mode of this layer to Linear Light.
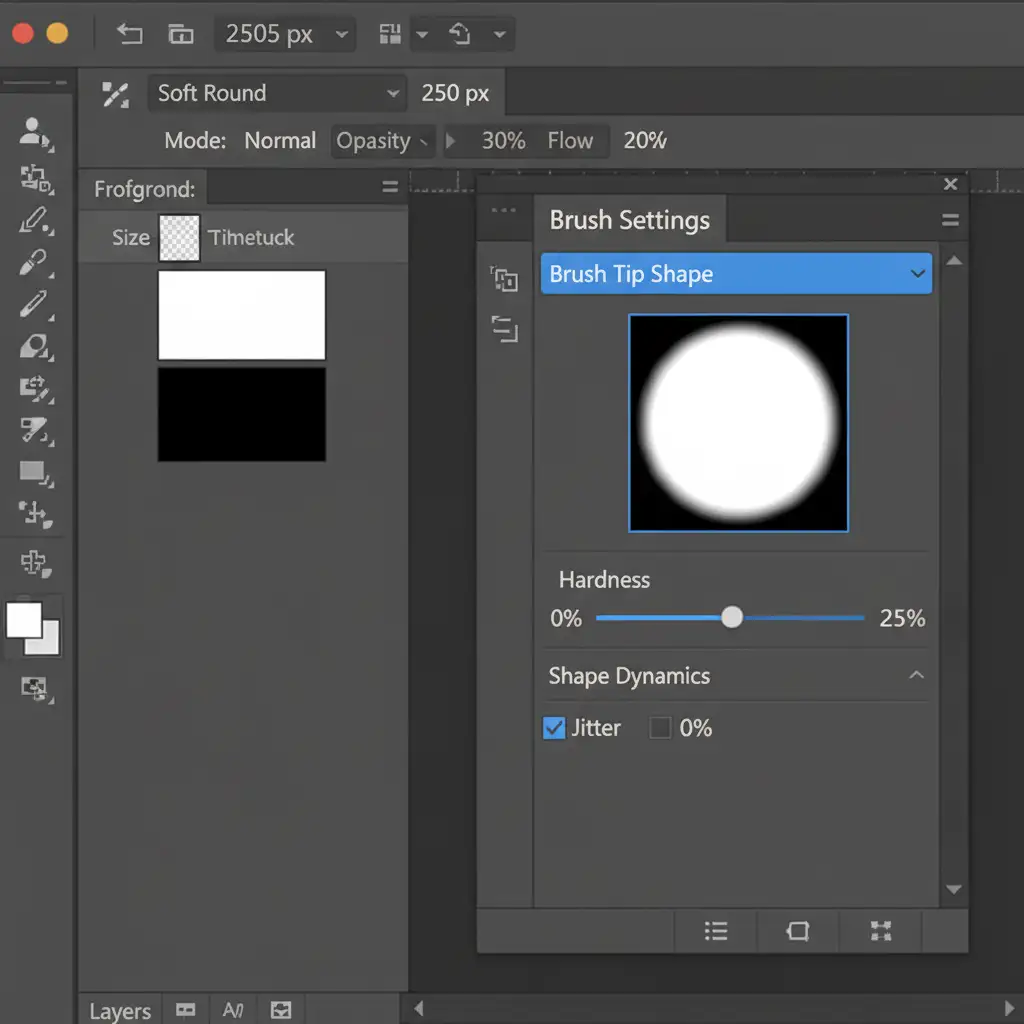
- Paint in the Pores: Hold Alt/Option and click the Add Layer Mask icon to create an inverted (black) mask, hiding the texture. Select a soft round brush, set your foreground color to white, and carefully paint the original high-frequency texture strictly over the AI-smoothed areas.
See It In Action
Need a visual walkthrough of the High Pass Texture Graft? Watch this quick demonstration of restoring micro-contrast over an AI-generated patch.
Stop Fighting AI: Outsource Your High-End Retouching
Restoring skin texture after generative fill is highly effective, but it adds significant manual labor to your post-production workflow. When you are processing hundreds of editorial, fashion, or beauty portraits, spending 10 minutes per image grafting pores simply isn’t scalable.
Struggling to maintain natural skin textures in your high-volume portrait editing? Let the experts at Image Work India and Cloud Retouch handle your high-end retouching. Our specialized team utilizes advanced frequency separation, luminosity masking, and micro-contrast recovery to deliver flawless, magazine-quality results—completely eliminating the plastic AI look.
Focus on capturing stunning images, and let us handle the pixels. Contact Cloud Retouch today to elevate your portrait workflow.


