
Have you ever tried to change wood stain color in Photoshop Generative Fill, only to end up with a plastic, fake-looking mess? It is a common frustration for e-commerce retouchers and furniture designers. When you use a text prompt like “dark mahogany stain,” Photoshop v25.0 and newer versions completely overwrite the original pixels. This destroys the natural wood grain, unique knots, and specular highlights that make the material look authentic.
To leverage AI for rapid color mapping while strictly isolating the luminosity and high-frequency texture data of the original wood, you need a hybrid workflow. Here is exactly how to blend AI generation with professional Photoshop retouching techniques to achieve flawless, realistic furniture color swaps.
The Problem with AI Generative Fill on Wood Textures
Native Generative Fill operates by generating entirely new pixels based on your text prompt and the surrounding image context. While incredible for adding or removing objects, it fails at delicate material alteration. Wood relies on micro-contrast—the tiny shadows inside the grain and the bright specular highlights bouncing off the polished finish.
When Generative Fill replaces these pixels, the depth is flattened. To achieve true wood grain preservation, you must separate the color generated by the AI from the texture of the original photograph.
Here are three professional methods to fix this, ranging from a quick blend mode trick to a highly technical frequency separation workflow.
Method 1: The Quick Fix Using Color Blend Mode
If you are working on a tight deadline and need a rapid color variation, changing the blend mode of your Generative Layer is the fastest way to map AI colors over original textures.
- Make Your Selection: Use the Object Selection Tool to isolate the wooden furniture piece.
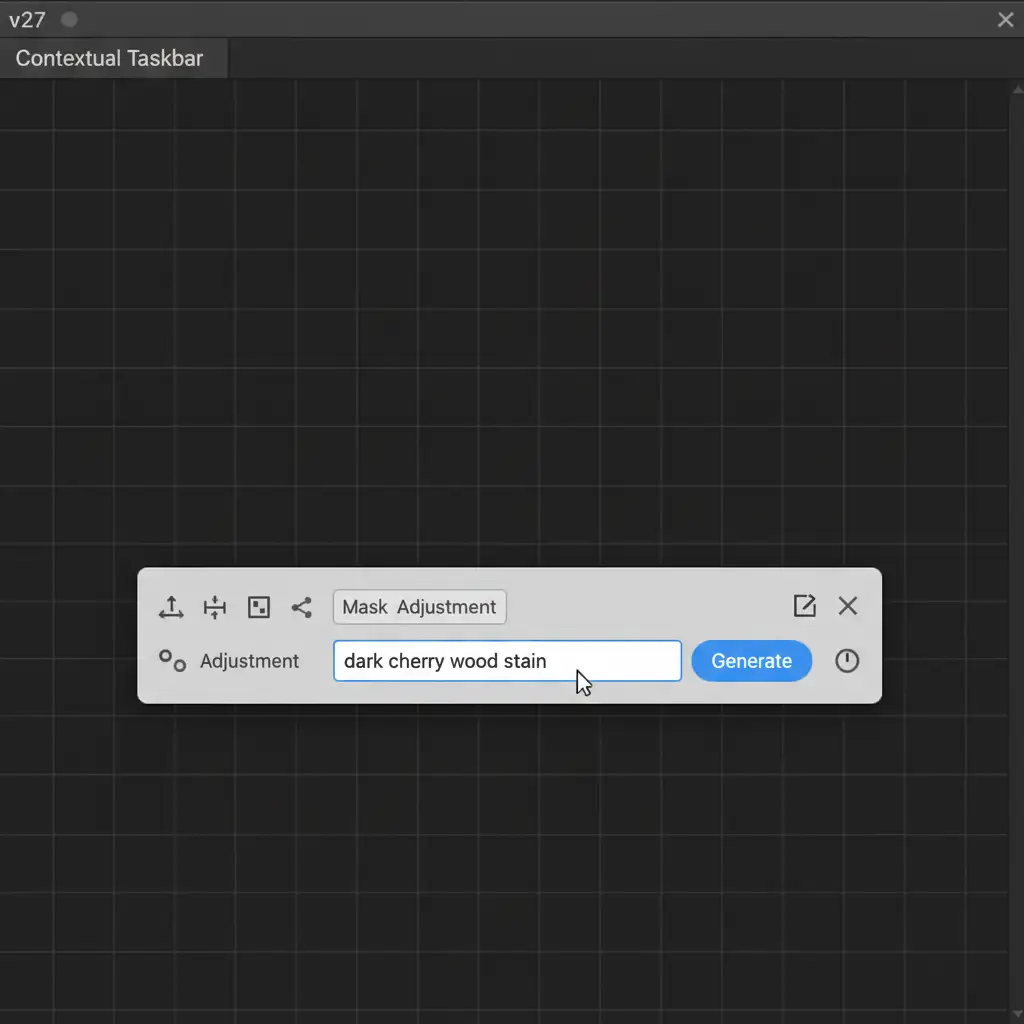
- Generate the Stain: Click on the Contextual Taskbar and enter a prompt like ‘dark cherry wood stain’. Hit Generate.
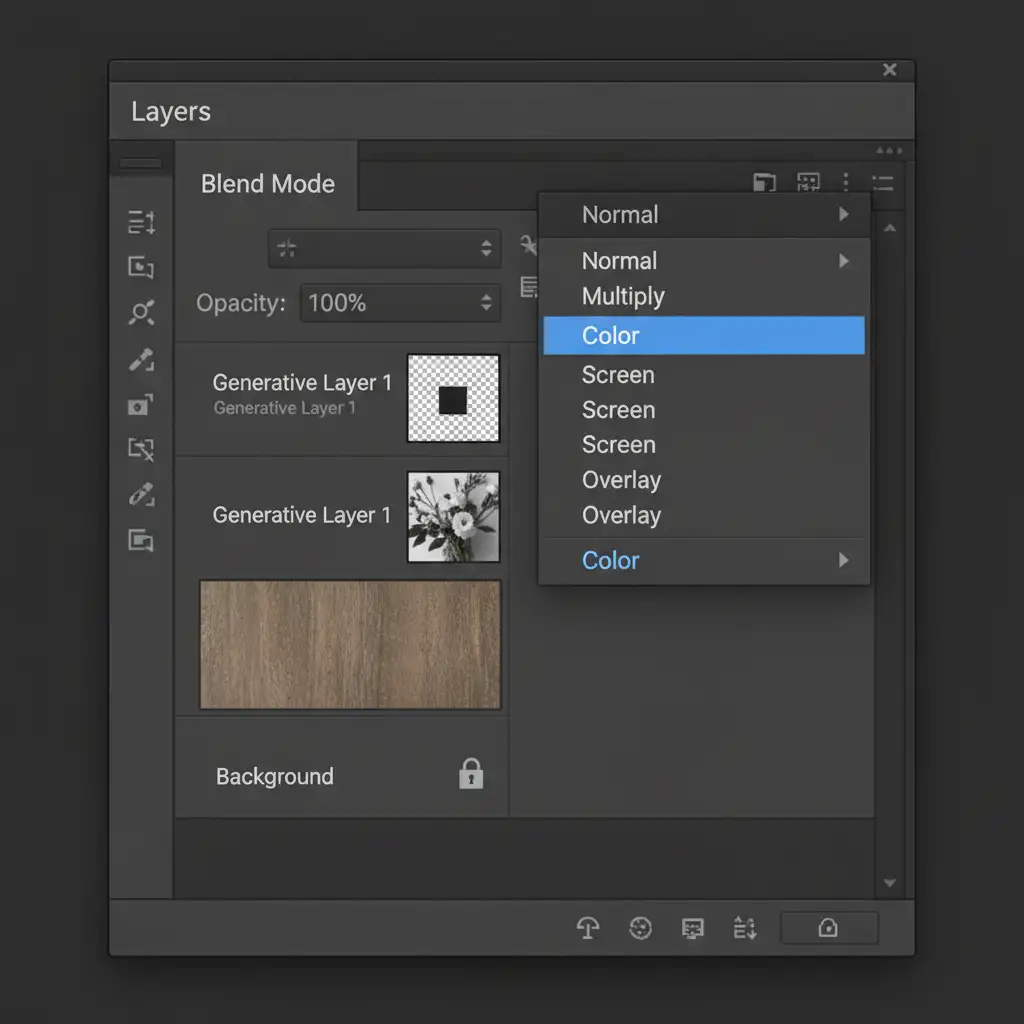
- Change the Blend Mode: By default, the Generative Layer is set to ‘Normal’. Go to your Layers panel and change the Color Blend Mode to ‘Color’ or ‘Multiply’.
Changing the blend mode to ‘Color’ forces Photoshop to apply only the hue and saturation of the AI-generated dark cherry stain, while pulling the luminosity (lightness and darkness of the grain) from the original layer below.
Method 2: The Pro Workaround with Blend If Sliders
The Color blend mode is great, but it can sometimes dull the brightest reflections on polished wood. To achieve perfect realism, you need to protect the specular highlights. This is where Blend If sliders come in.
- Generate the New Stain: Follow the same steps to generate your new wood color. Leave the blend mode on ‘Normal’.
- Open Layer Styles: Double-click the empty space next to your Generative Layer’s name to open the Layer Style dialog box.
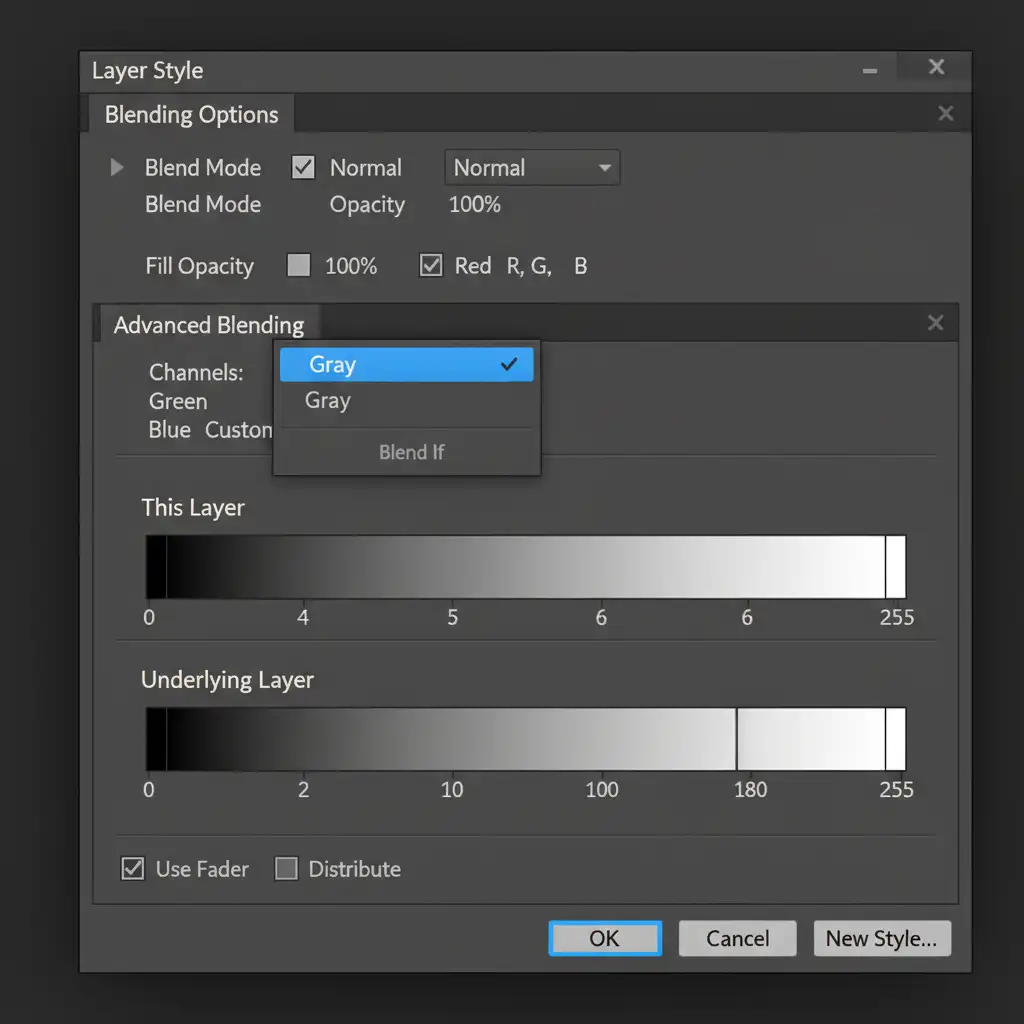
- Adjust Blend If: Look at the bottom for the ‘Blend If: Underlying Layer’ gradient.
- Split the Slider: Hold Alt (Windows) or Option (Mac) and click the right (white) slider to split it in half.
- Protect Highlights: Drag the left half of the split slider toward the left.
As you drag, you will see the original bright specular highlights and grain peaks punch through the AI-generated stain, restoring the natural, glossy finish of the wood.
Method 3: The Technical Deep-Dive – Frequency Separation AI Workflow
For high-end e-commerce retouching where wood grain preservation must be 100% mathematically accurate, you must combine AI with Frequency Separation. This technique splits your image into two distinct layers: Low Frequency (Color/Tone) and High Frequency (Texture).
Step-by-Step Frequency Separation Workflow:
- Duplicate your background twice. Name the bottom duplicate “Low Frequency” and the top duplicate “High Frequency.”
- Blur the Low Frequency: Select the Low Frequency layer. Go to Filter > Blur > Gaussian Blur. Blur it just until the macro wood grain disappears (usually 4–8 pixels).
- Apply Image to High Frequency: Select the High Frequency layer. Go to Image > Apply Image.
- Layer: Low Frequency
- Blending: Subtract
- Scale: 2, Offset: 128
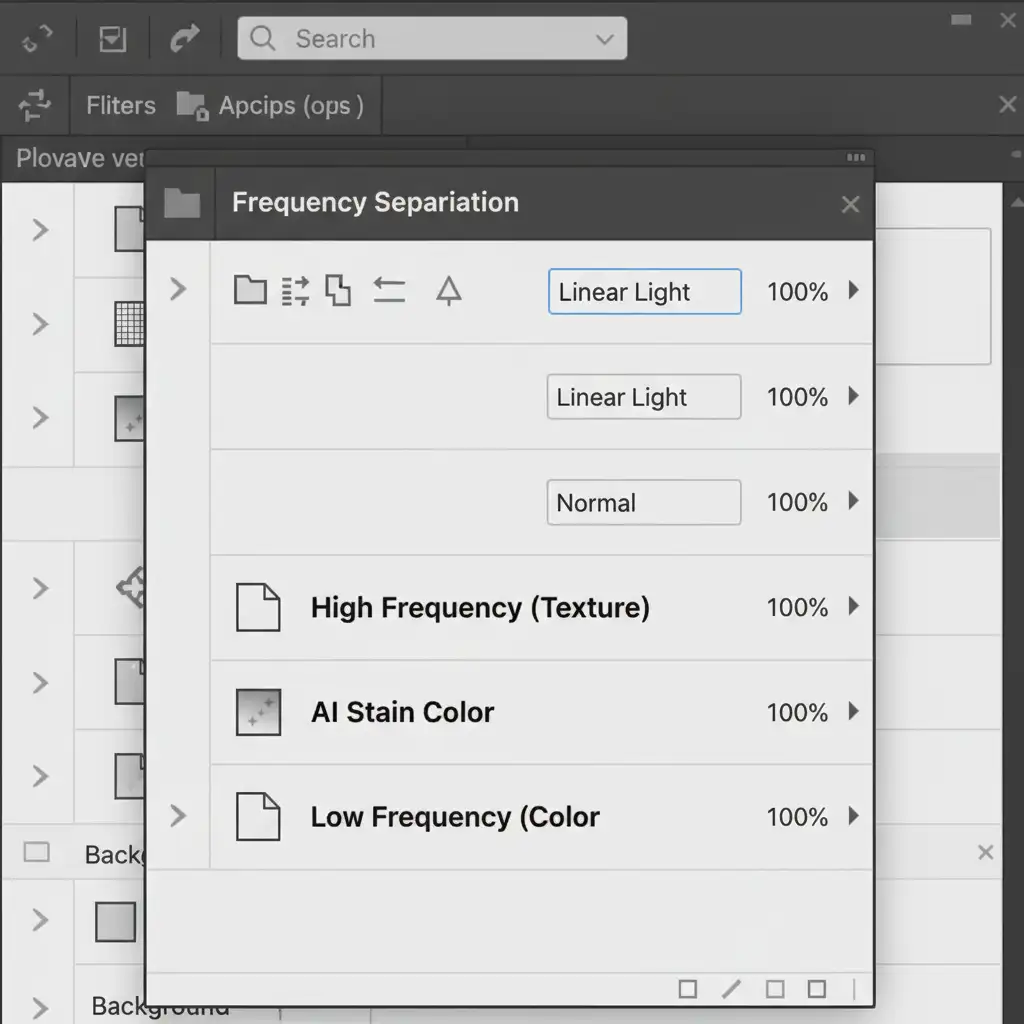
- Change High Frequency Blend Mode: Set the High Frequency layer to ‘Linear Light’. Your image will now look exactly like the original, but the texture and color are separated.
- Apply Generative Fill Safely: Make your selection and apply your Generative Fill strictly on the Low Frequency layer (or directly above it, clipped to it).
Because the AI is only altering the Low Frequency (tonal gradients and stain color), the untouched High Frequency layer sitting on top perfectly preserves every single knot, scratch, and grain line of the original wood. You can even utilize Smart Objects and a High-Pass Filter alternative for non-destructive texture preservation.
Streamline Your E-Commerce Color Swapping
Mastering how to change wood stain color in Photoshop Generative Fill without destroying the natural texture requires a deep understanding of luminosity masks, blending modes, and frequency separation. While these workflows guarantee perfect realism, they are incredibly time-consuming when dealing with hundreds of product SKUs.
Struggling to maintain realistic textures while creating furniture color variations for your catalog? You don’t have to do it alone.
Hire Image Work India and Cloud Retouch for flawless, high-volume e-commerce color swapping and professional retouching. Our team of expert retouchers combines advanced AI workflows with meticulous manual masking to deliver pixel-perfect product variations that drive sales.


