
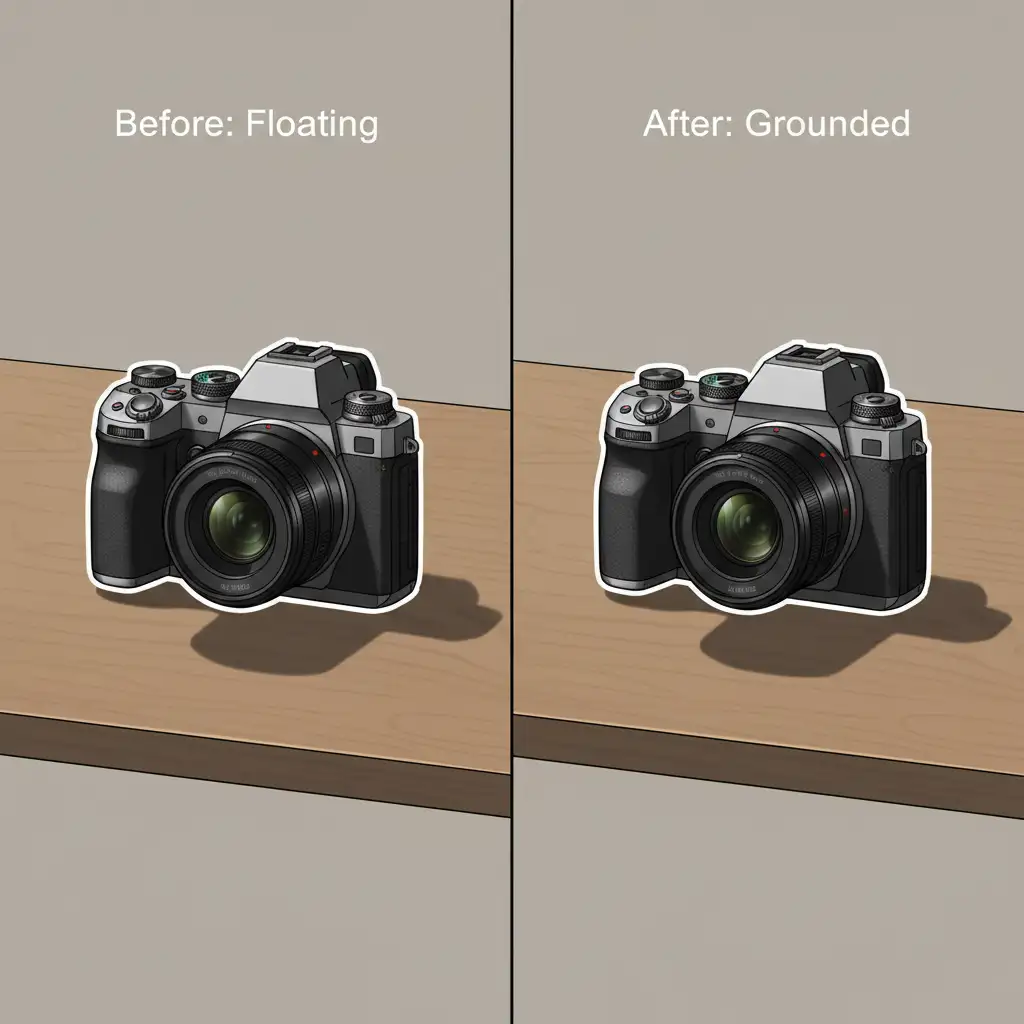
You have just generated the perfect Midjourney environment or expanded your canvas using Photoshop v25.x Generative Fill. You carefully paste your beautifully photographed product into the scene, but something is horribly wrong—it looks like it is hovering in mid-air.
This dreaded “floating product” effect instantly shatters the illusion of your composite. The culprit? A complete lack of physical grounding. Real-world objects block ambient light at their base, creating what is known as ambient occlusion. Because AI-generated backgrounds are simply flat 2D pixels, pasting a cutout over them ignores environmental light physics.
If you want magazine-quality results, mastering the art of creating realistic contact shadows for AI background replacement is non-negotiable. Here is exactly how to fix the float and achieve flawless composite realism.
Why AI Composites Fail Without Proper Shadows
When integrating real product photography into synthetic environments, the primary visual disconnect is lighting. AI backgrounds do not possess 3D depth data to automatically cast shadows over your placed objects. Therefore, achieving composite realism requires you to manually replicate three critical elements:
- Light Direction: Matching the angle of the primary light source in the AI background.
- Shadow Density: Ensuring the shadow is darkest where the object touches the floor.
- Color Temperature: Blending the shadow with the ambient environmental colors rather than using flat black.
Below are three professional methods to ground your products, ranging from a quick fix to a high-end retouching workflow.
3 Methods to Create Realistic Shadows in Photoshop
Method 1: The Quick Fix (Basic Cast Shadow)
If you are under a tight deadline and need a passable shadow quickly, this method works well for simple lighting scenarios.
- Duplicate your isolated product layer.
- Fill the duplicated layer entirely with black.
- Use the Transform tool to flip it vertically and warp it to match the light direction of your AI background.
- Apply a basic Gaussian blur to soften the hard edges.
- Lower the layer opacity to around 30-40%.
While fast, this method lacks the nuanced depth required for high-end e-commerce or advertising imagery.
Method 2: The Pro Workaround (Manual Ambient Occlusion)
To truly anchor an object, you must recreate ambient occlusion—the micro-shadow that occurs exactly where the object makes contact with the surface.
- Create a blank layer underneath your product and set it to the Multiply blend mode.
- Select a soft round brush and lower the Flow to 10%.
- Carefully paint a tight, dark line directly under the base of the product.
- Keep your brush strokes incredibly close to the object to simulate the complete blocking of ambient light.
This method instantly stops the product from floating, but it still requires a broader shadow to look entirely natural.
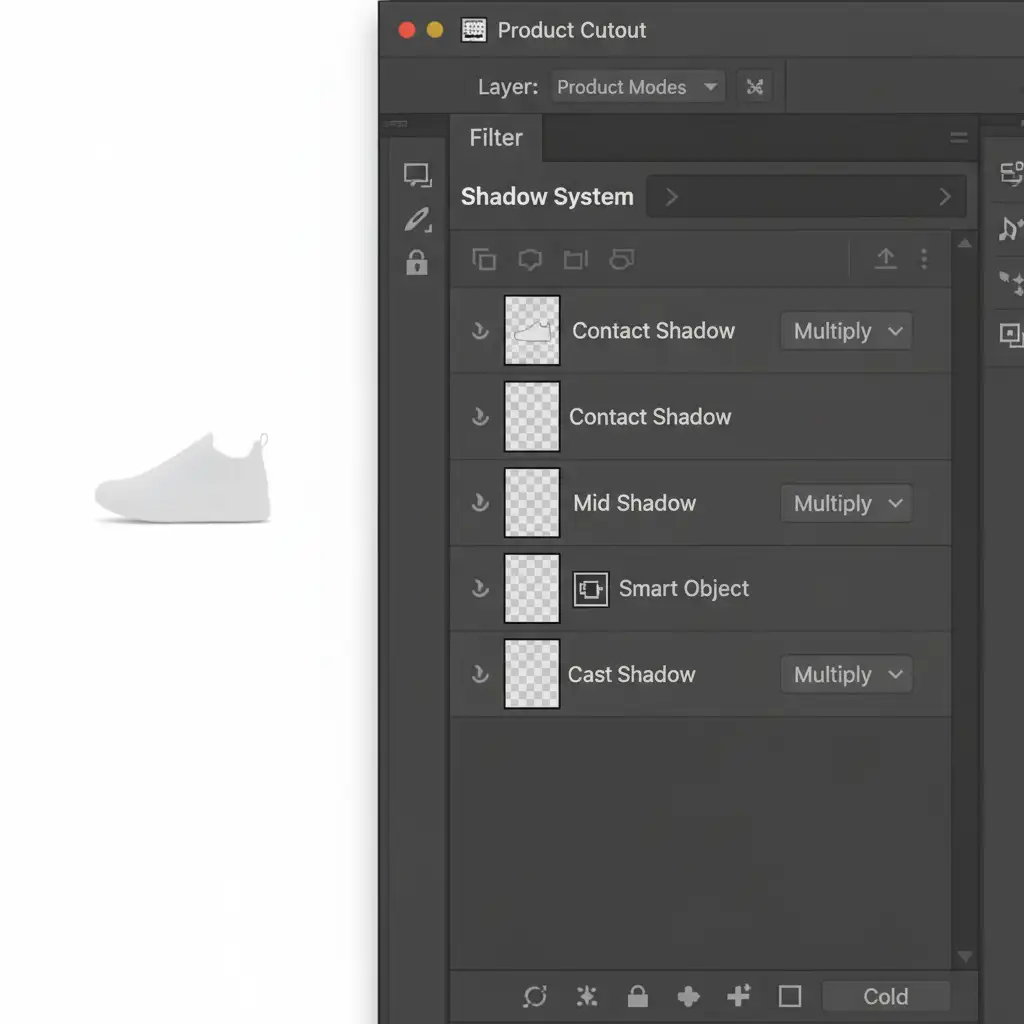
Method 3: The Technical Deep-Dive (Multi-Tier Shadow System)
For flawless composite realism, professional retouchers use a multi-layered approach. This technique builds a shadow exactly how light behaves in the real world.
Step 1: The Layer Setup
Instead of one shadow, you need three. Group them together and place them beneath your product layer.
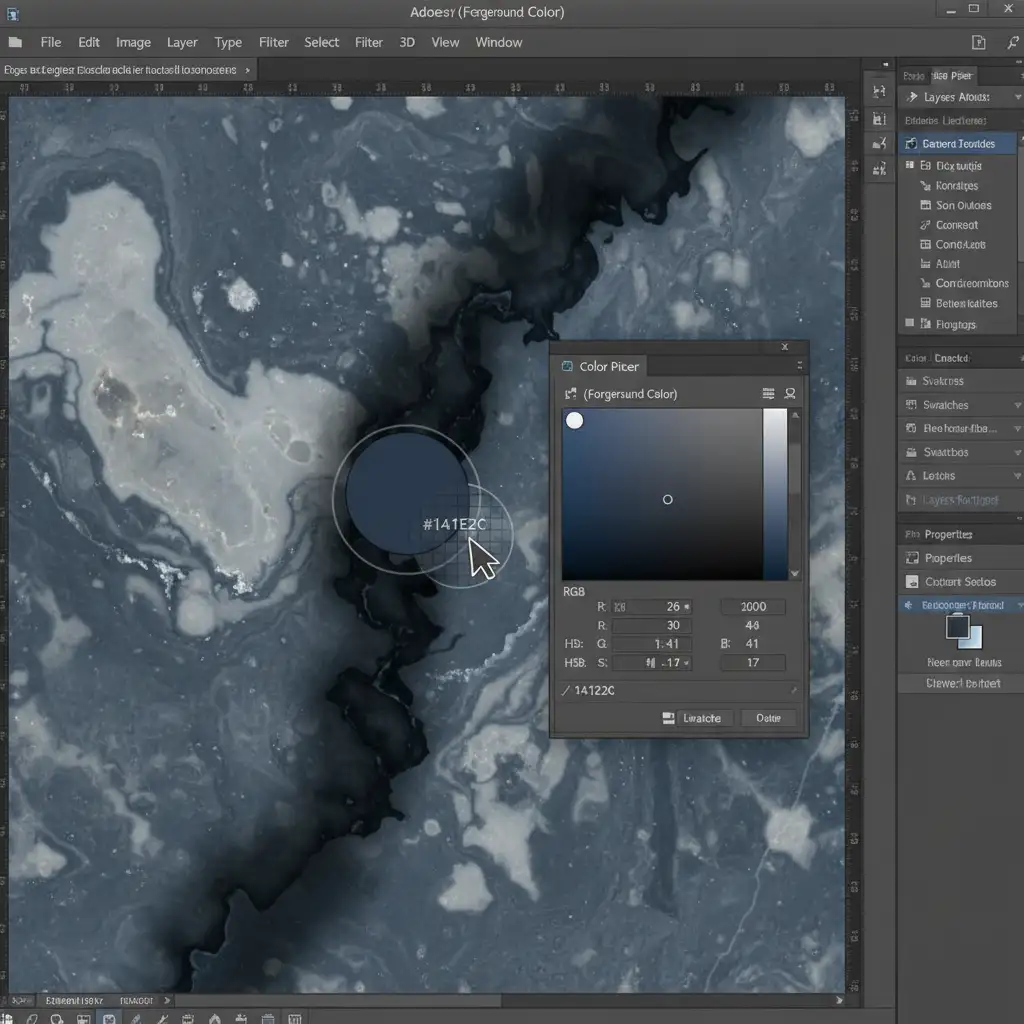
Step 2: Sample Environmental Colors
Never use pure black for shadows. Shadows take on the color of the surface they are cast upon. Select the Eyedropper tool and sample the darkest color natively present in your AI-generated background. Use this deep, rich tone to paint your shadows.
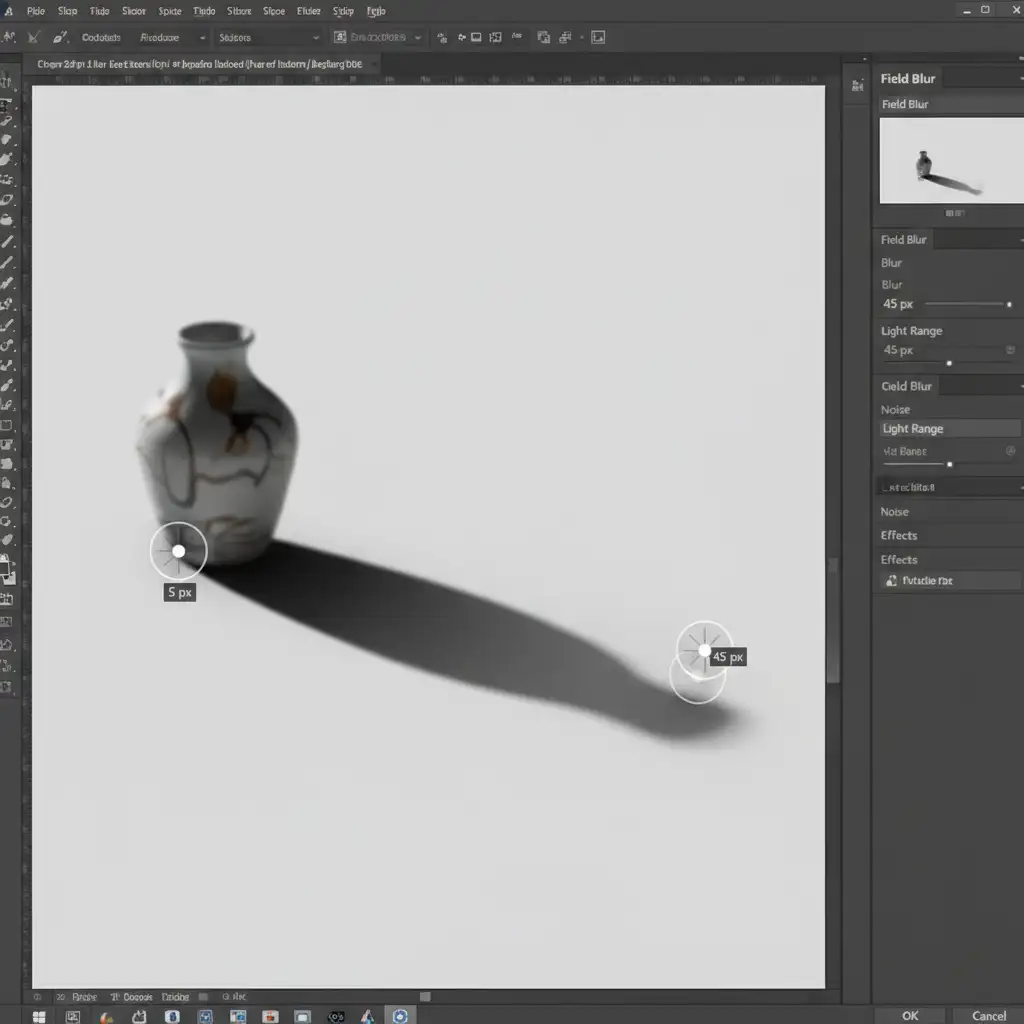
Step 3: Implement Shadow Falloff
A real cast shadow is sharper close to the object and becomes blurrier and lighter as it stretches away. To replicate this shadow falloff:
- Convert your Cast Shadow layer into a Smart Object. This allows for non-destructive editing.
- Navigate to Filter > Blur Gallery > Field Blur.
- Place one pin near the base of the product with a low blur value (e.g., 5px).
- Place a second pin at the furthest edge of the shadow with a high blur value (e.g., 45px).
Step 4: Refine with Layer Masks
Finally, apply a layer mask to the shadow group. Use a large, soft brush with low opacity to gently fade the very edges of the cast shadow, ensuring it blends seamlessly into the generative background.
Stop Struggling with Floating Products
Creating realistic contact shadows for AI background replacement is a highly technical skill. While the multi-tier shadow system will drastically improve your composites, it is incredibly time-consuming-especially when you are processing dozens or hundreds of product images for a campaign.
Want magazine-ready product composites without the tedious editing?
Outsource your image editing to Image Work India and Cloud Retouch. Our expert retouchers specialize in flawless AI integration, complex shadow creation, and high-end composite realism. We ensure your products look perfectly grounded, beautifully lit, and ready to convert.
Contact Image Work India today or try Cloud Retouch to elevate your product photography to the next level.


