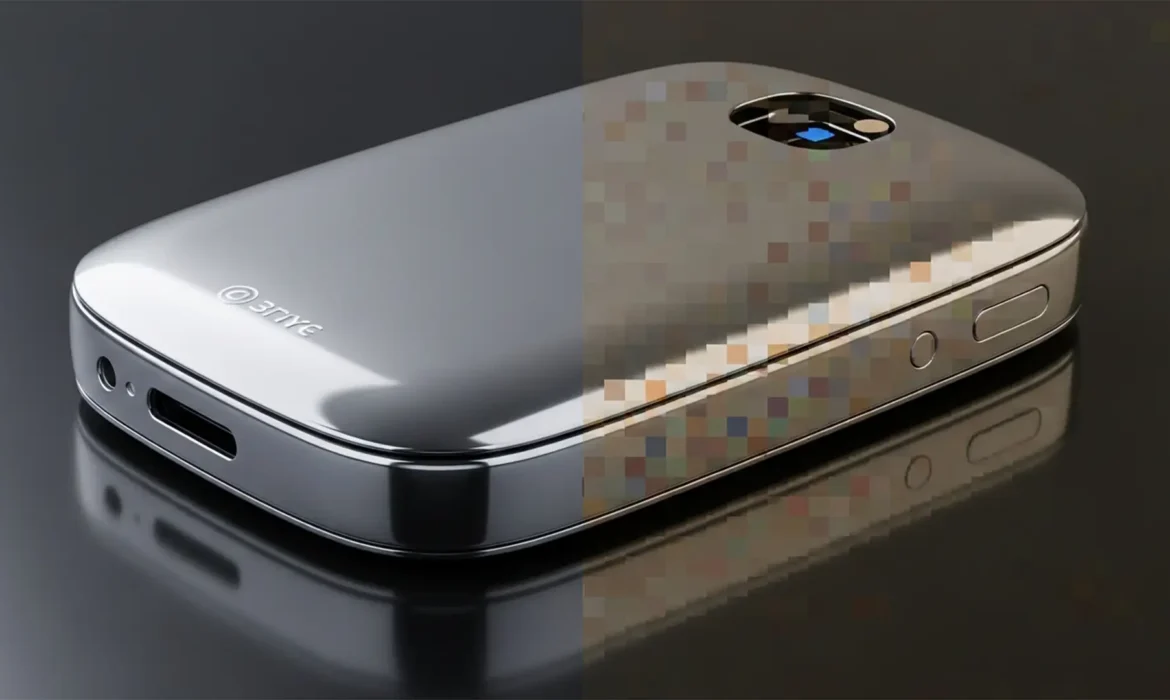
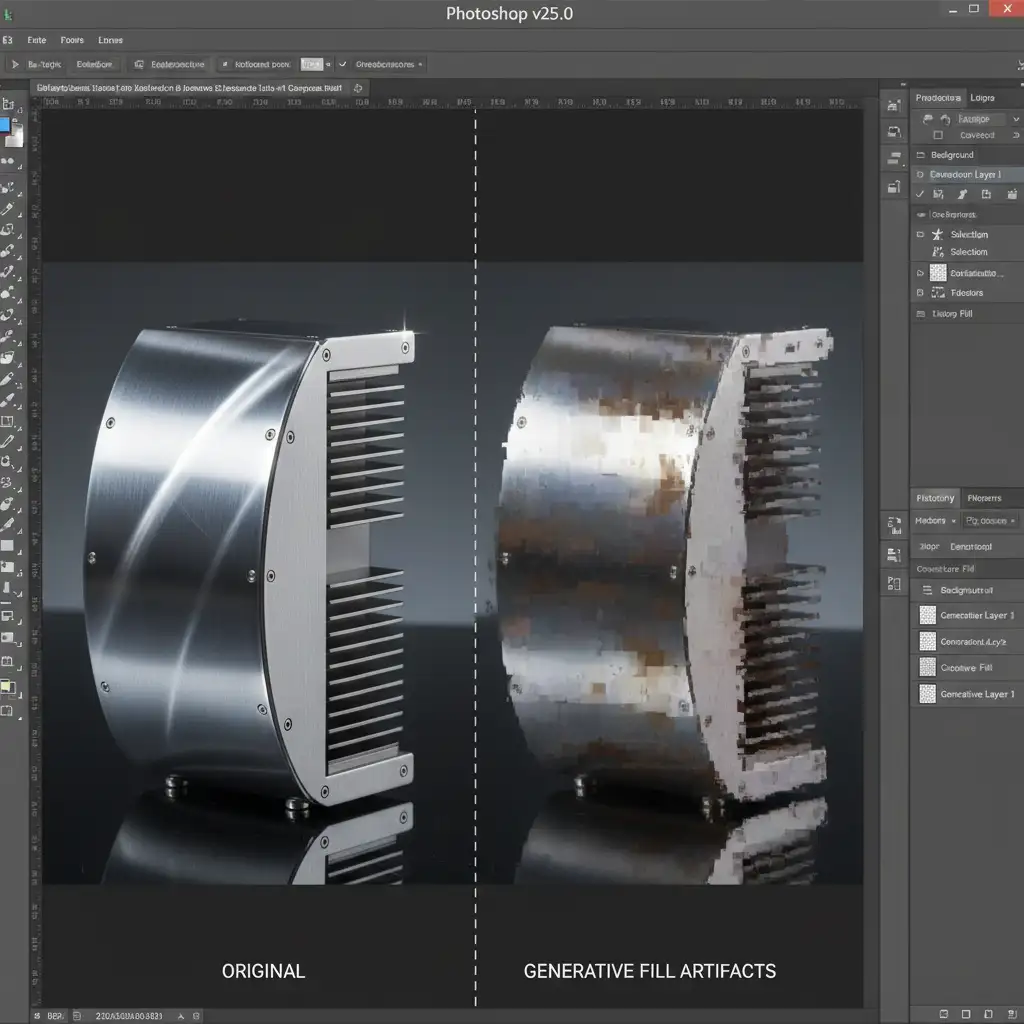
Adobe’s Generative Fill is a massive time-saver for e-commerce editors, but it has a glaring weakness: metal. If you have ever tried expanding or modifying a glossy watch, a steel thermos, or jewelry, you know the frustration. Instead of crisp, realistic reflections, the AI spits out muddy textures, aggressive color banding, and hallucinated reflections that immediately look fake.
Why does this happen? In Adobe Photoshop v25.0 and later (powered by the Firefly Image 2 Model), the AI struggles to interpret high-frequency details on reflective and metallic surfaces. It fails to calculate the mathematical precision of light bouncing off metal, specifically missing the mark on specular highlights and complex anisotropic reflections.
If you are tired of spending hours fixing generative fill artifacts on metallic products, this guide breaks down the professional workflows to override the AI’s flawed rendering and restore a photorealistic finish.
Method 1: The Quick Fix (Noise and Blur Smoothing)
When dealing with minor AI artifacting on flat metallic surfaces, you can manually rebuild the gradient and texture using basic Photoshop filters. The goal here is to kill the color banding and reintroduce the micro-texture of real metal.
Step-by-Step Workflow:
- Select the AI-Generated Layer: Target the specific Generative Fill layer causing the issue.
- Apply Gaussian Blur: Go to Filter > Blur > Gaussian Blur. Apply just enough blur to smooth out the color banding and muddy AI gradients. Do not over-blur; you want to maintain the general shape of the reflection.
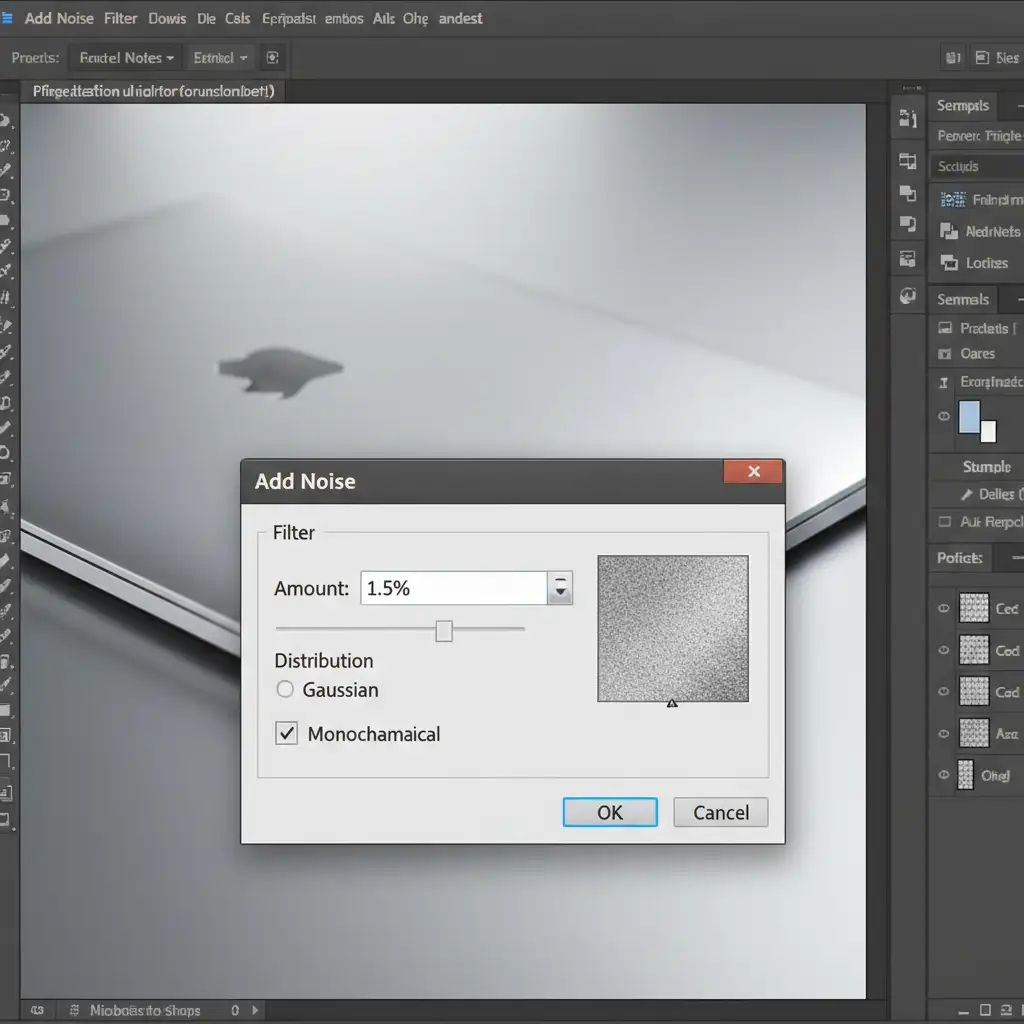
- Reintroduce Grain: Metal is never perfectly smooth. Go to Filter > Noise > Add Noise.
- Configure Noise Settings: Set the distribution to Uniform, check the Monochromatic box, and keep the amount very low (usually between 1-2%). This mimics the natural grain of a camera sensor and the micro-texture of polished metal.
Method 2: The Pro Workaround (Frequency Separation)
For high-end product photography, a simple blur won’t cut it. To fix severe artifacts without destroying the underlying lighting, you need to separate the image’s texture from its color and tone. Frequency separation is the industry standard for this.
Step-by-Step Workflow:
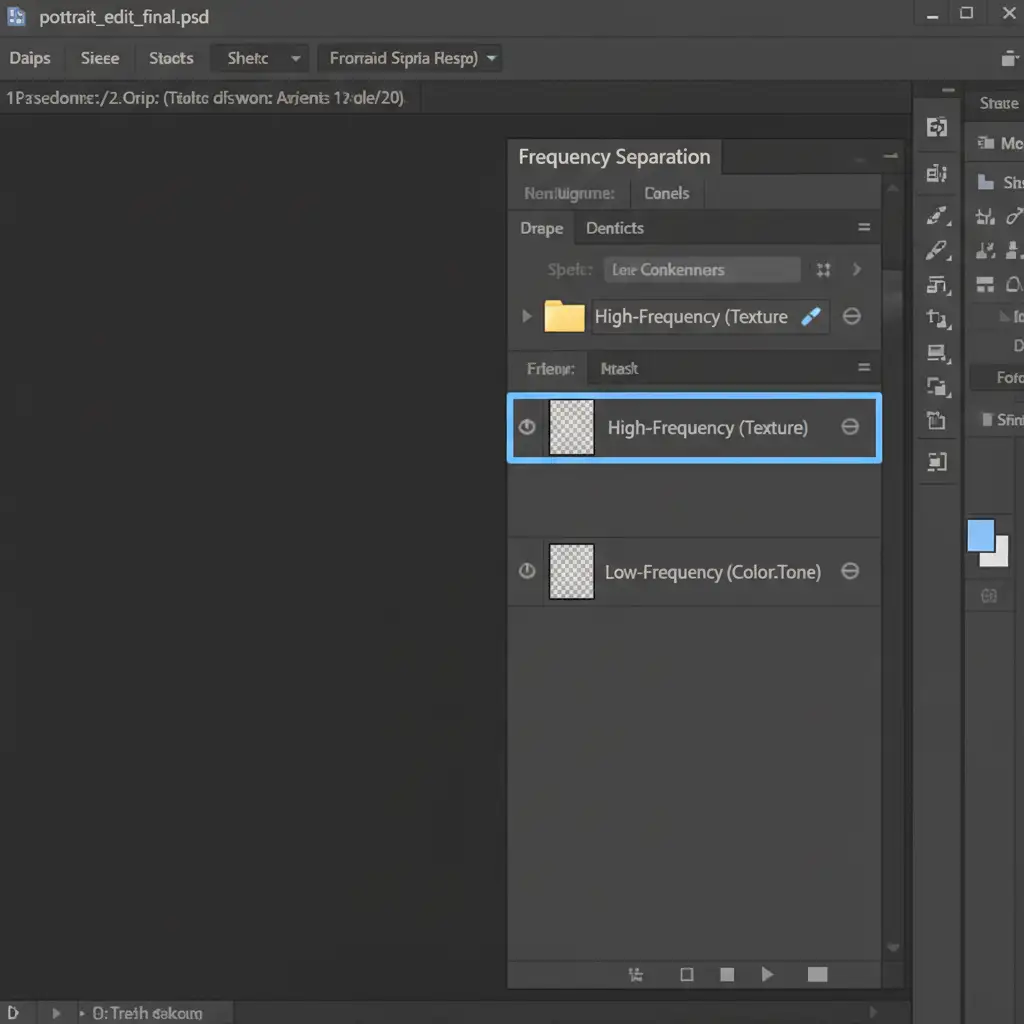
- Merge and Run Action: Create a stamped visible layer (Ctrl/Cmd + Shift + Alt + E) of your AI result. Run your standard Frequency Separation action to split the image into a Low-Frequency (Color/Tone) layer and a High-Frequency (Texture) layer.
- Smooth the Tone: Select the Low-Frequency layer. Use the Mixer Brush tool with a clean, moist brush setting to gently smooth out the AI’s muddy gradients and color banding.
- Restore the Texture: Select the High-Frequency layer. Use the Clone Stamp tool to sample clean, razor-sharp metal grain from unaffected areas of the original product photo, stamping it directly over the soft AI artifacts.
Method 3: The Technical Deep-Dive (Blend If and Specular Protection)
The biggest giveaway of an AI-generated reflection is the loss of pure, blown-out specular highlights. Generative Fill tends to render these bright spots as dull, gray blobs. To fix this, we use Photoshop’s ‘Blend If’ feature to force the mathematically perfect highlights from the original raw photo to punch through the AI layer.
Step-by-Step Workflow:
- Open Layer Style: Double-click the Generative Fill layer (outside the layer name) to open the Layer Style dialog box.
- Navigate to Blend If: Look at the bottom of the dialog box for the ‘Blend If’ section. Ensure the dropdown is set to ‘Gray’.
- Split the Underlying Layer Slider: Look at the ‘Underlying Layer’ gradient bar. Hold Alt (or Option on Mac) and click the white slider on the far right. This splits the node in half.
- Protect the Highlights: Drag the left half of the split white slider towards the left. As you drag, you will see the bright, crisp specular highlights from the original base photo underneath start to punch through the muddy AI layer.
- Refine with a Layer Mask: Add a layer mask to the AI layer. Invert it to black, and use a soft white brush to paint the Generative Fill in only where it is strictly necessary, leaving the original metal intact everywhere else.

Stop Letting AI Ruin Your High-End Product Shots
Generative Fill is an incredible tool for ideation and background expansion, but when it comes to the precise geometry and light physics of metallic products, it still falls short. Fixing generative fill artifacts on metallic products requires a deep understanding of frequency separation, noise application, and advanced masking techniques.
If your e-commerce catalog is suffering from muddy AI artifacts, don’t let it cheapen your brand.
Outsource your complex edits to Image Work India and Cloud Retouch. Our expert retouchers specialize in flawless, high-end metallic product retouching. We combine the speed of AI with the precision of manual, pixel-perfect editing to guarantee your products look expensive, realistic, and ready to drive sales.
Contact Image Work India today to elevate your product photography.


