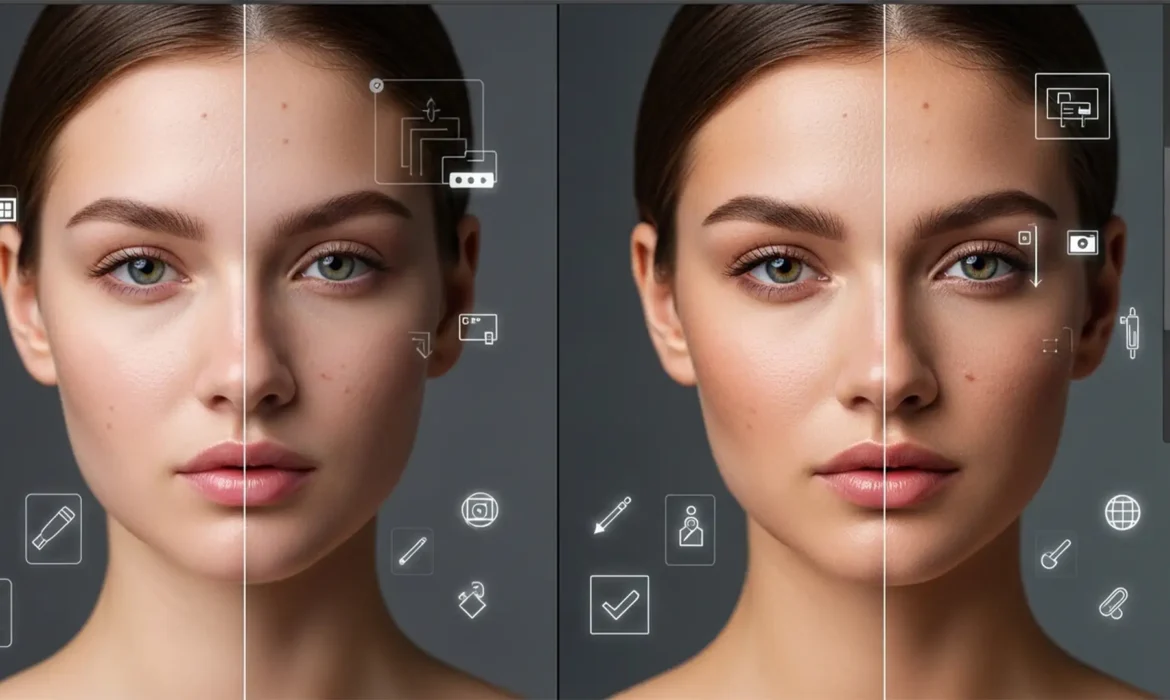
You’ve just used Photoshop’s latest Generative Fill or Skin Smoothing Neural Filter to clean up a portrait. The blemishes are gone, but there’s a massive problem: your subject now looks like a plastic mannequin.
In recent versions of Photoshop (v25.0+ and v26.x), AI models prioritize removing imperfections but fail to reconstruct the high-frequency micro-texture—like pores and fine lines. This creates a jarring disconnect between untouched areas and AI-generated patches.
If you want professional, high-end portrait results, you cannot rely on AI alone. You must intercept the AI output and blend it with original texture maps. Here is the definitive guide to Photoshop AI skin texture recovery.
Why Photoshop AI Destroys Skin Texture
Tools like Generative Fill and Neural Filters operate primarily on color and tone. When asked to remove a blemish or smooth a surface, the AI averages out the pixels. While this successfully eliminates the distraction, it also obliterates the micro-contrast that gives skin its realistic, human appearance.
To achieve a flawless but natural look, professional retouchers use a non-destructive workflow to separate the AI’s tonal corrections from the image’s original high-frequency details.
Here are three methods to recover real pores after AI retouching, ranging from a quick fix to a high-end commercial workflow.
Method 1: The Quick Fix (Opacity Blending)
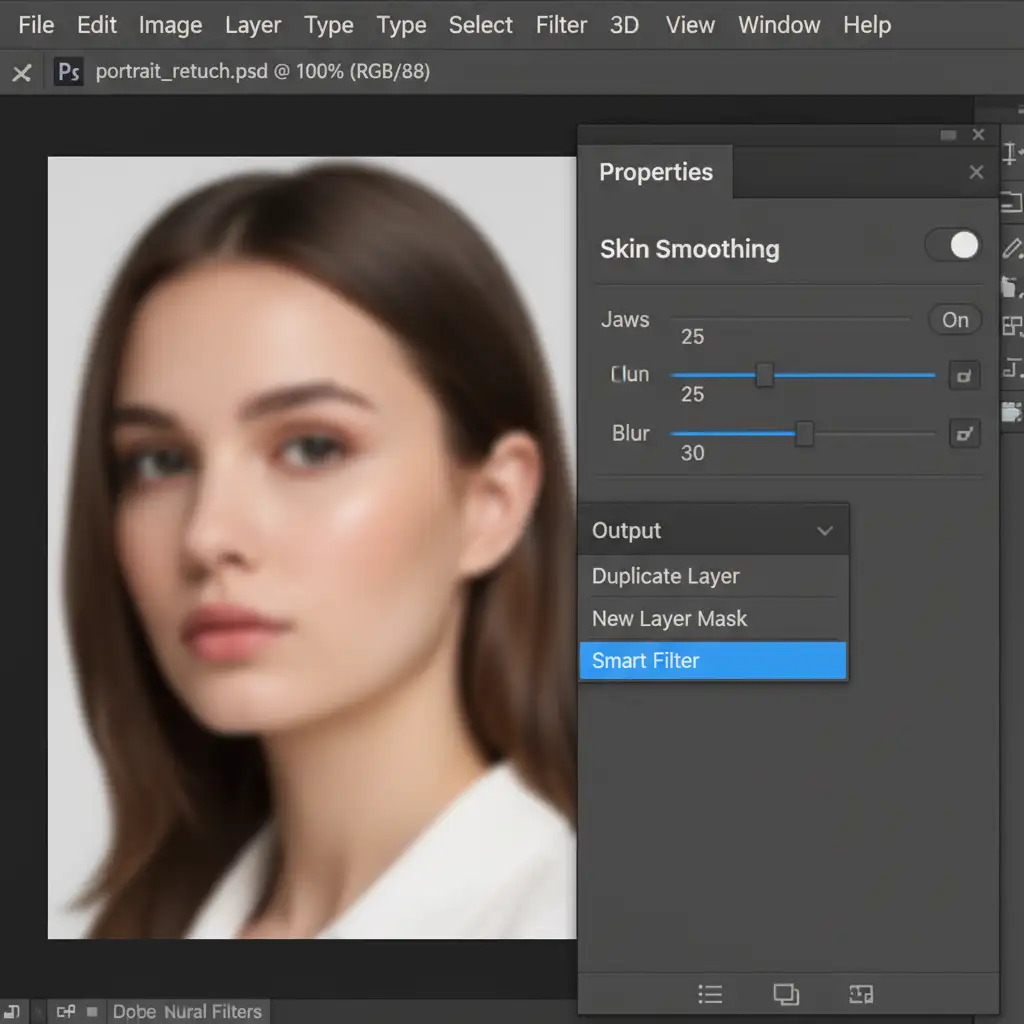
If you are using the Skin Smoothing Neural Filter and need a rapid turnaround, the easiest way to prevent the “plastic” look is to control the filter’s output and blend it with your original image.
Step-by-Step Workflow:
- Open your image and navigate to Filter > Neural Filters.
- Toggle on Skin Smoothing and adjust the Blur and Smoothness sliders to your liking.
- Crucial Step: Before hitting OK, look at the bottom right of the panel. Change the Output setting to New Layer.
- Back in your main workspace, select the newly created smoothed layer.
- Drop the Opacity to 40-60%. This allows the original pores from the background layer to show through the AI smoothing, restoring a natural appearance.
Method 2: The Pro Workaround (High Pass Texture Recovery)
When using Generative Fill to remove larger elements (like stray hairs across the face or large blemishes), Opacity blending won’t work because the underlying pixels are flawed. Instead, you need to extract the good texture from the original image and map it over the AI-generated patch.
Step-by-Step Workflow:
- Make your AI edits using Generative Fill or the Remove Tool on a new layer.
- Duplicate your original Background layer and drag it to the very top of your layer stack. Name it “Texture Recovery.”
- With the Texture Recovery layer selected, go to Filter > Other > High Pass.
- Set the Radius to 1.5px – 2.5px. You only want to see the fine outlines of the pores, not the color or lighting. Click OK.
- Change the blend mode of this layer to Linear Light.
- Hold Alt (Windows) or Option (Mac) and click between the “Texture Recovery” layer and your “Generative Fill” layer to create a Clipping Mask. This ensures the texture is only applied to the areas the AI altered.
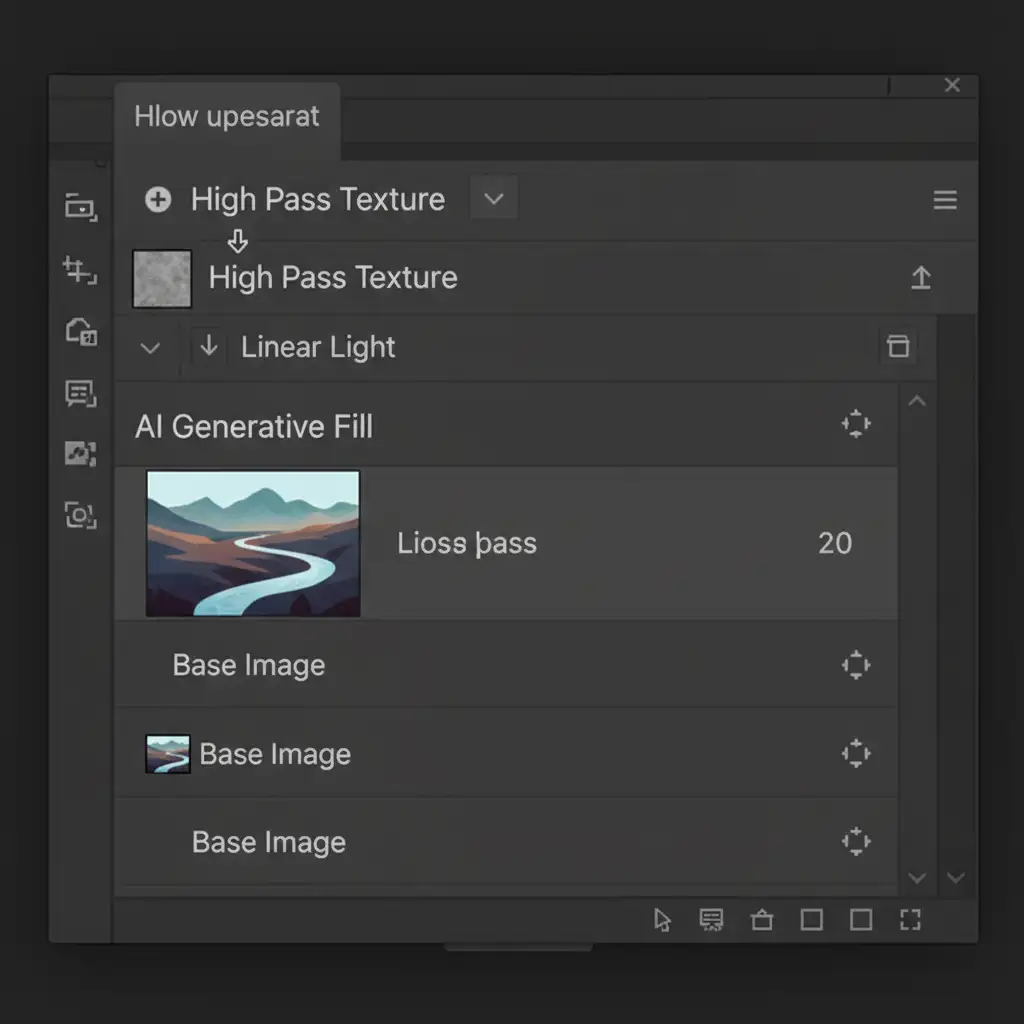
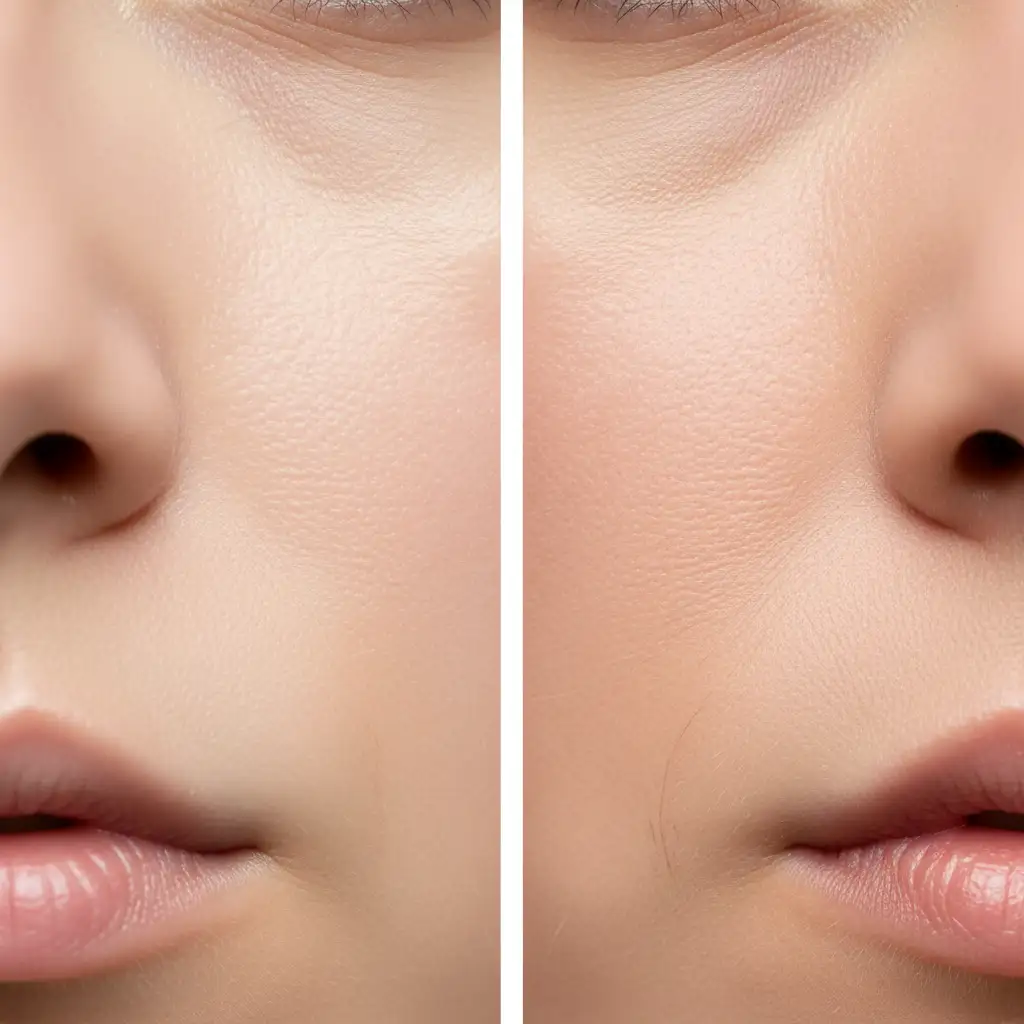
By utilizing the High Pass Filter and a Linear Light blend mode, you effectively force the original skin texture mapping back onto the completely smooth AI-generated pixels.
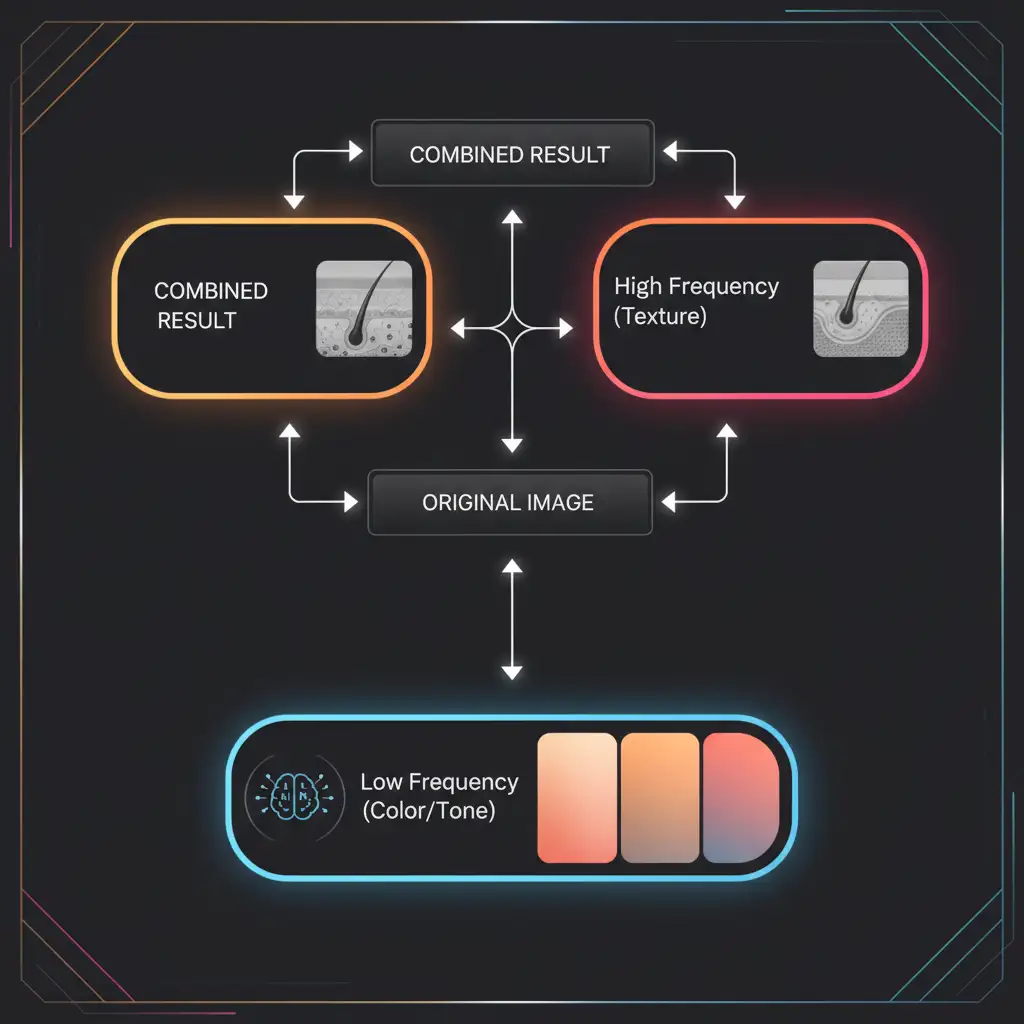
Method 3: The Technical Deep-Dive (Frequency Separation Integration)
For high-end fashion and beauty retouching, the ultimate solution is integrating AI tools directly into a Frequency Separation workflow. This completely isolates texture from tone before the AI ever touches the image.
Step-by-Step Workflow:
- Run your standard Frequency Separation action to split the image into a Low Frequency (Color/Tone) layer and a High Frequency (Texture) layer.
- Select the Low Frequency layer.
- Use the Lasso tool to select a blemished area.
- Apply Generative Fill (leaving the prompt blank) or use the Healing Brush.
- Because the High Frequency layer sits above your edits and remains untouched, the AI only alters the underlying color and shadow. The original micro-contrast and pore structure remain 100% intact over the newly generated tonal patch.
Stop Fighting AI—Let the Experts Handle It
Mastering Photoshop AI skin texture recovery requires a deep understanding of blend modes, micro-contrast, and non-destructive layer management. While these techniques are highly effective, they add significant time to your post-production workflow—especially when editing large batches of portraits, wedding photos, or commercial campaigns.
Struggling to balance flawless skin with realistic texture? Outsource your high-end portrait editing to Image Work India and Cloud Retouch.
Our team of expert retouchers specializes in pixel-perfect, natural results. We utilize advanced Frequency Separation and custom texture mapping to ensure your subjects look beautifully polished—never plastic. Focus on growing your photography business and let us handle the pixels. Contact Image Work India today to start your free trial and experience the difference of truly professional retouching.


