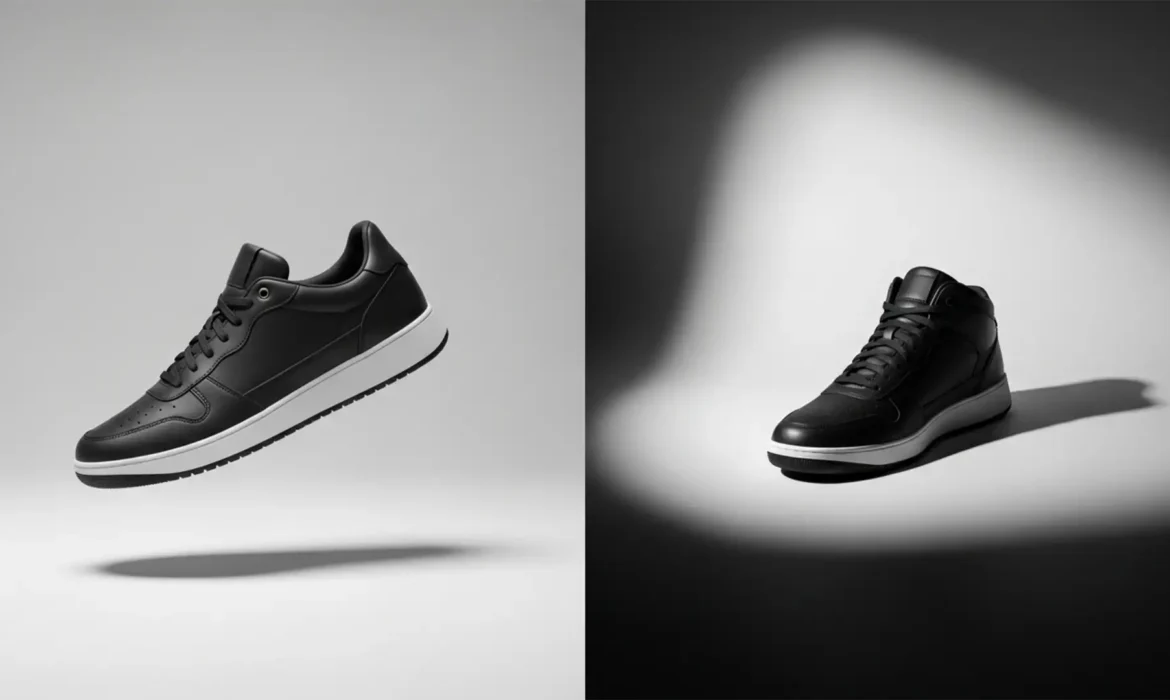
You just generated the perfect AI background for your e-commerce product using Photoshop’s Generative Fill. But there is a glaring issue ruining the shot: the product looks like a cheap sticker pasted onto the canvas. It is completely disconnected from the environment.
This “floating product illusion” destroys e-commerce conversion rates. The culprit? AI tools currently struggle with physically accurate, directional light. Achieving consistent shadow matching for AI composites requires more than just typing “add shadow” into a text box. To achieve seamless composite integration, you must master a hybrid workflow that combines AI base generation with manual perspective correction, realistic light falloff, and targeted contact shadows.
Here is the definitive guide to anchoring your products and fixing mismatched AI shadows in Adobe Photoshop v25.x and above.
Why AI Fails at E-commerce Shadows
Despite the power of Photoshop’s Generative Fill, AI models do not inherently understand the Inverse-Square Law of light or the 3D geometry of your specific product. When you ask AI to generate a shadow, it often guesses the light angle, resulting in:
- Mismatched light angles between the product and the generated background.
- Incorrect shadow opacity (usually too dense or entirely washed out).
- Missing contact shadows (the darkest point where the object physically touches the surface).
To fix this, professional retouchers use a hybrid approach. We leverage AI for the heavy lifting of texture and base shadows, then apply manual layer adjustments to dial in the physics.
The Hybrid Workflow: 3 Methods to Anchor Your Products
Depending on your time constraints and the complexity of the product, there are three proven methods for consistent shadow matching for AI composites.
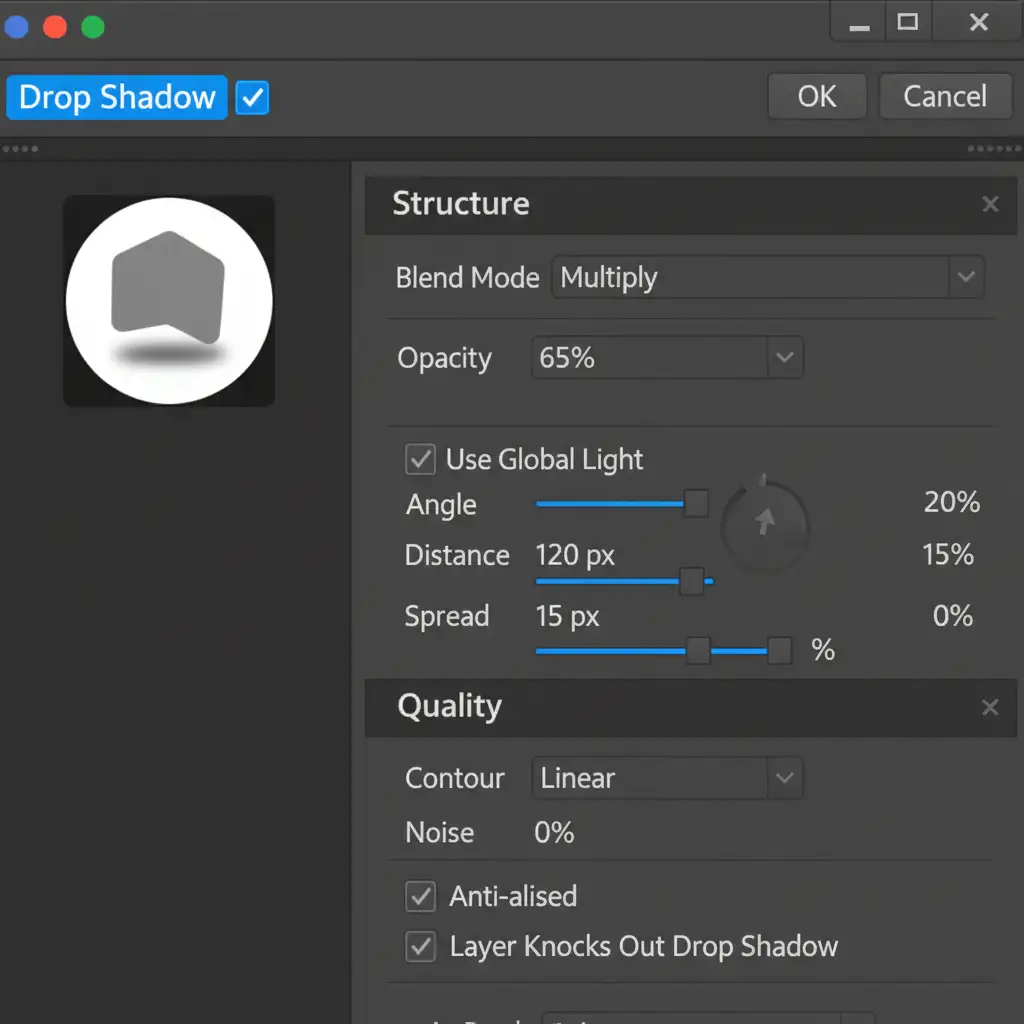
Method 1: The Quick Fix (Drop Shadow & Warp)
When you need a fast, directional shadow for a simple e-commerce catalog, manipulating the classic Drop Shadow layer style is incredibly effective.
- Select your isolated product layer.
- Open the Layer Style dialog and select Drop Shadow.
- Adjust the angle to precisely match the primary light source of your AI-generated background. Keep the opacity relatively high (around 60-70%) and the distance short.
- Right-click the Drop Shadow effect in the Layers panel and select Create Layer. This detaches the shadow from the layer style, turning it into editable pixels.
- Select the newly created shadow layer, press Ctrl/Cmd + T to transform, and use the Distort or Warp tools to pull the shadow flat onto the ‘floor’ of your background.
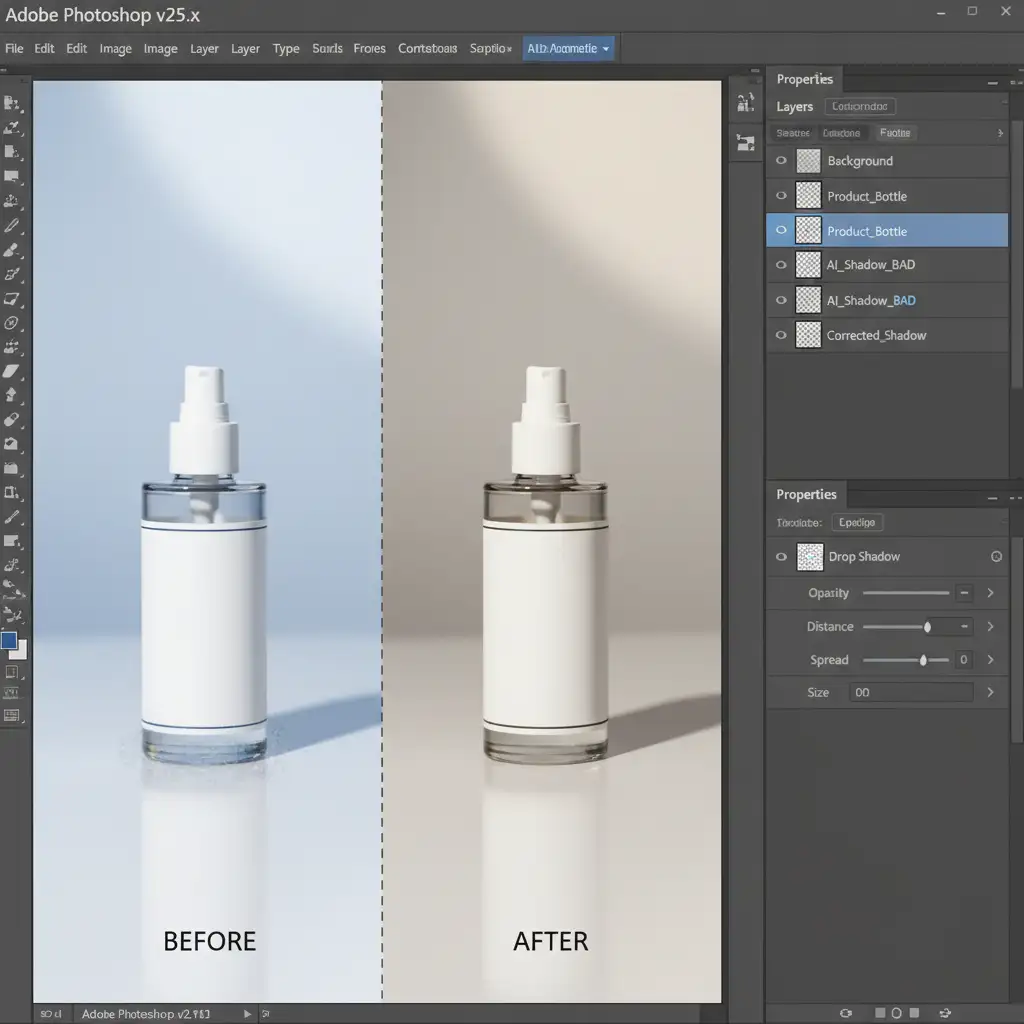
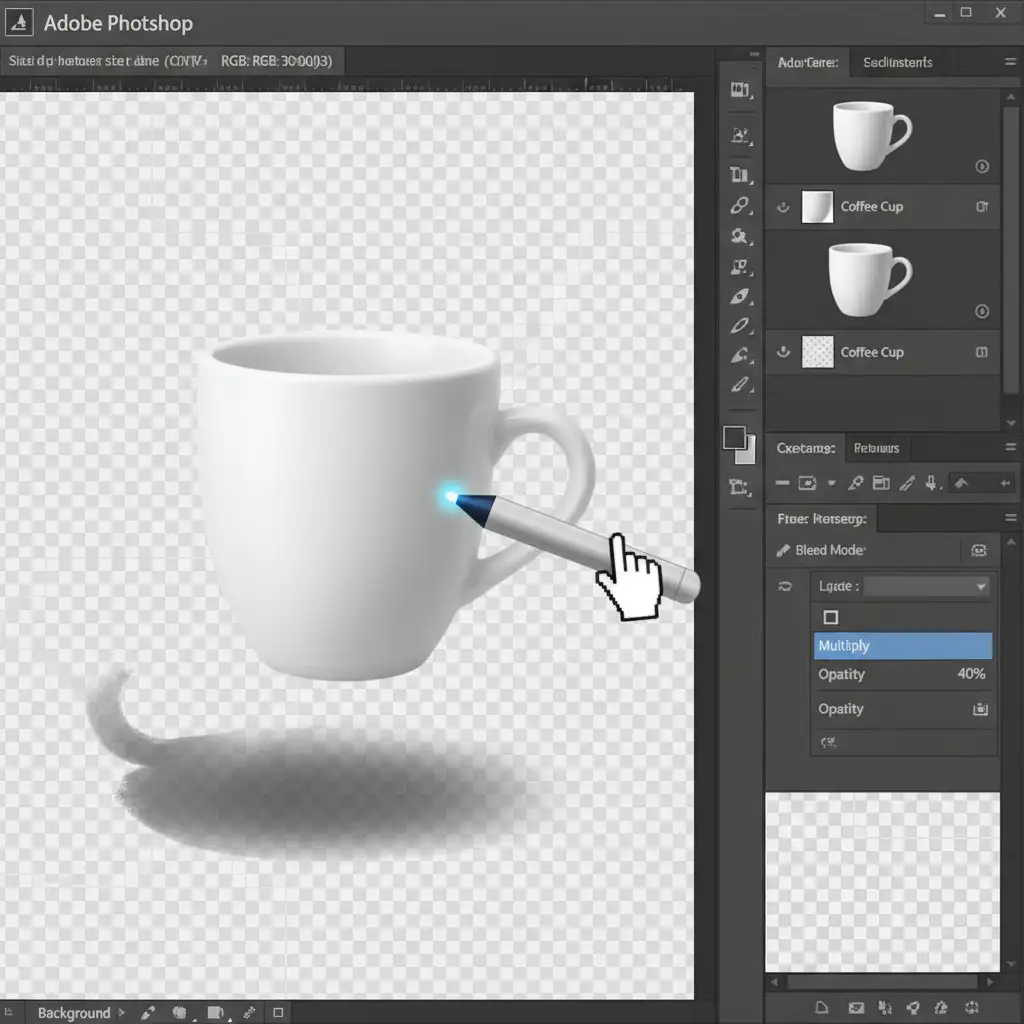
Method 2: The Pro Workaround (Generative Fill + Contact Shadow)
This method utilizes Generative Fill to create a realistic base, but manually fixes the missing occlusion shadows that AI almost always ignores.
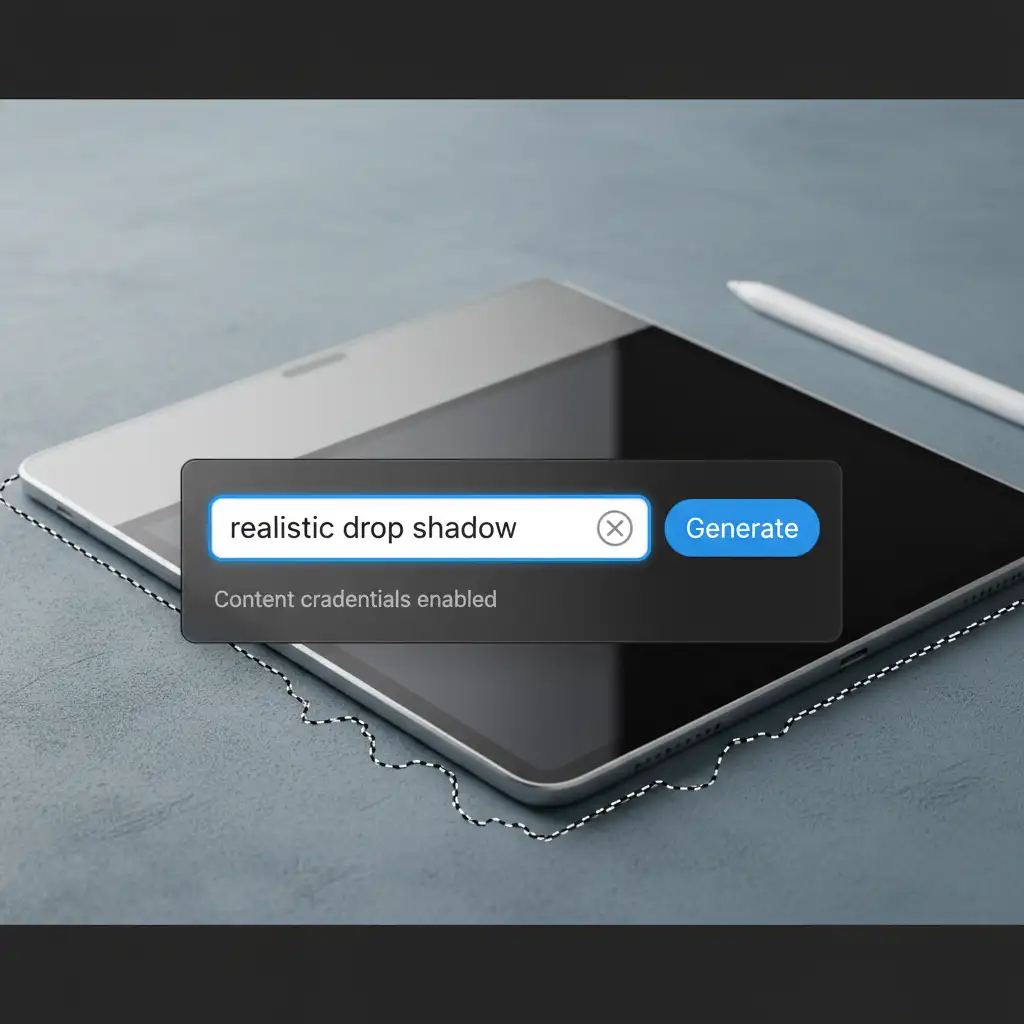
- Make a loose selection using the Lasso Tool at the very base of your product, slightly overlapping the floor area.
- In the Generative Fill prompt box, type: realistic drop shadow. Hit generate.
- Choose the variation that best matches the direction of your background light.
- The Crucial Step: Create a new blank layer above the AI shadow but below the product layer. Change the blend mode to Multiply Blend Mode.
- Select a soft round brush, set the color to pure black, and lower the brush opacity to 30%.
- Carefully paint a tight, dark line directly underneath the product where it touches the surface. This Contact Shadow immediately grounds the object, eliminating the floating effect.
Method 3: The Technical Deep-Dive (3D Shadow Mapping)
For highly complex composites where the light source is harsh and directional, you must build a shadow map from scratch. This ensures perfect geometric accuracy.
- Duplicate your product layer (Ctrl/Cmd + J).
- Apply a black Color Overlay to the duplicated layer and rasterize it.
- Flip the black shape vertically (Edit > Transform > Flip Vertical) and move it below the product layer.
- Use Perspective Warp to lay the shadow flat against the ground plane, matching the angle of the light.
- Real shadows fade as they stretch further from the object. To simulate Light Falloff, apply a Gradient Mask to the shadow layer. Drag the gradient from the base of the product (white) to the tip of the shadow (black) so it gently fades out.
- Real shadows also blur as they stretch. Apply a Gaussian Blur. To make it physically accurate, convert the shadow to a Smart Object, apply the blur, and use the Smart Filter mask to ensure the blur radius increases the further it gets from the object.
Scale Your E-commerce Imagery with Image Work India
Mastering consistent shadow matching for AI composites requires a deep understanding of lighting physics, perspective, and advanced Photoshop techniques. While this hybrid workflow guarantees flawless results, executing it across hundreds or thousands of product SKUs is incredibly time-consuming.
You don’t have to do it alone.
If you need pixel-perfect e-commerce composites without the guesswork, Image Work India and Cloud Retouch are your dedicated post-production partners. Our team of expert retouchers specializes in high-volume image editing, flawless composite integration, and advanced AI shadow correction. We ensure every product looks perfectly anchored, professional, and ready to convert.
Stop losing sales to floating products. Contact Image Work India today to scale your e-commerce imagery with unmatched precision.


