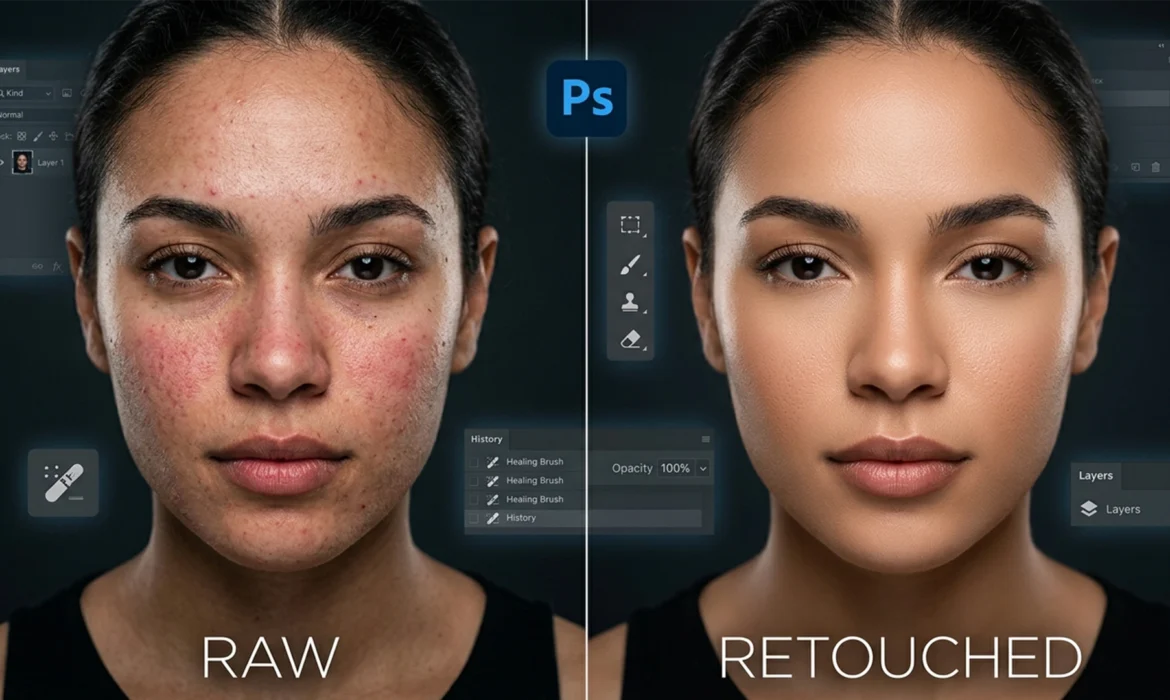
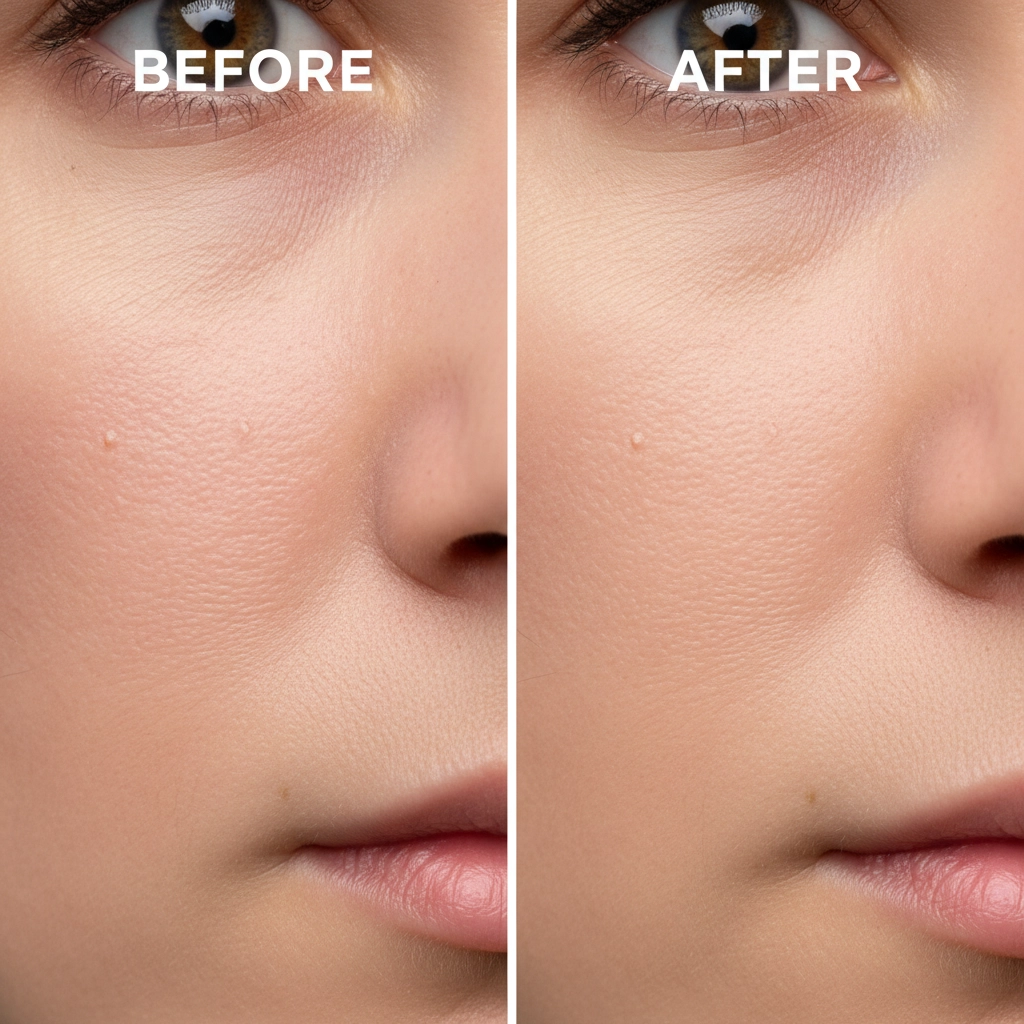
If you are a professional retoucher, you already know the frustration: traditional Frequency Separation takes too long and, if you misjudge your blur radius, leaves your subject with plastic, mannequin-like skin. You spend hours trying to preserve micro-contrast and edge details, only to end up with flattened tonal transitions.
There is a faster, highly targeted alternative hiding in plain sight within Adobe Photoshop CC (v24.x and v25.x+). Traditionally reserved for restoring old, damaged photographs, the dust and scratches skin retouching workflow is the industry’s best-kept secret for evening out skin tones and eliminating micro-blemishes while perfectly preserving natural pore structure.
Here is how to execute this high-end technique to achieve flawless skin texture retention without the destructive side effects of Gaussian Blur.
Why the Dust and Scratches Filter Outperforms Gaussian Blur
In a standard Frequency Separation workflow, the Gaussian Blur filter is applied to the low-frequency layer to smooth out color and tone. The problem? Gaussian Blur is indiscriminate. It blurs everything—including the critical edge details of the face, leading to color bleeding and a loss of volume.
The Dust and Scratches filter operates differently. By utilizing a specific Radius and Threshold, it seeks out high-contrast micro-blemishes (like stray hairs, pores, and localized discoloration) and smooths them without destroying the underlying edge transitions. This makes it the ultimate tool for non-destructive editing in beauty and fashion photography.
Step-by-Step: The Dust and Scratches Skin Retouching Workflow
Depending on your deadline and the required level of polish, there are three ways to integrate this technique into your Photoshop CC workflow.
Method 1: The Quick Fix (For Fast Turnarounds)
When you need to clean up skin rapidly without building a full frequency separation stack, this Smart Object method is your go-to.
- Duplicate your background layer (Ctrl/Cmd + J).
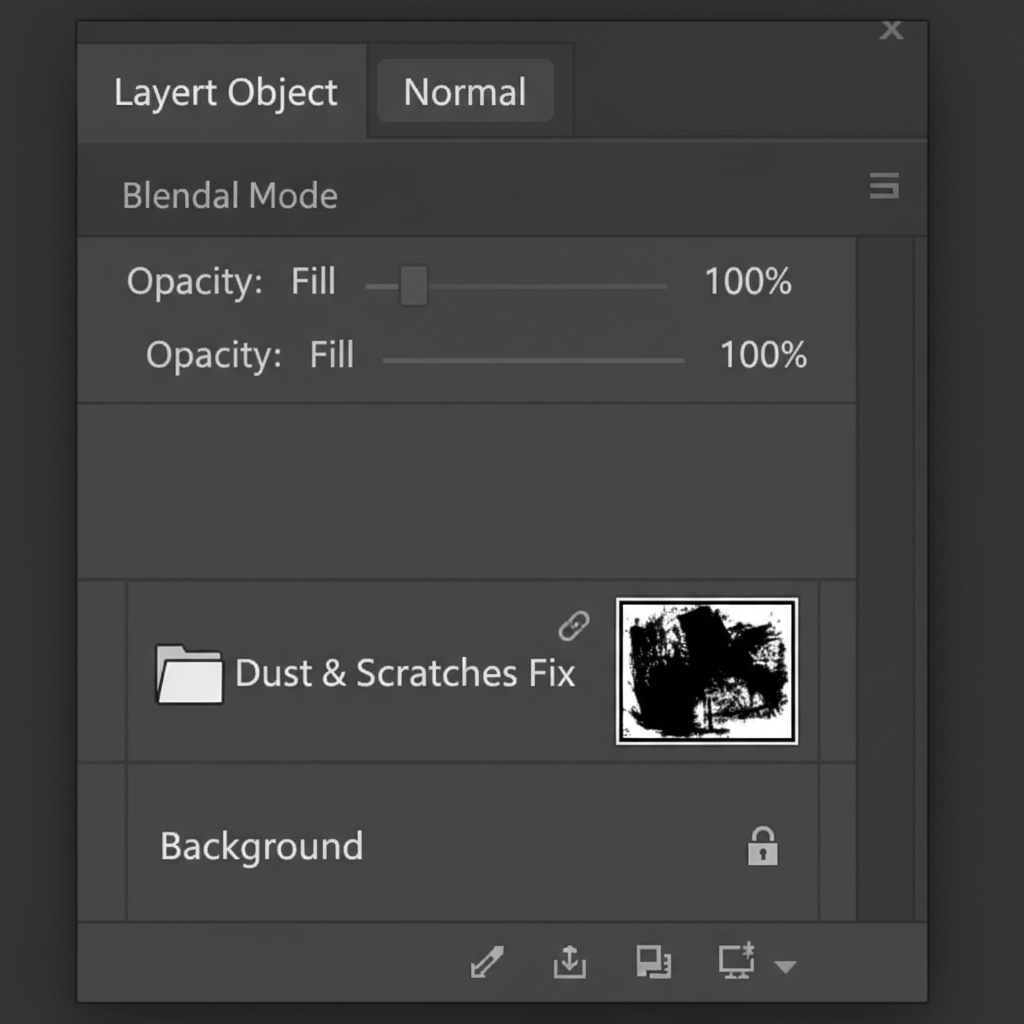
- Right-click the duplicated layer and select Convert to Smart Object. This ensures your edits remain completely non-destructive.
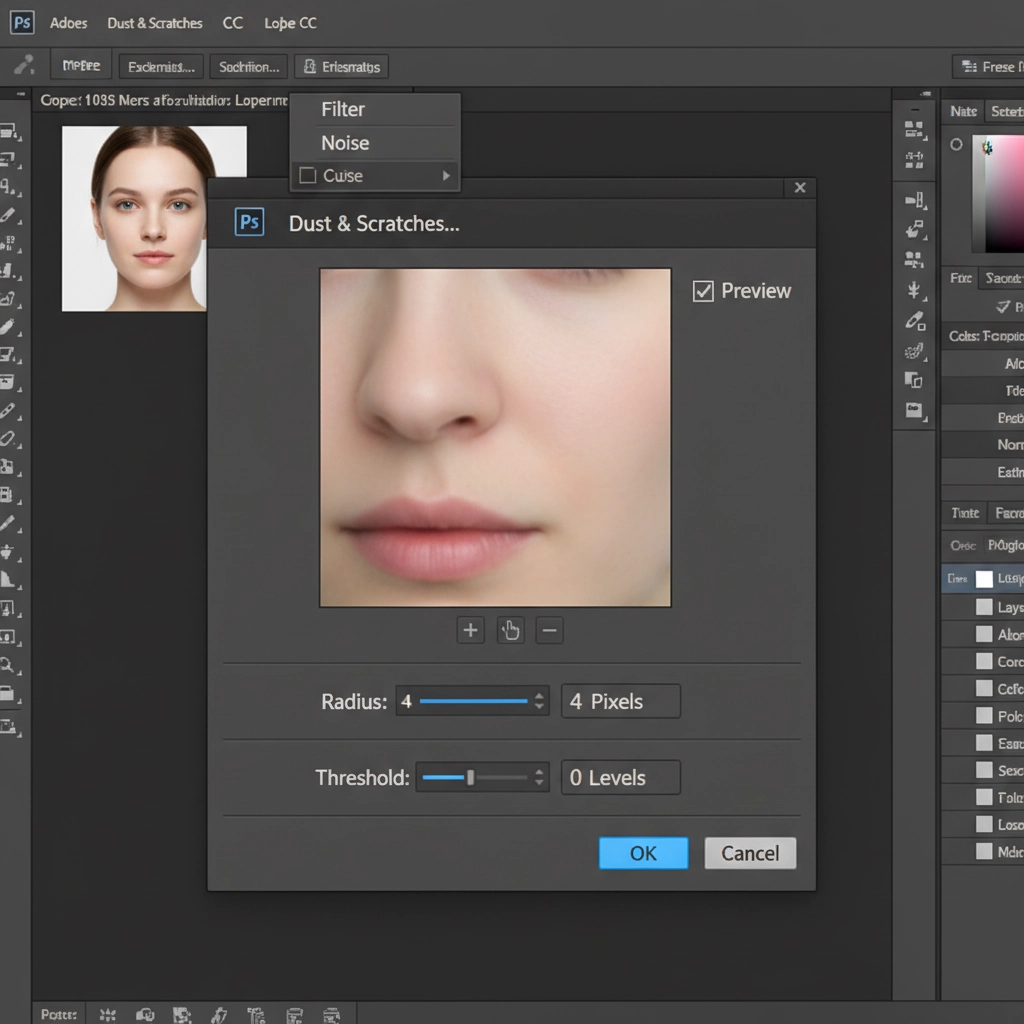
- Navigate to Filter > Noise > Dust & Scratches.
- Set your Radius to 3-5px (depending on image resolution) and your Threshold to 0. Click OK.
- Hold Alt/Option and click the Layer Mask icon to create an inverted (black) layer mask.
- Select a soft brush, set your foreground color to white, and gently paint over the blemishes and uneven skin tones.
Method 2: The Pro Workaround (Advanced Split-Frequency)
For high-end editorial work, you can substitute Gaussian Blur with Dust and Scratches inside your standard split-frequency setup. This prevents the “muddy” look often associated with low-frequency tonal layers.
- Create your standard two empty layers for Frequency Separation (Low Frequency for tone, High Frequency for texture).
- Select the Low Frequency layer. Instead of Gaussian Blur, apply the Dust & Scratches filter. Increase the radius until the blemishes disappear, then slightly raise the threshold (usually between 1-3) to bring back the structural edges of the face.
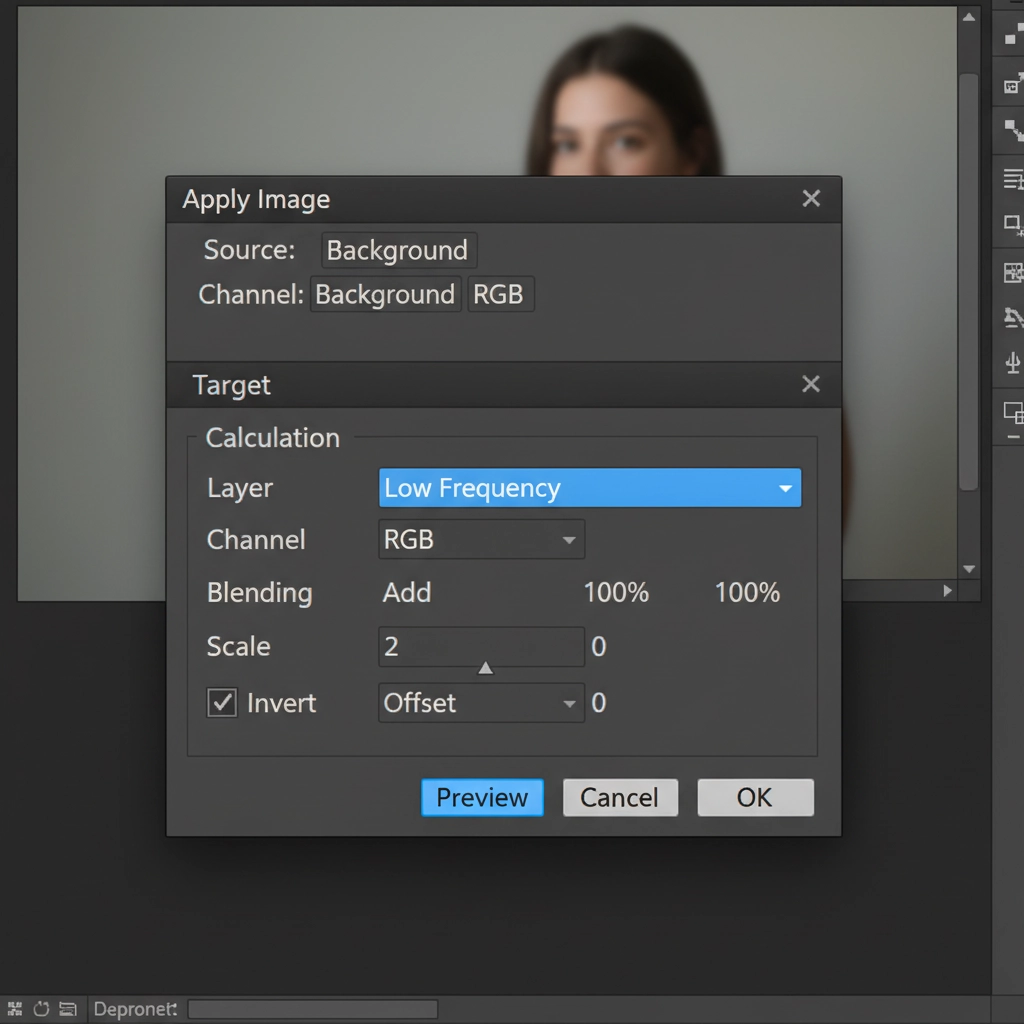
- Select your High Frequency layer and open the Apply Image dialogue box.
- Set the Layer to your Low Frequency layer. If working in 16-bit, set Blending to Add, Scale to 2, Offset to 0, and check the Invert box. (For 8-bit: Blending to Subtract, Scale to 2, Offset 128).
- Change the High Frequency layer’s blend mode to Linear Light.
Method 3: The Technical Deep-Dive (Inverted High Pass Integration)
For the absolute highest level of skin texture retention, combine Dust and Scratches with an inverted High Pass filter.
- Create a merged copy of your visible layers (Ctrl/Cmd + Shift + Alt/Option + E).
- Group the layer and set the Group blending mode to Normal.
- Apply a High Pass filter to the layer (Filter > Other > High Pass) with a radius that captures the pores (usually 6-9px).
- Invert the layer (Ctrl/Cmd + I).
- Now, apply the Dust & Scratches filter to this same layer to isolate specific frequency ranges, smoothing the tones while leaving the micro-contrast intact.
- Pro Tip: To seamlessly blend the reconstructed skin into the native digital grain of the photograph, add 1-2 percent monochromatic Add Noise to this layer.
Upgrading Your Retouching Arsenal
Mastering the dust and scratches skin retouching workflow is essential for modern retouchers. It eliminates the heavy-handed, artificial look of outdated techniques, allowing you to deliver the pore-perfect, natural aesthetic demanded by today’s top art directors and beauty brands.
Need Pixel-Perfect Beauty Retouching at Scale?
Implementing advanced techniques like Layer Masking, inverted High Pass setups, and non-destructive Dust and Scratches workflows requires time and immense technical precision. If your studio is facing a high volume of editorial or commercial images, you don’t have to sacrifice quality for speed.
Image Work India and Cloud Retouch offer expert, non-destructive skin retouching workflows for high-end editorial and commercial campaigns. Our team of professional retouchers specializes in flawless skin texture retention and micro-contrast preservation, ensuring your subjects look natural, radiant, and pixel-perfect.
Ready to elevate your visual content? Contact our team today to discuss your next high-end retouching project.


