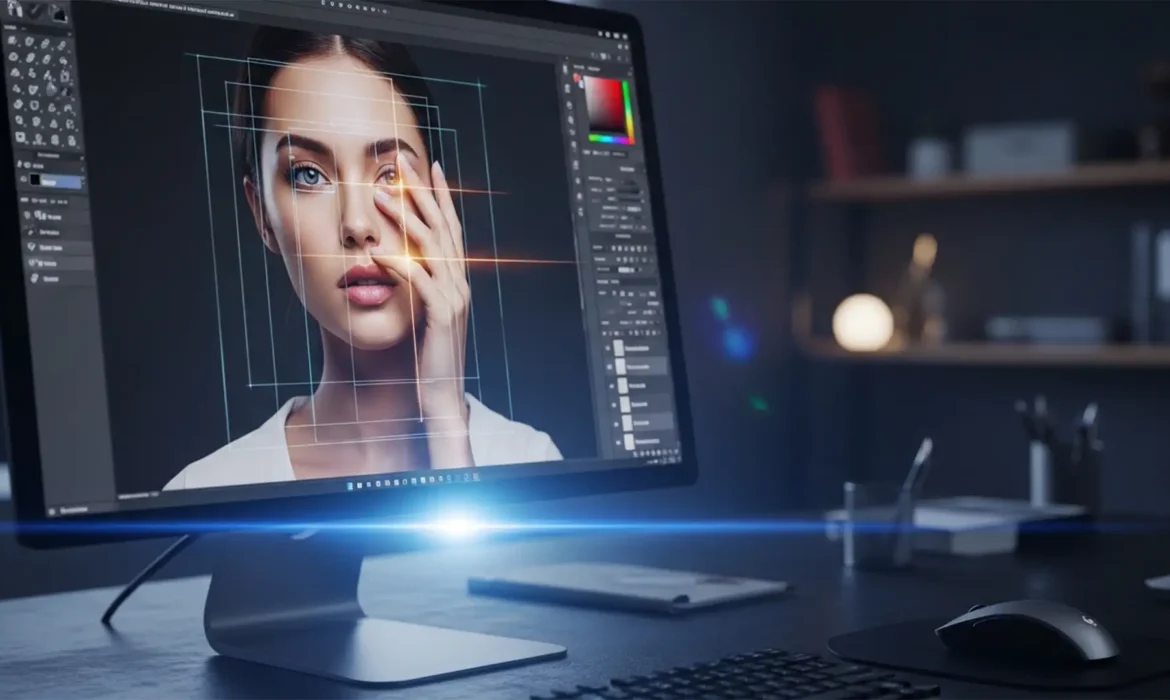
Even the most advanced image generators like Midjourney v6, DALL-E 3, and Stable Diffusion XL have a glaring weakness: complex spatial rendering. If you are generating commercial assets, you have inevitably encountered multi-jointed fingers, melted irises, or blending artifacts that instantly ruin photorealism.
The biggest frustration? These complex textures resist simple fixes. Grabbing the Healing Brush usually just smears the hallucinated pixels, resulting in a muddy mess. Fixing AI hand artifacts photo retouching requires a structural approach. To turn a flawed AI render into a usable commercial asset, you need to combine an understanding of anatomical proportion with advanced Photoshop techniques.
Here is the professional workflow for repairing AI-generated hands and eyes, ranging from quick AI-assisted fixes to high-end manual reconstruction.
Method 1: The Quick Fix (Photoshop v25.0+ Generative Fill)
Adobe’s Firefly integration has revolutionized inpainting, making it the fastest way to replace hallucinated limbs. However, the secret lies in the precision of your selection and your prompting.
Step-by-Step AI Replacement
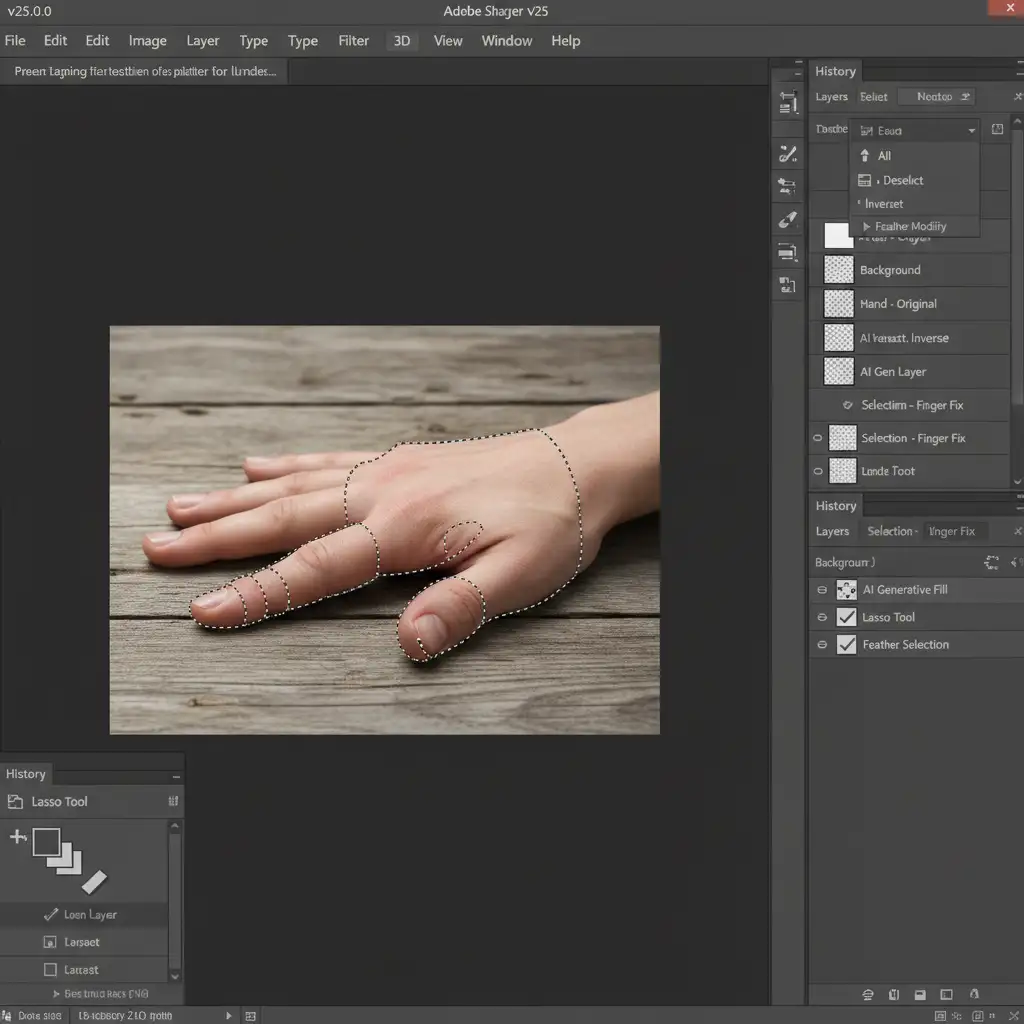
- Isolate the Artifact: Select the Lasso Tool. Make a tight, precise selection around the distorted hand or extra fingers. Do not select too much surrounding background, or the AI will try to replace the environment as well.
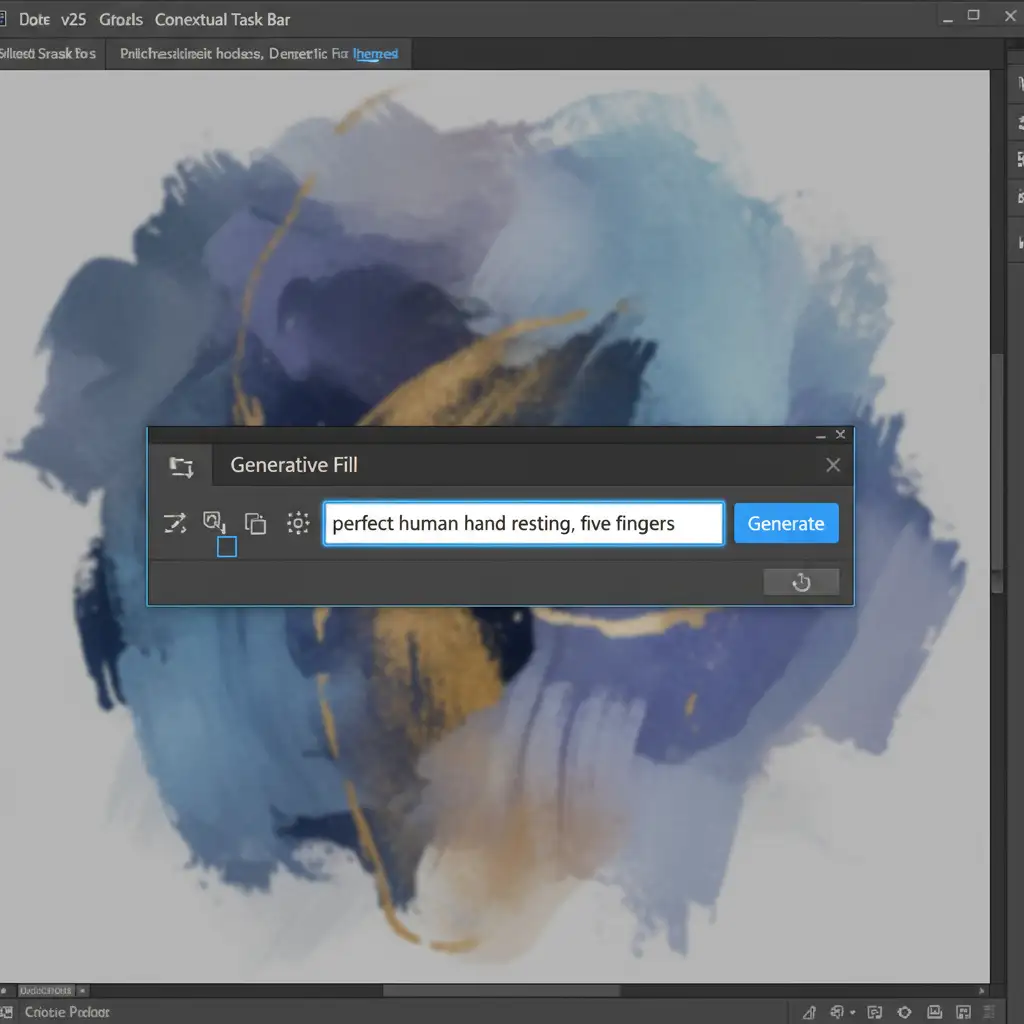
- Engage the Contextual Task Bar: Click on “Generative Fill” in the Contextual Task Bar.
- Prompt Precisely: Do not just type “hand.” Enter a highly specific prompt like ‘perfect human hand resting’ or ‘five fingers’.
- Iterate: Cycle through the three variations generated. If none are perfect, tweak your prompt to include lighting cues (e.g., ‘perfect human hand resting, soft studio lighting’) and generate again.
Method 2: The Pro Workaround (Compositing & Frequency Separation)
When Generative Fill fails to match the exact angle or complex lighting of your AI render, you must rely on traditional compositing. This method guarantees accurate anatomical proportions.
Sourcing and Blending Real Assets
- Source the Perfect Reference: Find a stock photo of a real hand that matches the exact angle, perspective, and lighting of your AI subject.
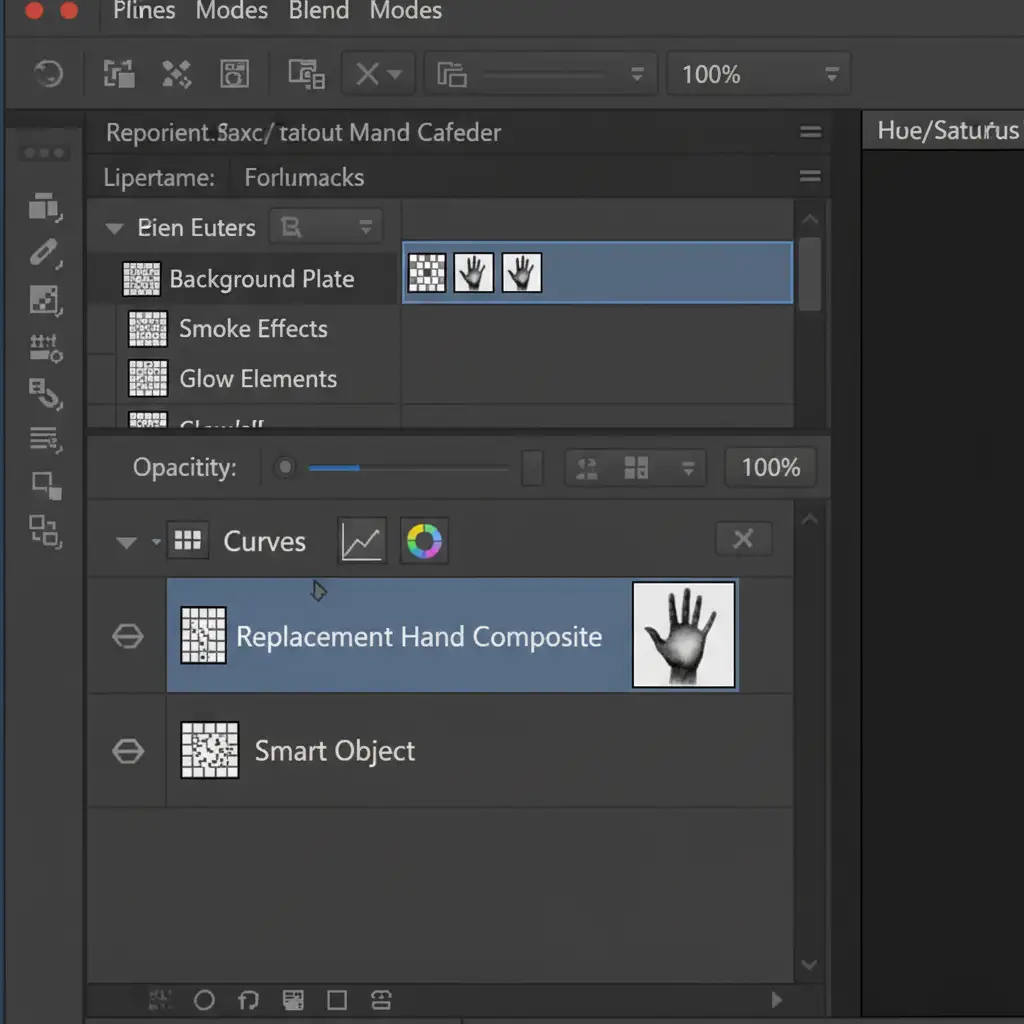
- Place as a Smart Object: Drop the real hand into your document as a Smart Object. This allows you to scale and warp the hand non-destructively.
- Precision Layer Masking: Add a Layer Mask to the Smart Object. Use a soft-edged brush to carefully mask out the background of the stock photo, blending the wrist seamlessly into the AI subject’s arm.
- Color and Grain Matching: Clip Hue/Saturation and Curves adjustment layers to your Smart Object to match the color grade and luminosity of the AI generation. Add a subtle noise filter to match the AI’s pixel grain.
- Frequency Separation: To clean up the transition seams where the real hand meets the AI arm, use Frequency Separation. This allows you to smooth out the color/lighting transitions on the low-frequency layer without destroying the skin texture on the high-frequency layer.
Method 3: The Technical Deep-Dive (Manual Anatomical Reconstruction)
For minor but critical errors—like slightly asymmetrical eyes, melted irises, or a single misshapen knuckle—rebuilding the pixels manually provides the ultimate control.
Step 1: Pixel Cleanup
Start by creating a new blank layer. Use the Clone Stamp Tool (set to Sample: Current & Below) to meticulously paint out extra fingers or chaotic blending artifacts. Keep your brush hardness around 50% to avoid harsh edges.
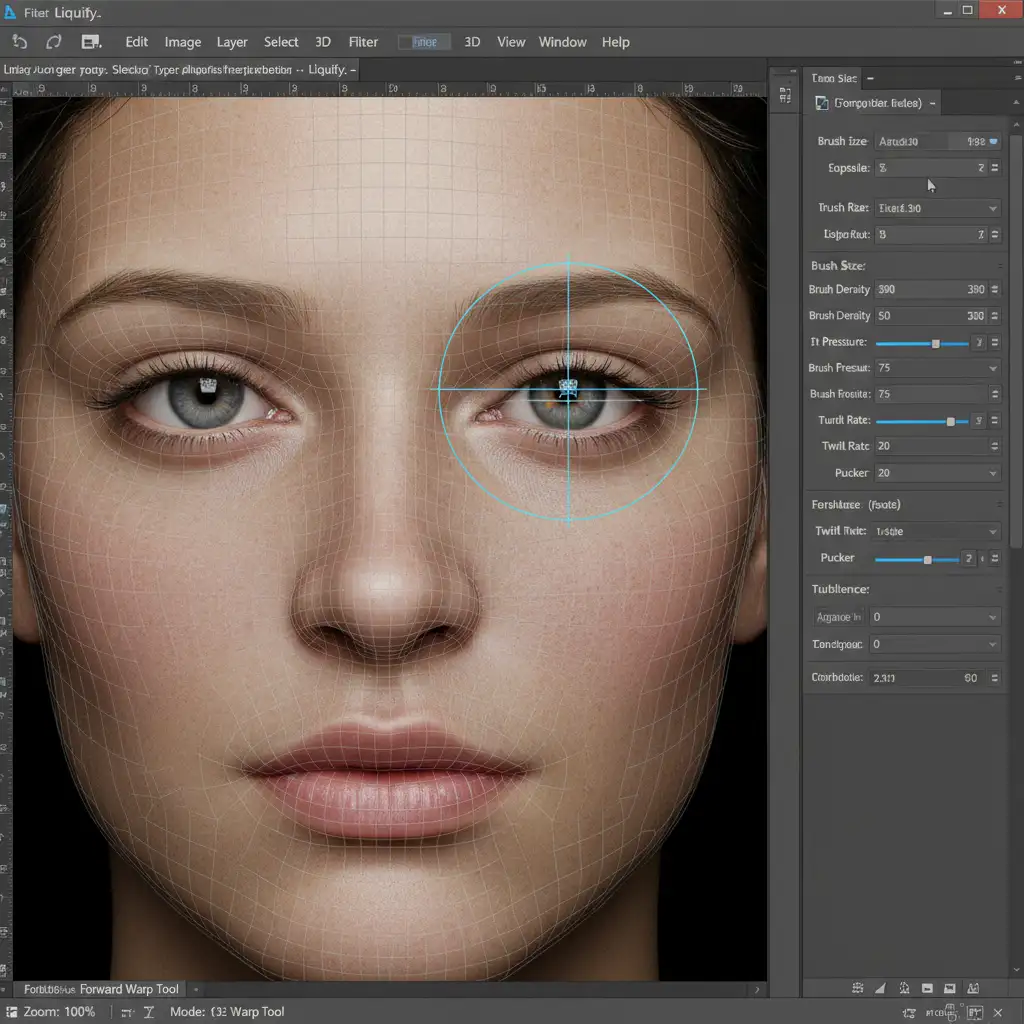
Step 2: Structural Correction
Merge a copy of your visible layers (Ctrl/Cmd + Alt/Opt + Shift + E) and open the Liquify Tool.
- Use the Forward Warp Tool with a low pressure setting to gently push asymmetrical eyes into alignment or correct the thickness of misshapen fingers.
- Use the Pucker Tool to reduce the size of bulging, hallucinated irises.
Step 3: Re-establishing 3D Volume
AI often flattens lighting when generating artifacts. To restore realism, create a new layer filled with 50% gray and set its blend mode to Overlay. Use the Dodge and Burn tools directly on this layer. Burn the shadows between knuckles and under the eyelids, and Dodge the highlights on the irises and finger joints to recreate realistic 3D volume.
Scale Your Image Production with Image Work India
Fixing AI hand artifacts photo retouching is a specialized skill. While Generative Fill has sped up the process, achieving true photorealism on complex AI generations still requires a master’s touch in compositing, masking, and manual pixel reconstruction.
If you are generating hundreds of AI assets for a marketing campaign, an e-commerce catalog, or a creative project, spending hours fixing melted eyes and extra fingers will destroy your production timeline.
Don’t let AI artifacts ruin your creative vision. Let Image Work India and Cloud Retouch handle the heavy lifting. Our team of expert retouchers specializes in high-end photo retouching, seamlessly blending AI-generated art with flawless, anatomically correct realism.
Contact Image Work India today to outsource your AI image cleanup and ensure every asset you publish is pixel-perfect.


