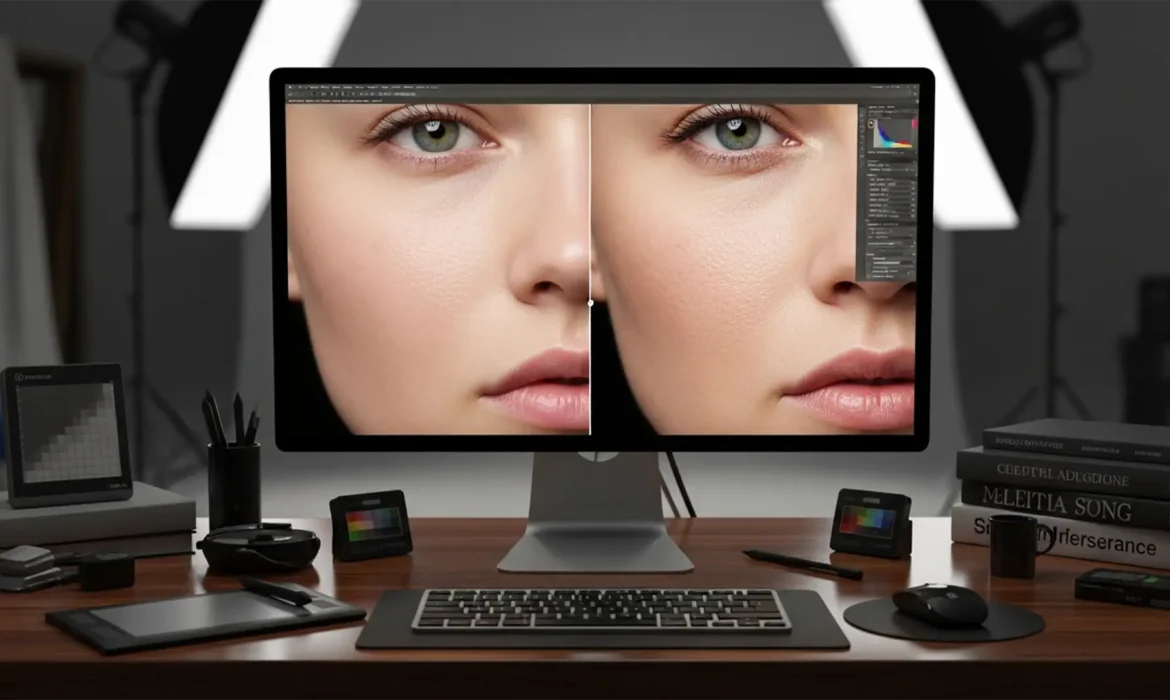
You’ve just used Photoshop’s Generative Fill or Neural Filters to clean up a complex portrait. The blemishes are gone, but so is humanity. Instead of a high-end editorial shot, you are staring at a plastic mannequin.
This “uncanny valley” effect happens because AI relies on pixel averaging and blurring to remove shadows and spots, inherently destroying high-frequency details like micro-hairs and natural skin porosity. Simply lowering the AI layer’s opacity isn’t a fix—it just brings the original blemishes back. To fix AI skin texture loss, you need to separate texture from tone.
Here is the professional workflow to restore natural skin micro-contrast and fix the plastic AI look in Photoshop v24.0 through v25.x.
The Problem with AI Retouching: Why Skin Loses Its Pores
Tools like Generative Fill and Skin Smoothing Neural Filters are incredible for evening out skin tones and removing complex distractions. However, their algorithms average out pixel data. When they generate a patch of skin, they create flawless tonal gradients but fail to replicate the microscopic bumps, pores, and fine lines that make human skin look real.
To achieve magazine-quality results, we must bridge the gap between AI-generated tones and organic human texture.

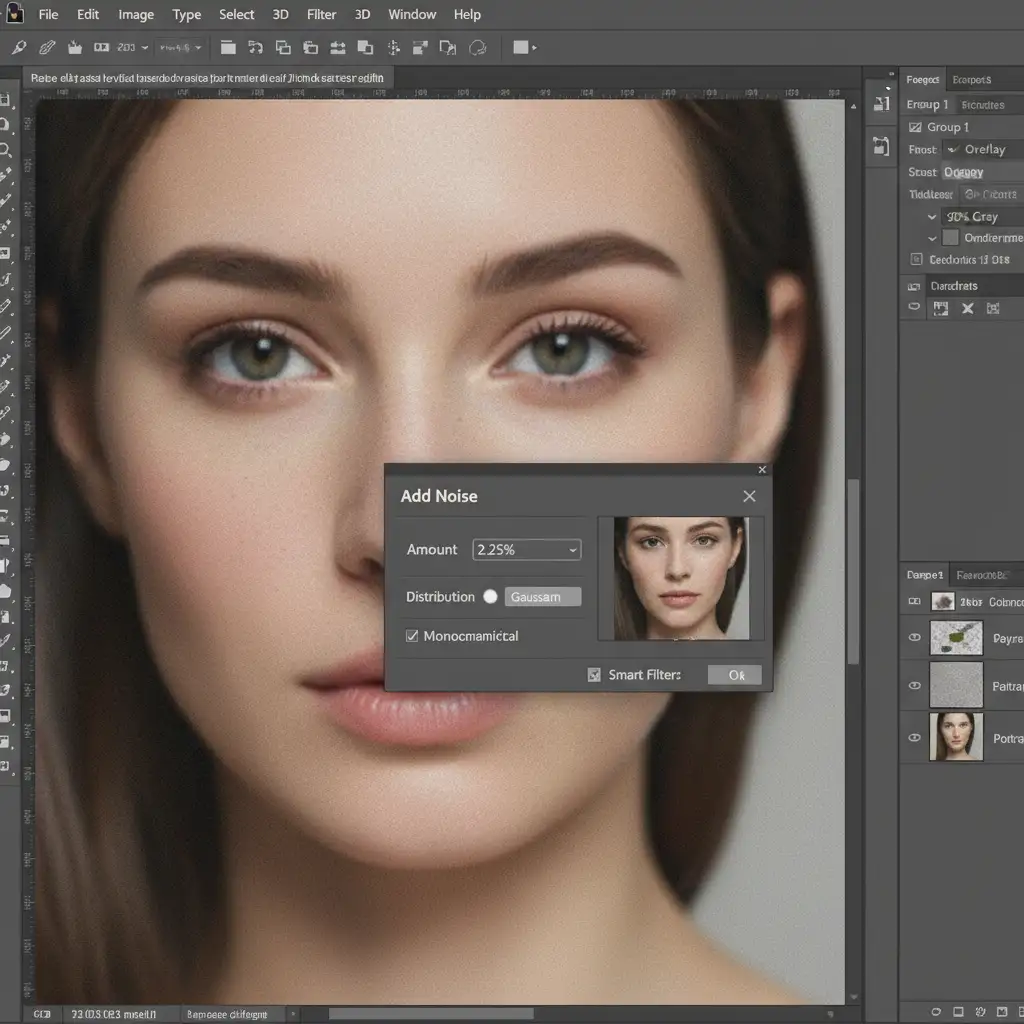
Method 1: The Quick Fix (Synthetic Noise Generation)
If you need a fast turnaround, you can simulate skin porosity by generating synthetic grain. This method works best for subjects photographed from a medium distance where macro pore detail isn’t strictly necessary.
Step-by-Step Workflow
- Create a Texture Layer: Create a new blank layer above your AI-retouched layer.
- Fill with Gray: Go to Edit > Fill, choose 50% Gray, and click OK. Set this 50% Gray layer’s blend mode to Overlay blend mode (or Soft Light for a subtler effect).
- Generate Noise: Navigate to Filter > Noise > Add Noise. Check “Monochromatic” and “Uniform,” and set the amount to around 2-5%.
- Soften the Pores: Raw noise looks like digital static, not skin. Apply a slight Gaussian Blur (0.3px to 0.5px) to soften the noise into realistic pores.
- Clip to AI: Clip this noise layer directly to your AI layer so the texture only applies where the AI smoothing occurred.
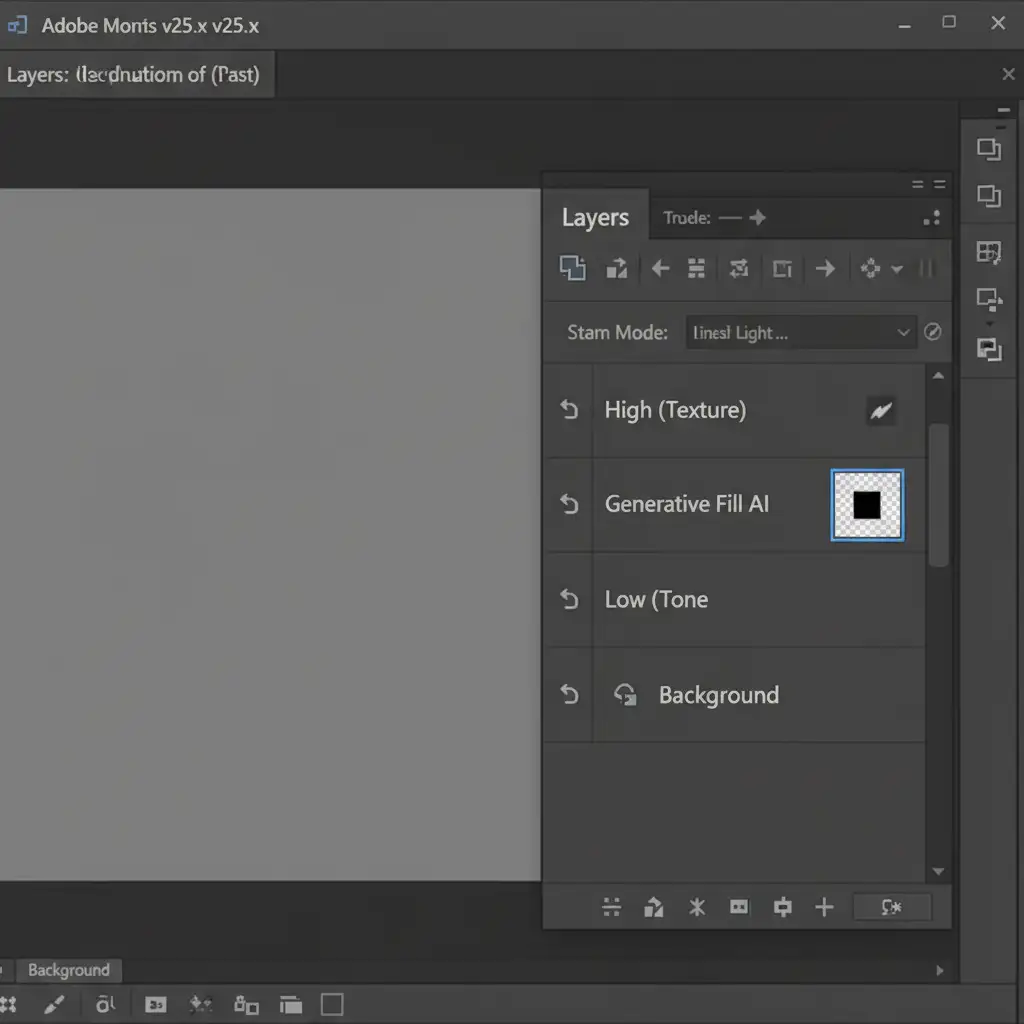
Method 2: The Pro Workaround (Frequency Separation Integration)
For high-end beauty retouching, synthetic noise won’t cut it. You need the subject’s actual skin texture. The most effective way to utilize AI without destroying texture is to integrate it into a Frequency Separation workflow.
How to Inject AI Safely
- Setup the Stack: Duplicate your background layer twice. Name the top layer “High (Texture)” and the middle layer “Low (Tone)”.
- Separate Frequencies: Apply a Gaussian Blur to the Low layer (just enough to blur the texture). Then, select the High layer, go to Image > Apply Image, subtract the Low layer, and set the High layer’s blend mode to Linear Light.
- Apply AI to Tones Only: Run Generative Fill or Neural Filters strictly on the Low Frequency (Tone) layer.
- Preserve Texture: Keep the original High Frequency layer untouched on top. Because the AI is sandwiched beneath the texture layer, you get perfectly smoothed tones with 100% original texture preservation.
(Pro Tip: If you need to manipulate the AI layer further, you may need to rasterize the Generative Fill layer before running specific localized filters).
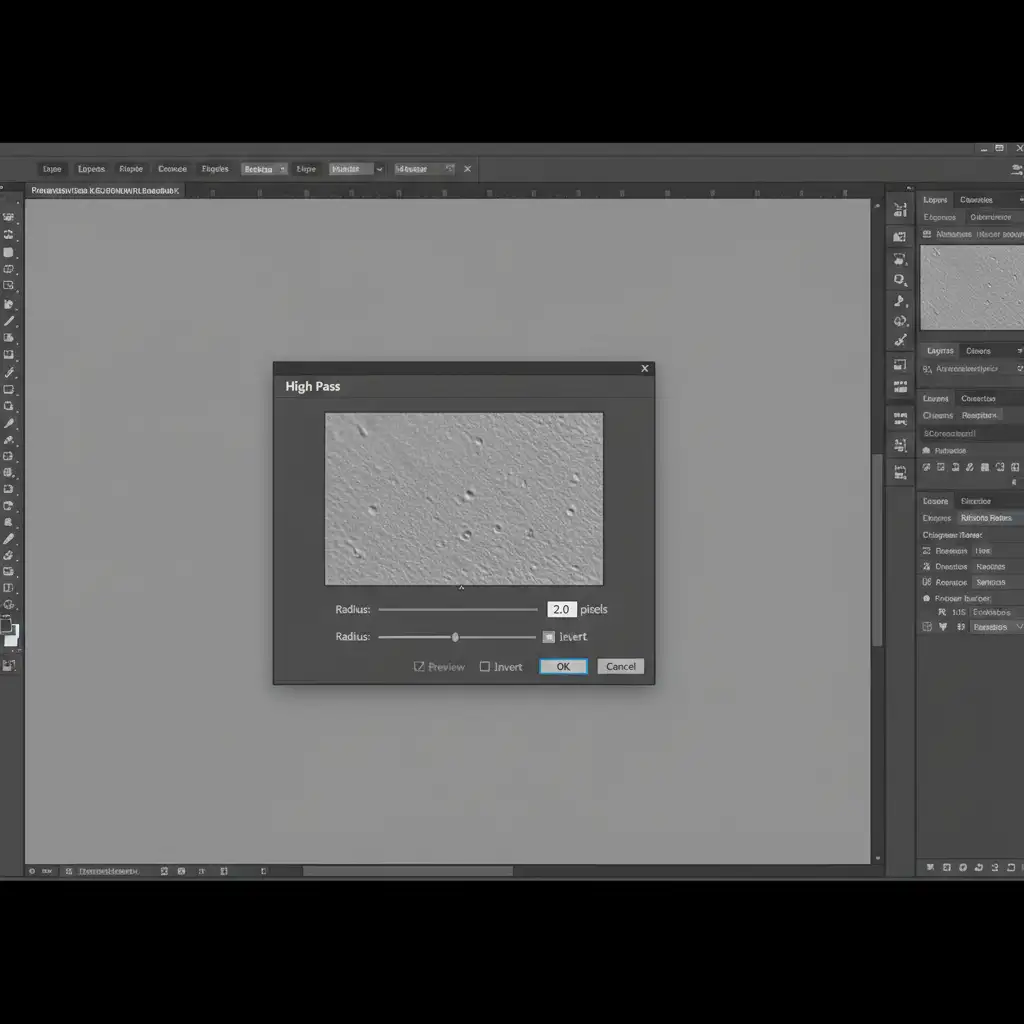
Method 3: The Technical Deep-Dive (High Pass Texture Grafting)
What if you’ve already flattened your AI edits, or the AI generated a completely new patch of skin (like extending a forehead) where no original texture exists? You need to graft real pores from another area using the High Pass filter.
Grafting Real Pores onto AI Gradients
- Source the Texture: Use the Marquee tool to select a clean patch of skin with excellent natural texture from elsewhere on the subject’s body.
- Isolate the Pores: Copy this selection to a new layer above your AI edits. Desaturate it (Ctrl/Cmd + Shift + U) and set the blend mode to Linear Light.
- Run High Pass: Go to Filter > Other > High Pass. Set the radius between 1.5px and 3.0px. This strips away the underlying tones, leaving only the isolated pores and micro-contrast.
- Tile and Mask: Duplicate and tile this texture over the plastic AI areas using the Pattern Stamp tool. Group the texture layers, add an inverted (black) layer mask, and use a soft white brush at a low opacity to manually paint natural porosity exactly where the AI destroyed it.
- Refine with Luminosity: For an ultra-realistic blend, use Luminosity Masking to ensure the grafted pores only appear in the midtones, keeping the extreme highlights and deep shadows naturally smooth.
Stop Fighting AI: Scale Your Retouching with Image Work India
Fixing AI skin texture loss requires a deep understanding of professional compositing. While Generative Fill and Neural Filters speed up the initial cleanup, manually restoring high-frequency details, building frequency separation stacks, and grafting pores takes significant time—time you could spend shooting or acquiring new clients.
Struggling to maintain the delicate balance between flawless skin and natural texture in bulk volume? Outsource your post-production to Image Work India and Cloud Retouch.
Our expert retouchers understand the exact mathematics of skin micro-contrast. We combine the speed of modern tools with high-end, manual finishing techniques to deliver magazine-quality results without the plastic AI look.
Don’t let bad retouching ruin a great photograph. Contact Image Work India today for your free trial and let our team handle the pixels while you focus on the big picture.


