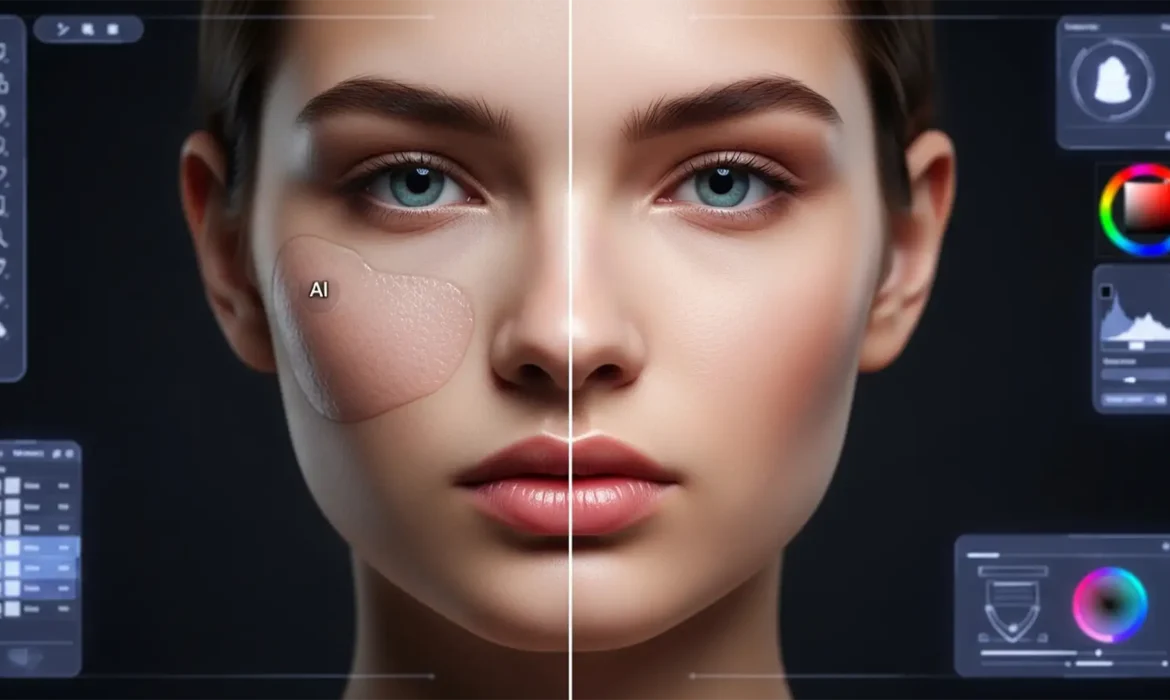
You’ve just used Adobe Photoshop’s Generative Fill to extend a background or remove a complex blemish on a high-end beauty portrait. The composition looks seamless, but there’s a glaring problem: the AI-generated skin looks muddy, overly orange, or completely ashy.
Correcting AI skin undertone shifts has become one of the most frustrating new challenges for professional retouchers using Photoshop v25.0+. Adobe Firefly AI often struggles to calculate precise human color palettes, averaging surrounding pixels and creating a jarring visual mismatch. If you’re tired of your model retouching looking disjointed, this technical guide will show you exactly how to fix these AI skin tone shifts permanently.
Why Adobe Firefly AI Struggles with Skin Undertones
Before we jump into the fixes, it helps to understand why the AI is ruining your color grading.
Adobe Firefly AI generates pixels by analyzing the surrounding data. However, human skin is highly complex, featuring varied subsurface scattering and micro-gradients. When Generative Fill attempts to recreate this, it often “averages” the surrounding pixels. This results in a loss of natural luminosity and introduces an ‘orange/muddy’ or ‘ashy/gray’ shift, particularly noticeable in shadows and midtones.
This issue is severely exacerbated if you are working in an 8-bit color depth or within specific color spaces like CMYK, where the AI struggles with color gamut translation.
How to Fix AI Skin Undertone Shifts in Photoshop
Fortunately, you don’t have to abandon Generative Fill. By applying traditional high-end retouching techniques to AI layers, you can seamlessly integrate generated patches. Here are three professional methods to resolve undertone mismatches.
Method 1: The Quick Fix Using Blend Modes
If the AI generated a great texture but the color is slightly off, you can manually paint the correct skin tones back in without affecting the luminosity or texture of the generated pixels.
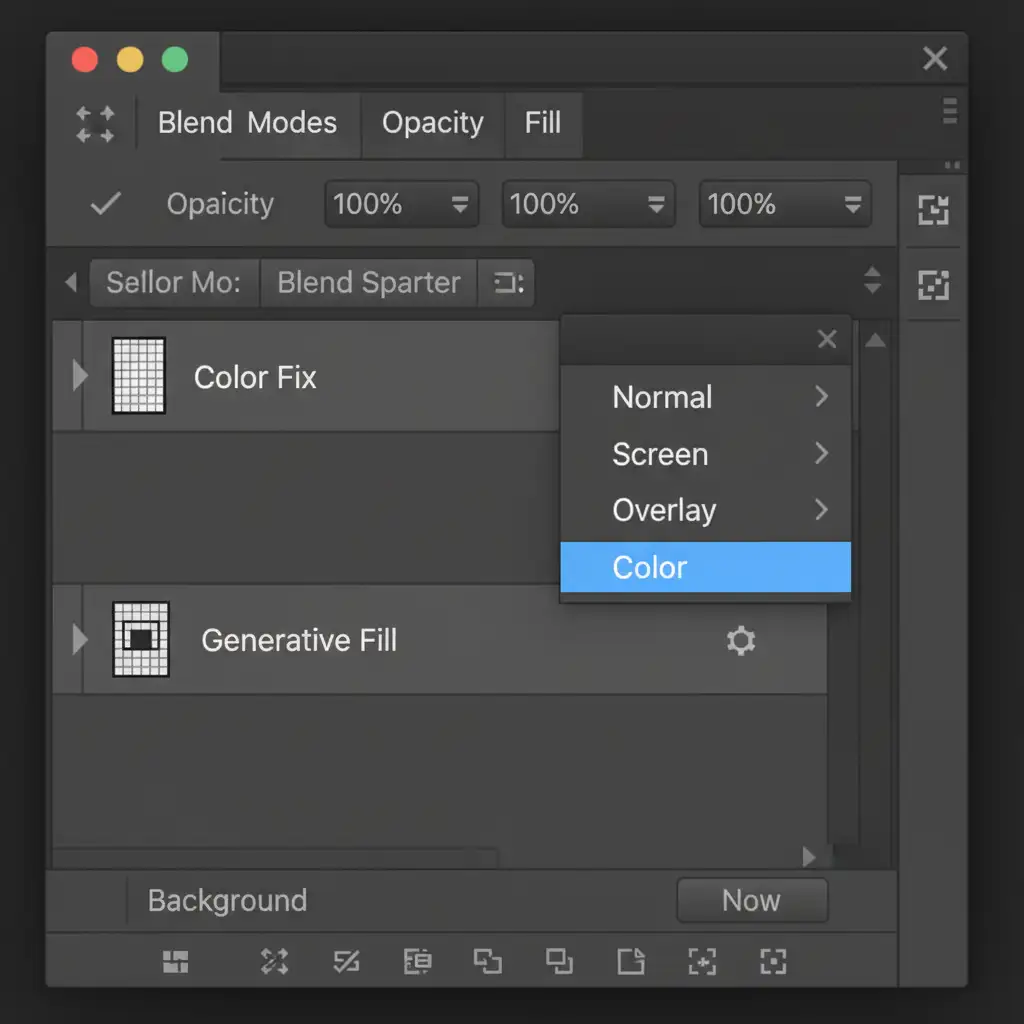
- Create a New Layer: Add a new Blank Layer directly above your Generative Fill layer.
- Change Blend Mode: Change this new layer’s Blend Mode from ‘Normal’ to ‘Color’.
- Sample and Paint: Select the Brush Tool (B). Set your brush opacity very low (10-15%). Hold Alt/Option to sample the correct, natural skin tone from the original unedited image.
- Blend: Gently paint over the discolored AI-generated skin. Because the layer is set to the Color blend mode, it will only alter the hue and saturation, leaving the AI’s generated texture intact.
Method 2: The Pro Workaround with Selective Color
For more severe color shifts—such as when the AI turns the skin aggressively orange or completely gray—you need the precision of a Selective Color adjustment layer.
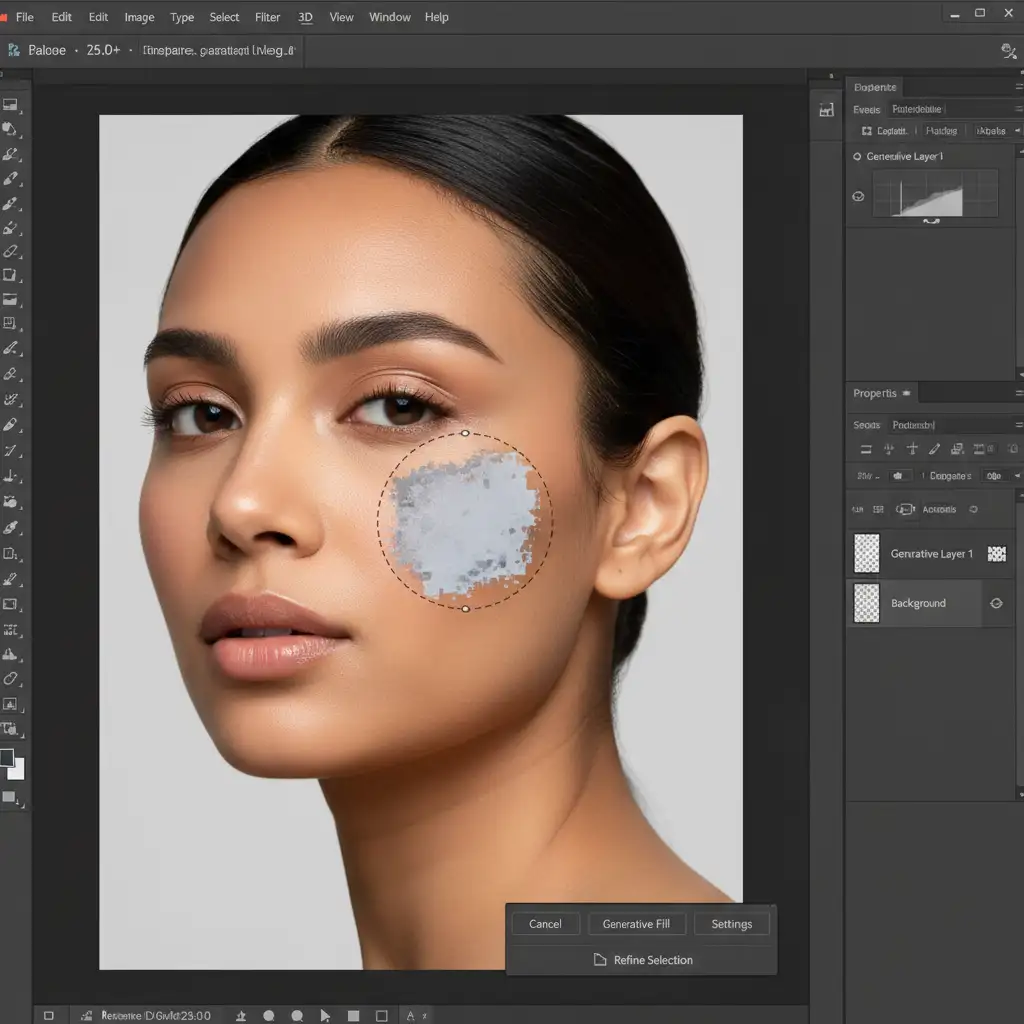
- Add Adjustment Layer: Create a Selective Color (or Color Balance) adjustment layer above your Generative Fill layer.
- Create a Clipping Mask: Hold Alt/Option and click the line between the adjustment layer and the Generative Fill layer. This clips the adjustment so it only affects the AI-generated patch, not the whole image.
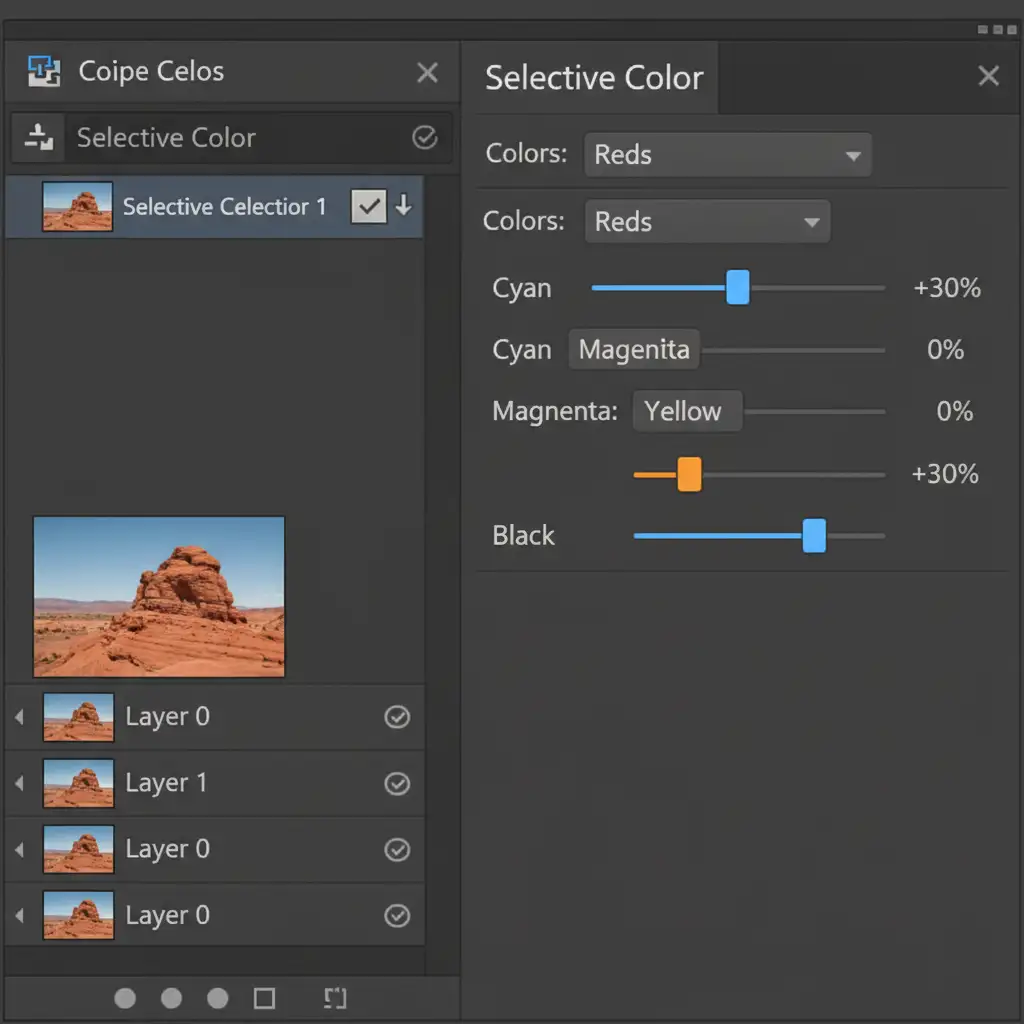
- Target Reds and Yellows: In the Properties panel, target the Reds and Yellows. If the skin is too orange, push the Cyan slider slightly to the right to cool it down, or reduce the Yellows.
- Refine with Layer Masking: If the Generative Fill layer includes non-skin elements (like clothing or hair), use a black brush on the adjustment layer’s Layer Mask to paint out the color grading on those specific areas.
Method 3: The Technical Deep-Dive (Preventing the Mismatch)
The best way to fix an AI skin undertone shift is to prevent the AI from making the mistake in the first place. You can optimize your document setup to give Adobe Firefly the best possible data to work with.
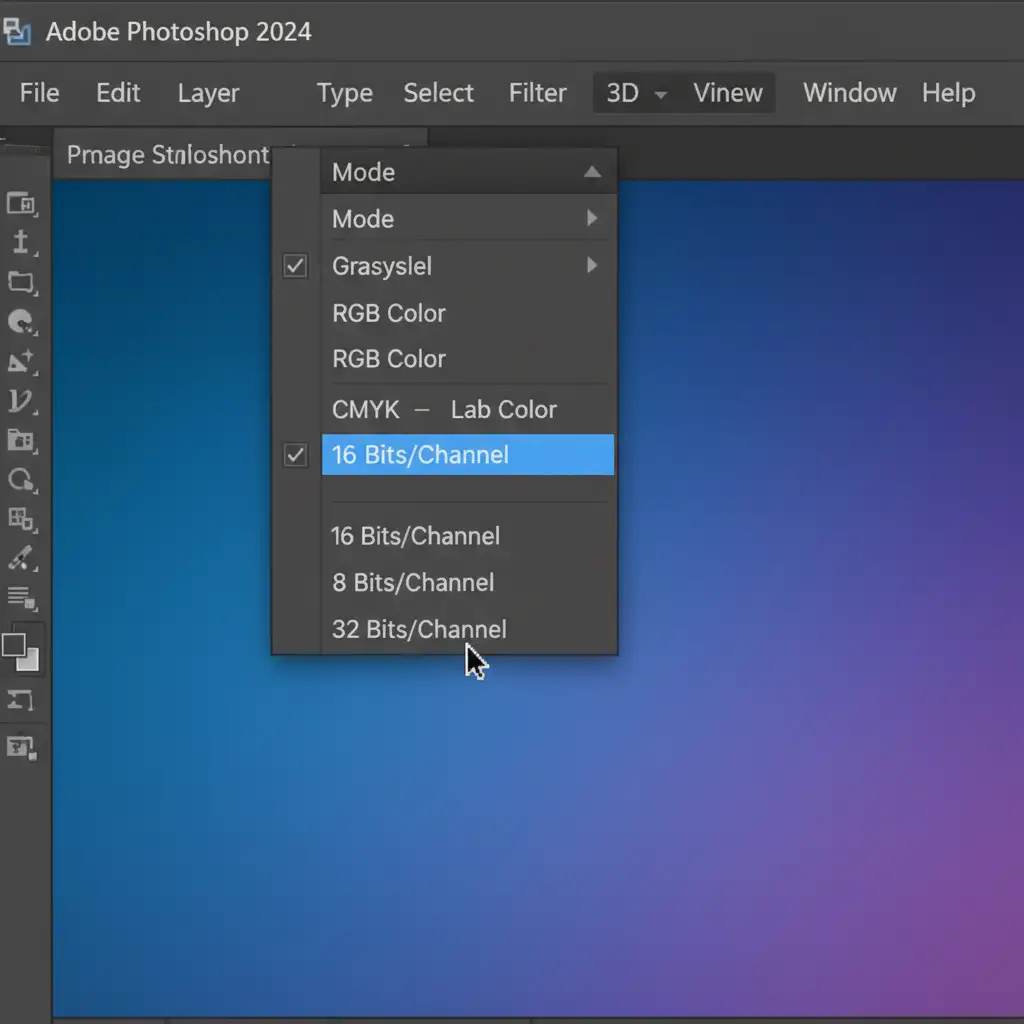
- Switch to 16-Bit Color Depth: Before making your selection and clicking Generative Fill, navigate to Image > Mode > 16 Bits/Channel. Forcing the document into 16-bit depth gives Firefly a vastly higher tonal range to calculate gradients, drastically reducing gray banding and ashy shadows.
- Ensure RGB Mode: Ensure your document is in RGB color mode (Image > Mode > RGB Color). Generating in CMYK often causes catastrophic color shifts.
- Prompt Engineering: Don’t leave the prompt blank. Use specific text prompts like “smooth skin texture matching natural warm skin undertones” to actively guide the AI’s color generation process.
Video Tutorial: Flawless AI Color Grading
Want to see these techniques in action? Watch this quick demonstration on how to perfectly match AI-generated patches to natural skin tones.
Stop Fighting the AI: Let the Experts Handle Your Retouching
Correcting AI skin undertone shifts requires a deep understanding of color theory, luminosity, and advanced Photoshop masking. While Generative Fill is a powerful tool, it is not a replacement for the meticulous eye of a professional retoucher—especially in high-end commercial, fashion, or beauty photography where flawless skin is non-negotiable.
If you are spending hours trying to fix muddy AI artifacts and mismatched color grading, it’s time to streamline your workflow.
Image Work India and Cloud Retouch provide world-class, pixel-perfect model editing and high-end retouching services. Our team of expert retouchers relies on industry-standard, non-destructive techniques to ensure your models look natural, vibrant, and flawless—without the unpredictable gray patches of AI.
Need flawless commercial retouching? Contact Image Work India and Cloud Retouch today to outsource your editing and elevate your visual content.


