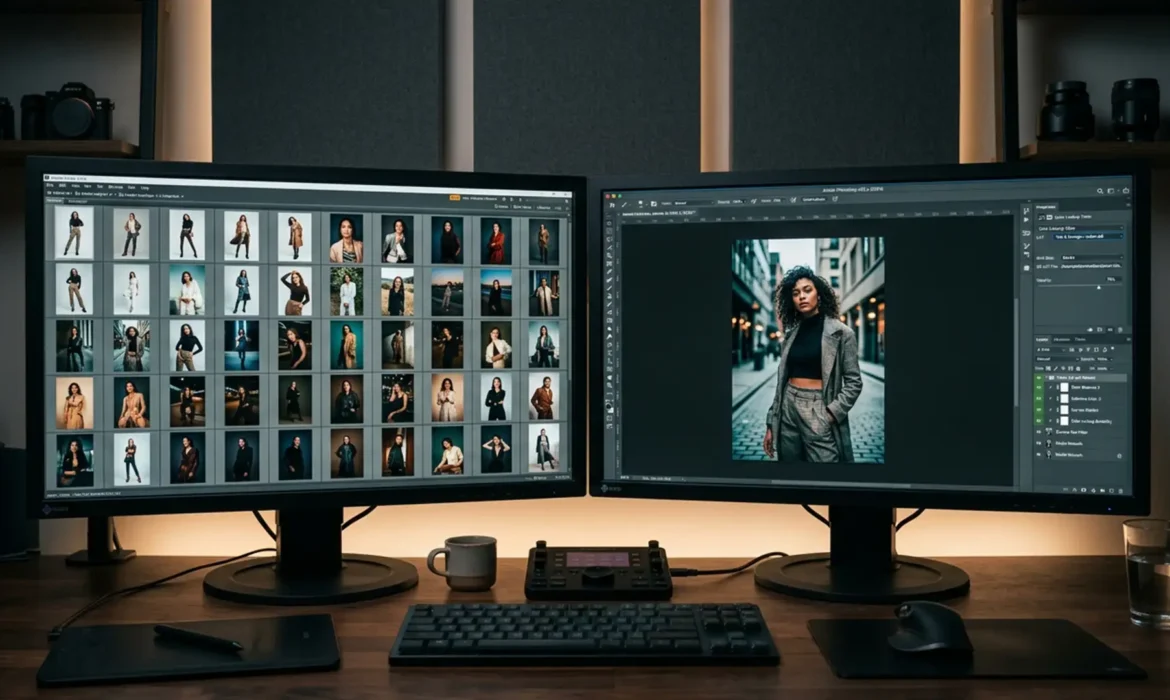
You just wrapped a massive 50-shot fashion campaign, but as you pull the RAW files into your editor, your stomach drops. Flash recycling times lagged, ambient studio light shifted throughout the day, and now the background brightness and fabric colors are subtly—but noticeably—inconsistent across the batch. Manually adjusting each photo is a nightmare that will destroy your profit margin and timeline.
If you are struggling to unify skin tones and fabrics across high-volume shoots, you need a mathematically precise system. In this guide, we break down the definitive lookbook color consistency workflow 2024, utilizing the latest features in Adobe Lightroom Classic (v13.x) and Photoshop (v25.x) to automate flawless batch processing.
The 2024 Challenge: Why Lookbook Consistency Fails
Even with high-end strobes, micro-inconsistencies are inevitable in high-volume fashion photography. A slight drop in strobe output alters the exposure, which in turn shifts the perceived saturation of fabrics and skin tones. Without a unified raw processing baseline, your color space becomes fragmented.
To fix this, we rely on a tiered approach: starting with global raw corrections and advancing to pixel-perfect Photoshop color mapping.
Method A: The Quick Fix – Lightroom Classic Batch Processing
For baseline corrections, Adobe Lightroom Classic (v13.x) is your first line of defense. The goal here is to establish a unified foundation before moving into heavy retouching.
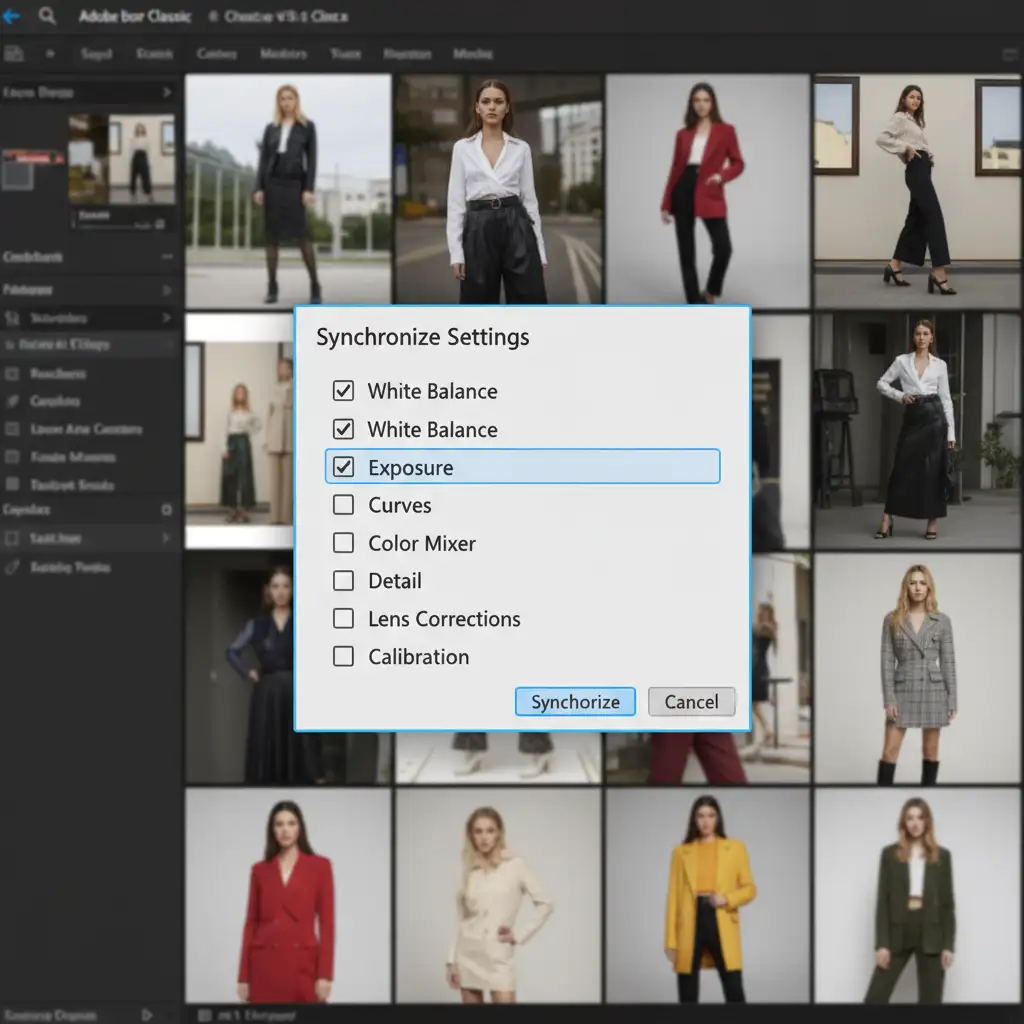
1. Establishing the Baseline with White Balance Sync
First, select your “hero” shot—the image with the most accurate lighting and color. Correct the white balance and exposure on this single image. Next, select the rest of the images in the sequence, click Sync, and ensure only the essential baseline parameters are checked.
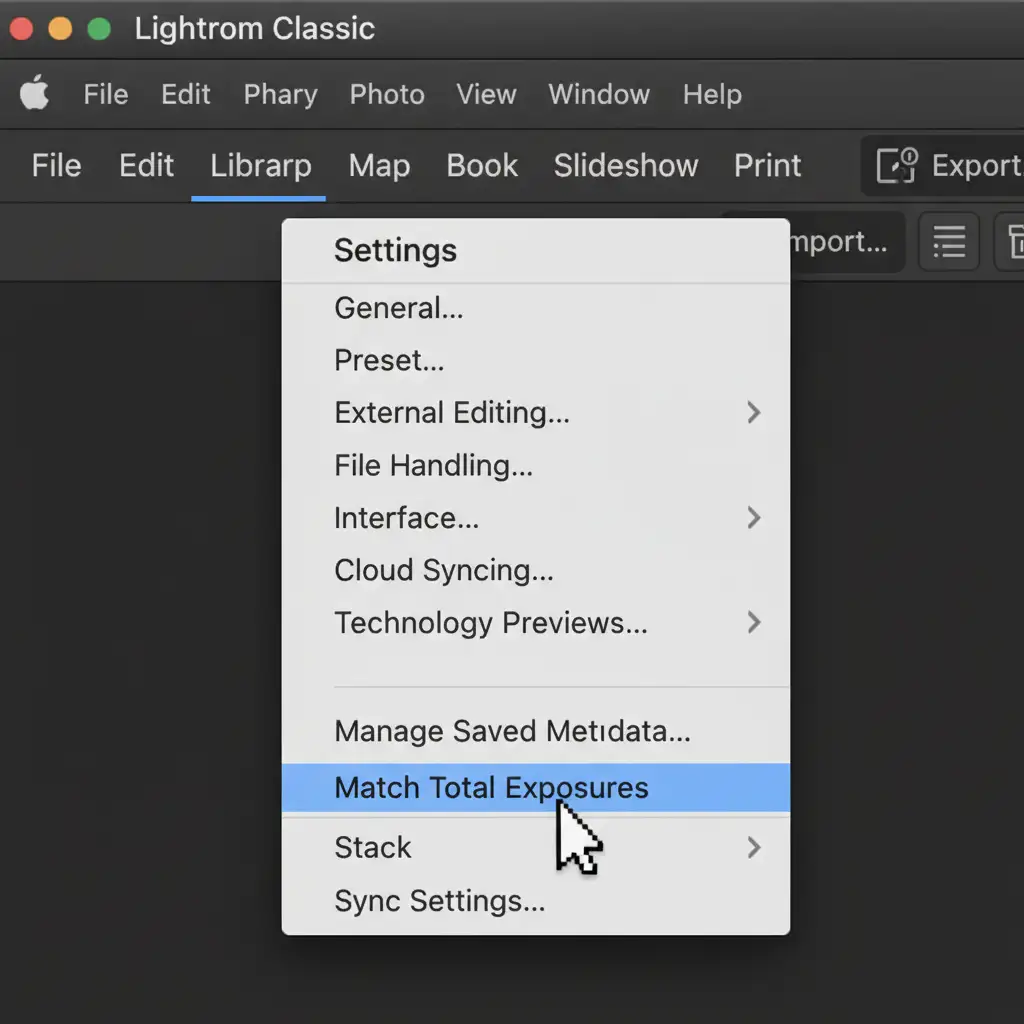
2. Utilizing Match Total Exposures
Because flash power can fluctuate, a simple sync might leave some images slightly darker or brighter. Lightroom’s Match Total Exposures feature calculates the overall exposure value of your active hero shot and mathematically adjusts the exposure slider of the selected batch to match it.
Navigate to Settings > Match Total Exposures to instantly equalize the brightness across your 50-shot lookbook.
Method B: The Pro Workaround – Photoshop Neural Filters
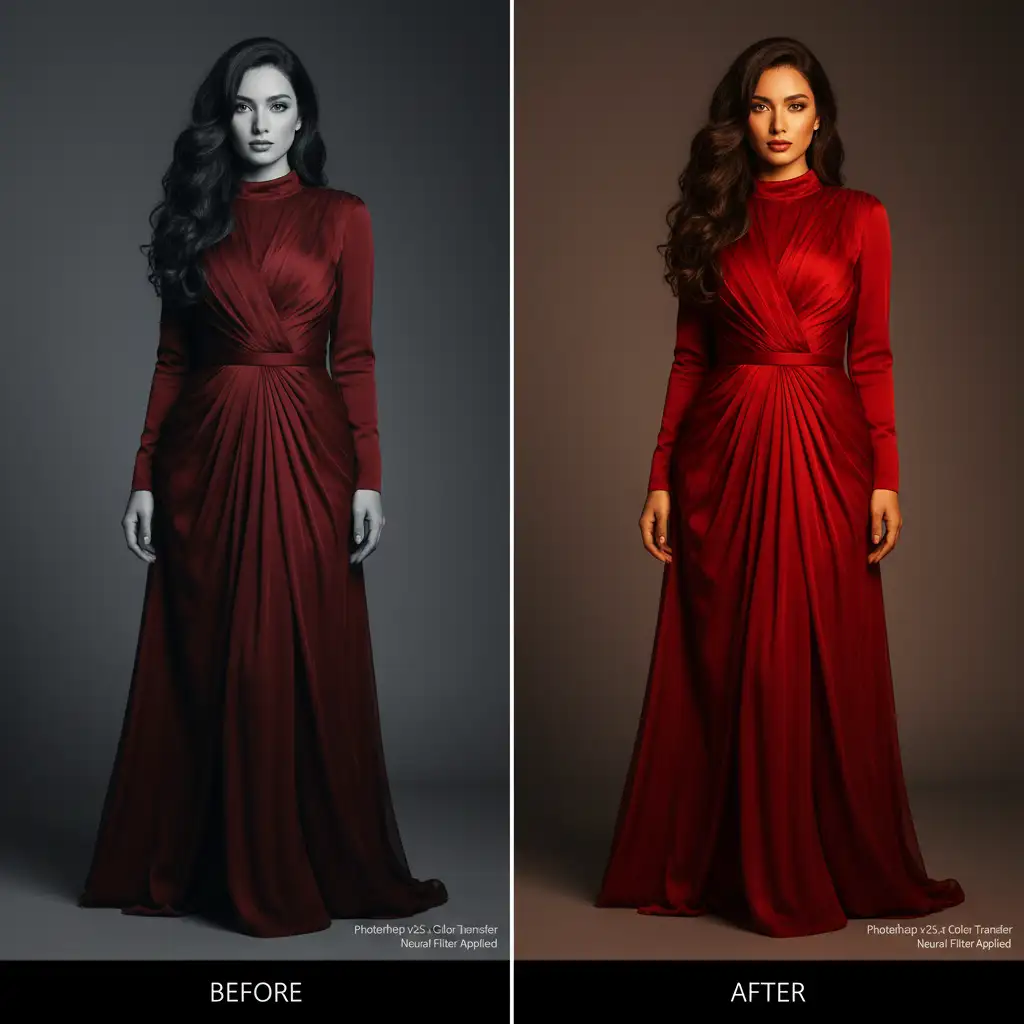
When exposure matching isn’t enough to fix fabric color shifts, we move to Adobe Photoshop (v25.x). This method is ideal when a specific garment looks drastically different under varying lighting setups.
Smart Objects and Color Transfer
By opening your images as Smart Objects, you ensure all adjustments remain non-destructive. To force a stubborn image to match your hero shot:
- Open both the hero shot and the inconsistent shot in Photoshop.
- On the inconsistent shot, navigate to Filter > Neural Filters and select the Color Transfer Neural Filter.
- Choose your hero shot as the reference image. Photoshop’s AI will map the color palette and tonal distribution from the hero shot onto your target image.
- Refine the result using a Selective Color adjustment layer clipped to the subject to tweak specific fabric dyes without affecting the skin tones.
Method C: The Technical Deep-Dive – Custom LUTs
For ultimate, mathematically guaranteed color consistency across hundreds of images, the most robust workflow involves building custom Color Lookup Tables (LUTs).
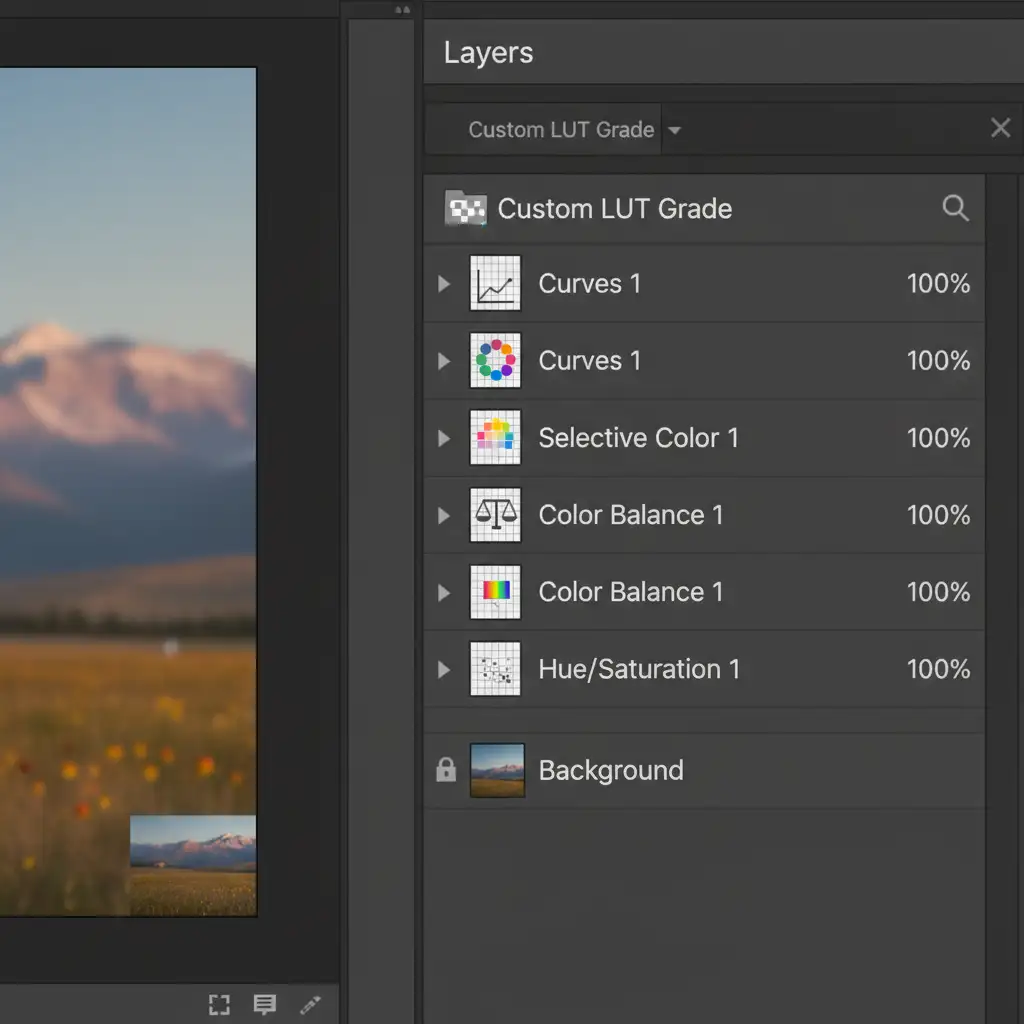
Building the Adjustment Layer Stack
Instead of applying filters to individual images, you build a master Adjustment Layer Stack (Curves, Selective Color, Hue/Saturation, and Color Balance) over your hero image. Once the color grading is perfect, you export this data as a mathematical formula.
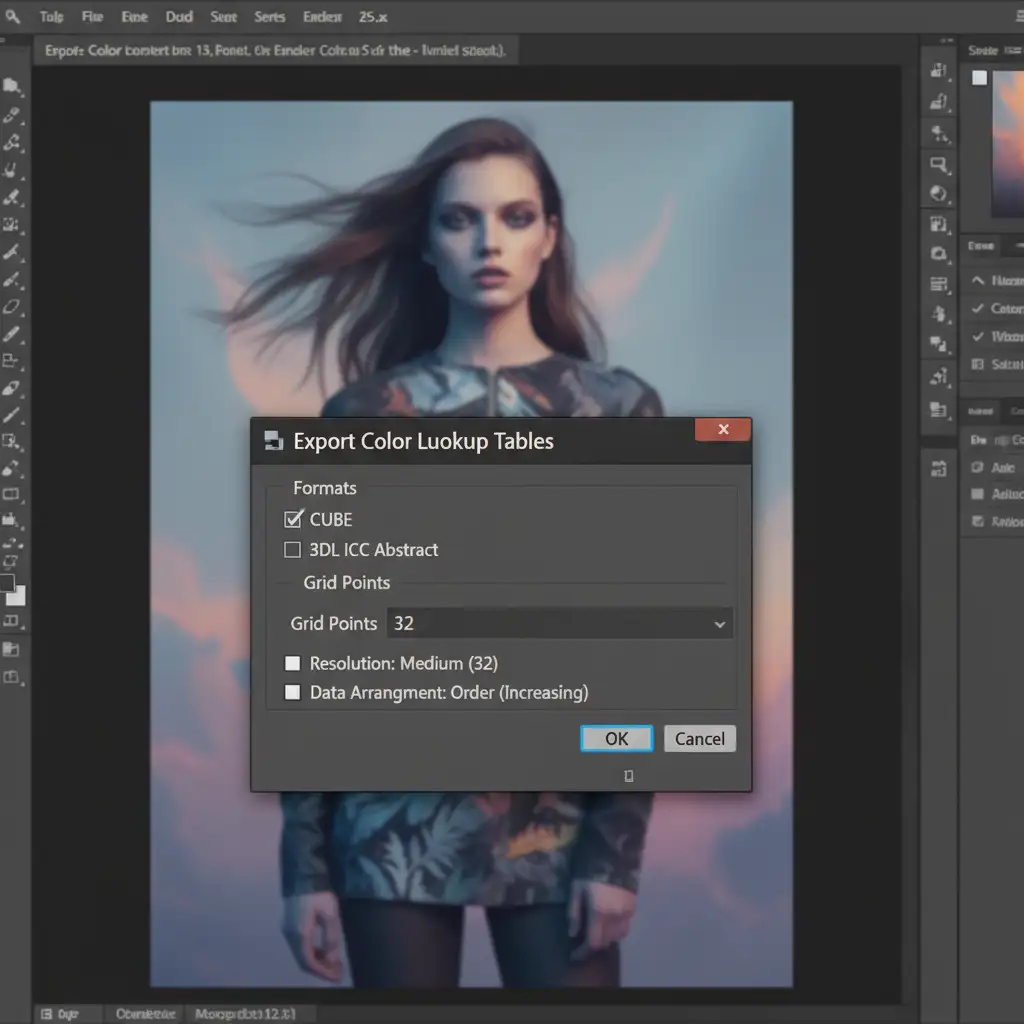
Exporting the .CUBE File
Navigate to File > Export > Color Lookup Tables. Save the file as a .CUBE file export. This file can now be loaded into Photoshop actions or imported back into Lightroom as a custom profile, allowing you to apply complex, multi-layered color grading to 50+ images with a single click.
Streamline Your Workflow with Video
Want to see this exact process in motion? Check out our workflow breakdown:
Automate Your High-Volume Retouching with the Experts
Mastering the lookbook color consistency workflow 2024 requires a deep understanding of color spaces, raw data manipulation, and advanced Photoshop automation. While these steps will drastically improve your output, managing custom LUTs and batch processing for hundreds of seasonal campaign images drains valuable time that you could spend shooting or directing.
Don’t let color inconsistencies ruin your brand’s aesthetic.
At Image Work India and Cloud Retouch, we specialize in professional, high-volume fashion retouching. Our expert retouchers utilize advanced color mapping, custom LUT generation, and meticulous fabric-matching techniques to guarantee absolute brand accuracy across every single frame of your lookbook.
Need flawless color consistency delivered on a tight deadline? Contact Image Work India and Cloud Retouch today and let our dedicated team scale your post-production workflow.


