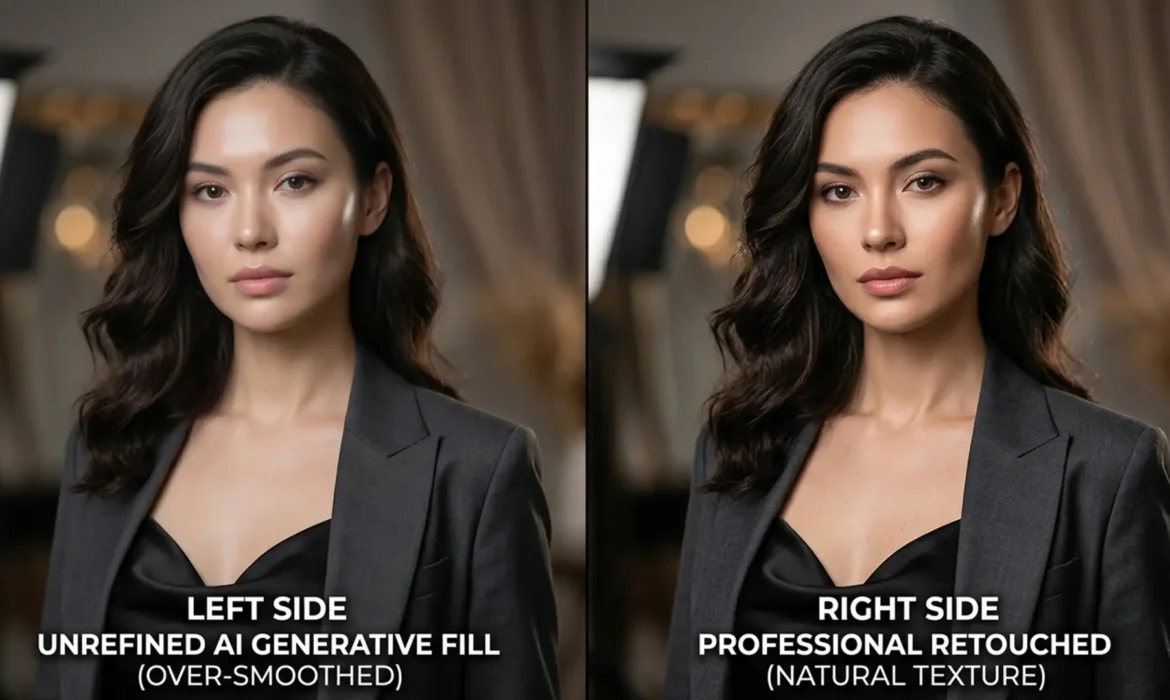
Adobe’s latest updates to Photoshop (v25.x – v27.x) have introduced incredibly powerful tools, but they come with a frustrating flaw for high-end beauty retouchers. When using Generative Fill (Firefly) or Neural Filters for skin smoothing, the AI frequently destroys high-frequency skin textures. The result? An overly blurred, ‘plastic’ surface plagued by blocky artifacts that clash violently with the natural sensor grain of your original RAW file.
If you are struggling with AI skin artifact removal in fashion retouching, you are not alone. The AI simply cannot preserve micro-contrast or delicate specular highlights on its own. To fix this, you need a hybrid workflow that combines the speed of AI with the precision of traditional high-end retouching.
Here is how to eliminate those blocky AI artifacts and restore natural, pixel-perfect skin pores.
The Problem: Why Generative Fill Ruins Skin Texture
When Photoshop’s AI evaluates a high-resolution fashion portrait, it excels at mapping low-frequency data—the broad transitions of color, shadows, and light. However, it completely fails at the high-frequency level.
Instead of reading and replicating individual skin pores, the AI applies a smoothing algorithm that flattens micro-contrast. When these AI-generated patches sit next to untouched areas of the image, the visual disconnect is obvious. To achieve professional results, we must manually reinstall the high-frequency texture layer over the AI-generated low-frequency color maps.
3 Workflows for AI Skin Artifact Removal
Depending on your deadline and the required level of finish, there are three distinct ways to handle AI skin artifact removal in fashion retouching.
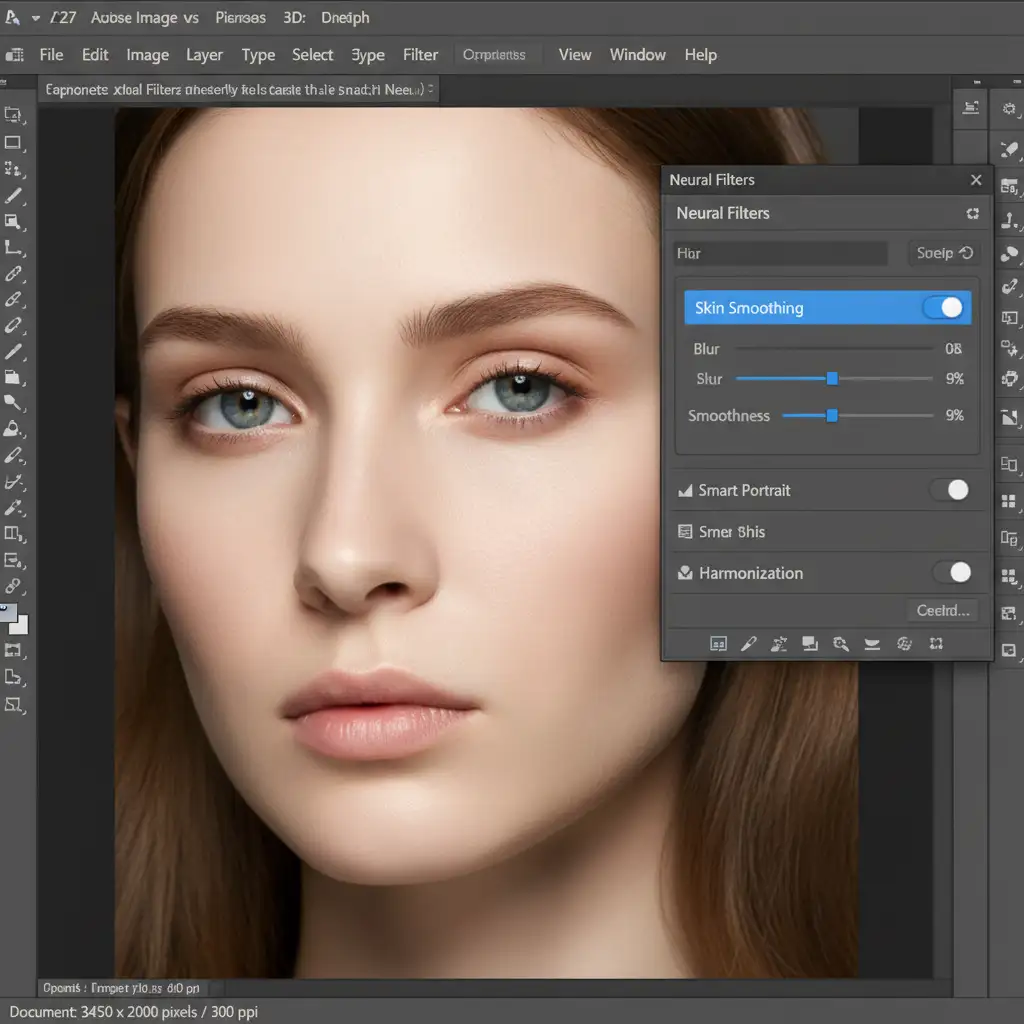
Method 1: The Quick Fix (The Fade Command)
If you are working on a tight deadline for social media assets and need a rapid reduction of the plastic effect, the Fade command is your best option.
- Apply your AI Skin Smoothing via the Neural Filters panel.
- Immediately go to Edit > Fade (or press Shift + Ctrl + F / Shift + Cmd + F).
- Reduce the opacity to 40-60 percent.
This blends the AI’s aggressively smoothed color map with the original texture of the background layer, bringing back a baseline level of natural skin grain.
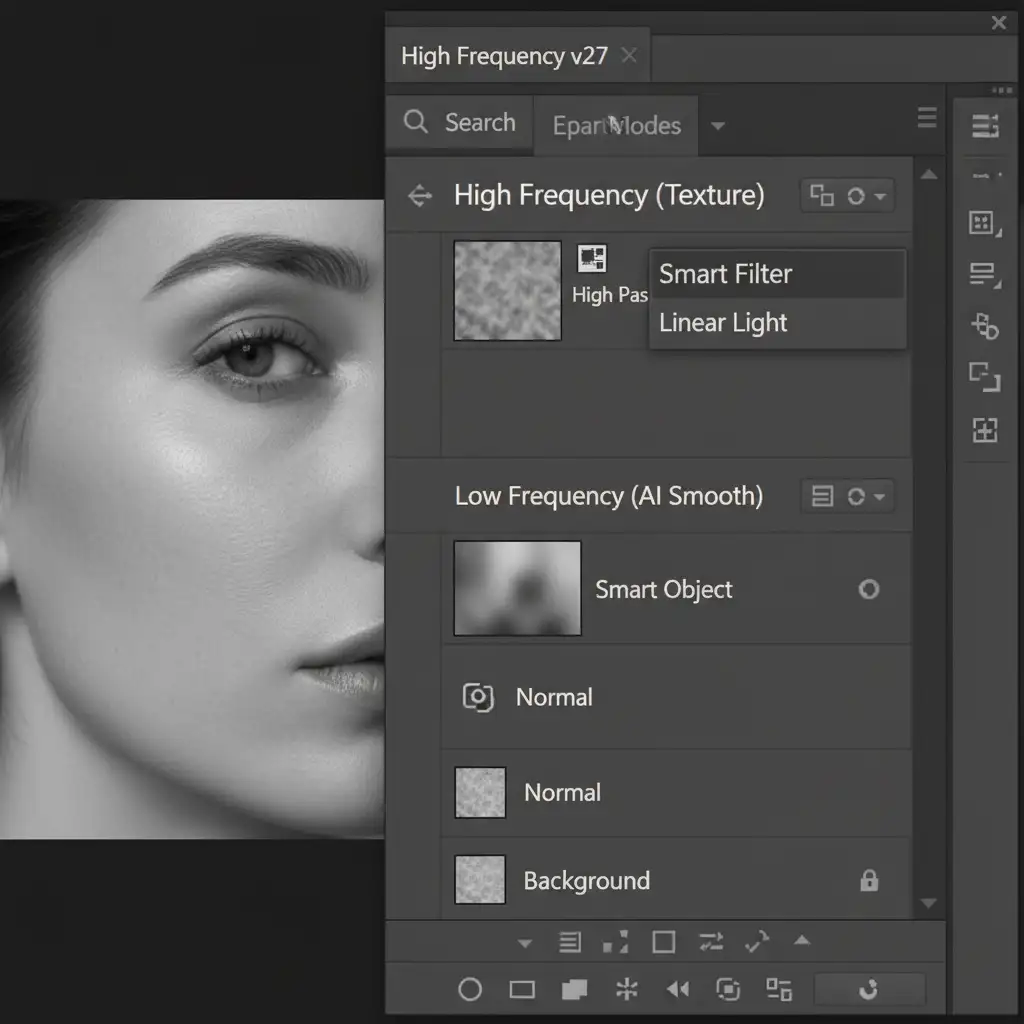
Method 2: The Pro Workaround (Hybrid Frequency Separation)
For commercial fashion campaigns, you need absolute control. This method integrates AI into a traditional Frequency Separation workflow.
- Duplicate your background layer twice.
- Run the AI Skin Smoothing or Generative Fill on the lower duplicate (your Low-Frequency layer) to handle the color transitions and blemishes.
- Select the top duplicate (your High-Frequency layer) and apply a High Pass filter (Filter > Other > High Pass). Adjust the radius until only the fine pores and edges are visible.
- Change the blending mode of this High Pass layer to Linear Light.
- Place this layer directly above your AI-smoothed layer.
By doing this, the AI handles the tedious color blending, while your High Pass layer strictly enforces the original, natural skin pores over the top of the AI’s plastic finish.
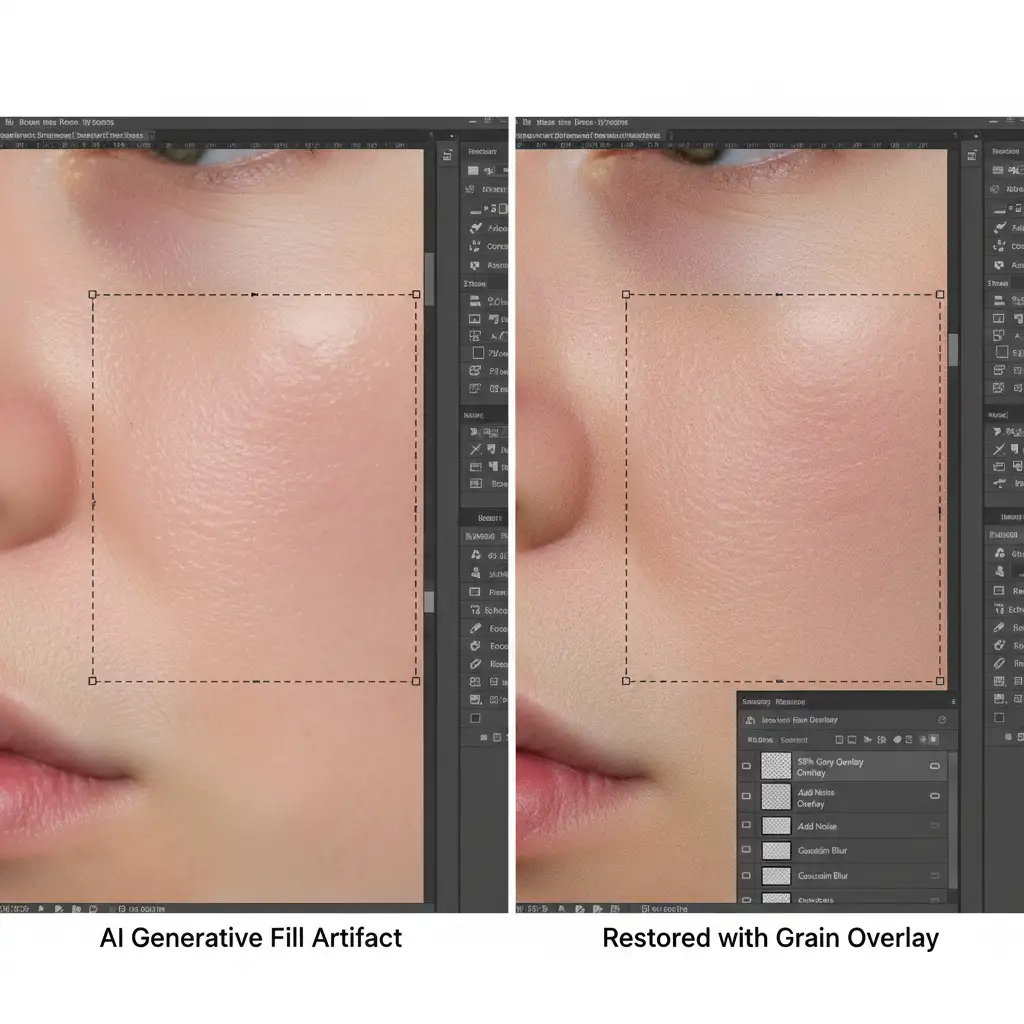
Method 3: The Technical Deep-Dive (Smart Object Masking & Synthetic Grain)
When AI Generative Fill leaves behind blocky artifacts or completely destroys a patch of skin, you must manually rebuild the sensor grain to match the camera’s original output.
Step 1: Targeted Layer Masking
Convert your layer to a Smart Object before applying any AI retouching. This allows you to use Smart Filters non-destructively. Double-click the Smart Filter mask, invert it (Cmd/Ctrl + I), and use a soft brush to manually paint in the AI smoothing only where absolutely necessary, protecting areas with complex micro-contrast.
Step 2: Rebuilding Sensor Grain
To fix the remaining plastic patches where the AI was applied:
- Create a new layer and fill it with 50 percent Gray (Edit > Fill > 50% Gray).
- Change the layer blending mode to Overlay.
- Go to Filter > Noise > Add Noise. Select Uniform and Monochromatic, setting the amount to roughly 2-4 percent (depending on your image resolution).
- Apply a very slight Gaussian Blur (0.3 – 0.5 pixels) to the noise layer. This softens the sharp digital noise, making it perfectly mimic photographic sensor grain.
Why Top Retouchers Still Rely on Human Expertise
While AI tools like Generative Fill and Neural Filters drastically reduce the time spent on basic cleanup, they are not a one-click solution for high-end beauty and fashion imagery. The nuances of specular highlights, the precise mathematical balance of Frequency Separation, and the artistic judgment required to maintain a model’s natural features still require an expert human eye.
Relying solely on AI algorithms often results in rejected campaign assets due to the uncanny, over-processed look. Mastering the hybrid workflow is the only way to ensure your images meet top-tier industry standards.
Let Image Work India & Cloud Retouch Perfect Your Campaign
Struggling with unnatural AI edits on your high-end fashion campaigns? Fixing blocky artifacts and rebuilding micro-contrast is highly technical, time-consuming work. If you need flawless, magazine-ready results without the headache, let the expert retouchers at Image Work India and Cloud Retouch handle it.
Our team specializes in advanced AI skin artifact removal in fashion retouching. We seamlessly blend AI efficiency with pixel-perfect, traditional retouching techniques to deliver beautiful, natural skin textures every single time.
Stop letting AI ruin your beauty shots. Contact Image Work India and Cloud Retouch today for professional, high-end fashion retouching services that elevate your brand.


