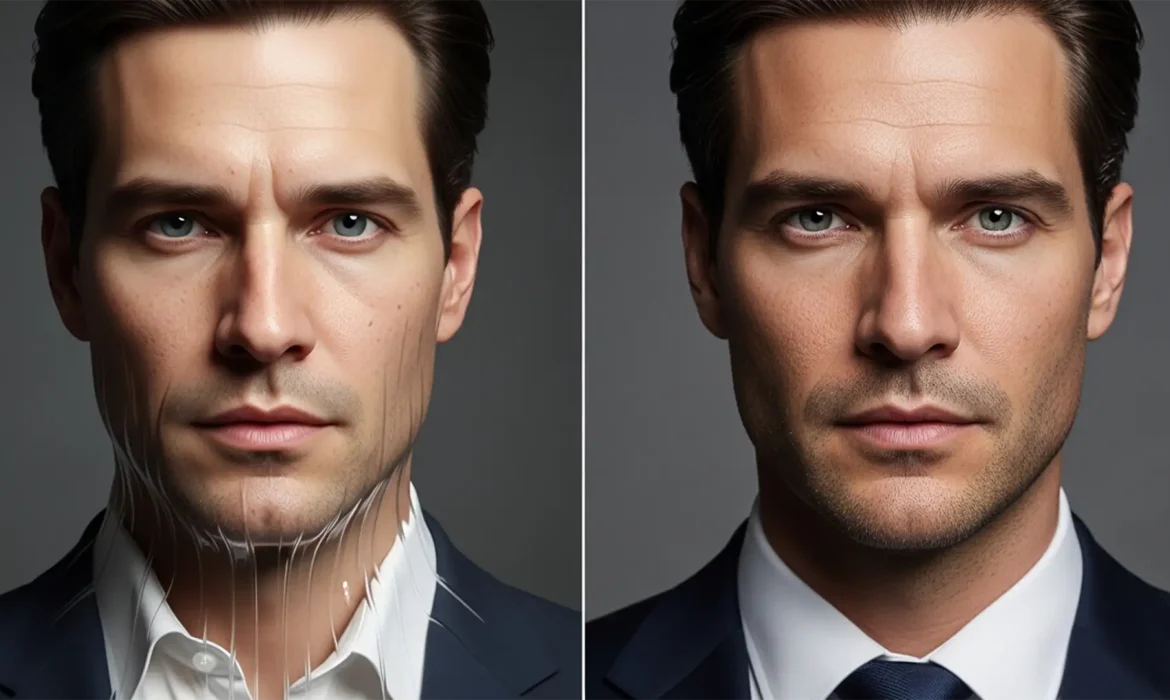
You generated a batch of professional portraits using Midjourney or Lensa, but something feels slightly off. The eyes are mismatched, the teeth look warped, and the skin resembles a smooth plastic mannequin rather than a real human being. Welcome to the “Uncanny Valley.”
While artificial intelligence is incredible at generating base images, it frequently struggles with precise anatomical details and fabric logic. If you want to use these images for LinkedIn, corporate websites, or professional branding, you need to know how to fix AI headshot distortions.
In this guide, we will walk you through the exact technical workflows used by professional retouchers to rescue AI-generated portraits, shifting from global AI generation to targeted, non-destructive pixel manipulation using Adobe Photoshop v25.0+.
Why Do AI Generators Create “Uncanny Valley” Artifacts?
AI image models like Stable Diffusion and Midjourney don’t “understand” human anatomy; they predict pixel patterns based on training data. This lack of structural comprehension leads to common AI structural artifacts:
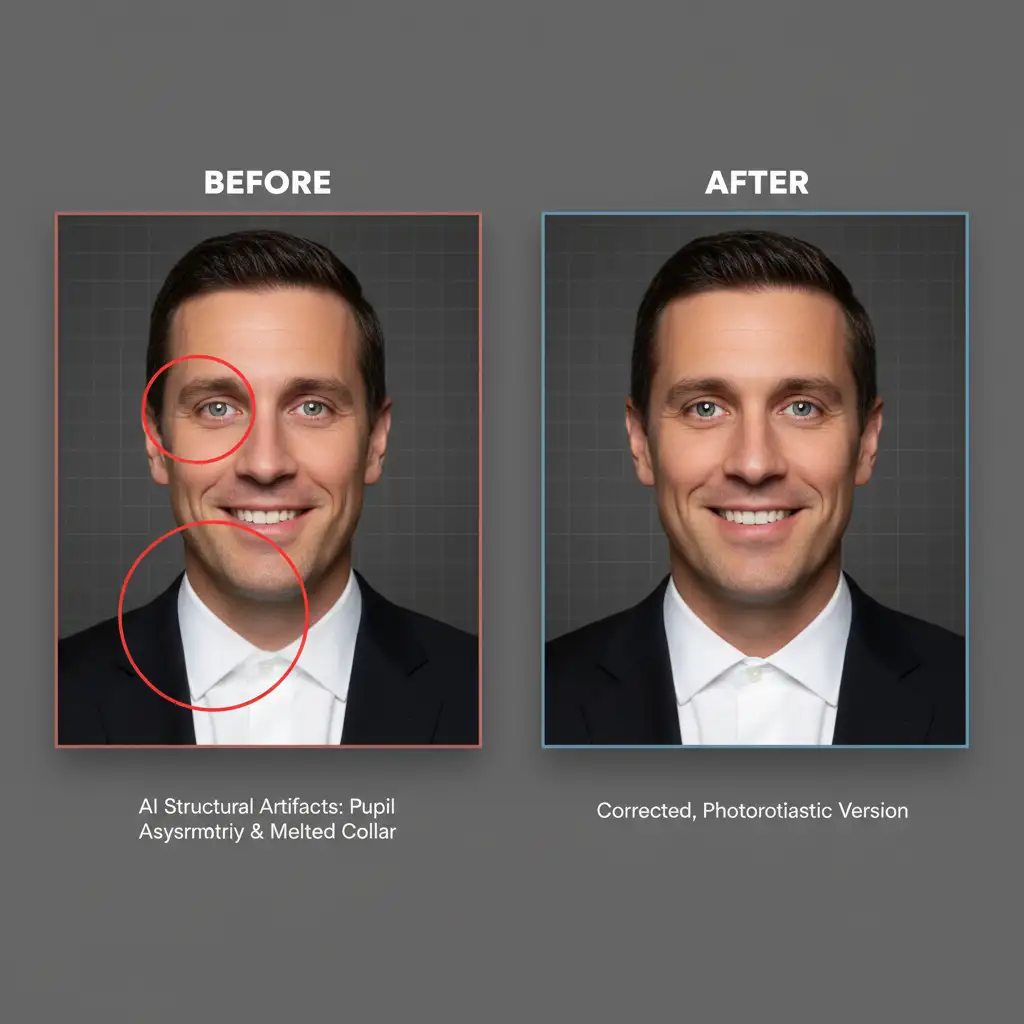
- Pupil Asymmetry: One eye looking slightly off-center or featuring bizarre, unnatural catchlights.
- Melted Fabrics: Neckties merging into shirt collars or earrings blending into the jawline.
- Hyper-Smoothed Skin: A complete lack of natural pores, resulting in a fake, plastic appearance.
To correct these deep-seated pixel errors, you need a combination of traditional compositing techniques and modern AI-assisted patching.
Method 1: The Quick Fix for Melted Artifacts
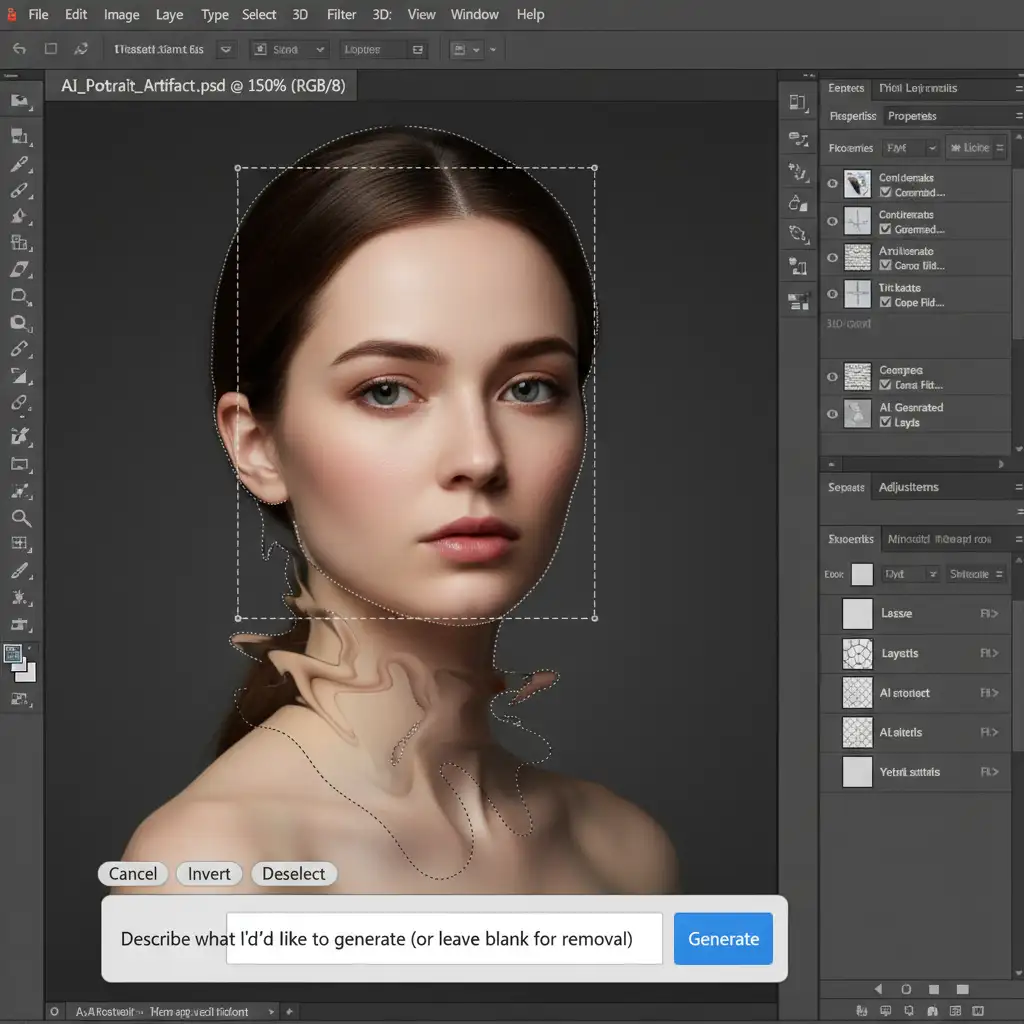
For bizarre background objects or merged clothing layers, Adobe Photoshop’s (v25.x+) Generative Fill is your fastest solution.
- Open your AI headshot in Photoshop.
- Select the Lasso Tool (L) and draw a loose selection around the melted artifact (e.g., a warped collar).
- Click on Generative Fill in the contextual task bar.
- Leave the prompt completely blank (or type “remove”) and hit Generate.
- For minor, localized glitches, switch to the Remove Tool (J) to efficiently patch weird AI textures without altering the surrounding pixels.
Method 2: The Pro Workaround for Skin Retexturing & Asymmetry
AI generators are notorious for outputting over-smoothed skin devoid of natural pores. To address this plastic look and fix structural facial issues, we use Frequency Separation and the Liquify Tool.
Restoring Natural Skin Texture
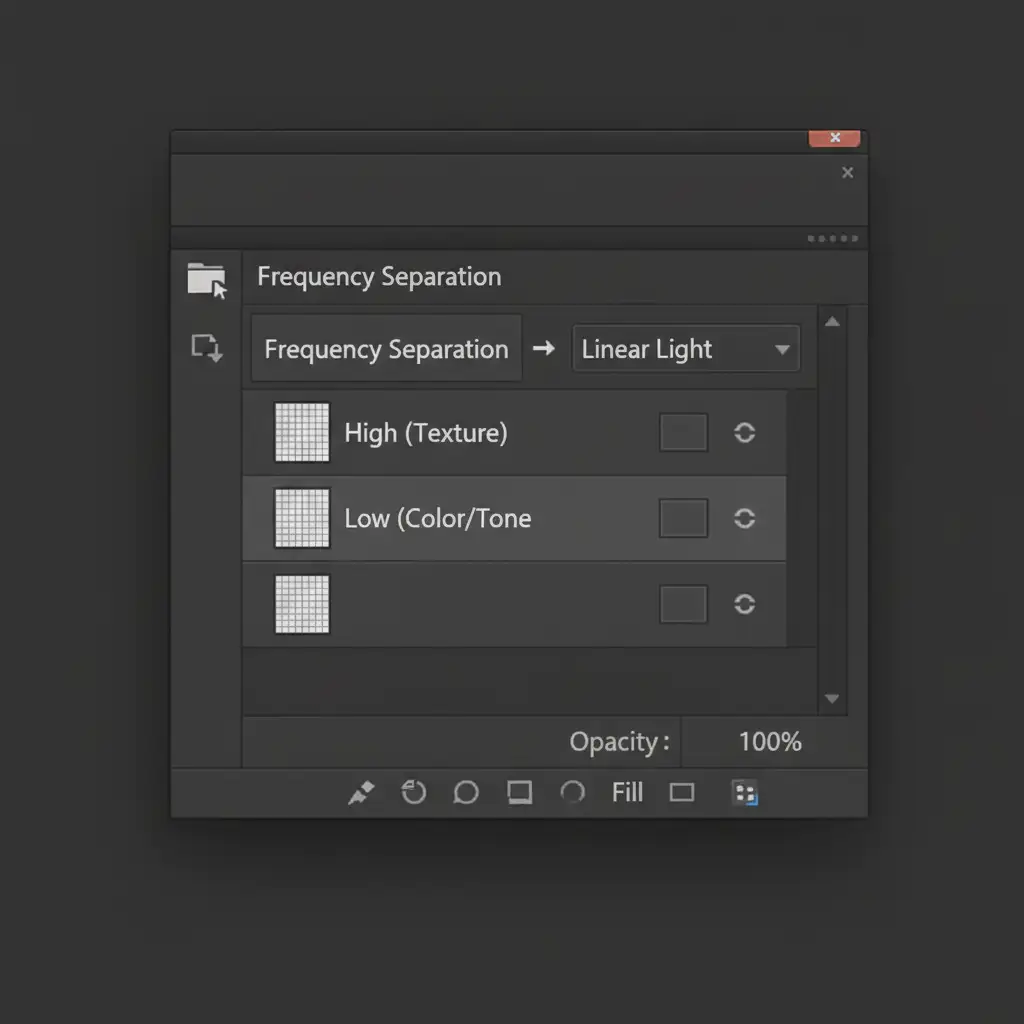
- Duplicate your base layer twice. Name the bottom layer “Low” (for color/tone) and the top layer “High” (for texture). Group them into a folder.
- Apply a Gaussian Blur to the Low layer until the fine details disappear.
- Select the High layer, go to Image > Apply Image, and subtract the Low layer to isolate the texture. Change the High layer’s blending mode to Linear Light.
- Use a Mixer Brush on the Low layer to gently even out any weird AI color banding.
- Skin Retexturing: To simulate real human pores, add a subtle, uniform Noise filter to the High layer. This instantly removes the plastic AI sheen.
Correcting Facial Asymmetry
To fix mismatched eyes or warped jawlines:
- Merge a copy of your visible layers (Ctrl/Cmd + Shift + Alt + E).
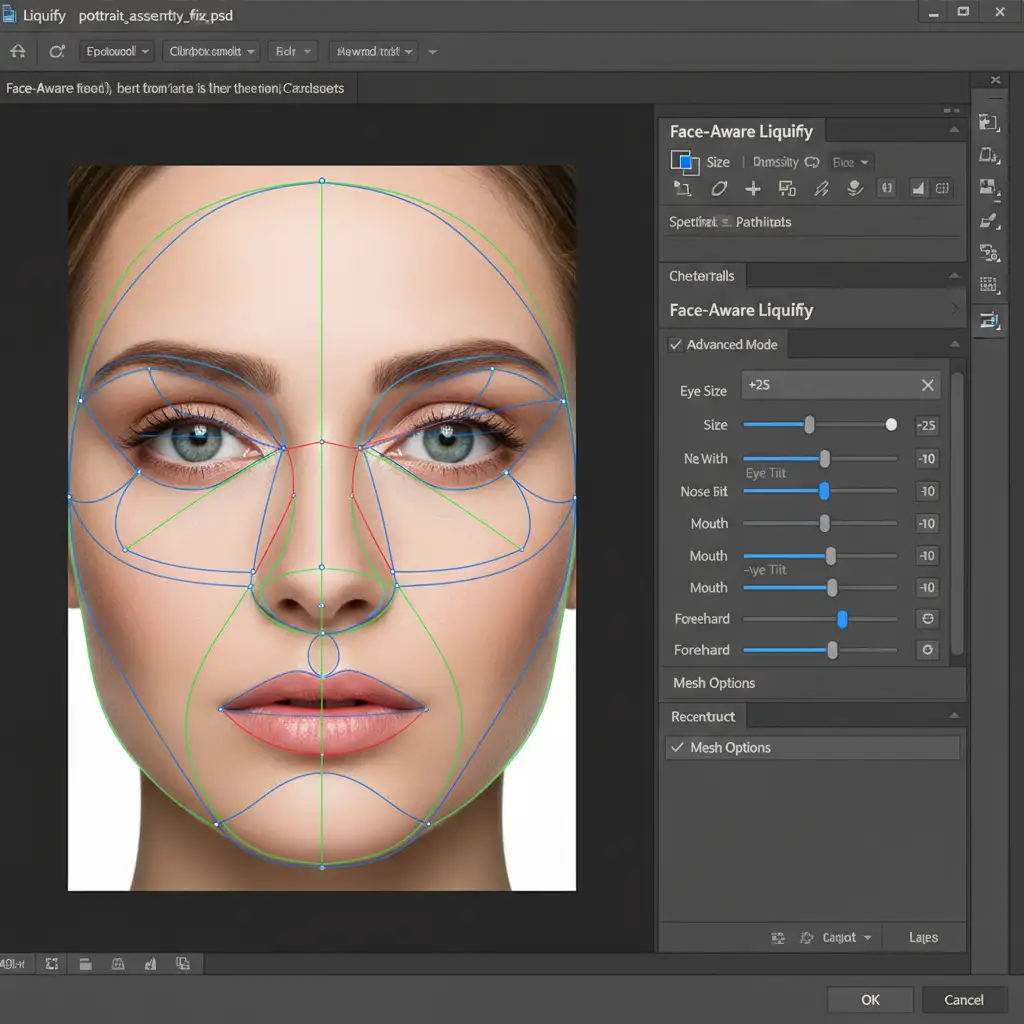
- Navigate to Filter > Liquify.
- Open the Face-Aware Liquify section.
- Use the Eye Size, Eye Tilt, and Jawline sliders to mathematically correct pupil asymmetry and restore natural human proportions.
Method 3: The Technical Deep-Dive for Eyes and Teeth
Sometimes, Generative Fill isn’t enough. AI frequently fails at rendering realistic dental structures and pupil catchlights. When the data simply isn’t there, you must rebuild these features through traditional compositing.
- Source References: Find high-resolution stock references of natural human eyes or teeth that match the lighting angle of your AI headshot.
- Smart Objects: Paste the reference over the AI distortion and convert it to a Smart Object.
- Warping: Use Edit > Transform > Warp to align the perspective of the new teeth or eyes to the subject’s face.
- Layer Masking: Add a black Layer Mask to hide the reference. Paint with a soft white brush to seamlessly blend the new feature into the face.
- Dodging and Burning: Finish by creating Dodge and Burn adjustment layers. Carefully paint in highlights and shadows so the new composite matches the exact lighting of the original AI generation.
Skip the Hassle: Let the Experts Perfect Your Portraits
Learning how to fix AI headshot distortions requires a deep understanding of advanced Photoshop techniques like Frequency Separation, Layer Masking, and compositing. If you miss a step, you risk making the image look even more unnatural.
Don’t let AI artifacts ruin your professional first impression. If you want flawless, photorealistic results without spending hours manipulating pixels, let the human experts at Image Work India and Cloud Retouch handle it.
Our professional retouchers specialize in rescuing AI-generated images, correcting uncanny valley distortions, and delivering polished, hyper-realistic headshots ready for your corporate profile.
[Contact Image Work India & Cloud Retouch Today] to turn your AI drafts into flawless professional realities.


