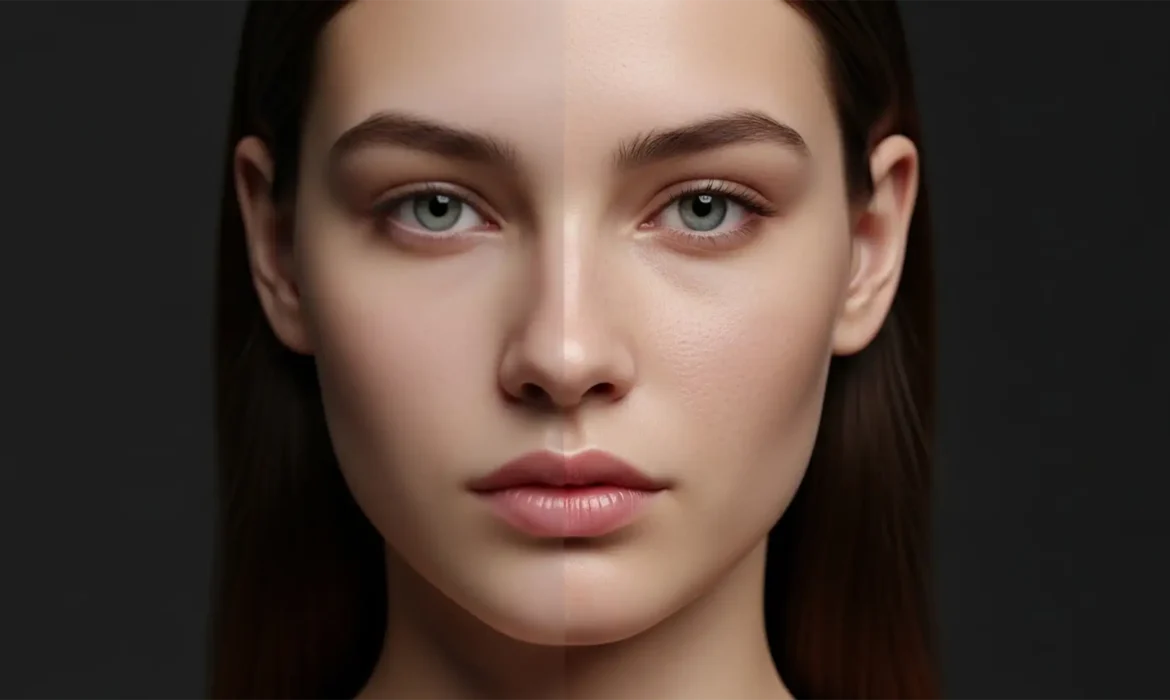
Are you tired of your high-resolution portraits looking like plastic mannequins? In Photoshop v25.x and v26.x, Adobe’s Neural Filters offer a tempting “one-click” solution for skin smoothing. But there is a massive catch. While incredibly fast, these automated machine learning algorithms aggressively blur high-frequency data, destroying natural pore texture and micro-contrast. The result is that dreaded “uncanny valley” effect that instantly ruins a high-end editorial shot. Natural Skin Retouching Vs AI Smoothing. If you want to elevate your portfolio, you have to stop relying on destructive AI blurring and master professional, non-destructive editing techniques. Let’s explore why AI fails at micro-detail and how natural skin retouching vs ai smoothing is the only debate that matters for high-end retouchers.
The Core Problem: Why AI Skin Smoothing Destroys Texture
Adobe Sensei’s AI algorithms are trained to identify faces and smooth out tonal inconsistencies. However, the machine learning model often misinterprets natural skin texture—like pores, fine lines, and micro-shadows—as digital noise.
When you apply aggressive AI smoothing, the software flattens the micro-contrast of the skin. It merges the underlying color tones with the surface texture, resulting in an artificial, overly airbrushed look. Professional retouchers know that flawless skin isn’t featureless; it requires the meticulous separation of tone and texture.
Here are three professional methods to bypass or fix the plastic AI look, ranging from a hybrid quick-fix to top-tier magazine retouching.
Method 1: The Hybrid Fix (Taming Neural Filters)
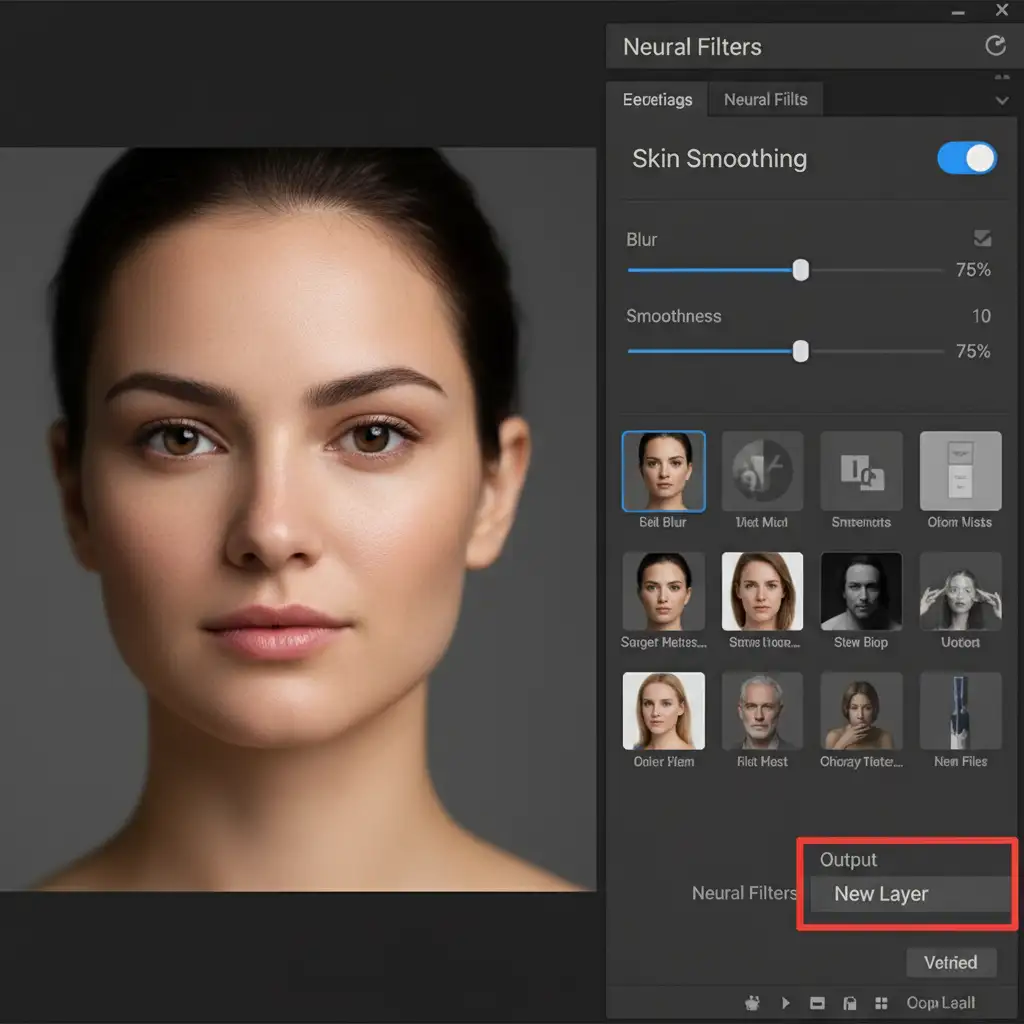
If you are on a strict deadline and must use Photoshop’s AI, you can prevent the plastic look by severely restricting where the AI applies its effect.
- Open Neural Filters and toggle on Skin Smoothing.
- Adjust the Blur and Smoothness sliders to your liking, but critically, set the Output to a New Layer.
- Once back in your main workspace, add a Layer Mask to this new AI-smoothed layer.
- Invert the mask to black by pressing Alt/Option + Click on the Mask icon (or Ctrl/Cmd + I on the mask).
- Select a soft-edged brush, set the opacity to 30%, and paint with white only over problematic areas (like blotchy cheeks or forehead blemishes).
By masking out the AI, you leave the vast majority of the natural skin untouched, utilizing non-destructive editing to maintain realism.
Method 2: The Industry Standard – Frequency Separation
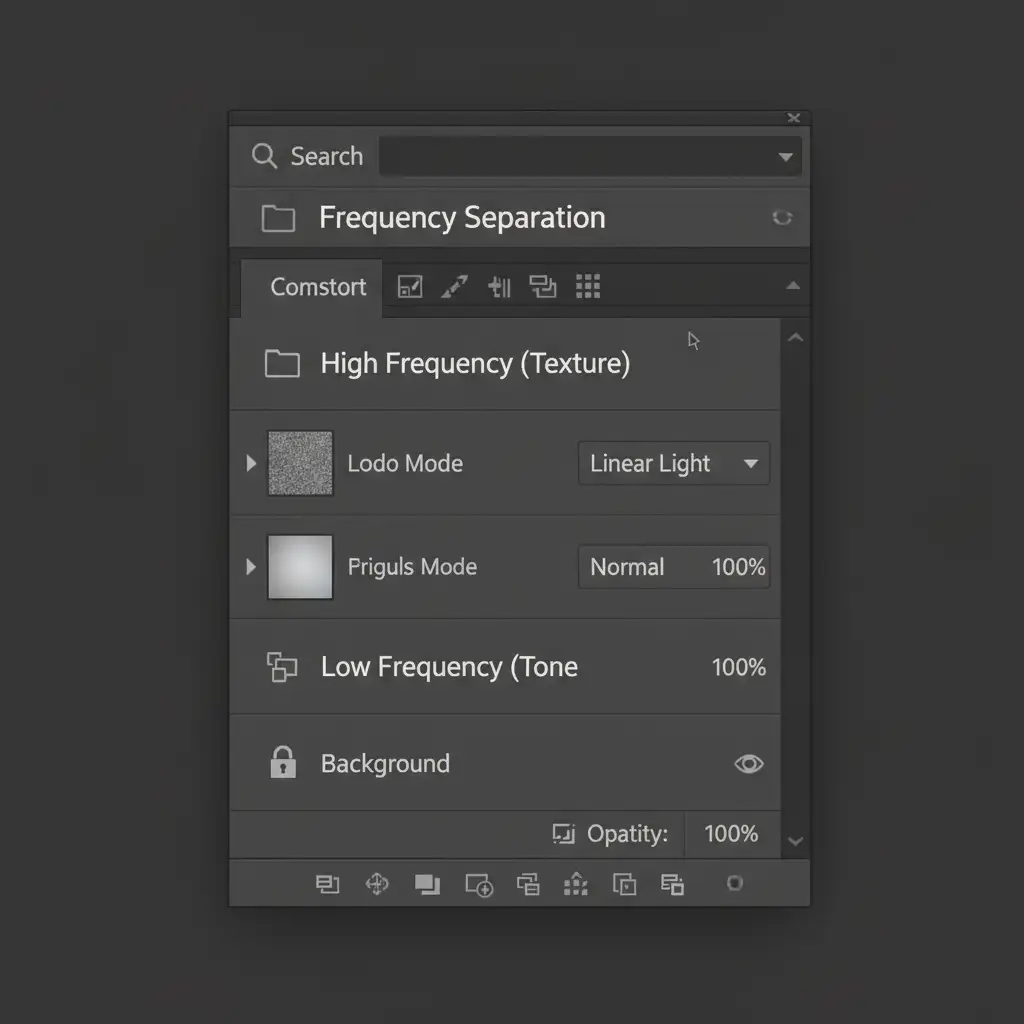
To truly separate texture from tone, frequency separation is the mandatory workflow. This technique allows you to fix color blotchiness without ever touching the pores.
- Duplicate your background layer twice. Group them into a folder.
- Name the bottom layer “Low Frequency” (for color/tone) and the top layer “High Frequency” (for texture).
- Select the Low Frequency layer and apply a Gaussian Blur. Increase the radius just until the blemishes disappear, but the underlying colors remain.
- Select the High Frequency layer. Go to Image > Apply Image.
- In the Apply Image dialog, set the Layer to your Low Frequency layer, change the Blending Mode to Subtract, Scale to 2, and Offset to 128 (for 8-bit images).
- Change the High Frequency layer’s blending mode to Linear Light. (Note: Some retouchers use a High pass filter instead of Apply Image, but Apply Image yields mathematically perfect separation).
Now, select the Low Frequency layer and use a Mixer Brush to blend uneven skin tones. Because you are working beneath the texture layer, the pores remain 100% perfectly intact.
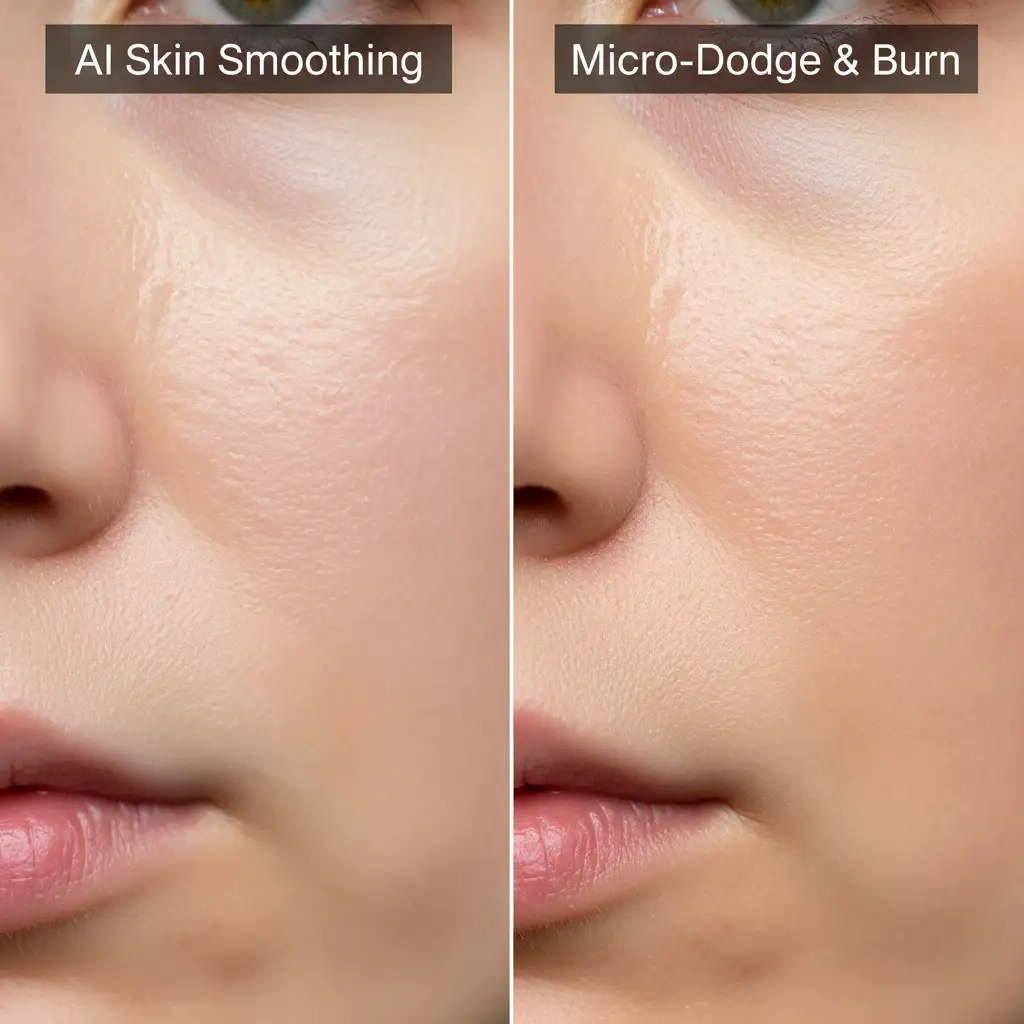
Method 3: The Technical Deep-Dive – Micro-Dodge and Burn
For high-end beauty and fashion campaigns, professionals bypass AI and blurring entirely. The ultimate solution is Micro Dodge and Burn. This technique fixes imperfections at the pixel level while preserving absolutely 100% of the original skin texture.
- Create two Curves adjustment layers. Name one “Dodge” (pull the curve up to lighten) and one “Burn” (pull the curve down to darken).
- Invert both layer masks to solid black.
- Zoom into your image at a massive 200% magnification.
- Select a standard soft brush. Set the size to 1px–3px and the Flow to 1%.
- The Process: Manually paint white on the Dodge mask over dark micro-shadows (like deep pores or blemishes) to lighten them. Paint white on the Burn mask over bright specular highlights to darken them.
This painstakingly evens out the skin’s micro-contrast. It is the only way to achieve truly flawless skin that looks completely natural under macro scrutiny.
See It In Action
Understanding the difference between flattening pixels and manipulating micro-contrast is easier when you see the transition in real-time.
Stop Sacrificing Quality for Speed
Achieving perfect, natural skin through Frequency Separation and Micro-Dodge and Burn takes hours of meticulous, pixel-level editing. While AI tools are tempting, they simply cannot deliver the high-frequency data retention required for commercial, beauty, and editorial photography.
You don’t have to choose between missing your deadlines and delivering plastic-looking portraits. Save your time and guarantee magazine-quality results by outsourcing your portrait and beauty retouching to the experts. At Image Work India and Cloud Retouch, our team of professional retouchers specializes in high-end, non-destructive skin retouching that preserves every pore while delivering flawless results.
Contact us today to elevate your portfolio with retouching that looks beautifully, undeniably human.


