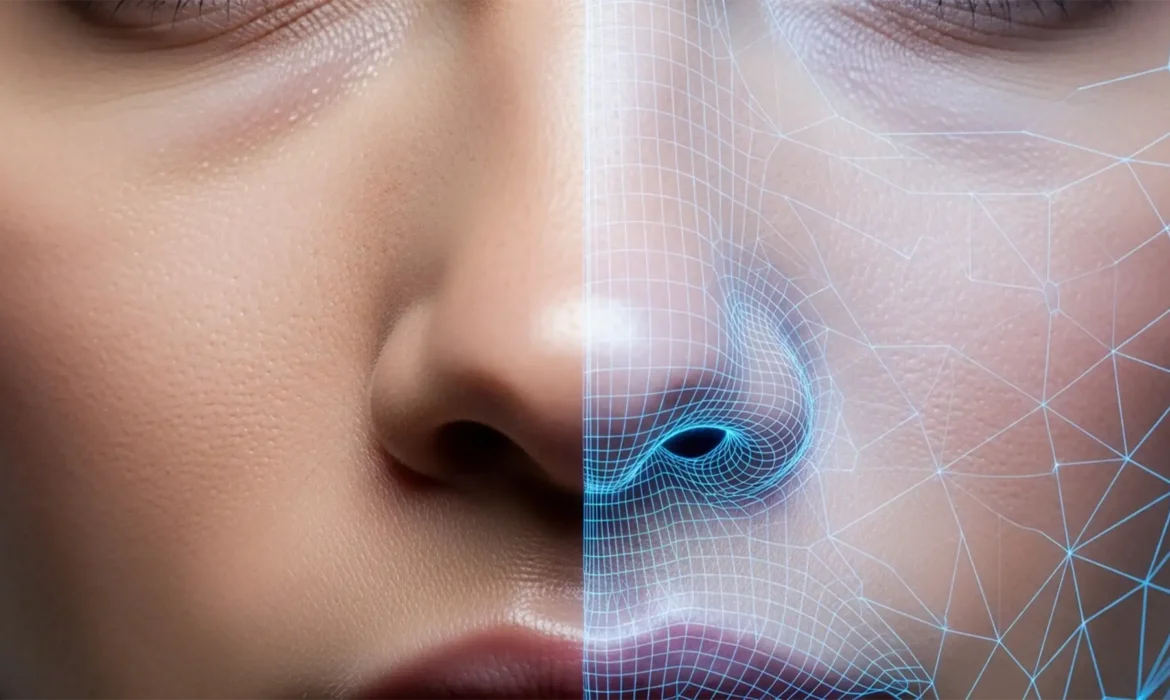
There is a glaring problem in modern portrait editing: AI tools are destroying natural skin. When you try to remove a blemish, stray hair, or distraction, the AI often replaces it with a smooth, poreless patch. This AI hallucination creates a mismatched, “plastic skin” effect that instantly ruins high-end commercial portraits.
If you want flawless results, you need to know exactly which tool to use and when. In the battle of Lightroom Generative Remove vs Photoshop Generative Fill for skin, the difference comes down to workflow environment, prompt control, and texture preservation.
Here is the definitive guide to leveraging these tools to maintain perfect skin texture.
The Core Problem: AI Hallucination on Human Skin
Every generative AI model struggles with high-frequency detail. When tasked with replacing a section of skin, the AI has to guess the pore density, lighting gradient, and underlying anatomical structure.
Often, it guesses wrong. It hallucinates a generic, overly smoothed patch that stands out against the subject’s natural complexion. Fixing this requires understanding the fundamental differences between Adobe’s two flagship AI integrations.
Analyzing the Contenders
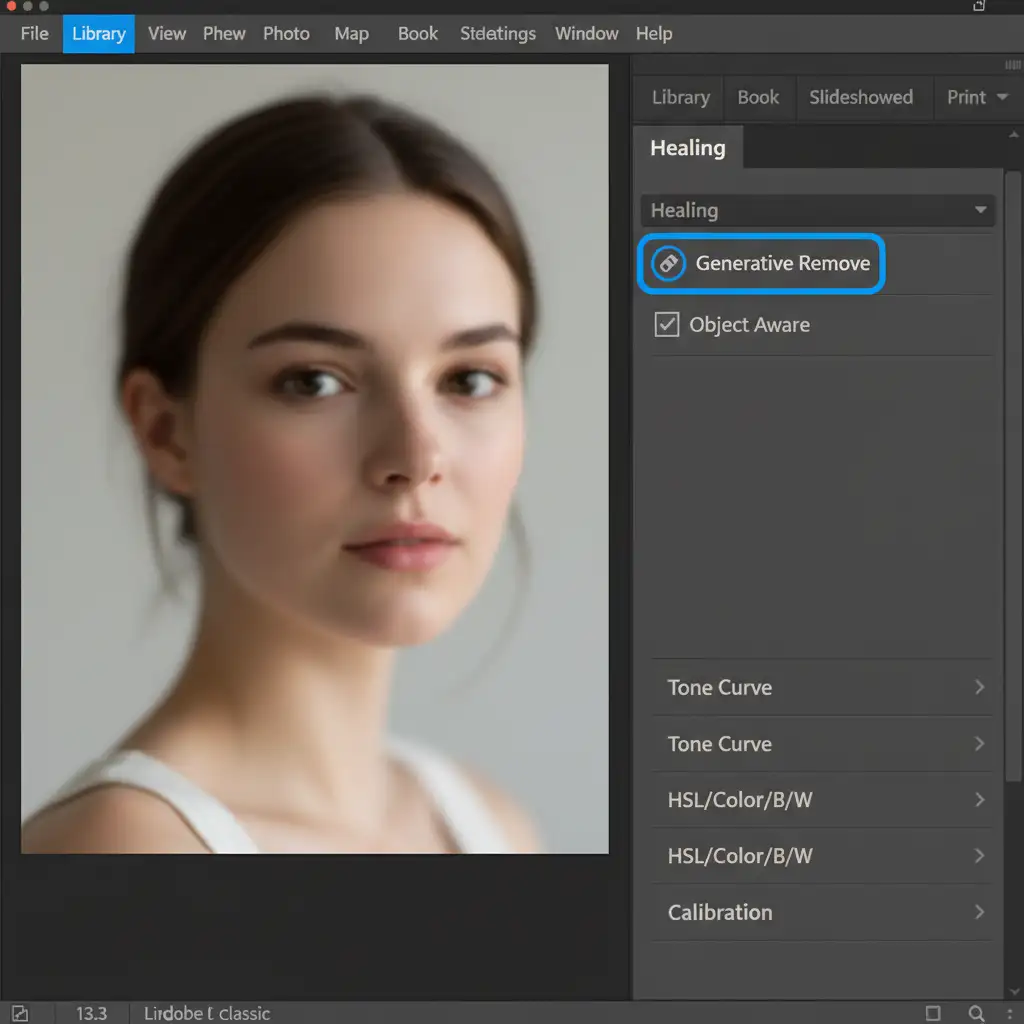
Lightroom Classic v13.3: The Quick RAW Fix
Lightroom’s new Generative Remove tool is built directly into the healing panel. Its biggest advantage is that it operates within a non-destructive raw workflow. You don’t need to generate massive TIFF files or leave your catalog to make a quick fix.
However, it acts as a “black box.” You cannot use text prompts to guide the AI, meaning you are entirely at the mercy of the algorithm’s interpretation of the surrounding skin.
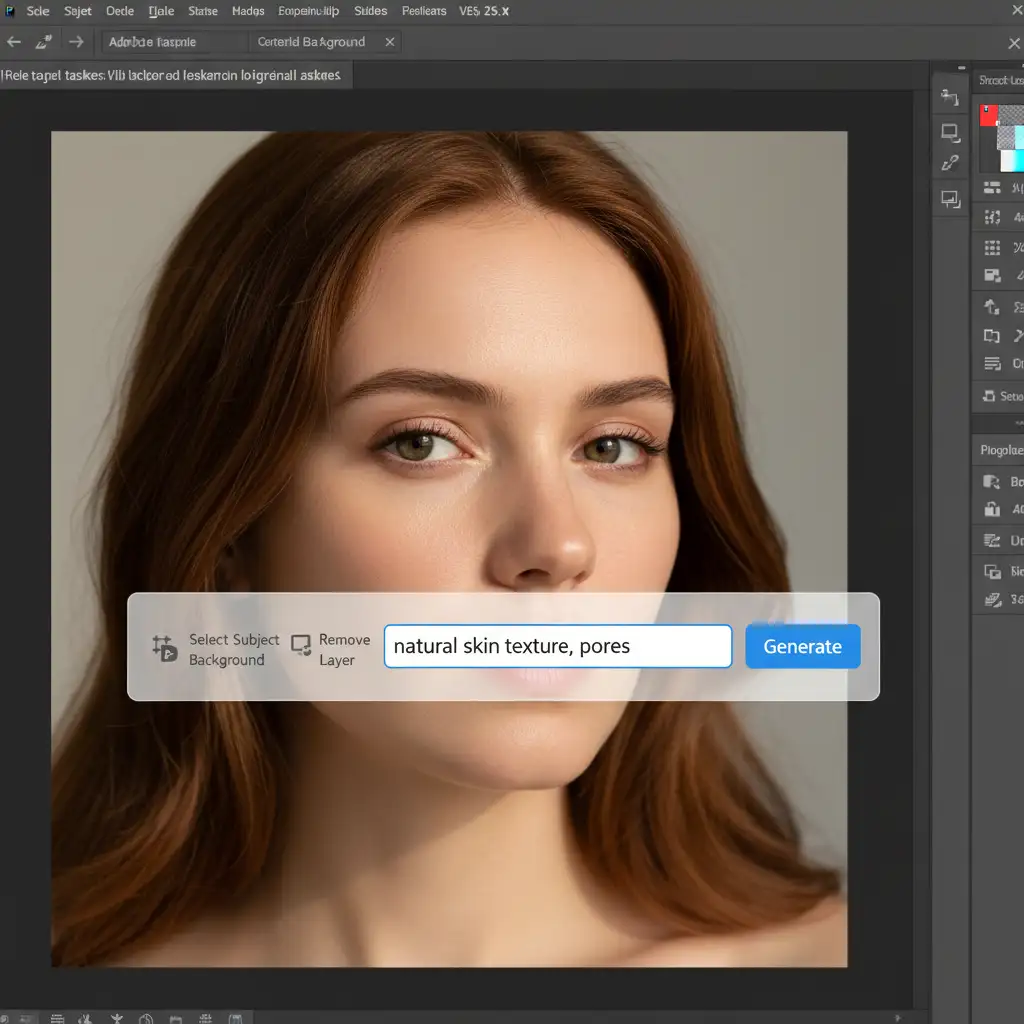
Photoshop v25.x: The Pro Pixel Editor
Photoshop’s Generative Fill, powered by the advanced Firefly Image 3 model, is a completely different beast. It requires rendering your image to a pixel layer, which increases file size and breaks the raw workflow.
The trade-off is absolute control. Photoshop allows for prompt engineering and advanced masking, giving professional retouchers the granular ability to blend AI-generated patches with the original skin structure.
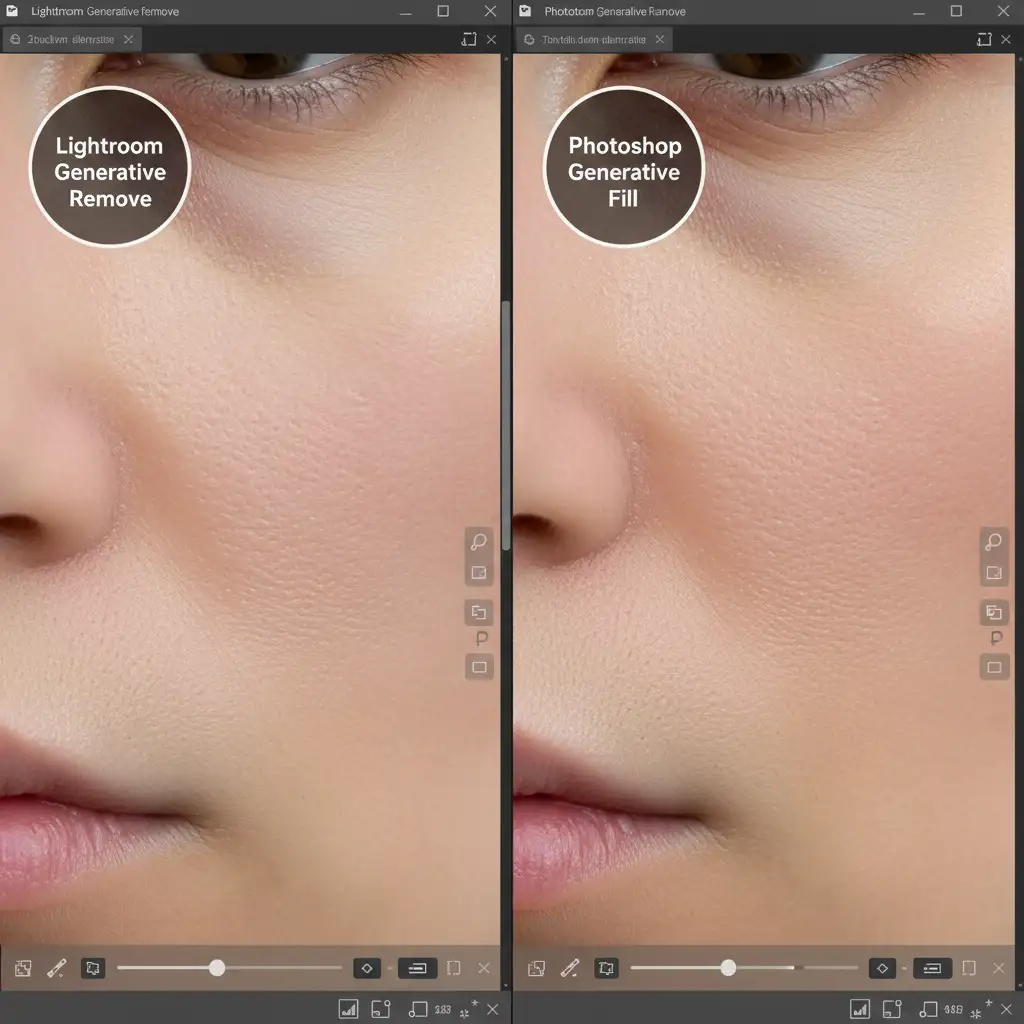
Side-by-Side: Skin Texture Retention
When pushed to the limit, how do these two tools compare in skin texture retention?
At a standard viewing distance, both tools successfully remove blemishes. But under the scrutiny of commercial retouching, the differences are stark. Lightroom’s lack of prompt control means larger replacement areas often lack the micro-contrast of surrounding pores. Photoshop, when prompted correctly, generates a much closer match to the subject’s unique epidermal structure.
3 Professional Workflows to Prevent “Plastic Skin”
To achieve commercial-grade results, you must adapt your workflow based on the severity of the blemish. Here are the three best methods to guarantee natural results.
Method 1: The Lightroom Precision Brush (For Quick Fixes)
For isolated acne, small scars, or single stray hairs, stay in Lightroom.
- Select the Generative Remove tool.
- Ensure Object Aware is checked.
- Keep your brush size as tight as possible—barely covering the blemish.
By minimizing the sample area, you force the AI to blend tightly with the immediate surrounding pores, drastically reducing the chance of a noticeable hallucination.
Method 2: Photoshop Prompt Engineering & Masking (The Pro Workaround)
When removing larger distractions (like a hand resting on a face or a large shadow), Lightroom will fail. Move to Photoshop.
- Make your selection and open Generative Fill.
- Instead of leaving the box blank, use specific prompt engineering: type “natural skin texture, pores”.
- Once generated, lower the layer mask opacity to 50–70 percent.
This allows the original underlying skin structure and luminosity to bleed through the AI-generated patch, creating a highly realistic composite.
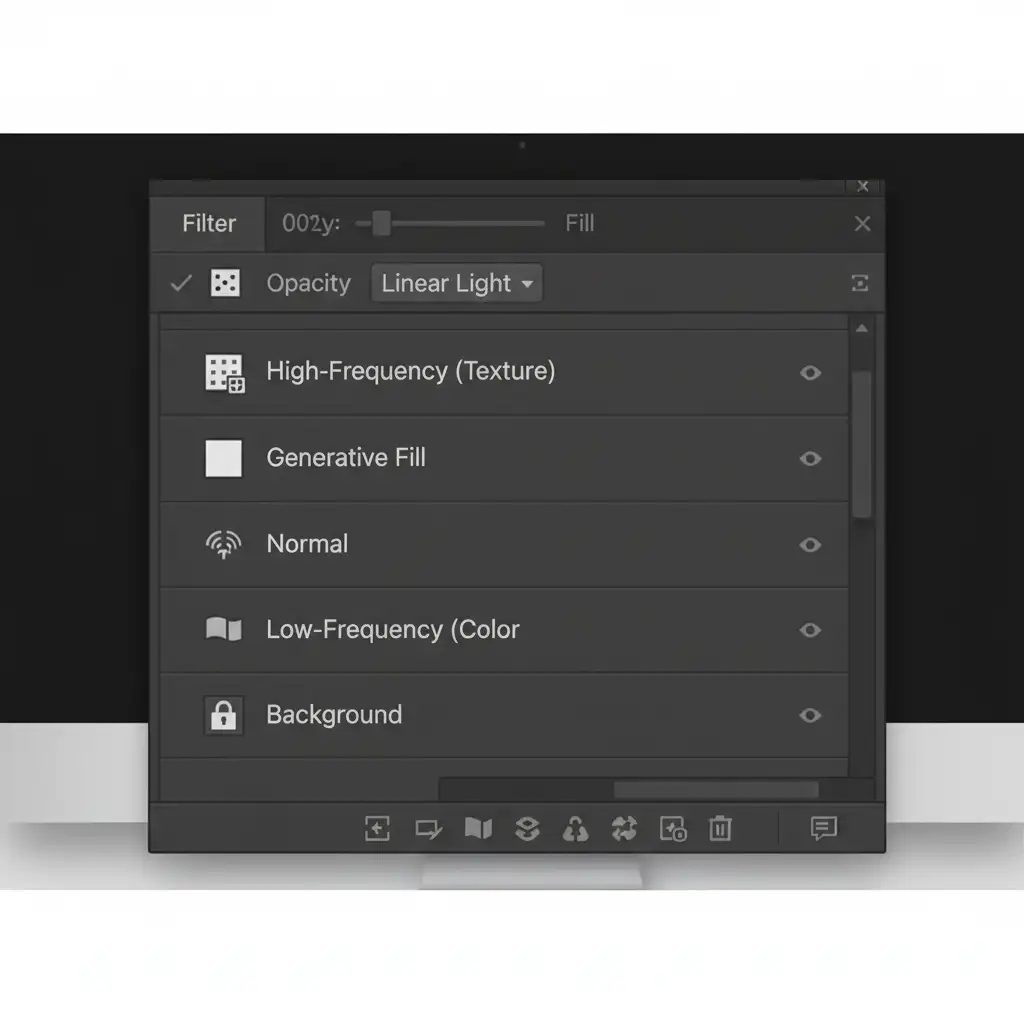
Method 3: Generative AI + Frequency Separation (The Ultimate Deep-Dive)
For the highest tier of beauty retouching, you must isolate color from texture. This involves combining AI with frequency separation.
- Set up your standard Frequency Separation layer stack in Photoshop (Low-Frequency for color/tone, High-Frequency for texture).
- Make your selection on the Low-Frequency layer only.
- Run Generative Fill on this layer to instantly fix redness, blotchiness, or harsh shadows.
Because the high-frequency detail layer remains completely untouched at the top of your stack, 100 percent of the subject’s natural pores are preserved. You get the speed of AI color correction with the flawless texture retention of manual high-end retouching.
Scale Your Retouching Workflow Today
Mastering the balance between Lightroom Generative Remove vs Photoshop Generative Fill for skin takes time, deep technical knowledge, and an eye for pixel-perfect detail. If your studio is struggling to maintain natural skin textures while trying to scale up volume, you don’t have to do it alone.
Let the professional retouching team at Image Work India and Cloud Retouch handle your high-end editing needs. Our experts utilize advanced AI workflows combined with manual frequency separation to deliver flawless, commercial-grade portraits with 100% natural skin retention. Contact us today to streamline your post-production workflow and deliver perfection to your clients.


