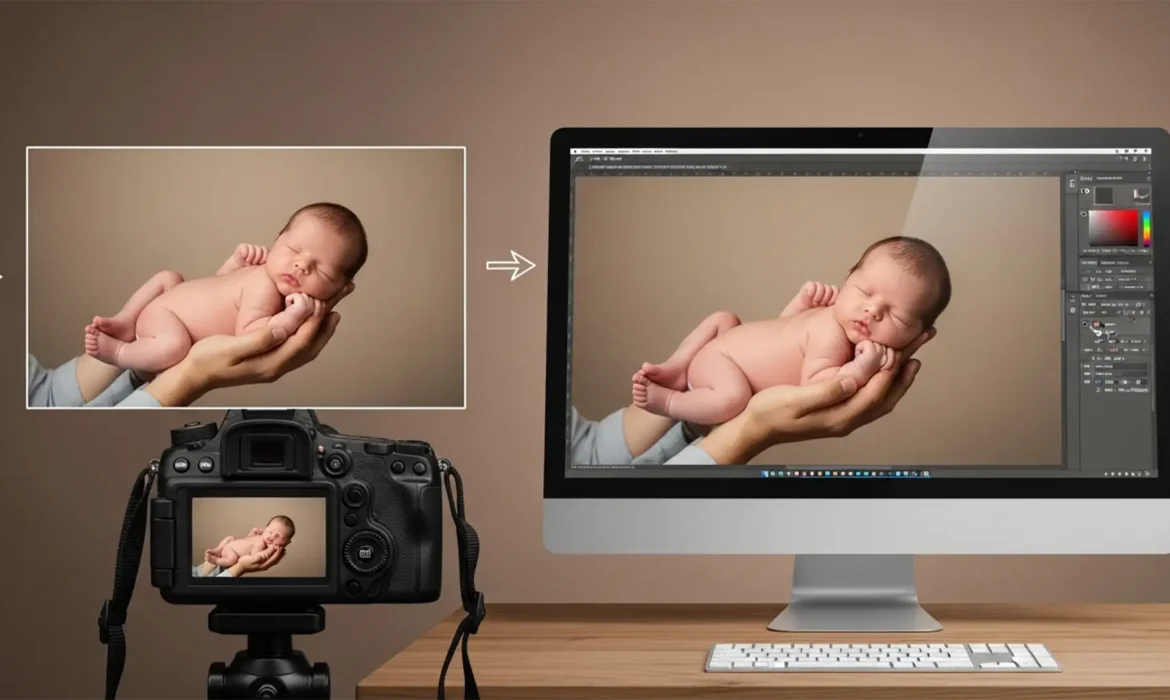
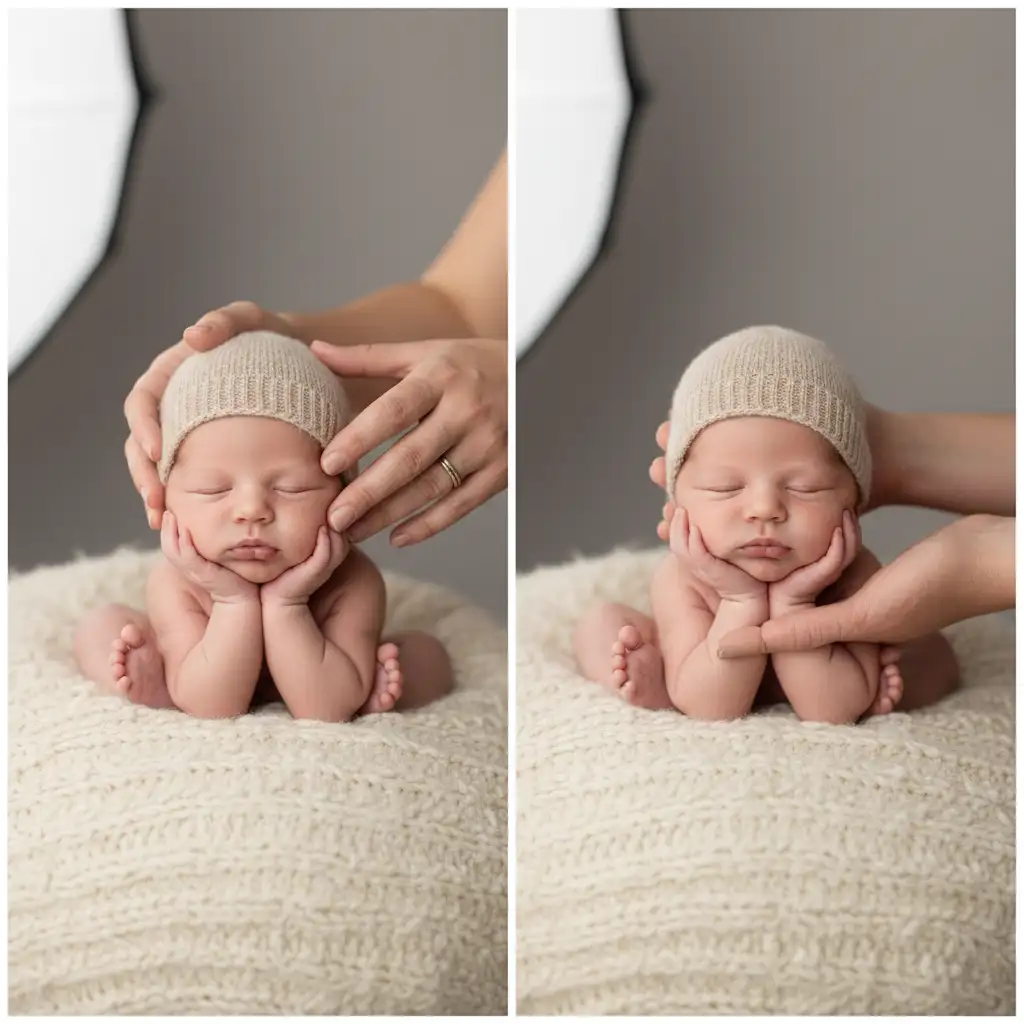
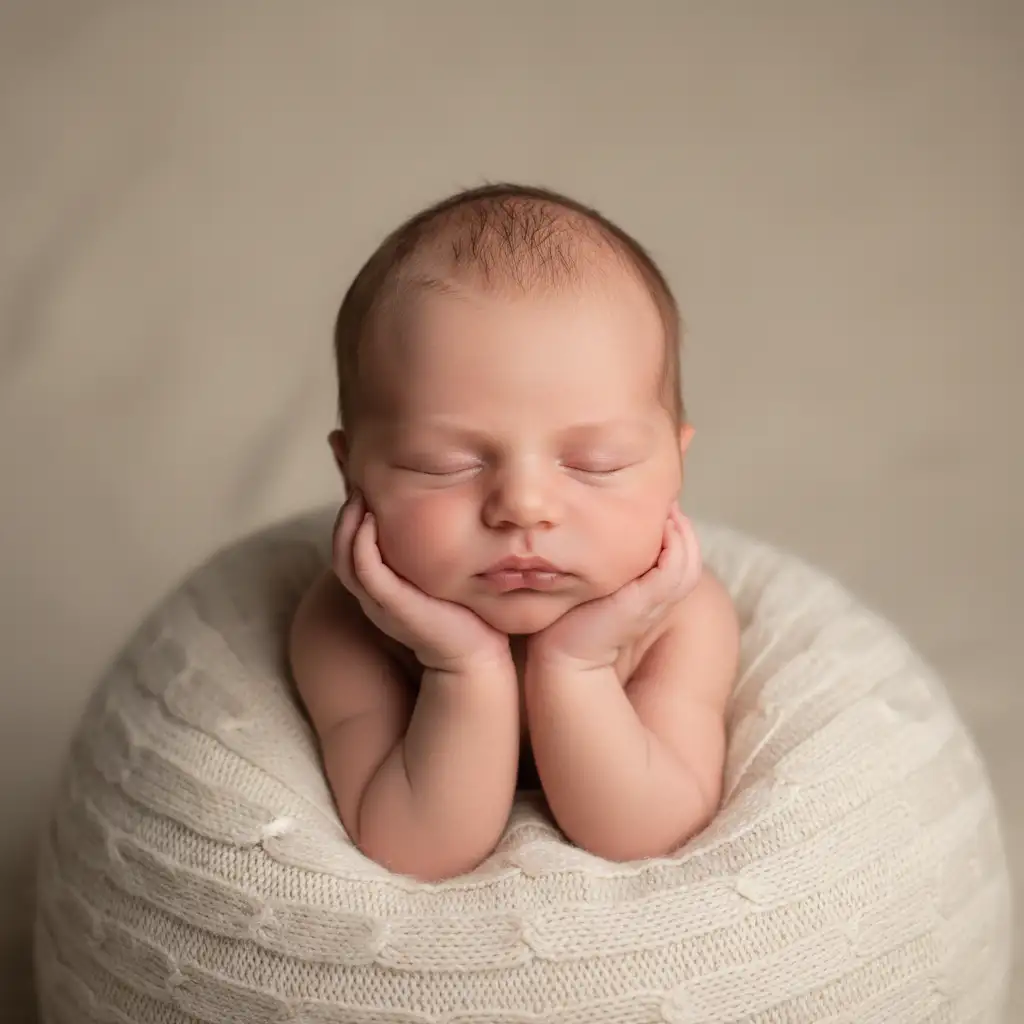
Every professional newborn photographer knows the golden rule: safety first. When clients request the iconic, adorable “Froggy Pose,” executing it safely means never letting the baby support their own weight. This requires capturing two separate images—one with an assistant supporting the baby’s head, and another supporting the wrists. But here is where the headache begins. When you sit down to composite newborn poses safely in Photoshop, micro-movements of the camera or the baby inevitably cause ghosting, lighting inconsistencies, and harsh edges where the assistant’s hands were removed.
If you’re struggling to seamlessly merge these safety shots in Photoshop v24.x or v25.x, you are not alone. This step-by-step tutorial will walk you through the exact technical workflow to create flawless, safe newborn composites.
The Technical Challenge of Newborn Composites
Taking the two foundational shots is only half the battle. The technical challenge arises during post-production. Even if you shoot on a sturdy tripod, the baby’s breathing or slight shifts in the assistant’s grip will cause the two frames to misalign. Merging these photos without the right techniques results in disjointed fabric creases, mismatched skin tones, and noticeable editing seams.
To overcome this, we rely on a non-destructive editing workflow utilizing Auto-Align Layers, precision Layer Masks, and advanced retouching tools.
Step-by-Step: How to Composite Newborn Poses Safely in Photoshop
Method 1: The Quick Fix (Alignment and Masking)
For images with minimal movement, a basic alignment and masking workflow is highly effective.
- Stack Your Images: Open both safety shots in Photoshop. Place the image where the head is supported on the bottom, and the wrist-supported image on top in the Layers panel.
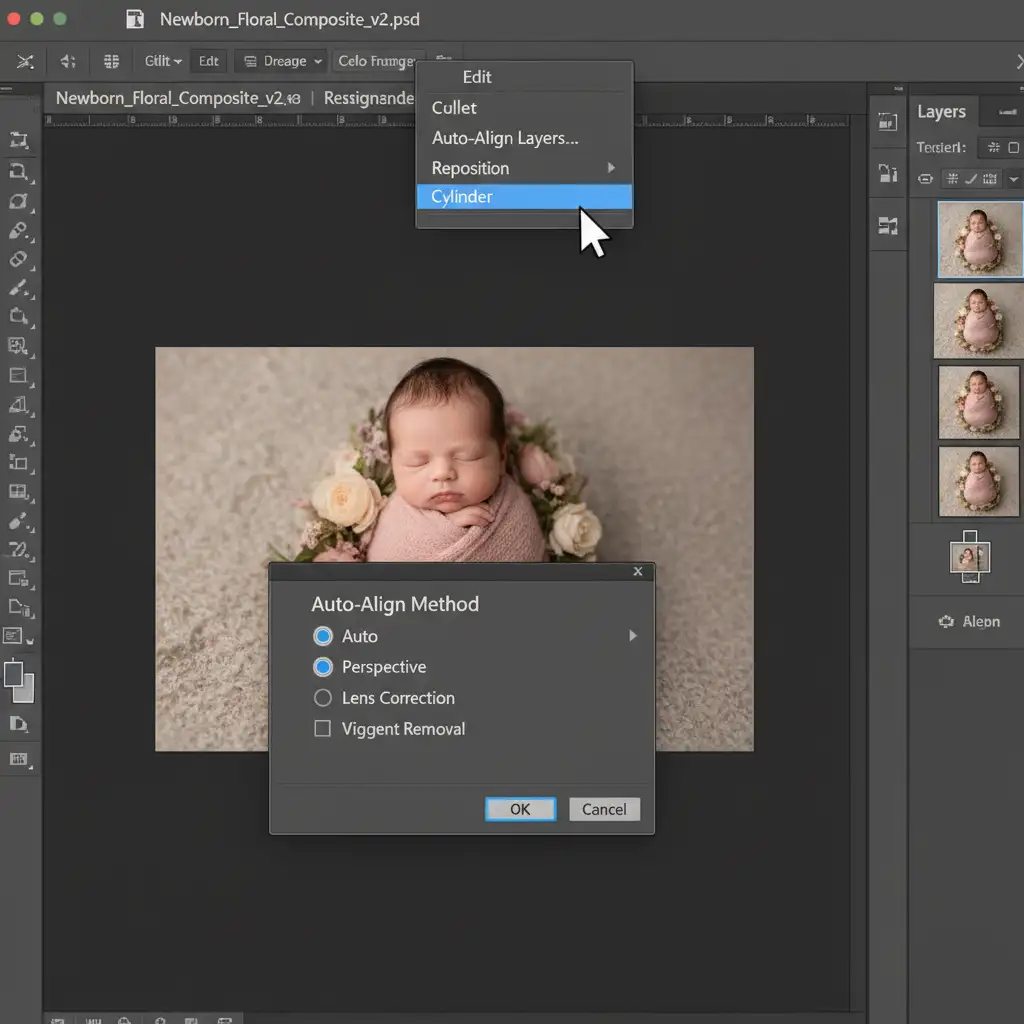
- Auto-Align Layers: Select both layers by holding Shift and clicking them. Navigate to Edit > Auto-Align Layers. Choose the “Auto” projection and click OK. Photoshop will automatically analyze the pixels and correct any micro-movements.
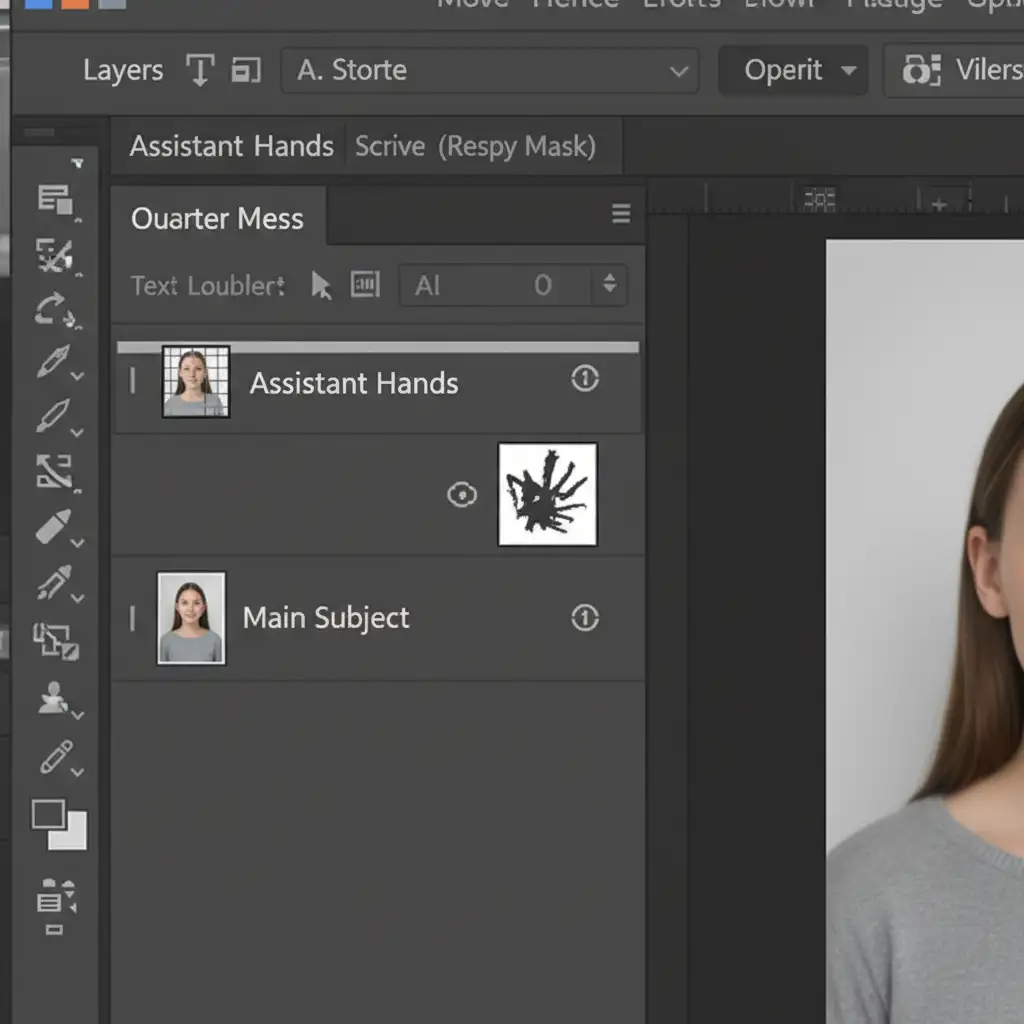
- Apply a Layer Mask: Select your top layer and click the “Add Layer Mask” icon at the bottom of the Layers panel.
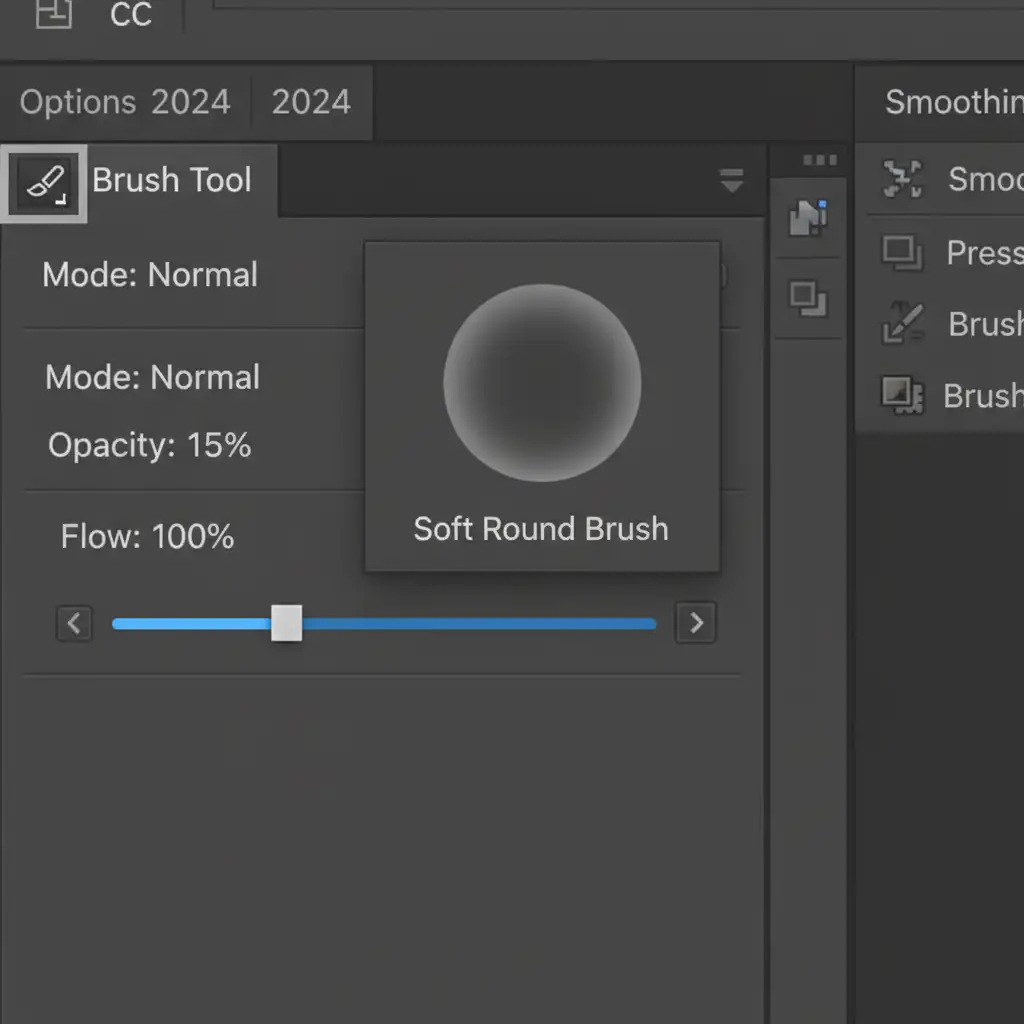
- Brush Away the Hands: Select a Soft Round Brush, set your foreground color to black, and gently paint over the assistant’s hands on the top layer. This will conceal the hands and reveal the clean, unsupported baby parts from the layer below.
Method 2: The Pro Workaround (Smart Objects & Generative Fill)
When the alignment isn’t perfect or the assistant’s hands disturbed the background fabric, you need a more robust, non-destructive approach.
- Convert to Smart Objects: Before aligning, right-click both layers and select “Convert to Smart Object.” This preserves the original image data, allowing for non-destructive scaling and transforming if manual alignment is needed.
- Precision Blending: Instead of relying solely on a brush, use the Pen Tool to create paths around hard edges (like the baby’s fingers or chin). Convert the path to a selection, apply a slight Feathering (1-2 pixels), and mask.
- Soft Blending: Switch to your Soft Round Brush. Lower the brush Opacity to 10-20 percent to gently blend the skin transitions, ensuring no harsh lines remain between the two exposures.
- Generative Fill for Fabric: In Photoshop v25.x (CC 2024), assistant hands often leave deep, unnatural creases in the posing fabric. Use the Lasso Tool to select the disturbed fabric, click Generative Fill on the Contextual Task Bar, leave the prompt blank, and hit generate. Photoshop will seamlessly reconstruct the missing background details.
Method 3: The Technical Deep-Dive (Fixing Skin Discoloration)
Even with perfect masking, pressure from the assistant’s hands often causes red marks or pale spots on the newborn’s sensitive skin. To fix this without destroying the natural skin pores, we use Frequency Separation.
- Create Separation Layers: Group your finished composite, duplicate the group, and merge it. Duplicate this merged layer twice. Name the bottom one “Low Frequency” (Color) and the top one “High Frequency” (Texture).
- Apply Blurs and Image Calculations: Apply a Gaussian Blur to the Low Frequency layer until the skin texture disappears. Select the High Frequency layer, go to Image > Apply Image, subtract the Low Frequency layer, and set the blending mode to Linear Light.
- Correct the Color: Select the Low Frequency layer. Use the Mixer Brush with a clean, moist brush setting to gently blend the pale or red pressure marks with the surrounding healthy skin tone.
- Restore the Texture: Select the High Frequency layer. Use the Clone Stamp tool to sample clean skin texture and stamp it over any areas where the skin pores were disturbed by the assistant’s fingers.
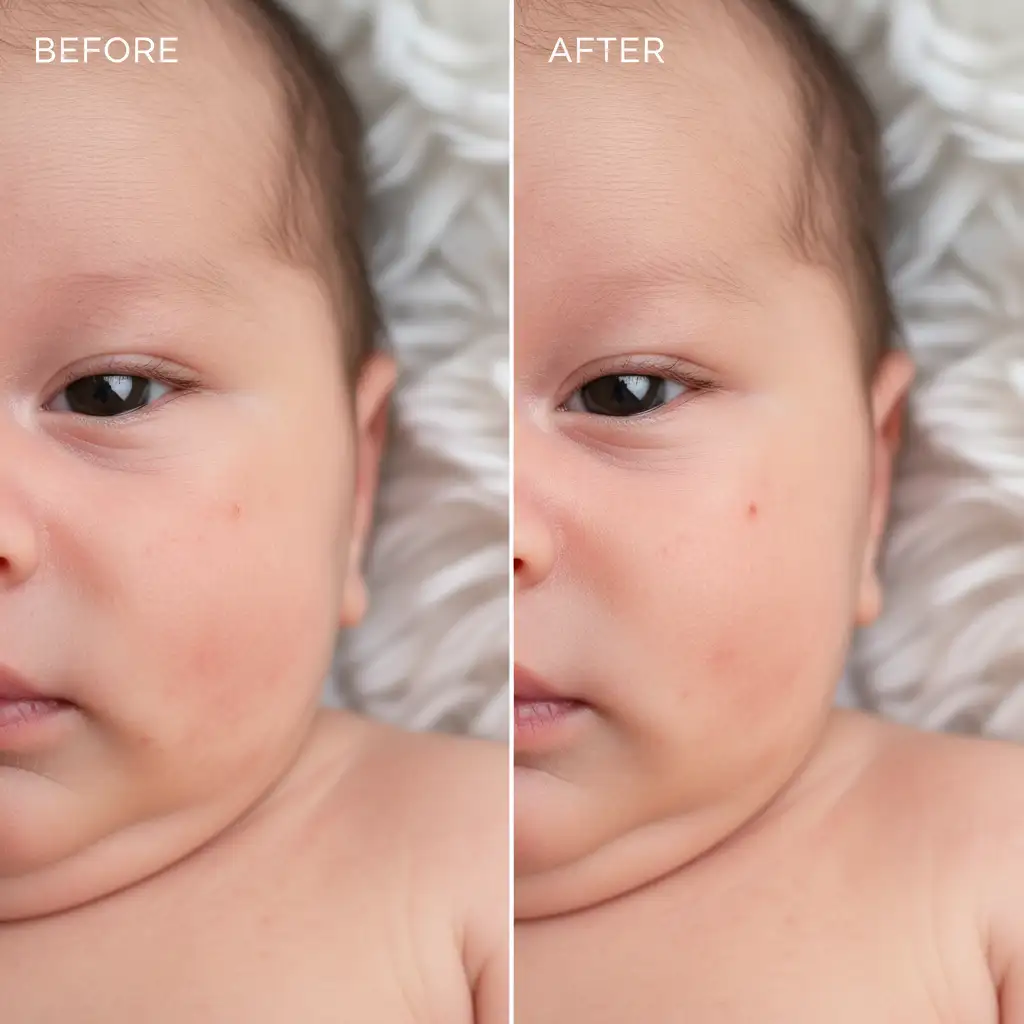
The Final Result: A Flawless, Safe Froggy Pose
By utilizing Auto-Align Layers to fix micro-movements, Layer Masks for seamless blending, and Frequency Separation for skin correction, you can deliver breathtaking images to your clients without ever compromising the safety of their baby.
Outsource Your Newborn Retouching to the Experts
Learning to composite newborn poses safely in Photoshop takes time, patience, and advanced technical skills. When you’re managing a busy photography studio, spending hours masking out hands, fixing ghosting, and correcting skin discoloration eats into your profitability and family time.
Need flawless newborn composites without the editing stress?
Outsource your newborn retouching to Image Work India and Cloud Retouch. Our team of expert retouchers specializes in high-end newborn photography editing. From complex Froggy Pose composites and background extensions to delicate frequency separation and flaky skin removal, we deliver pixel-perfect, safe, and professional results every time.
Focus on capturing beautiful, safe moments in the studio, and let Image Work India and Cloud Retouch handle the digital magic. Contact us today to streamline your post-production workflow!


