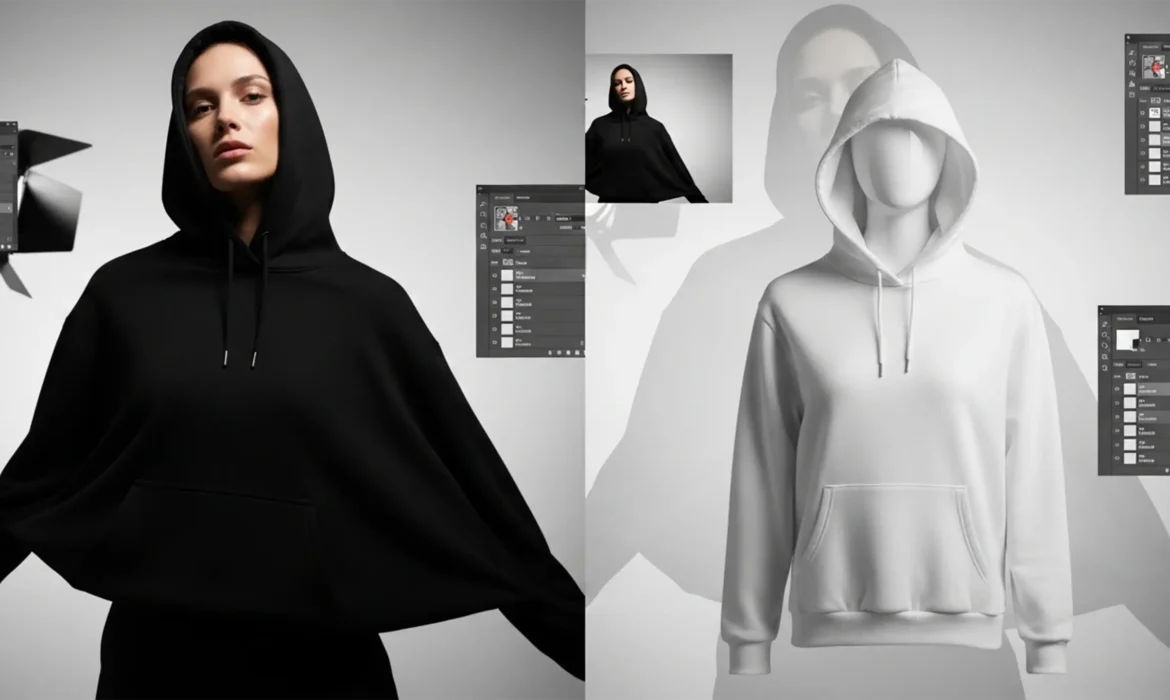
Every professional retoucher knows the dread of a client asking to “just make it white.” When you attempt to change black clothing to white in Photoshop 2026, standard brightness adjustments or simple inversions almost always result in a muddy, textureless gray or a blown-out, flat blob.
The core issue? Pure black pixels lack inherent luminosity data. When you force the exposure up, you destroy the fabric’s natural grain and specular highlights. While generative AI fills might seem like an easy out, they frequently alter the physical garment design—a massive red flag for e-commerce retouching where product accuracy is mandatory.
To achieve a photorealistic color replacement, you must artificially isolate luminosity, boost the midtones without clipping highlights, and utilize advanced blending modes. Here is the definitive guide to remapping black pixels to white while retaining every fold, shadow, and microscopic fabric weave.
Method 1: The Quick Fix (Camera Raw Filter)
If you are working with a forgiving fabric or need a rapid turnaround, the Camera Raw Filter provides an excellent foundation for texture recovery.
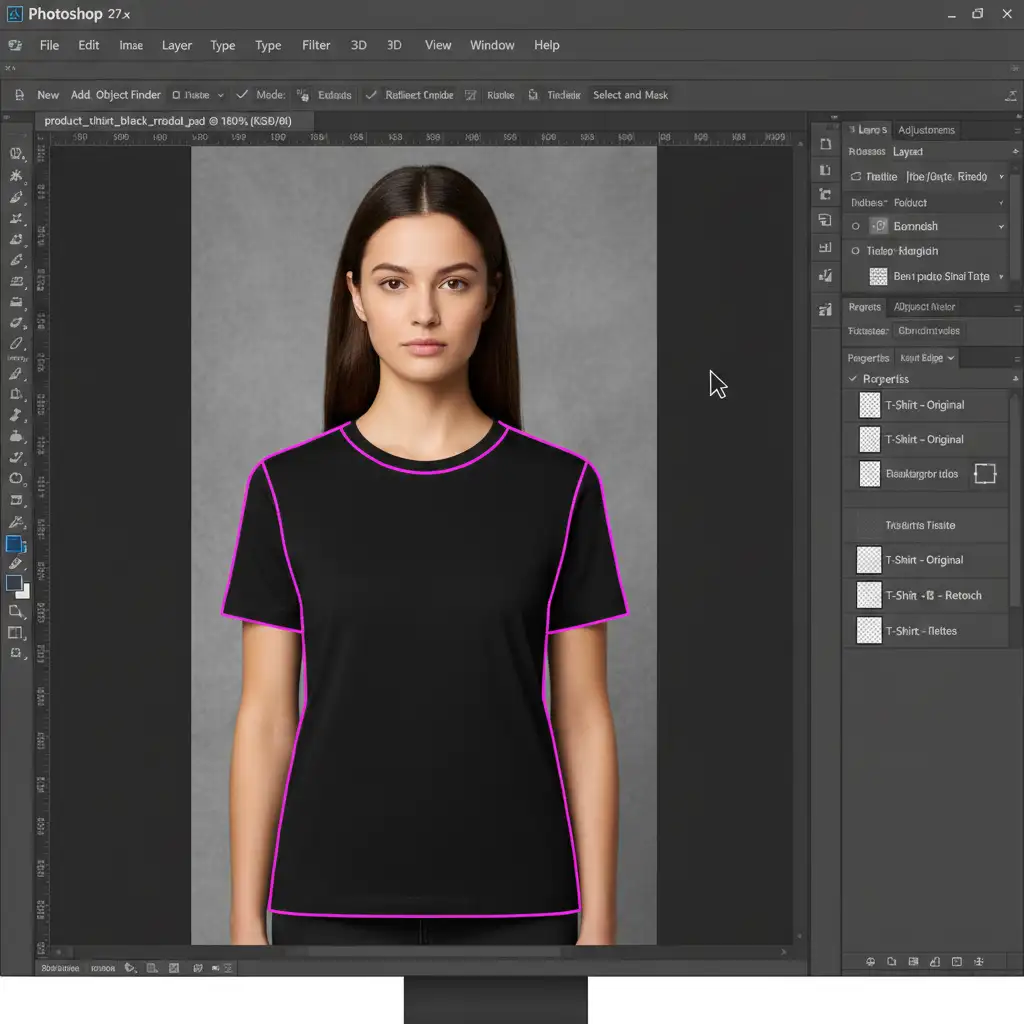
- Isolate the Garment: Use the Object Selection tool to mask the black clothing.
- Convert to Smart Object: Right-click your isolated clothing layer and select Convert to Smart Object. This ensures your adjustments remain non-destructive.
- Open Camera Raw: Navigate to Filter > Camera Raw Filter.
- Push the Sliders: To artificially recover texture from dark pixels, drastically increase the Exposure and Shadows sliders. Simultaneously, reduce the Blacks and Whites sliders to prevent clipping highlights.
- Remove Color Casts: Drop the Saturation to -100 to remove any unwanted color banding introduced by the extreme exposure push.
Method 2: The Pro Workaround (Invert and Blending Modes)
For standard e-commerce retouching where realistic shading is critical, the Invert and Blend method is the industry standard. This technique mathematically reverses the pixel values while preserving the structural integrity of the fabric.
Step-by-Step Workflow
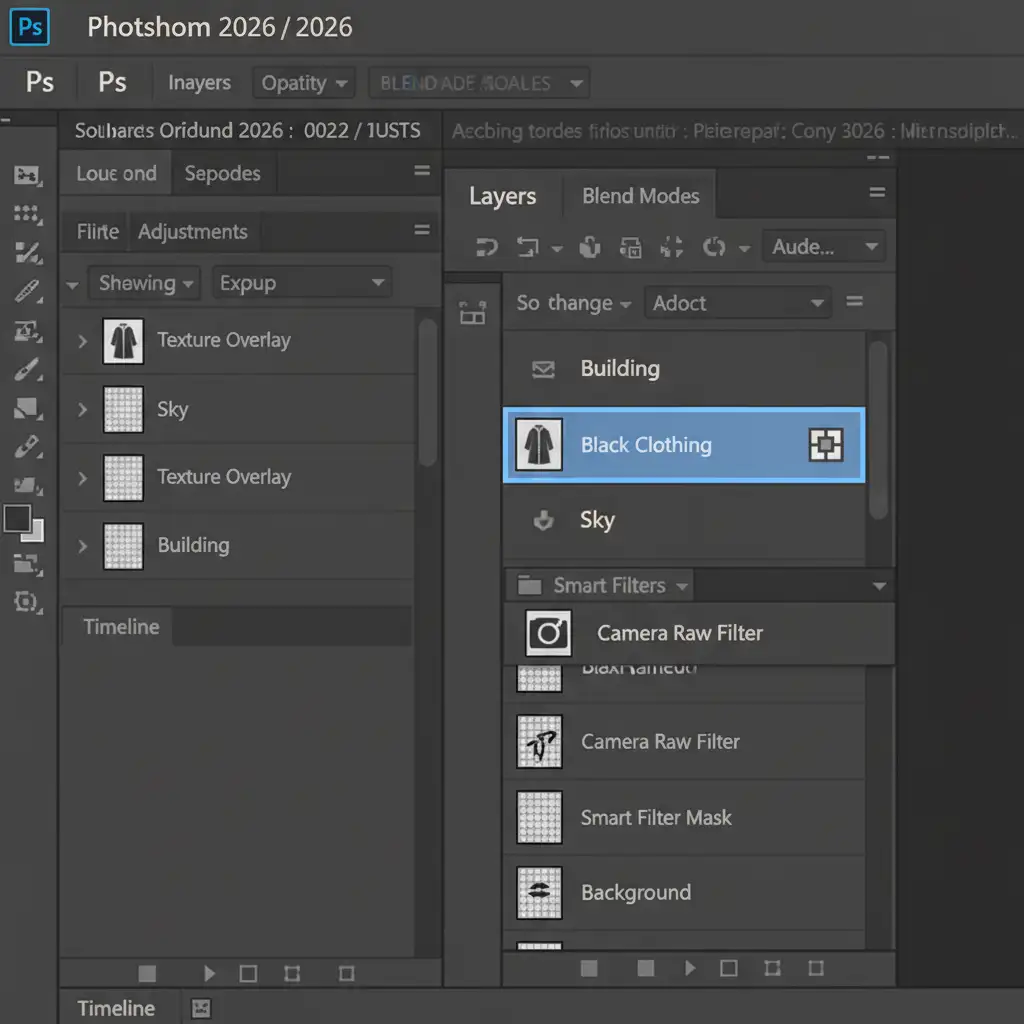
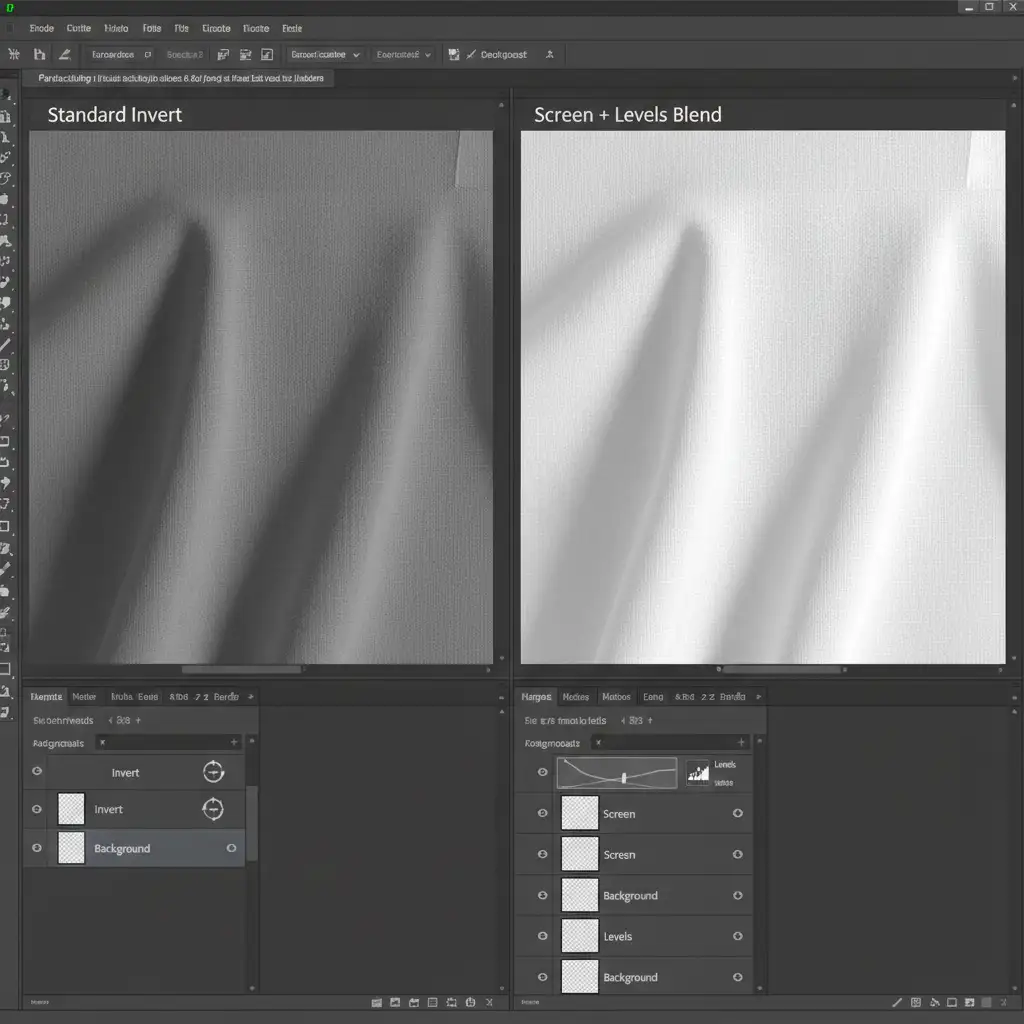
- Duplicate and Invert: Duplicate your masked clothing layer (Ctrl/Cmd + J). Invert the duplicate layer (Ctrl/Cmd + I). At this stage, the garment will look like a terrifying, muddy X-ray.
- Change Blending Mode: Change the inverted layer’s blending mode to Screen. This immediately drops out the dark, muddy tones and leaves you with a bright base.
- Control the Midtones: Add a Levels adjustment layer and clip it to your clothing layer (Alt/Option + Click between the layers). Pull the midtone slider (the gray triangle) to the right to add contrast and depth back into the fabric folds.
- Restore Shading: Add a Solid Color adjustment layer filled with a very light, warm gray. Clip it to the stack and set the blending mode to Multiply. Adjust the opacity to 15-20%. This restores realistic fabric shading and prevents the white from looking radioactive.
Method 3: The Technical Deep-Dive (Frequency Separation & Luminosity Masking)
When dealing with complex textures like corduroy, heavy wool, or intricate lace, standard blending modes fall short. You must separate the fabric’s physical texture from its color data using frequency separation, combined with a Gradient Map.
1. Separate Texture from Color
Run a standard frequency separation action to split your image into a High-Frequency (Texture) layer and a Low-Frequency (Color/Tone) layer.
2. Extract and Remap Luminosity
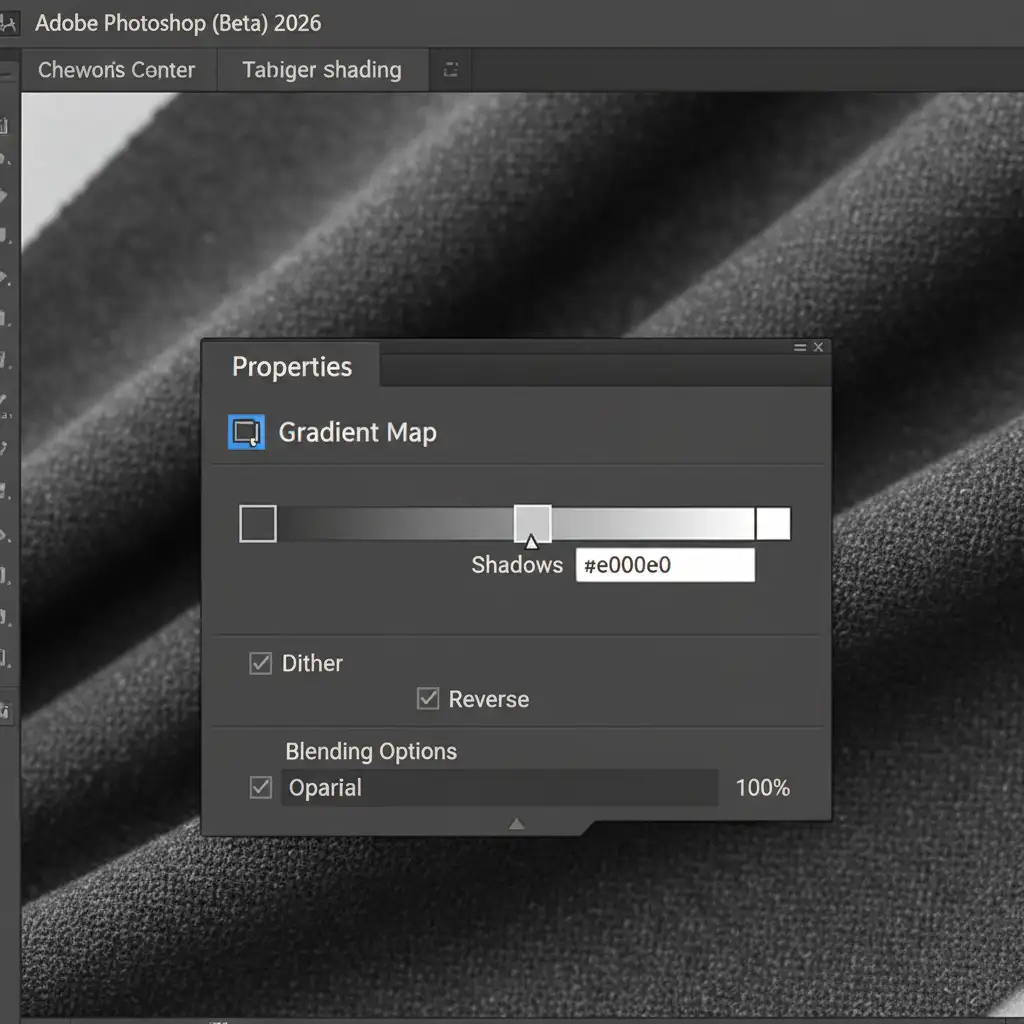
Target your Low-Frequency layer. Because we need to artificially generate luminosity, we will use a Gradient Map.
- Add a Gradient Map adjustment layer and clip it to your Low-Frequency layer.
- Set the gradient to transition from dark gray (shadows) to pure white (highlights).
- Pro Tip: Never use pure black for the shadows on a white garment, or it will look dirty. Use a hex code like #e0e0e0 for the deepest shadows to maintain a clean, premium white look.
3. Overlay the Micro-Texture
Move your original High-Frequency (Texture) layer to the very top of your layer stack. Change its blending mode to Linear Light. Adjust the opacity to around 30-50%. This overlays the exact microscopic weave of the fabric back onto your newly generated white tones without muddying the colors.
Outsource Your Complex Retouching Workflows
Learning how to change black clothing to white in Photoshop 2026 requires a deep understanding of pixel math, luminosity masking, and texture preservation. While mastering these techniques is incredibly rewarding, executing them across a catalog of 500 product images is a massive drain on your time and resources.
Struggling with complex color changes for your upcoming seasonal catalog? Stop fighting with muddy midtones and blown-out highlights.
Hire Image Work India and Cloud Retouch for pixel-perfect, realistic apparel color replacement. Our team of expert retouchers specializes in high-volume e-commerce editing, ensuring your product variations are flawlessly executed, visually consistent, and optimized to drive sales. Contact us today to streamline your post-production workflow.


