
You just spent hours meticulously capturing a 40-image macro photography sequence of a high-end diamond ring. The lighting was flawless, and your depth of field was perfectly dialed in. But when you run Auto-Blend Layers in Photoshop, the final result is a disaster. The fine metal prongs look like translucent jelly, and the diamond edges are smeared with blurry halos.
This is ghosting—the ultimate jewelry photography killer. For photographers dealing with extreme specular highlights and focus breathing, Photoshop’s default algorithms often fail. Here is exactly how to bypass algorithm errors and master fixing ghosting in jewelry focus stacking Photoshop workflows.
Why Photoshop Fails at Jewelry Focus Stacking
Photoshop v26.x and v27.x rely heavily on contrast-detection algorithms to execute the Auto-Blend Layers command. While this works beautifully for flat macro subjects, jewelry photography introduces complex optical challenges.
Highly reflective surfaces, like polished gold or platinum, and the refraction of light through diamonds create extreme specular highlights. As your camera’s focal plane shifts through the macro sequence, these highlights bloom, shift, or change shape—a phenomenon closely tied to focus breathing.
Photoshop’s algorithm incorrectly interprets these shifting highlights as structural details rather than lighting artifacts. When the software attempts to merge these frames, it creates translucent, overlapping layers, resulting in the dreaded ghosting artifacts. Furthermore, the default “Seamless Tones and Colors” setting frequently smears high-contrast edges, specifically around delicate prongs, requiring advanced technical intervention.
3 Professional Methods for Fixing Ghosting in Jewelry Focus Stacking Photoshop
To achieve a commercially viable, razor-sharp image, you must take control away from the automated algorithms. Here are three proven methods to eliminate focus stacking errors.
Method 1: The Quick Fix – Optimizing Auto-Blend Settings
Before diving into manual pixel-pushing, you can often fix minor smearing by preventing Photoshop from over-processing the blend transitions.
- Load your sequence into a single document and select all layers.
- Navigate to Edit > Auto-Align Layers. Choose Auto, but critically, uncheck Lens Correction. Lens correction can warp macro frames inconsistently.
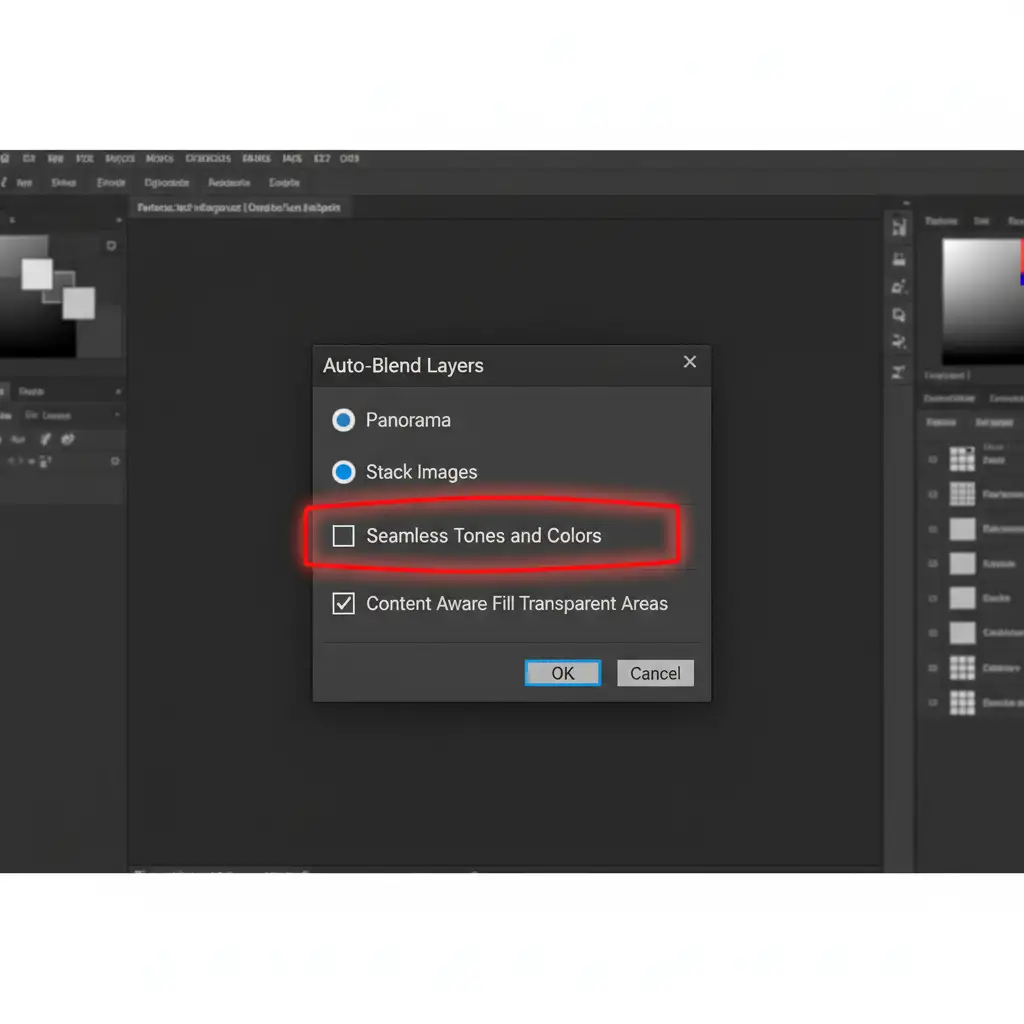
- Navigate to Edit > Auto-Blend Layers.
- Select Stack Images.
- UNCHECK ‘Seamless Tones and Colors’. This is the primary culprit for metal smearing in high-contrast jewelry stacks.
Method 2: The Pro Workaround – Manual Masking Recovery
When automated blending fails completely, you must manually rescue the ghosted areas. This technique leverages the precision of a layer mask to restore single-frame sharpness.
- Group your completed, auto-blended stack.
- Locate the single, sharpest source frame for the specific area suffering from ghosting (for example, the frame where the main diamond’s table facet is perfectly in focus).
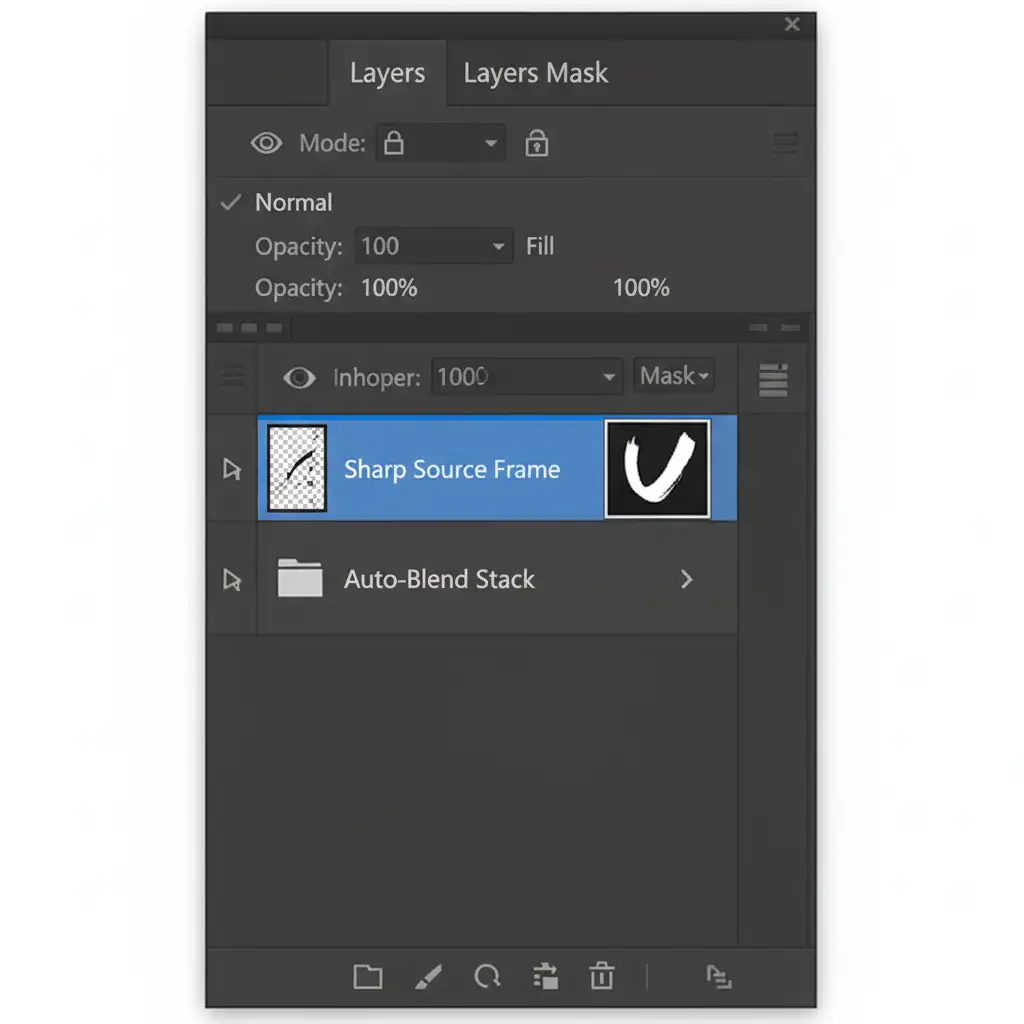
- Drag this single source frame to the very top of your layer stack, above the auto-blended group.
- Hold Alt (Windows) or Option (Mac) and click the Add Layer Mask icon. This applies a black layer mask, hiding the sharp frame entirely.
- Select a soft-edged brush, set your foreground color to white, and paint at 100% opacity over the ghosted areas. You are manually painting back the un-ghosted, razor-sharp detail over the algorithmic errors.

Method 3: The Technical Deep-Dive – Pre-Alignment Edge Enhancement
If your initial alignment is failing because the polished metal lacks sufficient edge contrast, Photoshop won’t be able to blend the sequence properly, no matter the settings. You need to feed the algorithm a contrast map.
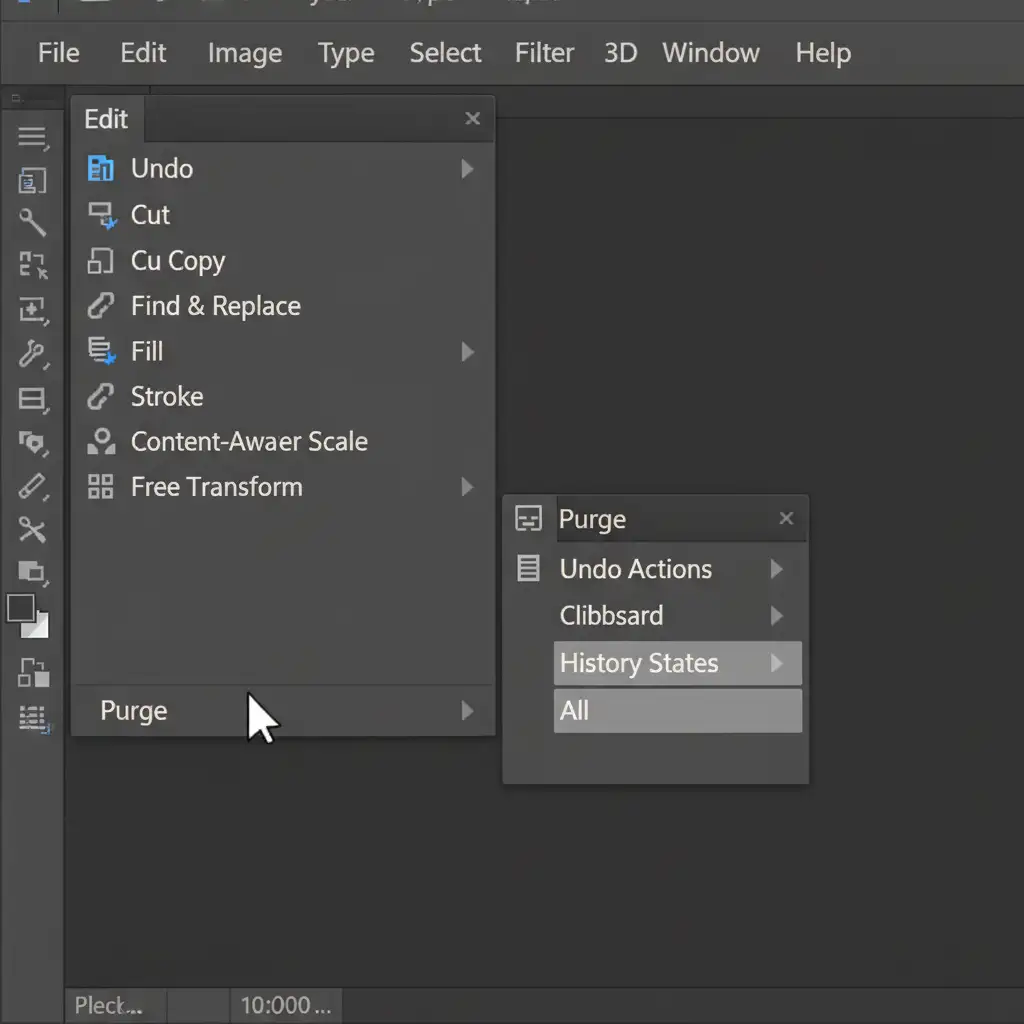
Note: Intensive macro stacks consume massive amounts of memory. Before starting this process, navigate to Edit > Purge > All to clear your system cache and prevent crashes.
- Duplicate all your original layer frames.
- Group the original layers and hide them temporarily.
- Select all the duplicated layers and apply a High-Pass filter (Filter > Other > High Pass). Set the radius just high enough to highlight the edges of the jewelry (usually between 2.0 and 5.0 pixels).
- This turns your duplicates into gray layers with neon-like edge contrast.
- Link each High-Pass layer to its corresponding original, full-color layer.
- Run the Auto-Align command based on the High-Pass layers. The algorithm will now flawlessly read the extreme contrast map.
- Once perfectly aligned, delete the High-Pass layers and run your standard Auto-Blend on the perfectly registered original files.
High-Volume Jewelry Retouching? Let the Experts Handle It
Fixing ghosting in jewelry focus stacking Photoshop workflows is a tedious, highly technical process. While manual masking and high-pass edge enhancement will save a single image, applying these techniques across an entire e-commerce catalog consisting of hundreds of SKUs will drain your studio’s time and budget.
You focus on capturing the perfect light; let us handle the pixels.
At Image Work India or Cloud Retouch, our team of specialized retouching artists handles complex macro focus stacks, advanced masking, and high-end jewelry compositing every single day. We ensure flawless, ghost-free, commercially perfect jewelry images that drive sales. Contact us today to streamline your post-production workflow and elevate your brand’s visual standard.


