You’ve just finished masking a stunning portrait in Photoshop v25.x, but there’s a glaring problem. When you tried to clean up a distracting background element near the model’s head, the AI left behind a blurry, smudged mess. This AI ghosting ruins the crisp realism of stray hairs, turning a high-end image into an obvious digital manipulation. If you are struggling with removing hair artifacts, Photoshop Remove Tool default settings are likely causing destructive editing. In this guide, we break down exactly how to fix these pixel blending errors and restore perfect, natural hair edges.
Why the Photoshop Remove Tool Struggles with Fine Hair
Adobe’s machine learning algorithms are incredibly powerful, but they still struggle with complex spatial interpretation. When you use the Remove Tool near fine details like hair, the AI attempts to guess the background texture. Unfortunately, it often misinterprets high-frequency data (the sharp, crisp details of individual hair strands) and blends it with low-frequency data (the overall color and tone of the background).
The result? Unnatural pixel blending, repetitive cloned textures, and blurry halos that immediately flag an image as poorly retouched. To achieve a flawless finish, professional retouchers must step in where the AI falls short.
3 Pro Methods for Removing Hair Artifacts: Photoshop Remove Tool Fixes
Depending on the severity of the AI ghosting, you can use one of these three techniques to salvage your portrait.
Method 1: The Quick Fix (Optimizing Tool Settings)
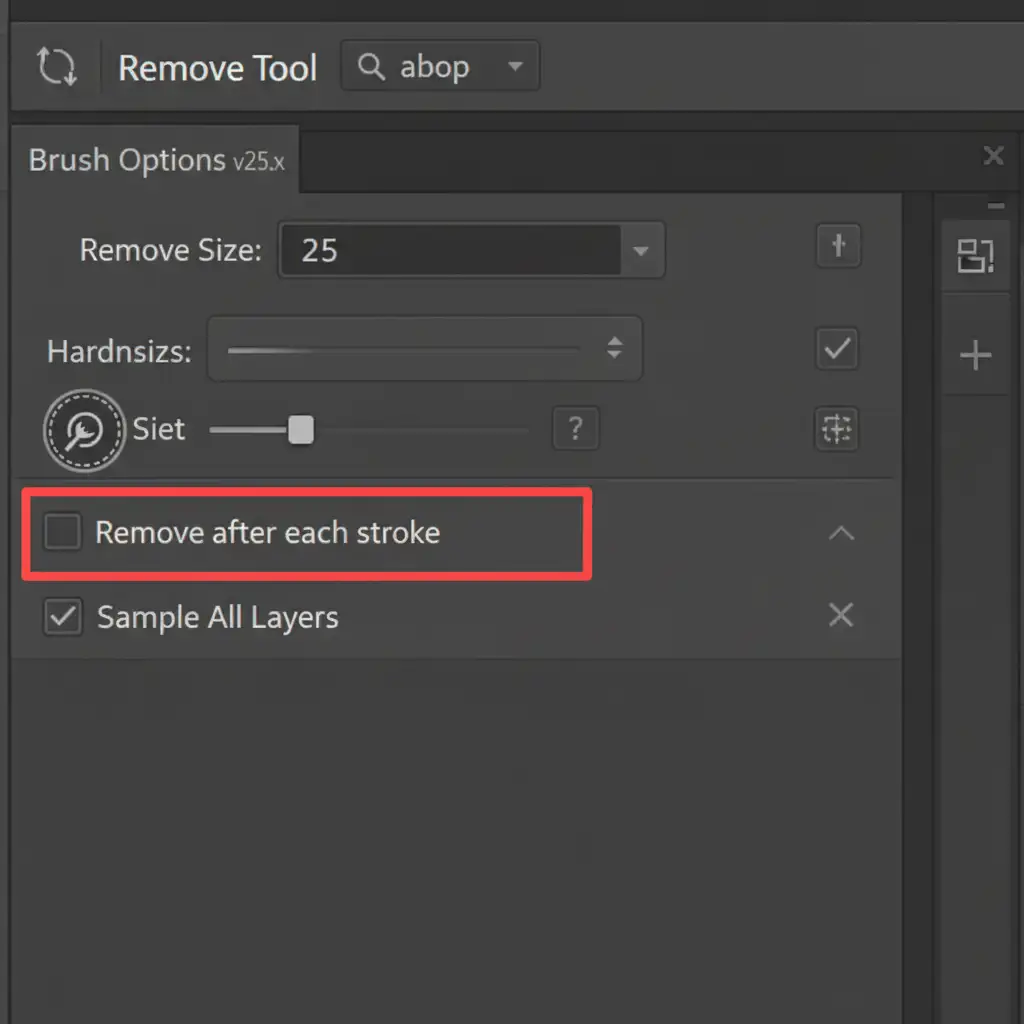
Often, the AI simply lacks the context needed to make a clean removal. By default, the Remove Tool processes your edit the moment you lift your stylus or release your mouse. This prevents you from giving the AI a complete picture of what needs to be removed.
- Select the Remove Tool.
- Look at the top options bar and uncheck Remove after each stroke.
- Carefully paint over the artifact area using a smaller brush size.
- Process multiple strokes at once by clicking the checkmark (or hitting Enter) only after you’ve highlighted the entire problem area.
This gives the algorithm a broader contextual map, significantly reducing smudged edges.
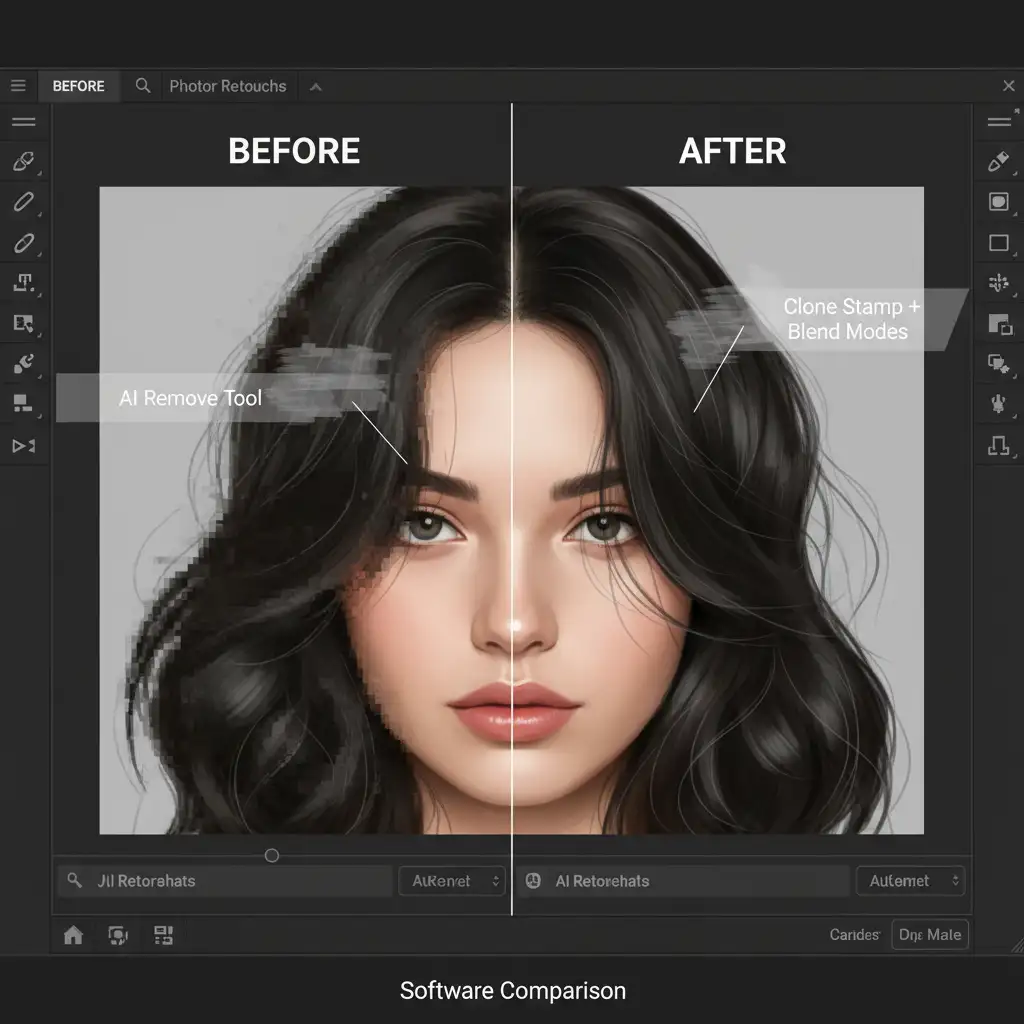
Method 2: The Pro Workaround (Blend Mode Clone Stamping)
When the Remove Tool has already caused destructive editing and you need to rebuild the edge, Clone Stamp blend modes are your best friend. This technique allows you to paint back missing hairs without overwriting the background you just cleaned up.
- Create a new blank layer above your edited layer.
- Select the Clone Stamp Tool and use a soft brush set to 30 percent opacity.
- Change the tool’s Blend Mode in the top bar:
- Use Darken if you are stamping dark hairs over a lighter AI-smudged background.
- Use Lighten if you are stamping light/blonde hairs over a darker background.
- Sample clean hair textures from another part of the head and gently brush over the artifact area.
Because of the blend mode, the Clone Stamp will only affect the pixels that match your target luminosity, seamlessly rebuilding the stray hairs over the AI’s mistakes.
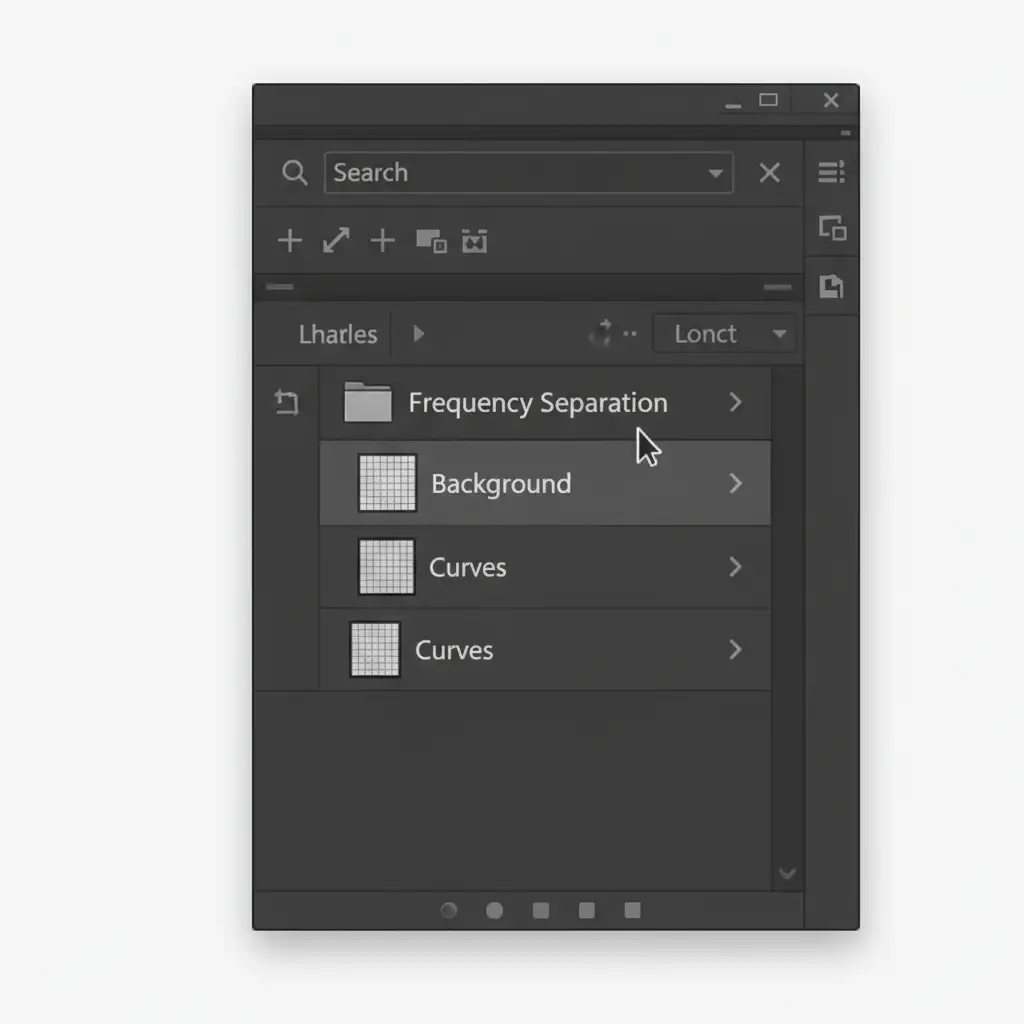
Method 3: The Technical Deep-Dive (Frequency Separation)
For absolute perfection in high-end portrait retouching, you must separate your image’s texture from its color. By utilizing Frequency Separation, you can safely use the Remove Tool to fix color bleeds without destroying the sharp texture of the hair.
Step-by-Step Frequency Separation for Hair Masking:
- Duplicate your base image twice. Name the bottom layer “Low Frequency (Color)” and the top layer “High Frequency (Texture)”.
- Apply a Gaussian Blur to the Low Frequency layer until the fine hair details disappear (usually a radius of 4-7px).
- Select the High Frequency layer. Go to Image > Apply Image.
- If working in 8-bit: Select the Low Frequency layer, Blending: Subtract, Scale: 2, Offset: 128.
- If working in 16-bit: Select the Low Frequency layer, check “Invert”, Blending: Add, Scale: 2, Offset: 0.
- Change the High Frequency layer’s blend mode to Linear Light. Group both layers.
- The Fix: Select the Low Frequency layer and use the Remove Tool to clean up the blurry color halos. Then, select the High Frequency layer and use the Healing Brush (not the Remove Tool) to carefully patch any broken hair textures.
This guarantees that the structural integrity of the hair remains 100% intact.
Stop Fighting AI—Let the Experts Handle It
While mastering the art of removing hair artifacts Photoshop Remove Tool creates is incredibly rewarding, it is also incredibly time-consuming. If you are a commercial photographer, e-commerce brand, or studio managing large batches of portrait photos, spending 15 minutes fixing AI ghosting on a single image simply isn’t scalable.
That’s where Image Work India and Cloud Retouch step in. Our team of expert retouchers specializes in pixel-perfect, high-end hair masking and portrait retouching services that automated AI tools just can’t match. We utilize advanced techniques like Frequency Separation, custom layer masks, and manual edge refinement to ensure your subjects look flawless and 100% natural.
Don’t let destructive AI editing ruin your professional portfolio. [Contact Image Work India and Cloud Retouch today] for a free trial, and let us handle the tedious pixel-pushing so you can get back behind the camera.


