
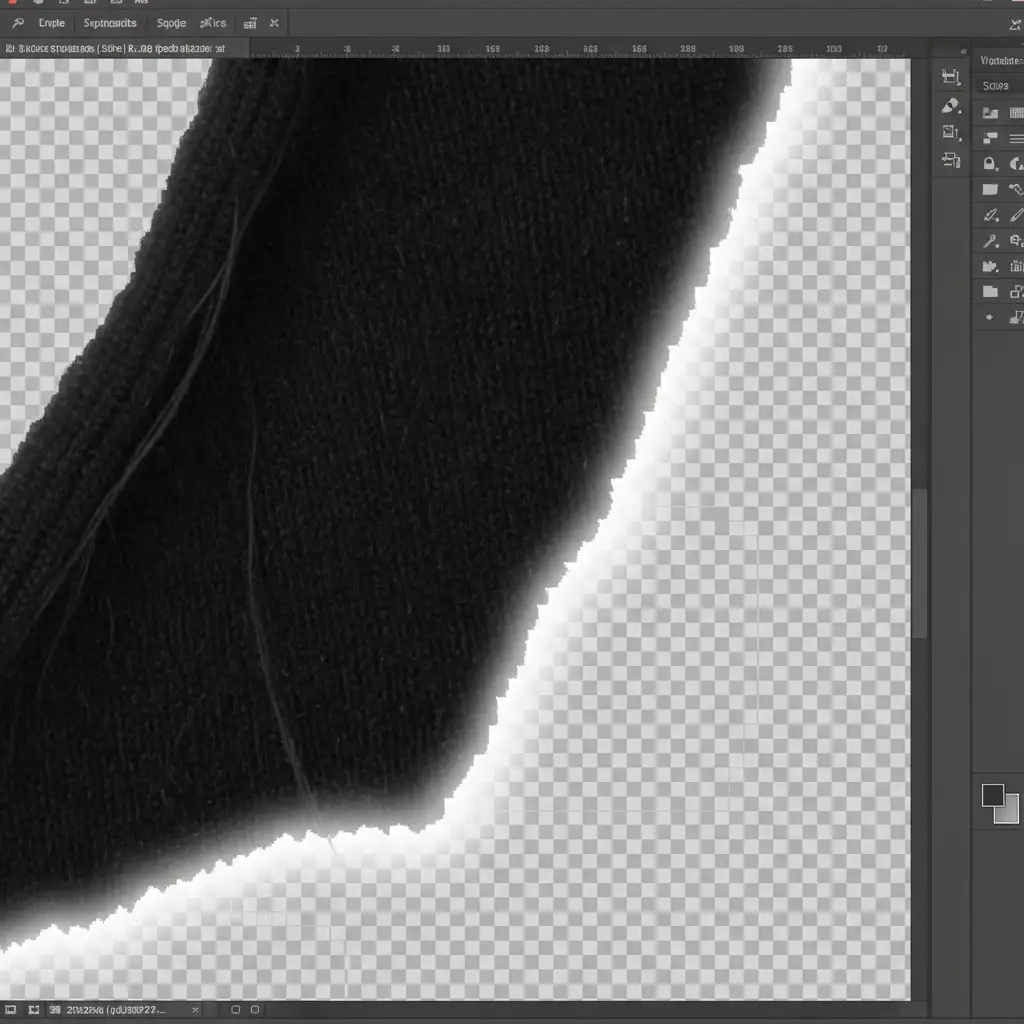
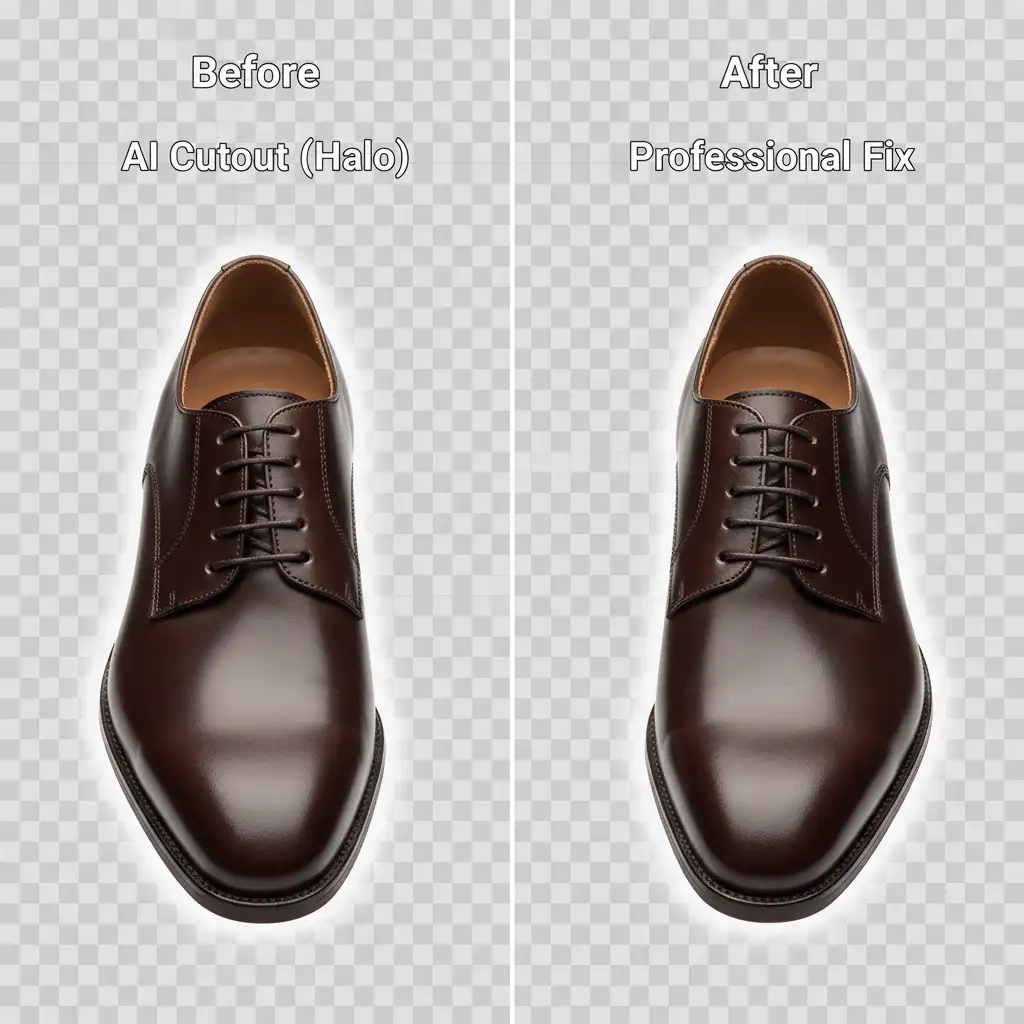
You click “Remove Background” in Photoshop 2024, and at first glance, the result looks magical. But zoom in to 300%, and there it is—the dreaded pixel halo. That ugly fringe of leftover background color clinging to your subject’s edges instantly ruins the professional illusion.
While Adobe Sensei’s machine learning is incredibly powerful, its automated alpha channel generation still struggles with high-contrast boundaries. It creates a soft mask that inadvertently traps original color data, leaving a visible outline on dark or light backgrounds. If you are tired of delivering amateur-looking composites, you need to go beyond the one-click solution.
Here is the ultimate guide to the Photoshop AI background removal halo fix, ensuring flawless, pixel-perfect edges every time.
Why Does Photoshop AI Leave a Pixel Halo?
When you use the AI Remove Background or Select Subject features in Photoshop v25.x, the software calculates the boundary between your subject and the background. To avoid jagged, pixelated cuts, the AI generates a soft alpha channel mask.
This softness blends the edge pixels. However, when dealing with high-contrast backgrounds (like a dark subject on a bright white studio backdrop), this blending traps the background’s color values inside the semi-transparent pixels of your layer mask. The result is edge contamination, commonly referred to as a pixel halo.
3 Professional Methods for the Photoshop AI Background Removal Halo Fix
Depending on the complexity of your image and the strictness of your deadline, there are three distinct ways to execute a flawless Photoshop AI background removal halo fix.
Method 1: The Quick Fix Using Photoshop Matting Tools
If you are dealing with a solid-color background and need a rapid solution, Photoshop’s legacy Matting tools are highly effective for stripping away immediate edge pixels.
- Select the layer containing your cutout subject and its layer mask.
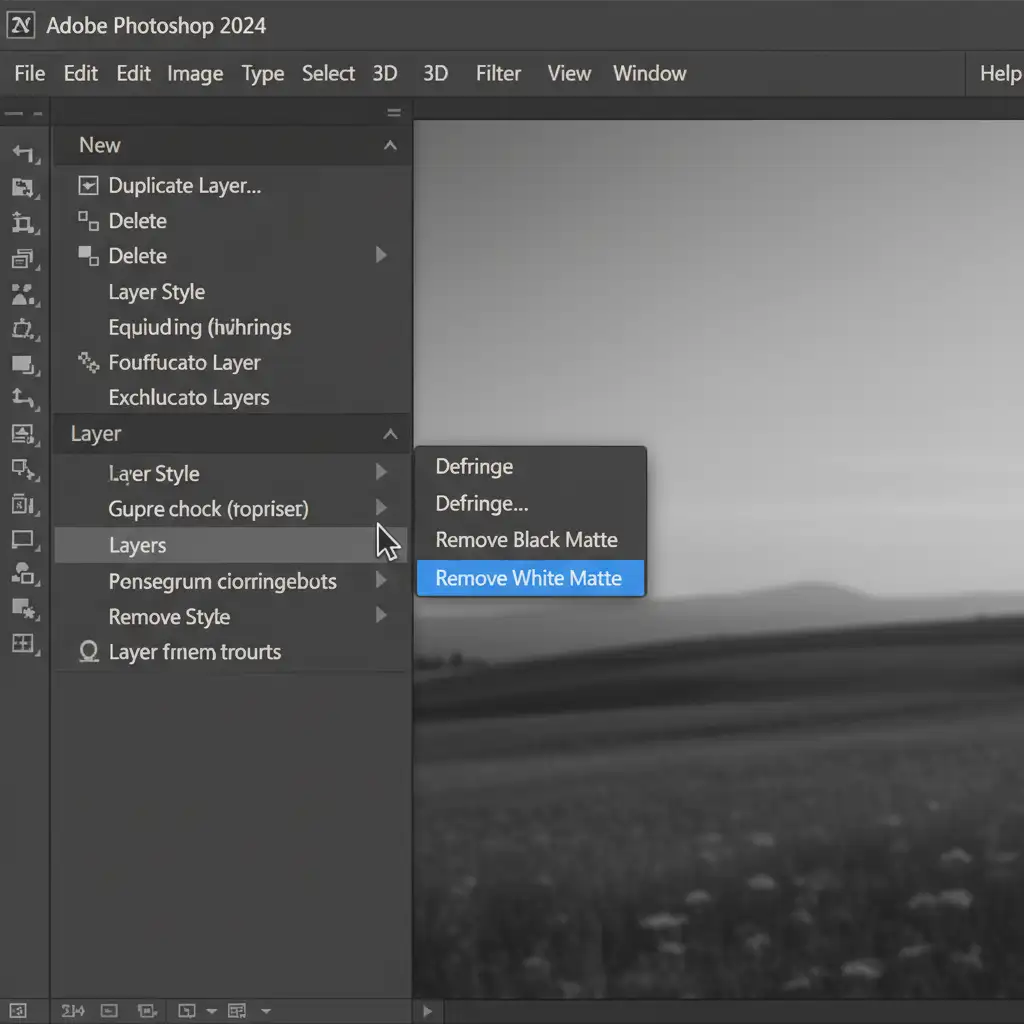
- Navigate to the top menu: Layer > Matting > Defringe.
- In the dialog box, set the pixel width to 1-2px. This forces Photoshop to replace the contaminated edge pixels with the colors of neighboring pixels further inside the subject.
- Alternative: If you cut your subject out from a pure black or pure white background, use Remove Black Matte or Remove White Matte from the same dropdown menu to instantly neutralize the fringe.
Method 2: The Pro Workaround in Select and Mask
For complex subjects like hair, fur, or textured fabrics, the Select and Mask workspace offers granular control over edge contrast and mask boundaries.
- Double-click your layer mask icon in the Layers panel to open the Select and Mask workspace.
- If there are complex areas like hair, briefly use the Refine Edge Brush to paint over them.
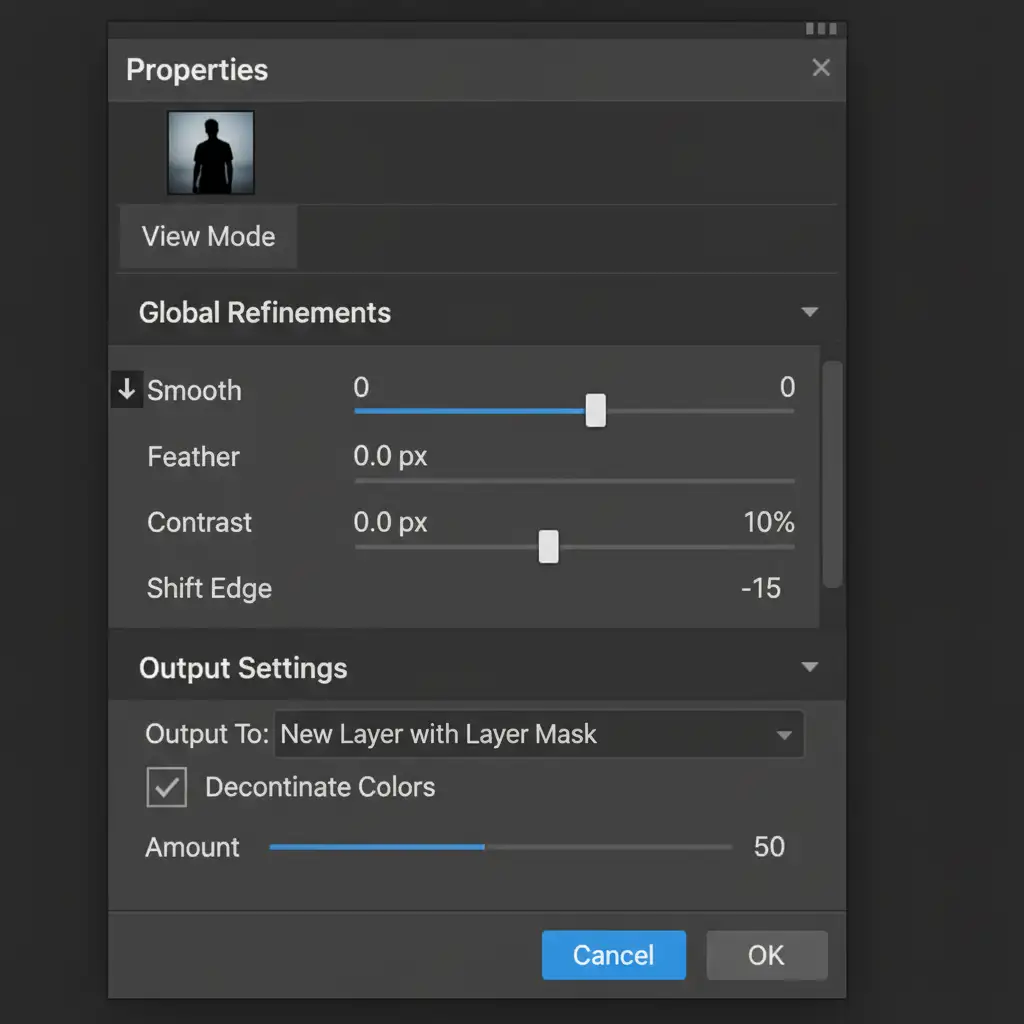
- Scroll down the right-side properties panel to Global Refinements.
- Move the Shift Edge slider to the left (try between -10% and -15%). This physically “chokes” the mask inward, hiding the outer contaminated pixels.
- Increase the Contrast slider slightly (around 5-10%) to harden the soft AI edge.
- Scroll down to Output Settings and check the Decontaminate Colors box. This forces Photoshop to physically replace the fringe colors with surrounding subject pixel data. Output to a “New Layer with Layer Mask”.
Method 3: The Technical Deep-Dive with Non-Destructive Clipping Masks
Choking the mask (Method 2) can sometimes alter the shape of your subject. If preserving the exact AI edge transitions is critical, you must recolor the halo non-destructively using a Clipping Mask.
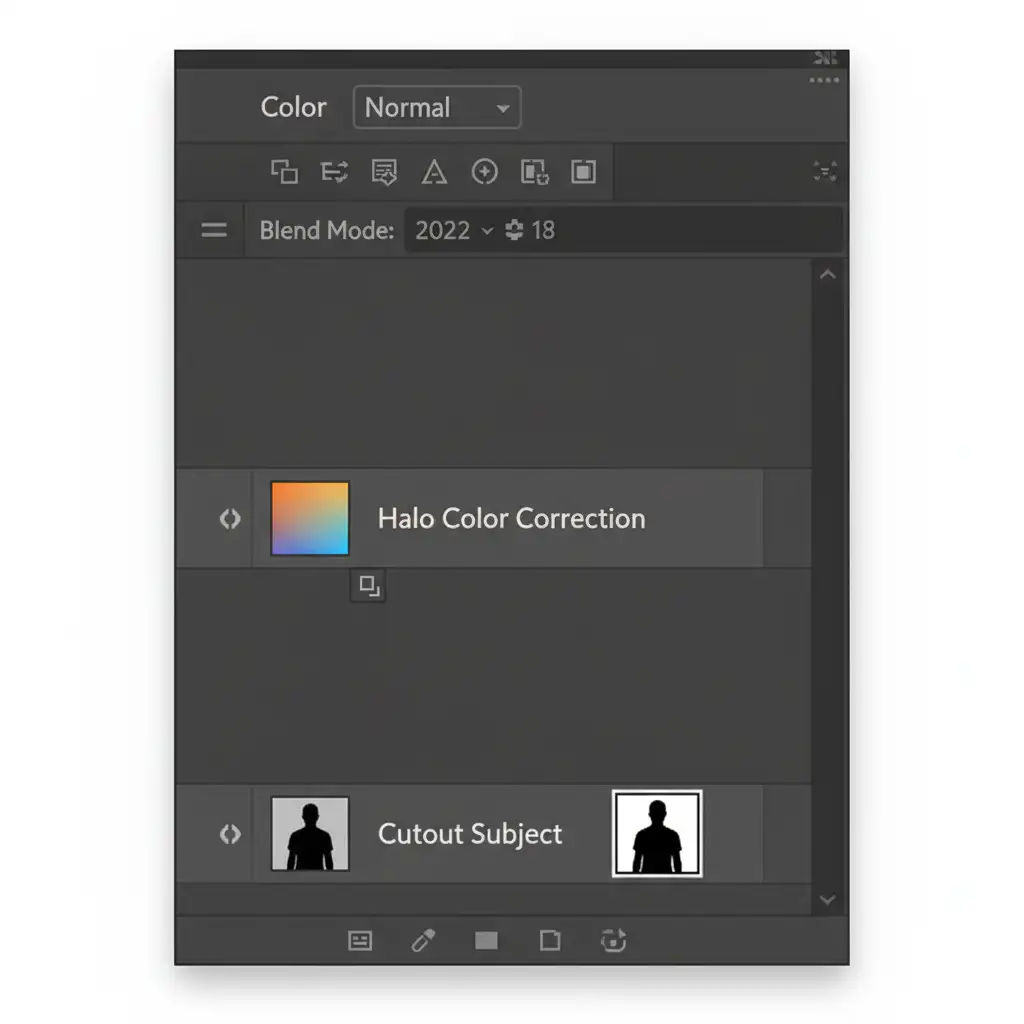
- Create a new blank layer directly above your cut-out layer.
- Right-click the new layer and select Create Clipping Mask (or hold Alt/Option and click the line between the two layers). A small downward arrow will appear.
- Change the blend mode of this clipping mask layer to Color or Hue.
- Select the Brush tool (B) with a soft edge.
- Hold Alt/Option to sample the correct, uncontaminated color just inside the edge of your subject.
- Carefully paint over the glowing pixel halo. Because of the clipping mask, your paint will only affect the visible pixels of the subject beneath it, replacing the halo’s color while perfectly maintaining the soft alpha mask generated by the AI.
The Final Polish: Before and After
By mastering these three techniques, you transition from relying solely on automated algorithms to executing professional-grade retouching. The difference between a raw AI cutout and a manually defringed, color-decontaminated mask is what separates amateur composites from high-end commercial imagery.
Stop Fighting AI: Scale Your Editing with Image Work India
Mastering the Photoshop AI background removal halo fix is essential for any retoucher. However, when you are managing high-volume e-commerce catalogs, spending 5 to 10 minutes meticulously defringing and painting clipping masks for every single image destroys your turnaround times and profit margins.
AI is fast, but it still cannot match the precision of a trained human eye.
If you are struggling with stubborn AI halos, edge contamination, and high-volume clipping paths, outsource the heavy lifting to the experts. At Image Work India and Cloud Retouch, our dedicated team of professional retouchers delivers flawless, hand-drawn clipping paths and pixel-perfect masking at scale. We guarantee razor-sharp edges, perfect color decontamination, and zero halos—delivered on time, every time.
Ready to elevate your image quality and get your time back? Contact Image Work India and Cloud Retouch today for a free trial and experience the difference of true professional masking.


