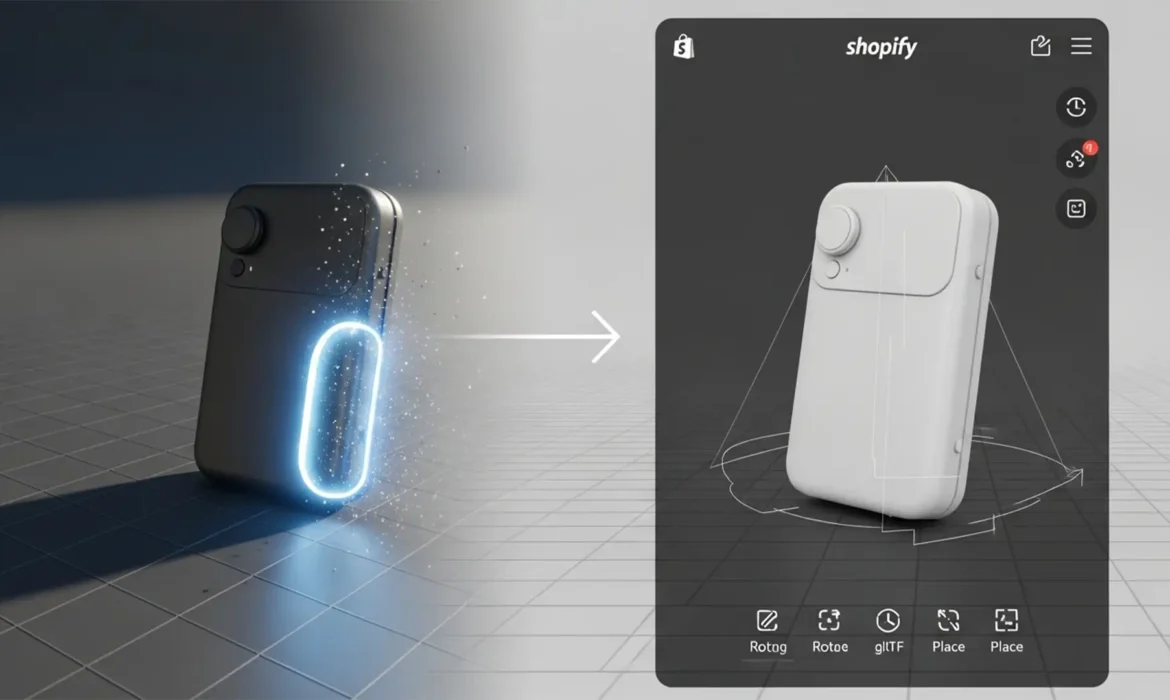
You have just spent hours converting 2D product photos into a 3D model for your Shopify store, only to open the AR viewer and see a disaster. The baked-in lighting and flash reflections from the original photograph are clashing with the real-time 3D environment, creating ugly double-shadows.
Since Adobe deprecated native 3D features in Photoshop v24.x and v25.x, 3D artists and merchants are forced to rely entirely on 2D texture editing to prepare glTF/glb formats. If you want seamless real-time product texture baking from 2D photos, you must master the art of “delighting.”
Here is the ultimate technical guide to cleaning up Albedo maps, fixing texture seams, and prepping flawless 3D models for Shopify AR.
The Problem with Baked-In Lighting in PBR Materials
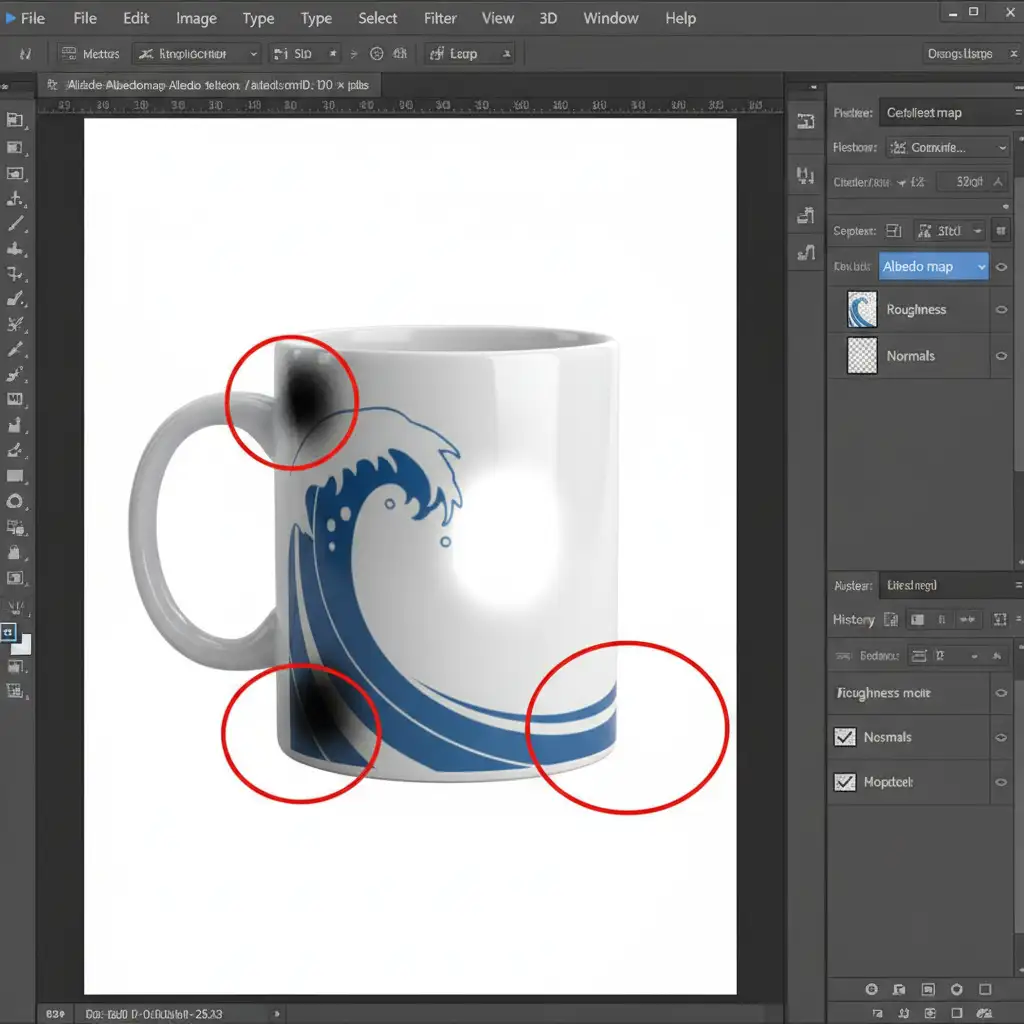
When you extract an Albedo map (also known as a Base Color map) directly from a standard photograph, you capture the exact lighting conditions of the room where the photo was taken.
In a real-time Shopify AR environment, the 3D viewer applies its own dynamic lighting. If your texture has baked-in lighting, the AR lighting multiplies against the shadows in your photo. The result? Unrealistic materials, conflicting highlights, and a poor customer experience. To create accurate PBR materials (Physically Based Rendering), your Base Color map must be completely flat and devoid of lighting data.
Step-by-Step Texture Delighting in Photoshop (v24.x & v25.x)
Depending on the severity of the shadows in your original photography, you can approach texture delighting using three different methods.
Method A: The Quick Fix for Flash Highlights
If your 2D photo is mostly evenly lit but suffers from a few harsh flash reflections, you can handle this rapidly before wrapping it onto your UV map.
- Open your texture file in Photoshop.
- Select the Patch Tool (J).
- Draw a selection around the harsh highlight.
- Drag the selection to a cleanly lit area of the texture to blend it.
- For complex edges, use Content-Aware Fill (Edit > Content-Aware Fill) to let Photoshop mathematically eliminate the reflection and replace it with surrounding pixel data.
Method B: The Pro Workaround Using High Pass Filtering
When dealing with gradient shadows across a curved surface, patching isn’t enough. You need to equalize the lighting across the entire texture.
- Convert your texture layer to a Smart Object (Right-click layer > Convert to Smart Object).
- Duplicate the layer.
- On the top layer, navigate to Filter > Other > High Pass.
- Set a high radius—typically between 50px and 100px depending on your image resolution. You want to see the color gradients neutralize while keeping the core texture intact.
- Change the top layer’s blending mode to Linear Light and drop the Opacity to 50%.
This technique effectively flattens the lighting, making it an excellent base for your Albedo map without destroying the underlying material details.

Method C: Technical Deep-Dive into Frequency Separation
For complex fabrics or highly detailed surfaces where you must preserve every thread while entirely removing shadows, frequency separation is the industry standard for delighting.
Separating Color and Detail
- Duplicate your base texture twice. Name the bottom duplicate “Color” and the top duplicate “Detail.”
- Apply a Gaussian Blur to the “Color” layer until the fine texture details disappear, leaving only the shadow and light gradients.
- Select the “Detail” layer, go to Image > Apply Image. Subtract the “Color” layer from it (Scale 2, Offset 128) and set the blending mode to Linear Light.
Averaging the Shadow Zones
Now that your details are safe on the top layer, select the “Color” layer. Use the Mixer Brush or the Gaussian Blur tool on specific shadow zones to average out the dark areas until the color is perfectly uniform.
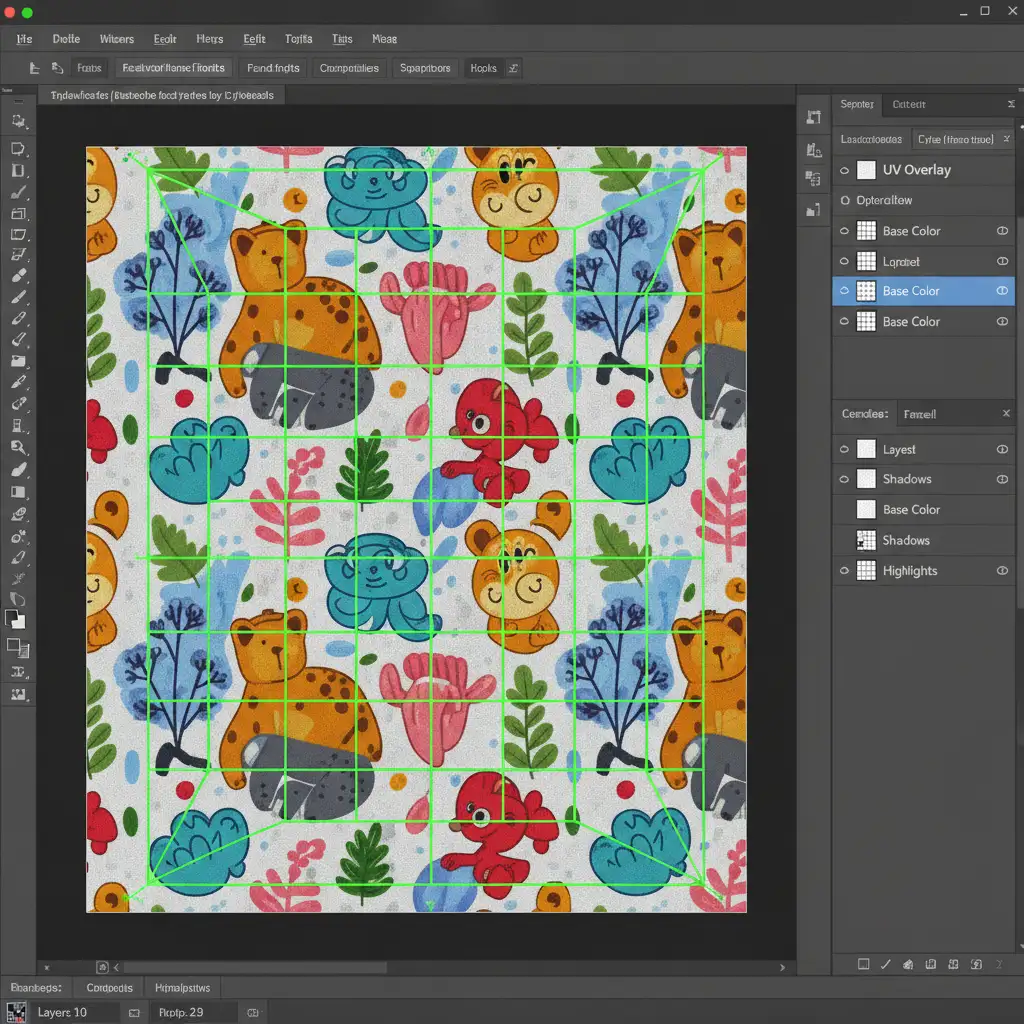
Fixing Texture Seams and UV Alignment
When you export this flat texture, it must wrap perfectly around your 3D model.
- Import your wireframe UV map into Photoshop.
- Overlay it onto your newly delighted texture.
- Ensure the edges of your texture align perfectly with the UV boundaries to prevent visible texture seams.
- Use the Offset filter (Filter > Other > Offset) to check for proper texture tiling.
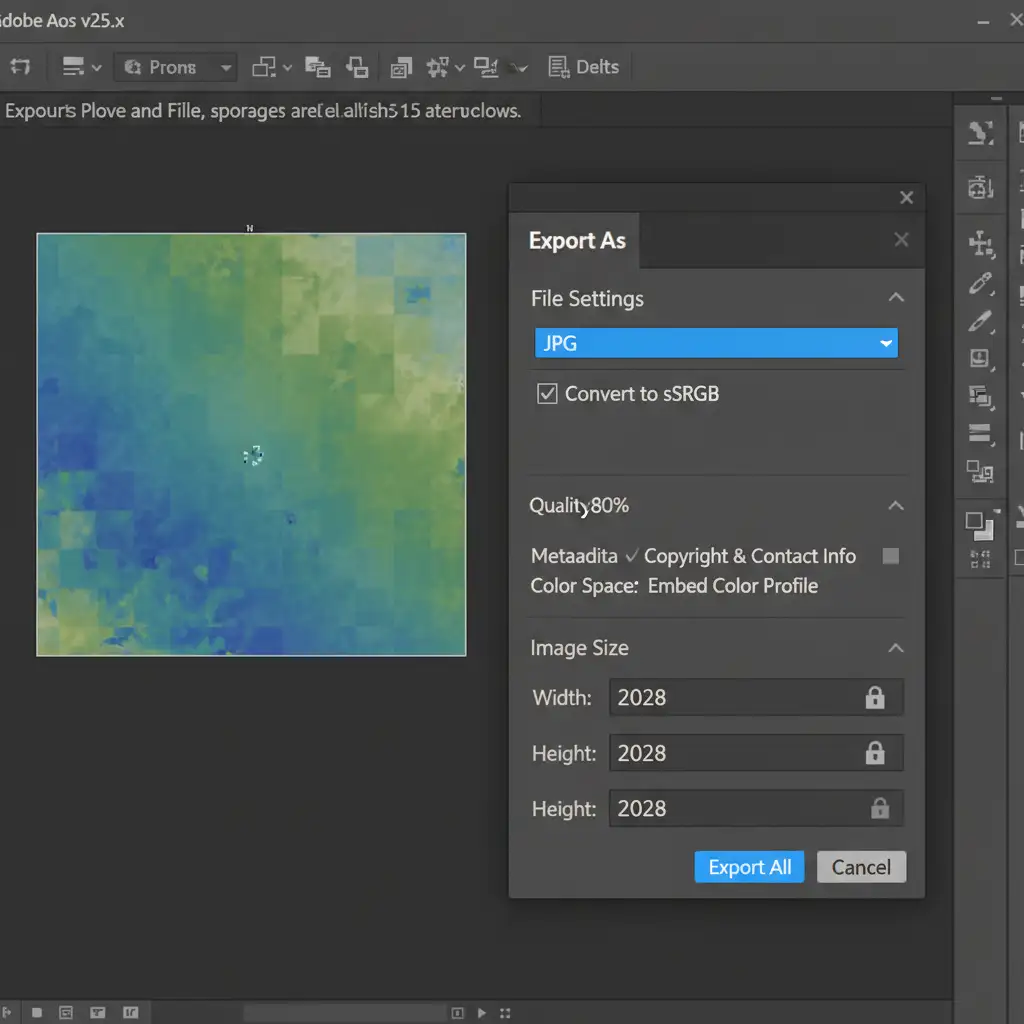
Exporting Web-Optimized Textures for Shopify glTF Compilers
Once your Albedo map is flat and your normal map is generated, you must export the files correctly. Shopify’s AR viewer requires highly optimized glTF/glb formats to ensure fast load times on mobile devices.
- Go to File > Export > Export As.
- Set the Format to JPG (unless you require transparency, in which case use PNG).
- Ensure Convert to sRGB is checked. glTF models expect sRGB color space for Albedo maps; using CMYK or Adobe RGB will result in washed-out colors.
- Set the Image Size to a maximum of 2048×2048 pixels. Anything larger will bloat your glb file size and cause Shopify’s compiler to reject or compress the model poorly.
Elevate Your Shopify AR Experience with Image Work India
Mastering UV unwrapping, frequency separation, and texture delighting takes years of practice. If your 3D models are suffering from baked-in lighting, visible texture seams, or poor optimization, it directly impacts your customer’s buying confidence.
You don’t have to navigate the complexities of real-time product texture baking from 2D photos alone. Image Work India and Cloud Retouch specialize in high-end 3D product modeling, texture optimization, and photo retouching. Our team of expert 3D artists can take your standard 2D product photography and transform it into flawless, web-optimized glTF/glb models guaranteed to look stunning in Shopify’s AR viewer.
Ready to boost your e-commerce conversion rates with picture-perfect 3D models? Contact Image Work India and Cloud Retouch today and let us handle the technical heavy lifting for you.


