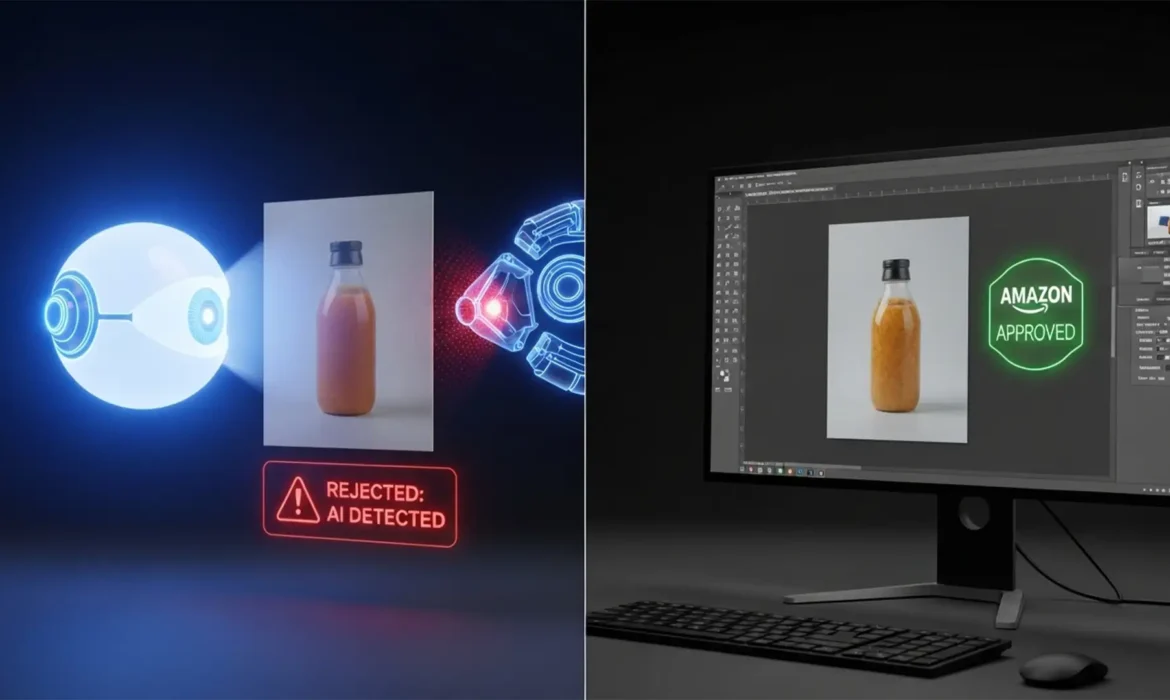
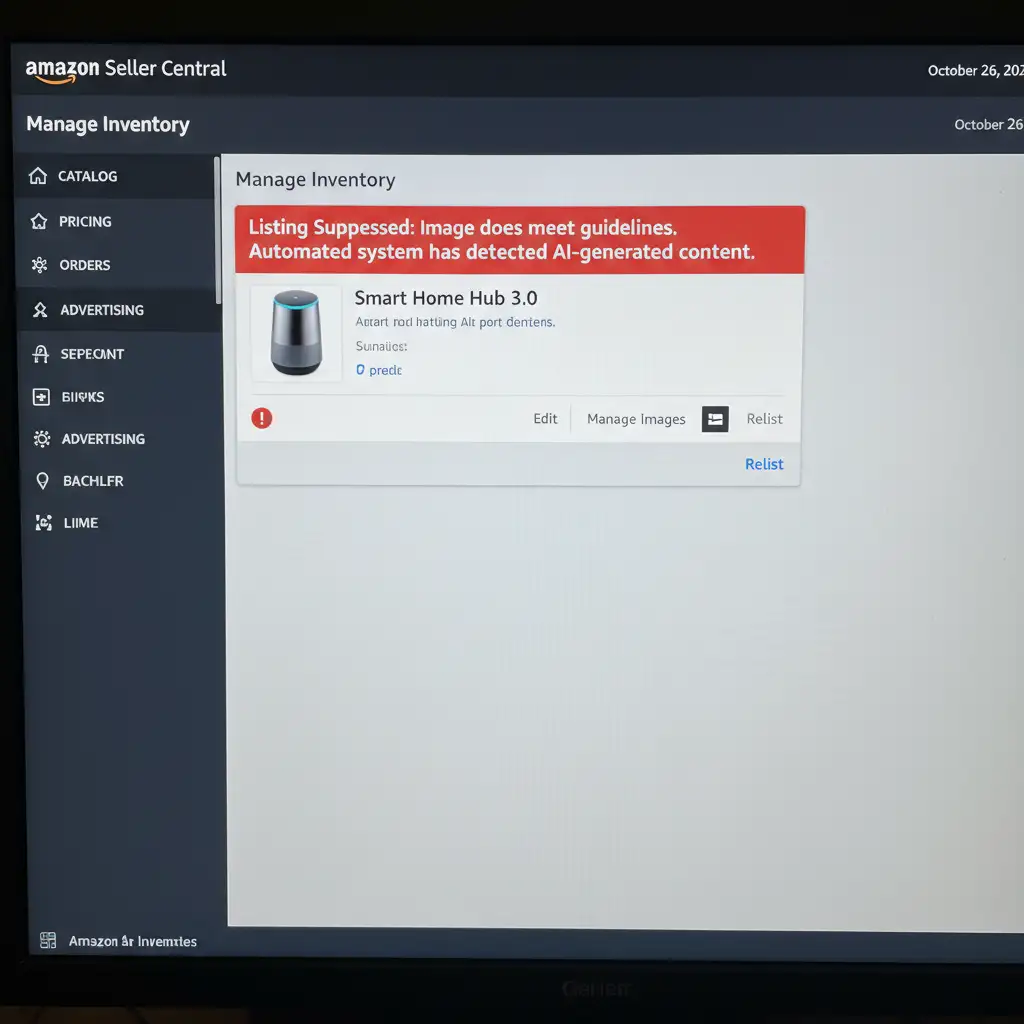
Imagine spending thousands of dollars on a high-end product photoshoot, meticulously retouching every detail, and uploading your flawless images to Seller Central—only to wake up to a suppressed listing. The reason? Amazon’s automated bots flagged your 100% genuine photos as “AI-generated.”
If you are dealing with a false positive AI detection, you are not alone. As Amazon tightens its algorithms to prevent misleading listings, legitimate sellers are getting caught in the crossfire. The culprit isn’t your camera; it is your post-production workflow.
In this guide, we will break down exactly why your images are failing to meet Amazon Seller Central guidelines and provide the ultimate Amazon AI image rejection fix to get your listings back online.
Why Amazon is Flagging Your Real Photos as “AI”
Amazon’s recent image verification updates rely on automated heuristics to spot AI signatures. Unfortunately, high-end e-commerce retouching techniques often mimic these exact signatures. The bots are looking for:
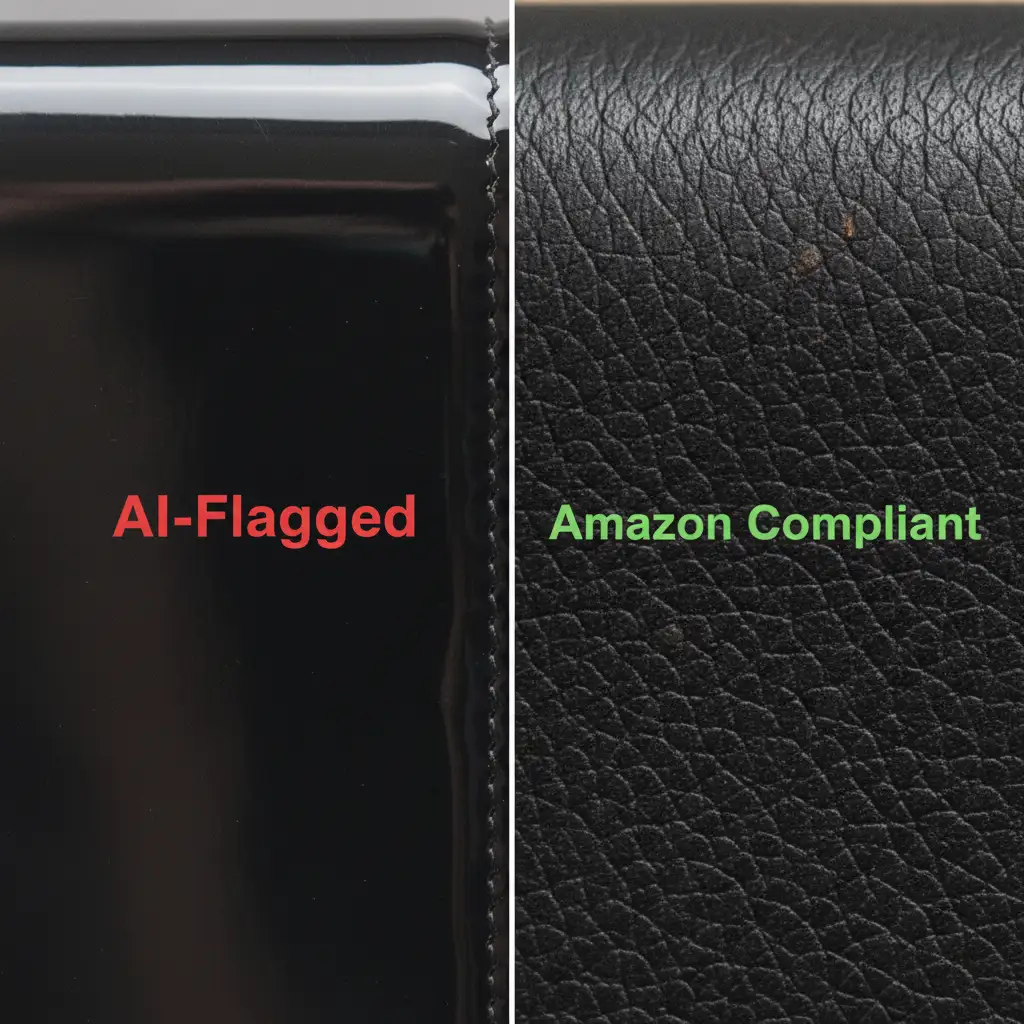
- Hyper-Smooth Textures: Aggressive frequency separation and heavy Gaussian blurring strip away natural micro-textures, making the product look artificially rendered.
- Missing Metadata: Stripping EXIF data during the export process removes the mathematical proof that the image originated from a digital camera.
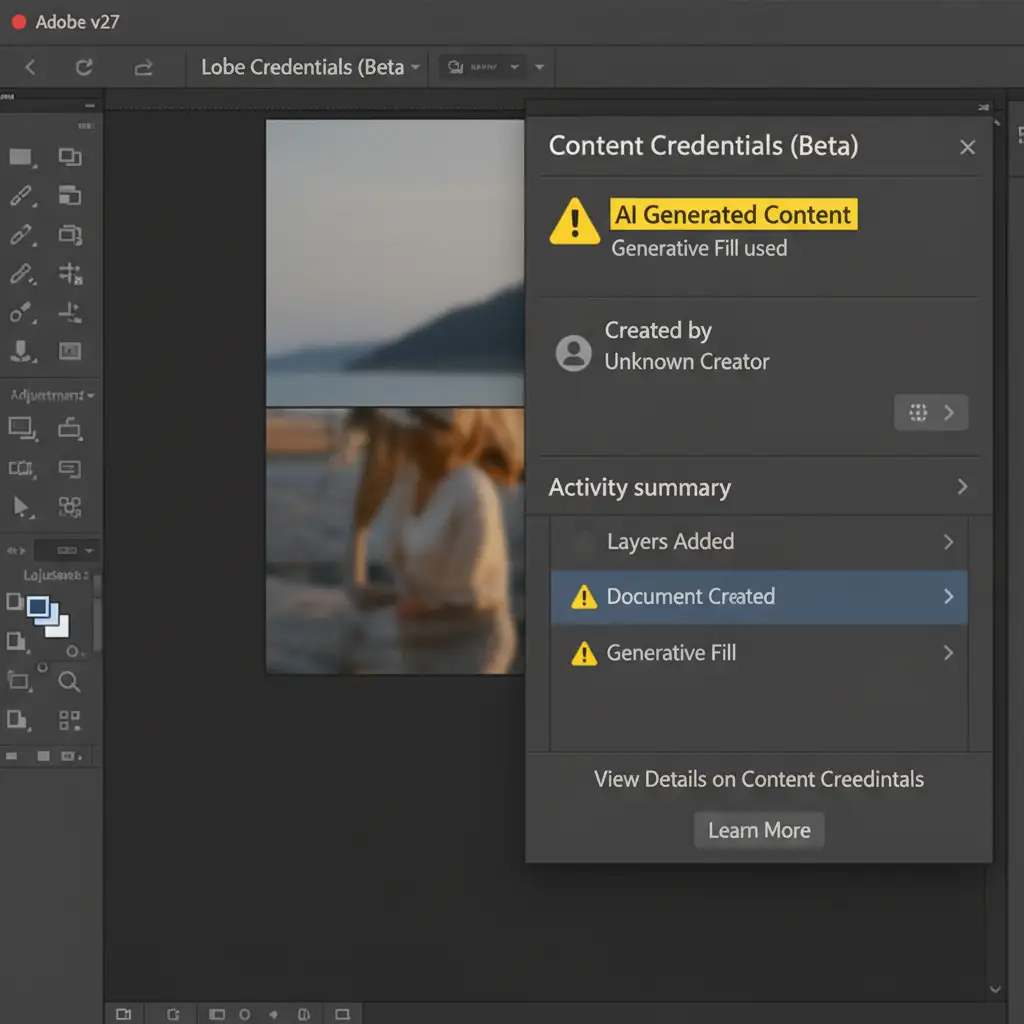
- Hidden AI Tags: Using Photoshop’s newest AI features embeds invisible Content Credentials (C2PA) into your file, which instantly triggers an automated rejection.
Here are three proven methods to adjust your retouching workflow and pass Amazon’s verification algorithms.
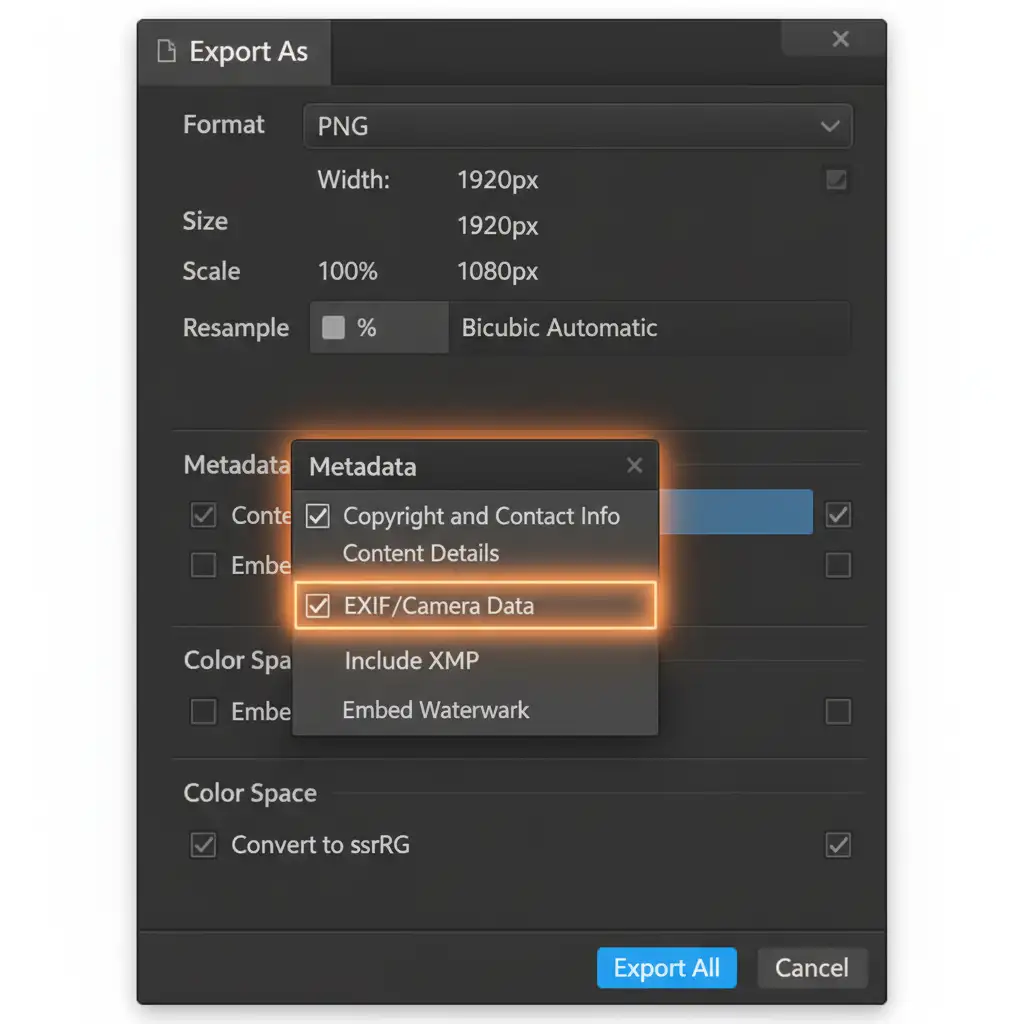
Method 1: The Quick Fix (EXIF Data Preservation)
The easiest way to prove your image is real is by showing Amazon the “receipts”—your camera’s metadata.
Many retouchers use Photoshop’s “Export As” feature to optimize web images, but by default, this strips away crucial camera data. EXIF data preservation is your first line of defense against AI bots.
How to fix it:
- Stop using the standard “Export As” shortcut without checking your settings.
- Navigate to File > Export > Export As.
- Look at the right-hand panel under the Metadata section.
- Change the dropdown from “None” to “Copyright and Contact Info” or ensure your original camera data is included.
- Alternatively, use File > Save a Copy to save your JPEG. This legacy method preserves the original RAW EXIF data, proving to Amazon’s algorithm that a physical camera captured the shot.
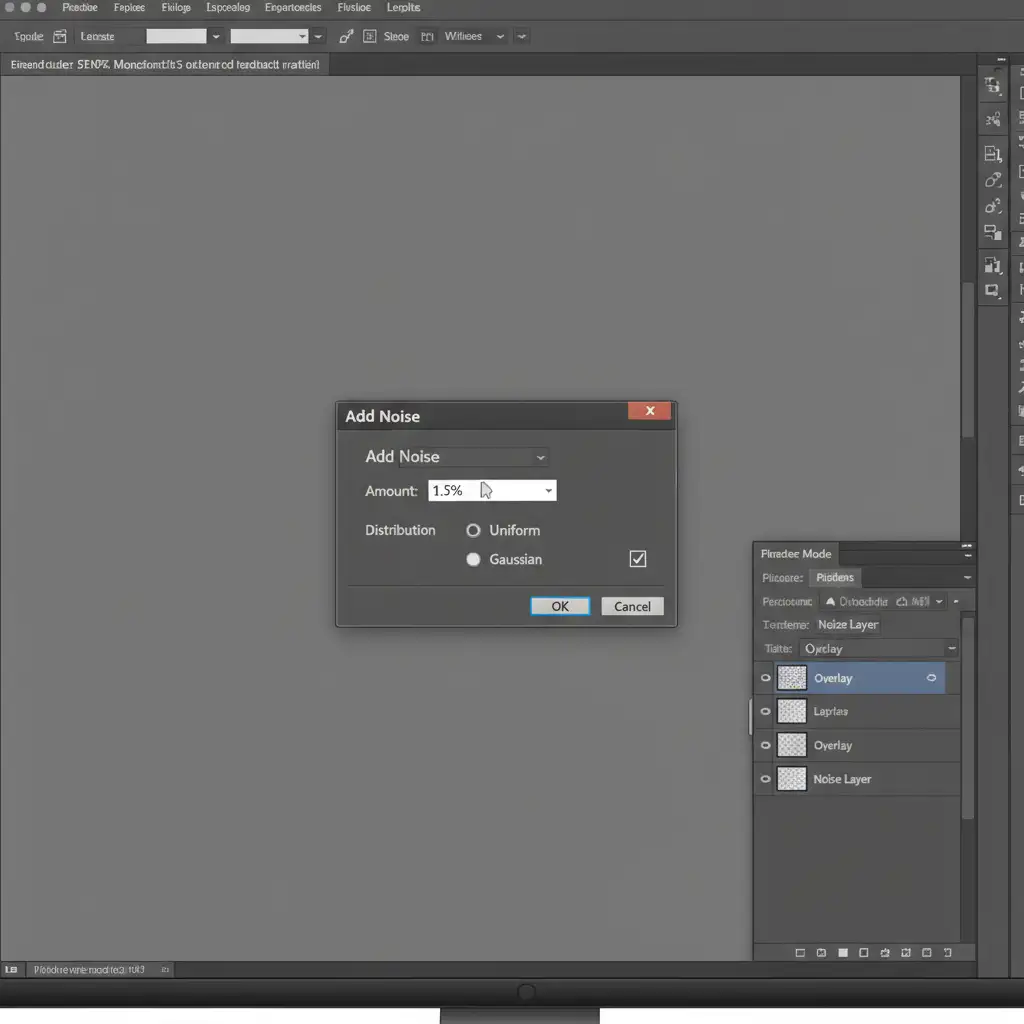
Method 2: The Pro Workaround (Digital Noise Generation)
AI image detectors are trained to flag unnatural, plastic-like smoothness. If you have used automated noise reduction tools (like Topaz Labs) or heavy surface blurring, you have essentially handed the algorithm a red flag.
To break the AI-smooth detection heuristic, you need to reintroduce organic imperfections through digital noise generation or Camera Raw Filter grain.
How to inject organic noise:
- Finish your standard retouching workflow.
- Create a new empty layer at the top of your layer stack.
- Fill this layer with 50% Gray (Shift + F5).
- Change the layer’s blending mode to Overlay.
- Go to Filter > Noise > Add Noise.
- Select Uniform and check the Monochromatic box.
- Add a very subtle 1% to 2% noise.
This invisible layer of mathematical randomness is imperceptible to the human eye but instantly proves to a bot that the image contains photographic noise, bypassing the false positive filter.
Method 3: The Technical Deep-Dive (Texture Retention & C2PA Avoidance)
If you are still facing rejections, you must fundamentally restructure your high-end retouching workflow to prioritize macro texture retention.
Adjust Your Frequency Separation
Instead of heavily blurring the low-frequency (color/tone) layer during high-frequency retouching, switch your toolset. Use a Mixer Brush with a very low flow (10% to 15%) to gently blend transitions. This prevents the “plastic” look while keeping the underlying structure intact.
Avoid Generative Fill Like the Plague
This is the most critical step for modern Photoshop (v24.x and newer) users. If you use Adobe’s Generative Expand to fix a background or Generative Fill to remove a prop, Photoshop automatically embeds Generative Fill metadata into the file structure.
This is known as Content Credentials (C2PA). Amazon’s system reads this C2PA tag and instantly categorizes the image as artificial—resulting in an immediate rejection. To avoid this, strictly rely on traditional tools like the Clone Stamp tool or the legacy Content-Aware Fill for your e-commerce backgrounds.
Stop Risking Suspensions: Get Amazon-Compliant Retouching
Navigating Amazon’s ever-changing algorithm is exhausting, especially when false positives threaten your revenue. You shouldn’t have to choose between a flawless product image and an active listing.
Don’t risk account suspension or listing deactivation due to algorithmic misunderstandings. Let the experts handle it.
At Image Work India and Cloud Retouch, our professional retouching teams specialize in high-end, Amazon-compliant product photography editing. We utilize advanced workflows that guarantee stunning macro texture retention, perfect color accuracy, and zero AI metadata flags.
We ensure your images look world-class while passing every automated check Amazon throws at them. Contact Cloud Retouch today to secure flawless, algorithm-proof product photos that convert browsers into buyers.


