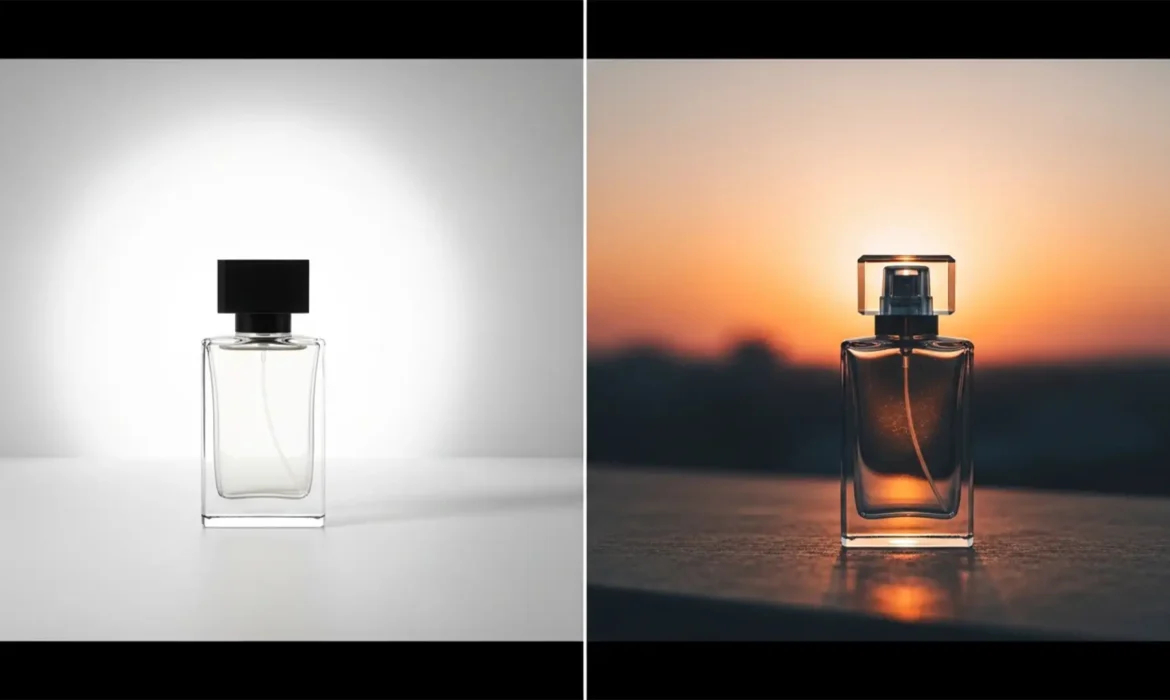
You just used the latest AI tools to isolate an e-commerce product, and the cutout is flawless. But when you drop it onto a new lifestyle background, something is horribly wrong. The product looks like it’s hovering. It feels pasted on.
This is the dreaded “floating object” effect. While AI background removal in modern software easily handles the edges, it leaves behind the directional lighting, white balance, and reflections of the original studio environment. If you want a composite that actually converts shoppers, you have to manually match lighting for product background swaps.
Here is the professional workflow to fix mismatched lighting, create realistic contact shadows, and eliminate that fake, ‘Photoshopped’ look.
Why AI Background Removal Isn’t Enough
In modern versions of Photoshop (v25.x and v26.x), features like the Remove Background action or the Object Selection Tool are incredibly precise. However, they only solve half the problem.
When you extract a product from a studio shot, you are carrying over the original lighting logic. If your new background features warm, diffused window light from the left, but your product has harsh, cool strobe lighting from the right, the brain instantly recognizes the image as fake. Products with highly reflective surfaces—like glass, metal, or glossy plastics—are especially prone to this, as they physically reflect a studio room that no longer exists.
To achieve pixel-perfect realism, you must address luminosity, color temperature, and ambient occlusion.
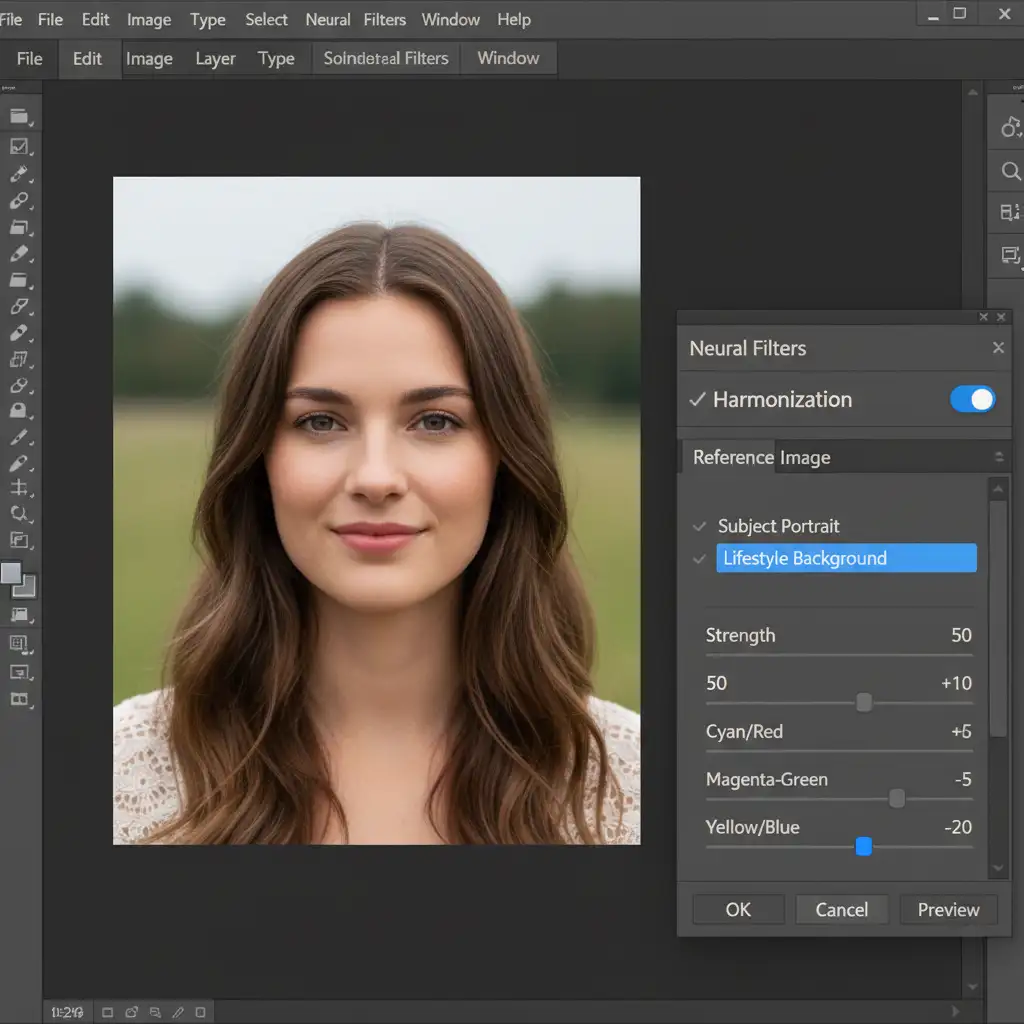
Method A: The Quick Fix Using the Harmonization Neural Filter
If you are working against a tight deadline, Photoshop’s built-in AI filters can establish a solid baseline for your composite.
- Ensure your cut-out product layer is positioned correctly over your new background layer.
- Select the product layer and navigate to Filter > Neural Filters.
- Toggle on the Harmonization Neural Filter.
- In the settings panel, select your new background layer from the reference dropdown menu.
- Photoshop will automatically calculate the color temperature and luminosity of the scene and apply it to your product. Output this as a Smart Filter so you can adjust the opacity if the effect is too strong.
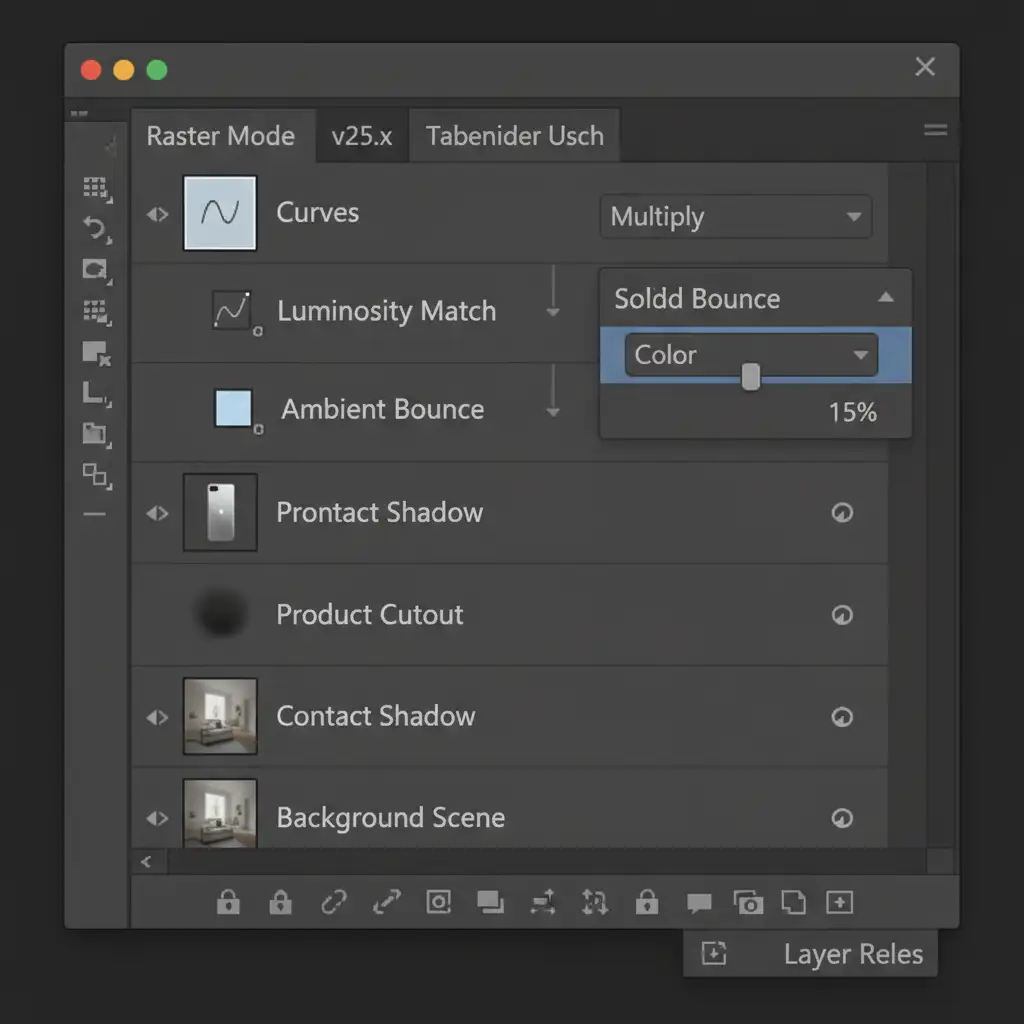
Method B: The Pro Workaround with Curves and Color Balance
For high-end e-commerce composites, automated filters rarely get you 100% of the way there. The professional approach requires manual adjustments using a Clipping Mask to precisely control the light.
1. Align Black and White Points
Create a clipping mask over your product layer. Add a Curves Adjustment layer. Your goal here is to match the darkest shadows and the brightest highlights of the product to the new background. If the background has faded, milky blacks, lift the bottom-left point of your Curves graph so the product’s shadows match that exact luminosity.
2. Introduce Ambient Bounce Light
Objects absorb the color of the surfaces they sit on. To replicate this:
- Add a Solid Color fill layer clipped to your product.
- Sample a dominant mid-tone color from the new background.
- Change the layer’s blend mode to Color and drop the opacity to 10-15%. This introduces a subtle, realistic ambient bounce light across the product.
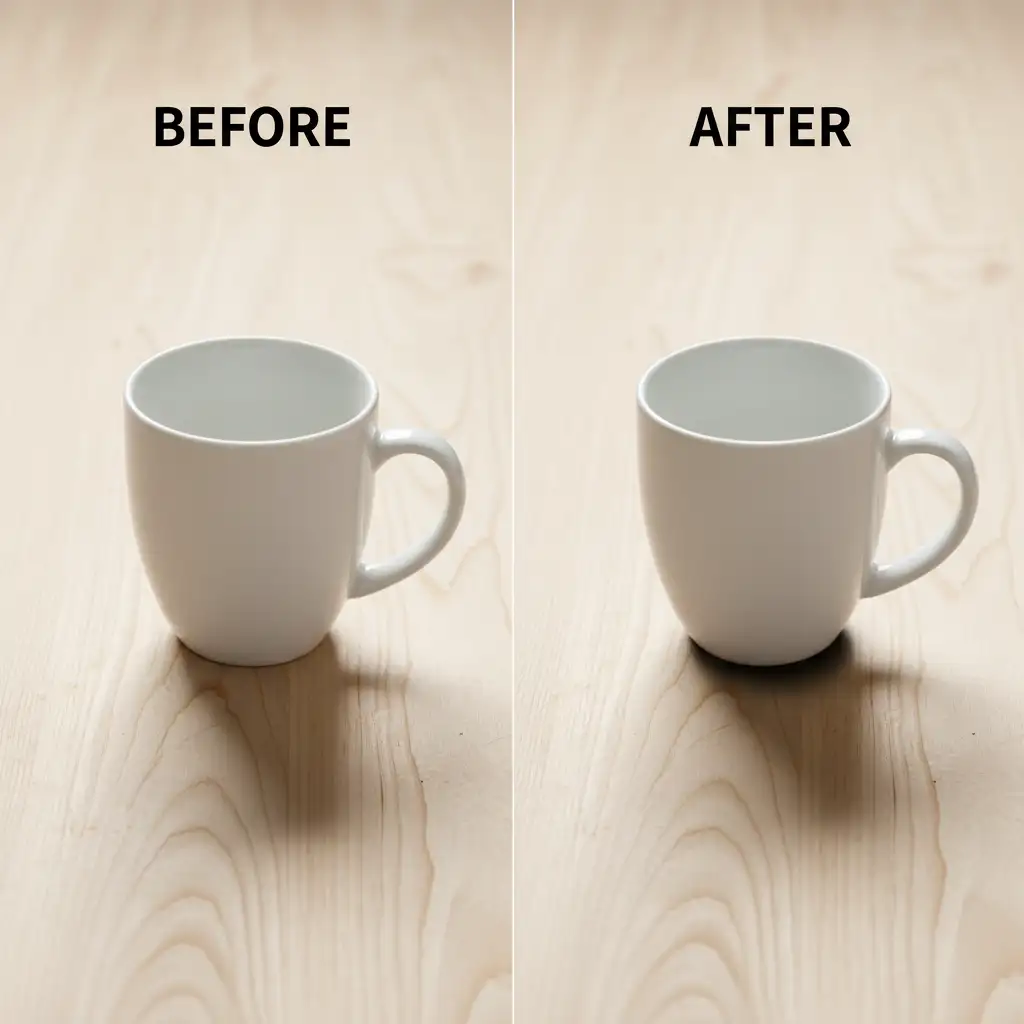
3. Anchor with Contact Shadows
A product will always look fake without a contact shadow. Create a new layer below the product. Using a soft brush set to the Multiply blend mode, sample a dark color from the background’s existing shadows. Carefully paint directly under the areas where the product touches the surface to ground it in the scene.
Method C: The Technical Deep-Dive for Ultimate Realism
When dealing with complex lighting, you need to emulate Ambient Occlusion and force the background’s light to wrap around the product. This requires advanced Blend If techniques.
Simulating Edge Light Bleed
- Group your product layer.
- Apply an Inner Shadow layer style to the group. Set the color to match the brightest light source in your new background. This simulates edge lighting wrapping around the product’s contours.
- Next, create a Gradient Map clipped to the product layer. Sample the background’s darkest shadow for the left side of the gradient, and the brightest highlight for the right. Set this layer to the Soft Light blend mode to map the environment’s lighting logic directly onto the product.
Forcing Integration with Blend If
To make the lighting interact naturally with the product’s textures:
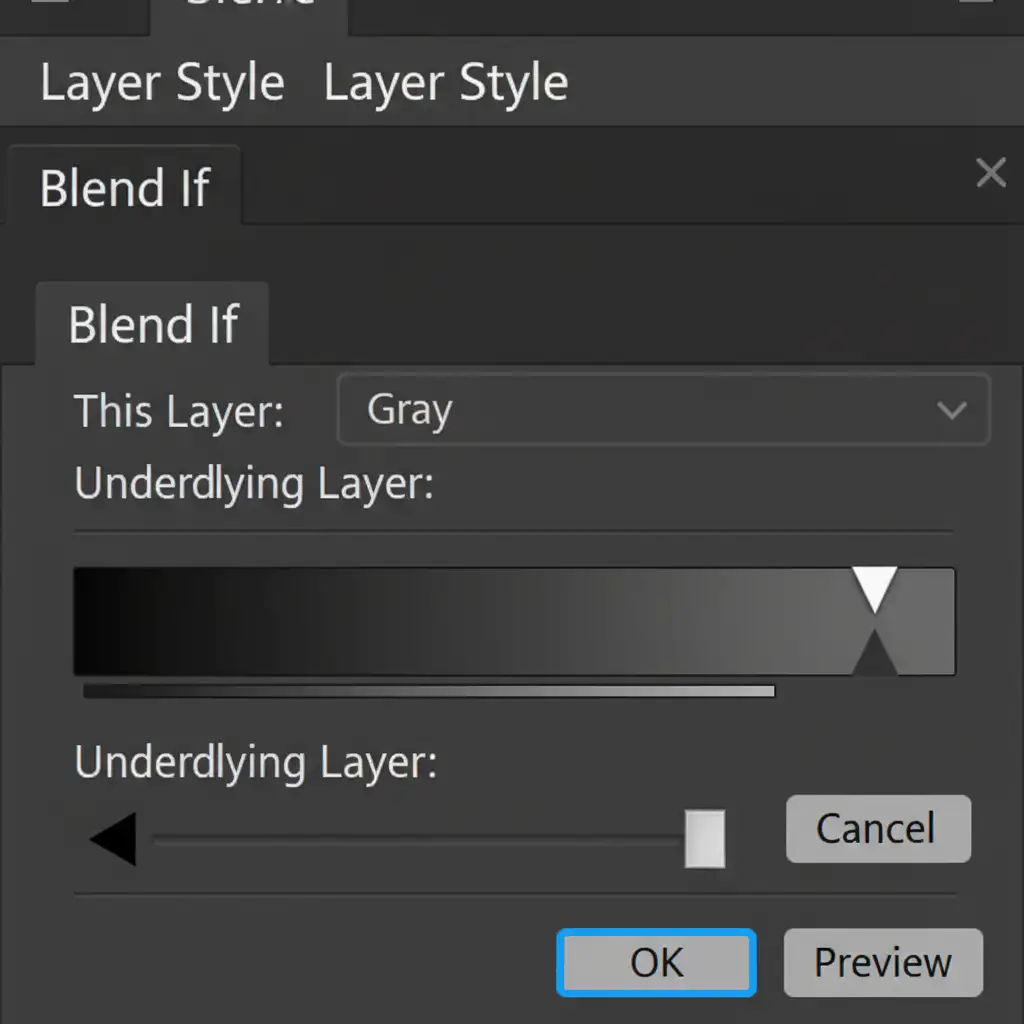
- Double-click the Gradient Map layer to open the Layer Style dialog.
- Locate the Blend If section at the bottom.
- Go to the Underlying Layer slider. Hold Alt (Windows) or Option (Mac) and click the black or white node to split it.
- Dragging these split nodes allows the original highlights and shadows of the product to push through the adjustment smoothly, creating a seamless integration without destroying the product’s physical texture.
Stop Fighting Bad Lighting: Let the Pros Handle It
Learning to manually match lighting for product background swaps takes hours of practice, a deep understanding of color theory, and an expert grasp of Photoshop’s most complex tools. When you are managing an e-commerce catalog with hundreds of SKUs, spending 45 minutes tweaking the edge light bleed on a single image simply isn’t scalable.
Struggling to make your e-commerce product composites look natural? Image Work India and Cloud Retouch provide professional product retouching, shadow creation, and background replacement services. Our expert retouchers understand the physics of light, ensuring pixel-perfect realism that eliminates the “floating object” effect and drives sales.
Focus on growing your brand, and let us handle the pixels. Contact us today to see how we can elevate your product imagery.


