Are you trying to batch remove glass reflections from glass products using AI, only to find your final images looking flat, lifeless, and completely devoid of natural depth? You are not alone. When processing e-commerce product photography, generic AI batch tools frequently fail on transparent materials. They treat delicate specular highlights and complex refraction as solid objects, aggressively over-smoothing the surface and destroying the product’s volume. If your automated workflow is ruining your studio-lit glass bottles, eyewear, or cosmetics, it is time to upgrade your approach. Here is exactly how to fix the batch glass reflection problem to achieve flawless e-commerce standards.
Why Generic AI Fails at Glass Transparency
Current AI batch processing tools, such as the automated features in Photoroom or Lightroom Classic v13, struggle heavily with glass. The core issue lies in how AI models interpret light. An AI cannot inherently tell the difference between an unwanted studio softbox reflection and the necessary internal refraction that gives a glass object its three-dimensional shape.
When you apply a blanket AI reflection removal tool across a batch of images, the software typically overcompensates. It targets all high-contrast white areas—wiping out the essential specular highlights that define the curve of a bottle or the bevel of a glass rim. The result is a product that looks like a flat, matte illustration rather than premium glassware.
To achieve true e-commerce optimization, a hybrid approach is required. You must combine the speed of AI object selection with the precision of manual techniques like frequency separation and opacity blending.
3 Professional Methods to Fix Glass Reflections in Bulk
Here are three distinct workflows, ranging from a quick automated fix to a technical deep-dive, designed to salvage your glass product photography.
Method A: The Quick Fix Using Generative Fill Actions
If you need a rapid turnaround, you can harness Photoshop’s automated Generative Fill via custom Actions. This method works best when the studio reflections are highly localized and consistent across the batch.
- Open your first image and begin recording a new Photoshop Action.
- Navigate to Select > Color Range. Use the eyedropper to target the harsh specular highlights.
- Once selected, go to Select > Modify > Expand and expand the selection by 2 pixels to ensure the edges of the glare are caught.
- Trigger Generative Fill with a blank prompt (or a simple prompt like “clear glass”) to allow the AI to seamlessly patch the area based on the surrounding pixels.
- Stop recording. You can now run this Action via Photoshop’s Batch Processing tool across your entire folder.
Method B: The Pro Workaround with Batch Frequency Separation
For high-end product photography, Generative Fill can sometimes be too unpredictable for bulk work. Method B uses Frequency Separation to give you absolute control over texture and lighting.
- Record an Action that duplicates your base layer twice.
- Apply a Gaussian Blur to the lower layer (Low Frequency/Color) and an Apply Image calculation to the top layer (High Frequency/Texture).
- Group these layers into a “Frequency Separation” folder.
- By running this Action across a batch, you prep every file instantly. You can then quickly go through the batch, select the Low Frequency layer, and use a soft mixer brush or Gaussian Blur to melt away the harsh glare.
- Because the High Frequency layer remains untouched, the physical texture, scratches, and edge refractions of the glass are perfectly preserved.
Method C: The Technical Deep-Dive Using Lightroom Classic v13
If you want to stay entirely within a raw processing environment, Lightroom Classic v13 offers a powerful hybrid workflow using its updated AI Masking.
- Open an image from your studio-lit batch in the Develop module.
- Click the Masking icon and choose Select Object. Paint roughly over the glass product.
- Once the AI selects the bottle, click the three dots next to the mask and select Invert.
- Now, intersect this inverted mask with a Luminance Mask targeting only the brightest exposure values (the reflections).
- Drop the Highlights to -100 and push the Dehaze slider up slightly to cut through the glare while retaining the core glass structure.
- Open the Sync Settings dialog, ensure “Masking” is checked, and synchronize this exact AI mask configuration across all similar images. The AI will recalculate the object boundaries for every single photo in the batch.
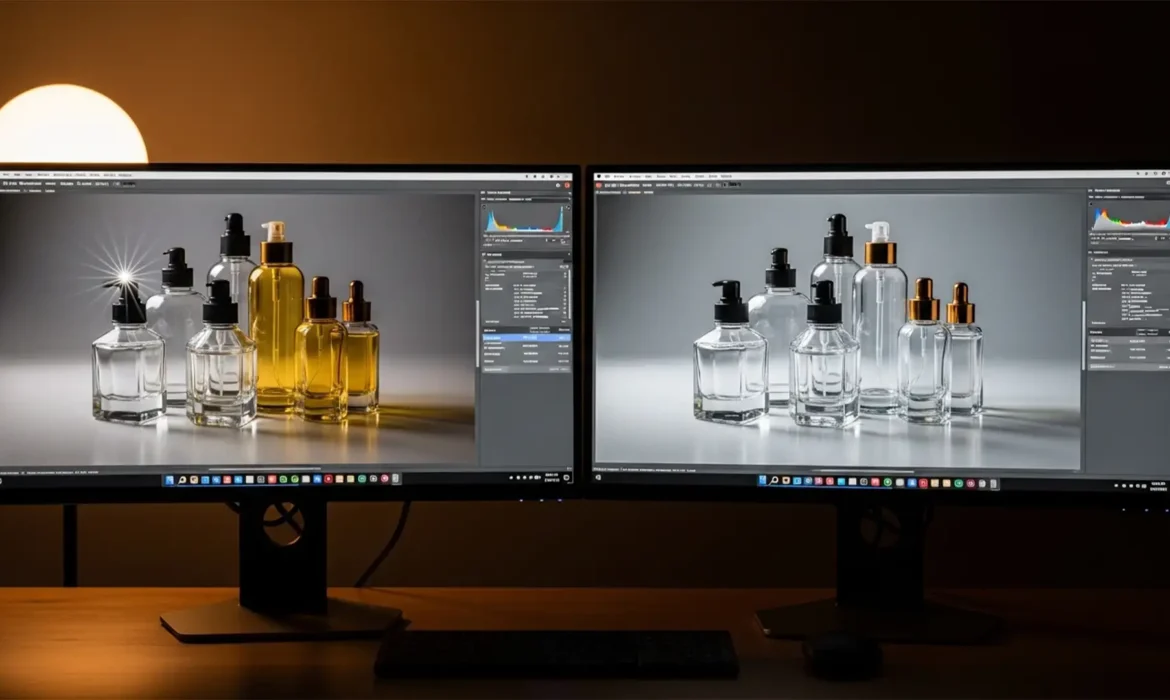
The Ultimate Proof: Retained Refraction
When executed correctly, these hybrid workflows prevent the “flat” look that plagues automated editing. The difference between a generic AI pass and a targeted, professional workflow is night and day. The volume remains intact, the edges stay crisp, and the product looks premium.
Scale Your E-Commerce Optimization with Image Work India & Cloud Retouch
While the methods above offer powerful solutions, the truth is that batch remove reflections from glass products AI workflows still require careful monitoring. Glass reflection removal demands a nuanced human touch that AI cannot yet scale with 100% accuracy. If your masking slips or your generative fill produces artifacts, your brand’s perceived value drops instantly.
You don’t have to spend hours adjusting luminance masking or tweaking frequency separation layers. At Image Work India and Cloud Retouch, our expert retouchers specialize in high-volume, complex e-commerce image editing. We combine the latest AI masking technology with decades of manual retouching expertise to deliver flawless glass products, clipping paths, and color correction in bulk.
Stop fighting with your software. Let us handle the technical heavy lifting so you can focus on growing your business. Contact Image Work India or Cloud Retouch today for crystal-clear, conversion-ready product photography.


