
Tips for Being More Productive with Microsoft Office
Microsoft Office is still on the list of skills of an ideal worker. For that reason, knowing interesting tricks and functionalities will not only help you increase your job opportunities, but it will also increase your productivity and allow you to have more free time.
Use older versions
Microsoft Office allows you to install different versions on your computer and use them as you see fit. And if you still do not acclimatize to the new version of Office, you can continue using a previous version so that you get used to the new version little by little.
Save time with a copy
If you want to work on copying a document while leaving the original file unchanged, you can do it without problems, this will save you time, and it will not be necessary to edit the original version. To do this, click on the “File” option, then choose “Open,” “Recent Documents,” right-click on the document you want to open, then “Open a copy,” and you’re done. Any changes you make to the document will be saved to the copy.
Online Documents
If you need to take an important document elsewhere, you can save your documents to your Microsoft account and then access the file from another device while away from your computer. Also, you can use the Office application for smartphones. This functionality makes it possible to make changes from wherever you want.
Read More: How to Take Pictures of Clothes Without Mannequin
No more need to copy and paste
Using Ctrl+X and Ctrl+V to move text within a document is not a sin. However, for some versions of Microsoft Office, you can do this same functionality faster, which will help you be more productive. Once you select the text, use the F2 key. This will allow you to choose where you want to put the text just by giving it “Enter.”
Use Wikipedia from Word
The Wikipedia app for Word is a good resource for research in general. Once you have it installed, go to the option “Insert,” “Apps for Office,” then Wikipedia, and that’s it. The app also allows you to insert some text or images. To do this, select the text or hover over the image, then click the insert symbol to put it inside the body of your Word file. The hyperlink to the source is included automatically.
Recommended charts
In previous versions of Microsoft Excel, creating suitable charts was time-consuming, as not only did you have to sort the data and edit the chart, but you had to find the right type of chart to represent your data. Now, in the new versions of Excel, you can do all that work with a single button, using the recommended charts feature. This function uses an algorithm to determine the graph.
Open PDF in Word
Microsoft Word has a function called PDF Reflow. The operation of this tool is complicated. However, the purpose is to open PDF files and change them to a Word format, allowing you to edit the documents as you wish, including the copy function. Now all PDF data is accessible with Word. Conversion isn’t always perfect, but it’s a very useful feature.
Conclusion
Microsoft Office has several features that not many people use. However, these can help you complete tasks more quickly and thus increase your productivity. As a good Digital Marketing professional, you must take advantage of all the necessary functions to make you more competitive in your daily work.

Secret Tools That Will Help You Manage Your Freelance Work
Being an efficient freelancer is a very difficult task since you must complete a myriad of functions, both related to work and unrelated, and project management and accounting. Fortunately, today many applications allow you to save time and facilitate responsibilities. Below, we give you the list of the best tools that will help you work as a freelancer.
Mint
All of Mint’s features are free, allowing you to pay your bills quickly and manage your budget, allowing you always to be attentive to your financial life. So, for example, if you are in the United States, you can check your credit score.
Dropbox
This is a free cloud storage tool that allows you to save all kinds of documents and view them from any device, no matter where you are. To do this, you only need to be connected to the Internet. If you require more storage space, there are several paid plans.
Todoist
This free tool allows you to keep a list of obligations and pending tasks, whether work or personal. You will only have to write the task and include it in the list to do this.
Teamwork
TeamworkPM is used by more than 370,000 companies, including PayPal and Pepsi. This application allows several people to collaborate on documents and projects without sending emails constantly.
Oh, Don’t Forget
This simple app allows you to schedule reminders for later. You will often have to stop what you are doing to attend to a new task. Using the application, you can resume the task later, without the possibility of forcing yourself.
Join. me
If you are away from your customers and want to show them something on your computer, they will visualize your screen through this application. The best thing about this is that you don’t even need to create an account to log in.
EchoSign
Suppose you can’t meet your client personally and you need to sign a document. In that case, this Adobe tool allows you to sign documents digitally without meeting physically or using couriers.
Evernote
This useful application has continuous functions and can be used as a digital filing cabinet. Evernote is a tool for note-taking, digital personal journaling, project management system, recipe warehouse, and much more. All functionalities work in the cloud.
Followup. cc
This tool is a Gmail extension where you can create reminders of emails sent to your customers or potential customers. In this way, you will never leave anyone unanswered and, therefore, you will not lose the opportunity to sell.
Conclusion
Being a freelancer is a difficult responsibility, but, despite this, there are many tools, some of them free, that will allow you to manage your time and money much better, which will help you focus on the most important thing, whether you are a professional in digital marketing, community management, or content management, among others.

What Are the Main SEO Pillars?
To develop an effective SEO strategy, you have to consider the 3 SEO pillars on which it is based. These are SEO On Page, Link Building, and User Response. Without these pillars, web optimization would not be possible, and the company would not reach its goals.
The importance of developing SEO strategies in digital marketing lies in achieving the efficient positioning of a website or blog on the Internet. This platform allows a brand or company to consolidate organically in the digital environment. And so, you can increase the number of customers and potential users or achieve other specific goals you’ve set for yourself.
The primary SEO pillars
So, to achieve the desired success in digital marketing, it needs to know in-depth what these SEO pillars mean. For that reason, we have developed this article to clarify and explain exactly what they are about and why they are so important in implementing an SEO strategy.
On-page SEO
First of all, “on-page SEO” refers to all the elements within a web page. This optimization’s primary goal is to communicate to Google what type of content the page provides, how it seeks to position itself, and with what keywords.
Among the most important elements of ON-Page SEO are the following:
Title
- It is located inside the <head> with the following tag: <title>.
- It is recommended that it not contain more than 10 words. Brevity and clarity are needed.
- Include references to the brand that works as a reinforcement. But you should avoid forcing this inclusion.
- You should avoid making spelling mistakes.
- As relevant, it is possible to mix keywords with the brand’s name in the “title.”
Meta Description
- The introductory text appears when Google displays a brand’s web page in search results.
- It must not be longer than 156 characters.
- It must be focused on the user to invite him to click the link.
- You should avoid making spelling mistakes.
- Include content that generates interest for the user, leading him to click on it.
- The label is as follows: meta name = “description” > meta content = “”>
URL
- The URL must indicate which product, content, or service is offered.
- It should include only alphanumeric content.
- It should be brief and clear.
- Include your keyword.
H1
- Navigate to the page.
- The primary keyword must be indicated.
- It must be unique across the entire page.
- It is the visible title of the content.
H2 and H3 are subheadings.
- Look over the page’s main themes.
- You can include several of them.
- It must include the keyword or its synonyms.
- It helps to visually sort the page.
Read More: The Best Tips for Showcasing Your Photos
Contents
- If duplicate or poor quality content within the page, it should be deleted immediately, as Google could penalize the website.
- The tag that should be used to avoid the above is as follows: meta name = “robots”; content = “no index, follow”;
- On the contrary, if the company wants to spread the content, the label is the same but without an “index.”
- The contents of quality articles with more than 1000 words are more likely to be positioned in search engines.
Internal links
- The most popular way to place internal links on a web page is by developing the top or side menus.
Link Building
Secondly, there is the Link building. This consists of obtaining quality external links that enhance the reputation and authority of a brand’s website. Below, we will show some factors that every brand should take into account for the execution of this pillar:
Anchors
- Anchor texts are another term for anchor text. They are the visible texts of the link.
- They should be as varied as possible. In this way, a varied number of words will generate a greater reach.
- The goal is to combine the “anchor” with the keywords. This way, the texts can be more natural for organic traffic.
IP, Network, and Origin
- It is recommended that the origins of the links be varied. This will avoid having many links from the same IP and network.
- You should check that these links are quality and not broken.
Thematic
- It is advisable to get links with a similar theme to provide greater naturalness and contextualization to the content.
- That way, Google is prevented from penalizing the website.
Also, you can visit the related article “Implement Link Building in your SEO Strategy.”
User Response
Finally, the user’s response is one of the most important SEO pillars in developing a web page. This pillar is key to achieving success in achieving organic traffic objectives. In this way, a brand will get users to choose their content, stay on their page, and come back another time.
For these goals to materialize, the following SEO factors must be considered:
CTR
- They are the last clicks to content links on a web page.
- If a user stays less than 30 seconds on a brand’s page, their web positioning will be harmed.
Brand prestige
- This is all down to the user’s response and the CTR of the page.
- That is to say, the higher the CTR, the greater the brand’s prestige.
Permanence
- It means the average user is interacting with a brand’s website.
Bounce rate
- It is the opposite of permanence since it represents the number of users who enter a page, but it does not stay long.
Return
- Google will reward you by improving the positioning of the pages that obtain the best return on traffic.
Finally, consider the SEO pillars.
It is important to take into account these three SEO pillars. Understanding them is not complicated, but ignoring them would imply that a brand would not have the possibility of succeeding. Also, it is of the utmost importance to follow an order so that the proposed objectives are easier to meet.
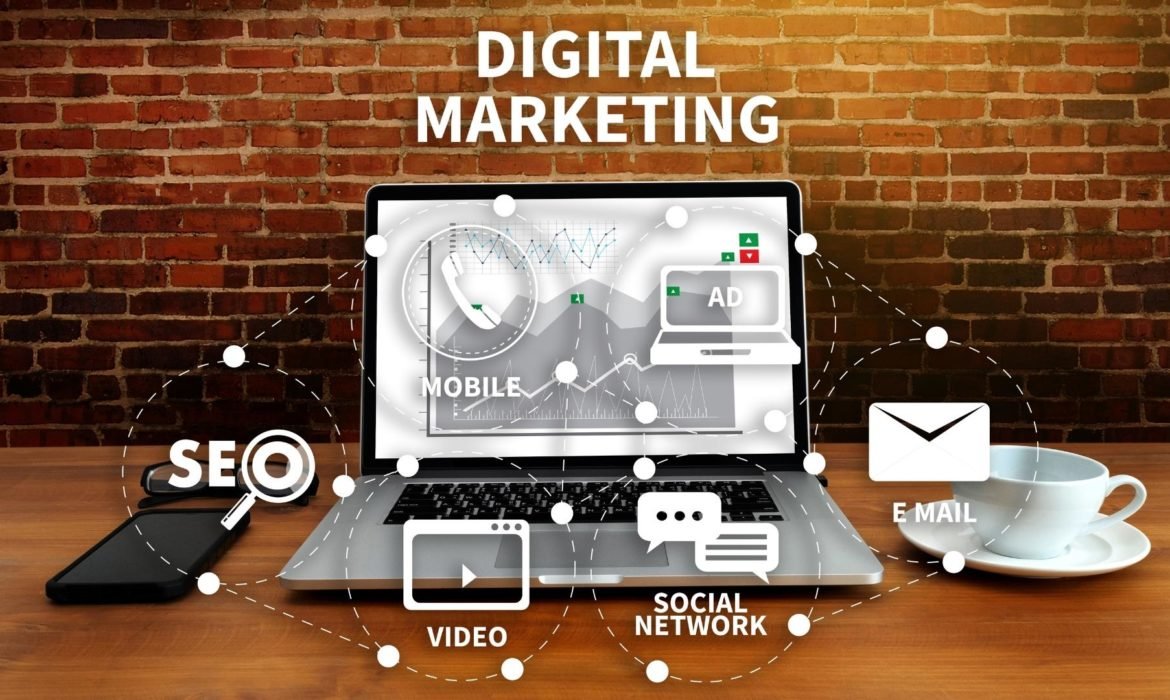
Top 12 Most Popular Types of Digital Marketing
To implement a digital marketing strategy, you must first know the types of digital marketing that exist in the market. Today, content marketing is the most used. However, the other types are also important, but many times, due to a lack of information, they are not developed as they should be.
Next, we will mention each of the types of digital marketing and comment on their specific objectives. In this way, those interested in digital marketing will differentiate between the types and know which one is the most suitable to implement within their strategy.
1. Content Promotion
As we mentioned initially, content marketing is one of the most popular types today. Digital marketing agencies know its importance. If the content of a portal is not interesting enough or is redundant for your target, then you will not be able to position yourself on the Internet, much less obtain the ROI (return on investment) you expected and the reach you projected.
The goal of content marketing is to produce things that inspire the user. That this can be identified with the content and that, in the face of that, they perform some type of action that benefits the brand. In addition, developing content of interest and quality generates trust in readers. That way, one brand’s construction becomes stronger than the others.
2. Integrated marketing communications
Secondly, there is inbound marketing. The main objective of this type of digital marketing is to get the potential customers of a brand to get to know it organically, follow it, and thus build loyalty. For that reason, digital marketing companies use inbound marketing to capture customers at the right time in the purchase funnel. They also do their best not to be intrusive and not cause any kind of rejection with excessive advertising.
Inbound marketing could be used in the following ways:
- Blogs
- Youtube videos
- SEO Strategies
- Podcasts
- Infographics
With a Diploma in Inbound Marketing and Content, you will learn to improve your brand image through interesting, useful, and personalized content. This will help you renew your reputation and visibility before your target, improving your positioning in search engines.
3.Relationship Marketing
It is of the utmost importance that companies know what consumers really want and are looking for every day. For that reason, they should concentrate on listening to them and developing quality content rather than just creating and producing a product. Understanding the customer is the phrase that summarizes Relationship Marketing.
In relationship marketing, customers are the focus. If a company does not know their needs and desires, it will be impossible to retain them. Therefore, this type of digital marketing is used by visionary companies that focus on attracting customers and keeping them in the long term.
Its goal is to get loyal customers to act as spokespersons and convince more people to join your brand. To achieve this, the digital marketing agency needs to use CRM tools, or customer relationship marketing, to develop an adequate management system for each of the brand’s users.
Read More: Business Ideas for Making Money on the Internet in 2022
4. Conversive marketing
In the fourth case, this type of digital marketing was developed to make the brand meet the requirements imposed by its customers. Thus, once fulfilled, they will be willing to stay with her. In this case, like the previous one, the product or service offered by a brand goes into the background, leaving customers to be the ones who matter most.
By communicating with them and complying with the proposed parameters, the brand will be privileged in the consumer’s mind. As a result, the brand must ask itself a series of questions to build an online reputation that corresponds to what it offers and meets the consumer’s expectations. The main questions that every brand should ask itself to figure out where its reputation is are the following:
1. Who are you?
2. Who do you claim to be?
3. What are people saying about you?
5. Marketing with Permission
Permission marketing is a very common term among digital marketing companies. However, this should be considered since today, positioning yourself on the web is not as easy as many think. This is because not all consumers are willing to accept web advertising. This is because it is often intrusive or simply because the user enters the virtual platform to look for something specific.
Therefore, among the types of digital marketing, permission marketing is an anticipated strategy that could be very helpful for brands. Using this tool, the brand asks users for permission to build loyalty. So if a brand develops this strategy, it is not only being respectful of the consumer’s wishes but also earning their trust. Well, as simple as it may seem, this action assures the user that the brand is a serious company.
6. SEO
SEO, or “search engine optimization,” is a process by which it is intended to improve a website to increase its position in the searches of users. In this way, by optimizing the website and improving its visibility in search engines, the business will attract potential customers. Some SEO factors to consider to improve the marketing strategy are:
- Improve the quality of the content, considering that it is of interest.
- Establish strategic, competitive, and relevant keywords.
- Crawlability and website download speed.
- Valuable and authoritative link-building strategies.
- Constant audits of the status and operation of the website
7. SEM
SEM, or in Spanish, “marketing in search engines,” is a process that consists of tools, techniques, and strategies to optimize the visibility of websites in search engines. While SEM can encompass organic web positioning (SEO) and paid web positioning (PPC), it is mostly referred to as the latter. This is also known as PPC marketing or pay-per-click marketing.
Therefore, SEM marketing actions are those in which the advertiser seeks to get traffic by investing in advertising in search engines. Which is based on measurable indicators such as impressions, clicks, and CTR. By placing high-performance ads, the company aims to achieve a short position on the main page of the search engines. A commonly used SEM marketing strategy is advertising using Google Ads.
8. Marketing automation
In marketing, many actions are carried out every day, which sometimes makes it difficult to concentrate on strategies. Marketing automation allows you to establish tools and automate actions to facilitate these tasks. However, the intention is that these automated actions do not lose their human quality.
To do this, automation software governed by user experience is used since it simulates real interaction in the most natural way possible. Among these actions are the automation of email, chats through bots, the description of the behaviors of potential customers, and others that save time without losing the quality of attention to the user.
9. Email marketing
This is one of the most popular digital marketing campaigns as it is effective, measurable, economical, and non-intrusive. It generates lists of users and customers to whom emails can be sent periodically with informative or promotional content. Even this kind of marketing has been improved to be more personalized and tailored to the needs and preferences of each person who sees it.
To generate these lists of subscribers, you can include registrations on the website or social networks where the user grants you the authorization to receive information from the brand. In addition, in these forms, you can include some general questions about user preferences to send you the content of interest. In this way, you will increase the chances of generating conversions and adding new customers.
10. Social Media Promotion
Social networks are the best platforms to make brands known. This is something that marketing experts know how to recognize and therefore turn creative strategies into these channels. In particular, taking advantage of the variety of tools that each of these platforms offers and the specificity of users who use them. Which allows us to generate a greater and better link with customers and keep the brand on everyone’s lips.
Also, considering that new social networks usually arise with new formats and tools, it is necessary to stay on top of these marketing opportunities. That way, you can define which platforms are the right ones for marketing strategies and which audience the brand is targeting. Currently, the most used networks are Facebook, Instagram, TikTok, Snapchat, LinkedIn, Twitter, and Pinterest.
11. Marketing Through Influencers
Influencer marketing is a profitable and effective strategy that uses people with great visibility on social networks. It consists of taking advantage of the power of opinion that some characters have to spread the brand among new users. An influencer is someone with a high level of reliability among their users, and that is why companies turn to them to spread their products or services. In this way, influencer marketing allows:
- Give credibility to the consumption of the brand’s products or services.
- Increase traffic to the website.
- Improve, humanize, and increase the prestige of the brand image.
- Capture the attention of the millennial generation.
12. Video advertising
Finally, we use video marketing to market or promote brands and companies on digital channels. Video marketing is an interactive resource with low investment that allows you to disseminate brief and impactful information in a short time. For this reason, it has become one of the favorites of companies that bet on a type of open communication with the potential for virilization.
However, this type of content requires strategic planning to take care of the amount of information. Above all, they are elements of great memory because users usually share them on their social networks. Therefore, it is necessary to consider the development process, considering the information, the audience to which it is addressed, and the publication formats that each social network demands.
Conclusion on the types of digital marketing
First of all, for a company to succeed in the digital world, it needs to know what it wants to achieve and how it will do it. For that, you need to know what the best path you should use is. In this case, what types of digital marketing are the best to achieve the objectives set.
The types of marketing are similar but not the same. The question lies in knowing how to differentiate them and identify which best suits a company. For that reason, we have written the article to provide a little more knowledge in digital marketing.

How to Attract Customers on Social Networks
Currently, internet sales are constantly increasing, which also increases the likelihood that most of your customers or potential customers are on social networks, many of which also tend to buy online. These platforms offer businesses a cheaper way to reach their customers and influence their decisions. Here are some practical tips on how to attract customers on social networks.
1. Identify which social media platforms your ideal customers are using and get on those as well. Are your customers on Facebook or Twitter? Perhaps they also frequent certain blogs or forums that allow you to reach them out there.
2. Before you jump in with a content strategy, you should research that social platform. Always keep in mind how other businesses are using them, no matter their field. Consider what has worked for other businesses in that medium and try to use it in your own content strategy.
3. Develop a strategy that you will fulfill with your online presence. Every strategy should always have objectives that can be measured. These must be realistic. Many companies also use traditional marketing methods, so it is essential to be able to mix these initiatives with your digital marketing.
4. Create a profile on the social networks you have chosen. Don’t forget to include them in your brief. Also, add essential information about who you are, what you do, and why someone should follow you. Optimize your profile by including as much information as possible.
Read More: Sunrise Photography: 7 Tips for Better Photography from Sunrise
5. Communicate with potential customers by expressing what you can do for them. Try to talk about how you differentiate yourself from the competition and what problem you are solving.
6. Implement your branding rules into your online communication. This will generate consistency in your content, which will allow you to be quickly identified visually.
7. Keep in mind that each social network has a different tone of communication. For this reason, it is essential that you consider it in your communication network. Some social networks like Facebook allow you to be a little less formal. However, it’s the exact opposite on LinkedIn.
8. It is important that every business listens to what is being said about them. All constructive criticism must be taken into account and be answered in order to constantly improve over time. Always try to be informative in your answers and offer help and advice.
9. Always keep up with your field, and communicate your knowledge with your followers. You will quickly establish yourself as a leader in your sector and generate brand awareness since users will relate your field to your business.
10. Be active on the platforms you have chosen. It is important that you always keep up with all the messages they send you. Show your followers that they care about you by having a content plan with a frequency of at least one post a day and sticking to it to the letter.
Keep in mind that you should always measure your progress based on your goals. Many social networks have measurement tools that will allow you to quickly know how your online efforts are doing. If they are not meeting your goals, it is important to identify them quickly so that you can change your social networking strategy.
Conclusion
All businesses can benefit from an online presence. However, they must comply with all good practices on social networks if they want positive results for their businesses.

How to Create a Photographer Website
Anyone who makes a living with a camera needs a portfolio site at some point. After all, with its help, you can show galleries of works in high resolution and attract potential customers. This article will tell you how to make a website for a photographer without knowing the code – just by choosing a powerful website builder. We’ll walk through the basic steps, such as optimizing SEO, setting up a mobile site, and choosing free photography website templates.
How to make a photographer website
- Set clear goals
- Collect the best works
- Choose a layout
- Choose a template
- Add the pages you want
- Connect social media
- Optimize your SEO
- Customize the mobile version
- Ask for feedback
- Update the photographer’s website in time
1. Set clear goals
Before making a website for a photographer, decide on its purpose. This will determine the appearance and the functionality of the site: for example, the presence of specific pages or a form with a subscription to the newsletter. Ask yourself – why do you need a portfolio site? For instance:
- Showcase your best work. If so, your free photography website templates come in handy, including prebuilt image galleries like the Cloud retouch Pro Gallery.
- Increase industry credibility and build a loyal audience. You should add a blog to the site or start a newsletter to do this.
- Attract new customers. In this case, be sure to create a contact page or add a live chat feature.
- Sell prints and other paraphernalia. To do this, you can open an online store and place it in a special section on the site.
2. Collect the best works
A photographer’s website is not an Instagram account, where visitors can endlessly scroll through the photographer’s feed and leave likes. In the case of an online portfolio, you have less than a minute to grab the user’s attention and get them to read on. So choose works you are genuinely proud of, projects you want to show the world. We recommend breaking your work into short galleries – no more than 20-30 photos each. Each gallery should reflect a particular concept or direction of work: for example, “Portraits,” “Wedding photography,” “Nude,” or “Reportage photography.” This will make it easier for visitors to navigate the site, and their attention will not be overwhelmed by a tremendous amount of work.
3. Select a layout
The layout is the visual structure of a site; it determines how the elements are displayed on the page. It is in your best interest to make your photos the center of attention to instantly pique the interest of new visitors.
Suppose there are a few web design tricks to help you do this. First, use a lot of “air” to fill in the gaps between the elements with a white or black background. The background will serve as a frame for each photo and avoid the cluttering of details on the page. Second, consider the format of your photos when choosing a layout. A gallery with “endless” scrolling a la Instagram is suitable for vertical images, where new images will be loaded as you scroll down. For horizontal – classic block layout. For pictures of different formats, you can try an asymmetric design, in which parts of the pages are not equal to each other. This option is also good because it makes the page’s appearance more dynamic.
4. Select a template
Free website templates for photographers are an opportunity to create a beautiful and functional web resource without resorting to the services of web designers. Cloud retouch offers dozens of design templates in a wide variety of categories, such as wedding photographer, family photographer, and food photographer. Each template can be customized to your taste using a convenient visual editor: change the color scheme, font, graphic elements, and much more. Even if you plan to start a website from scratch, photography website templates can be a source of inspiration and exciting solutions for your page.

5. Add the pages you want
Now is the time to think over the site architecture – that is, what pages your portfolio will consist of. As a general rule, photographers do not want complex websites with a lot of pages – however, we advise you to pay attention to the following sections:
Home Page
This is the first thing that a visitor who visits the site will see – so make sure that the home page contains your name, surname, and logo and tells about you and your business in detail and clearly. Photographers often ignore the textual part of the site – and this is a big mistake. Yes, images are the most crucial part of your online portfolio – however, the accompanying text provides the visitor with the necessary context. For example, the introductory text is essential for a landscape photographer. After all, without it, visitors may think that they have come to the website of a travel agency or travel blogger.
Also, include a menu at the top of your site so that users can easily navigate from page to page. Depending on the site’s style, the menu can be a navigation bar in the site header or a hamburger icon that will open when clicked.
Gallery
The gallery is the heart of a photographer’s site, so create it with the utmost care. Adjust the quality and other characteristics of the images to appear exactly as you intended. Choose from ready-made layouts to suit your needs – like a panorama or an Instagram feed-style gallery. In addition, Pro Gallery allows you to protect photos from downloading or sharing them on social networks to attract a new audience. You can also upload videos and text to the gallery to add important context to any project.
About Me Page
Share a little about yourself to create and strengthen an emotional connection between you and your visitors. Share only the essential and exciting details: your philosophy, technique, sources of inspiration, and the most exciting biography details. Tell the story in the first person – this makes the text more personal, and the visitors are more likely to want to know more about you. If you deem it necessary, leave your photo and resume here as well.
Showcasing Clients
Submit photos of the people and brands you’ve worked with on your site – with their permission, of course. A gallery-like is a great way to build credibility and encourage potential customers to collaborate.
Contacts
Make it possible to contact you as quickly and simply as possible – after all, the fate of future orders depends on this. Your email and phone number must be in the site’s footer; however, you can create a separate page with contacts so that visitors will not get lost for sure. For an even better user experience, add a contact form to your page so potential customers can communicate with you directly through the site.
Additional Pages
Depending on the purpose of the site, you may also find the following pages helpful:
- Blog. Share news, projects, opinions about the industry. This will help build your credibility in the photography community and build a loyal community around your site. In addition, it improves SEO, and the site will appear more often in search results.
- Reviews. Create a customer testimonial page to serve as additional advertising for your services.
6.Connect social networks
With 500 million daily users on Instagram alone, social media is the easiest and cheapest way to tell the world about yourself and reach potential customers:
- Include social media icons on your website that lead to profiles with your work.
- Enable the sharing function in Pro Gallery to share photos from the site on their pages and thereby increase your traffic.
- Put the site’s domain name on all social media accounts to redirect leads to your portfolio.
7. Optimize SEO
Search engines don’t recognize images – so you need to add text descriptions to get your site indexed adequately and generate traffic. Add a title and caption to each image in the Cloud retouch Pro Gallery. Don’t try to add unnecessary information or keywords – just briefly describe what exactly is shown in the photo. The photo descriptions will serve as alt-text and help the site appear in Google and Yandex in the “Pictures” section.
8. Configure the mobile version
In 2020, more than half of the traffic came from mobile devices. Therefore, in addition to making a photographer’s website, you need to make sure that it displays correctly on smartphones and tablets.
Some work is already done for you: Cloud retouch Pro Gallery automatically adjusts images to fit different screen sizes. You can customize the rest in Cloud retouch’s visual editor: enlarge some elements and delete others with a few mouse clicks.
9. Ask for feedback
Before publishing a photographer’s site, ask friends and family to check it out. An outsider’s perspective will help you optimize navigation, fix design flaws, and spot trivial typos in the text.
10.Update the photographer’s website in time
Nobody likes sites that haven’t been updated for a long time. Therefore, even when you are not looking for new clients, do not forget to add something new to the site. This could be information about an upcoming project, a blog article, new prints for sale, or even a built-in Instagram feed that will automatically pull your photos from social networks to the page.

How to Open an Online Store
According to statistics, online sales will reach $ 4.8 trillion by 2021—large numbers, great opportunities, especially now that the world is increasingly moving online. We have prepared a detailed guide to tell you how to open an online store and make it successful, even if you have no experience at all.
Action plan:
- Decide what you want to sell;
- Choose a platform for hosting your online store;
- Customize the product catalog, the form of payment, and delivery;
- Come up with a name and connect a domain;
- Get involved in branding and positioning;
A consistent plan is key to ensuring that you don’t go crazy choosing a niche, building a website, managing a warehouse, and running ads. Careful preparatory work will avoid mistakes, save time and save money.
1. Decide what to sell
Ask a question that interests you. Choose a couple of segments, conduct market analysis, and define your target audience. Who are these people? What gender, age, and where do they live? Find out their interests views and ask what worries them. How does the product solve their problem?
Take a look around and do better
Look at reviews of existing products in the selected segment and highlight the challenges shoppers face. This will help you learn what to avoid while producing your product and what to add. Take backpacks, for example. There are already a thousand brands on the market. The thousand and first should include all the wishes of customers to the maximum to become more successful than competitors.
Sell products that are easy to ship
Choose products that are easy to send. It is advisable that they are not fragile, too heavy, and could be folded during transportation. Otherwise, it would be best if you were prepared to pay extra for more accurate shipping and, accordingly, increase the product’s final price.
Determine liquidity
The business must be profitable. Estimate ROI (return on investment):
- Calculate your unit cost.
- Analyze competitors’ prices to set your own.
- Determine the time it takes you to break even.
Make sure your product meets the needs of your customers. Suggest something that is of particular benefit. For example, a coloring book for children will cover the child’s need for creative self-expression and the parent’s desire to keep his son or daughter busy with something useful.
Here are a couple of sources to help you find popular or niche products:
- Check out The Strategist’s Top Selling List by New York Magazine.
- Analyze the volume of demand through Google Trends and Yandex. Wordstat.
- Look for inspiration on this list of the most popular projects on Kickstarter.
02. Choosing a platform for an online store
The site will become the face of your brand. To make your first impression unforgettable, take your platform seriously. It should combine customization flexibility and have professional tools to support and grow your business. Different services offer different approaches – cloud retouch allows you to create an online store from a template or scratch.
- Prices and tariffs. Cloudretouch Builder offers several plans. The choice depends on your needs and volumes.
- Design. Cloud retouch has over 700 templates to suit any online store. You can customize them for yourself, edit the colors, font, and arrangement of elements.
- Functionality. The product gallery is designed so that it is convenient for the user to navigate through it and add products to the cart. After filling out the order form, he will receive a purchase notification by mail.
- View from mobile devices. There are 5.19 billion unique mobile users worldwide. The site must look equally good on desktop and mobile devices. All online stores created on cloud retouch are responsive by default – there is no need to create a separate mobile version of the site.
3. Customize product catalog, payment form, and delivery
The product catalog is the central part of the online store and the product control panel. Here you can add new positions, divide them into different sections, manage the quantity and characteristics. The changes will be immediately reflected on all pages of the site.
4. Come up with a name and connect a domain
The brand name is another crucial component of the success of an online store. Think about the character, pick up a few and check if such stores already exist. Alternatively, you can check out the title generator for inspiration.
Take advantage of SEO power to set direction when searching for a title. See what words users use when searching for similar products. You can find a detailed guide on how to use SEO here.
Please include the product category or the product’s name in the brand name. For example, if you sell hats, the title might consist of “accessories” or “hats.”
Make sure your brand name grabs attention and is easy to remember:
- Look at the competition – your name should be different and stand out.
- Check the name in the register of trademarks and names.
- Ask friends and family for opinions.
Once you decide on the brand name, connect the domain. It should be the same as the name so that customers can easily find your online store.
You can connect an existing domain or select a domain name and register it through the platform on cloud retouch.
05. Branding and positioning
A website will add much more value with an okay thought corporate identity. Choose colors and fonts to accompany your brand. For example, white and green are delicate colors if you sell organic dairy products.
Creating a memorable logo is equally important. This is a sign you will use on your website, packaging, business cards, and other corporate media. A beautiful logo grabs the customer’s attention and boosts sales. Think of the Chanel or Apple logo, for example. You don’t even need a name because the stamp allows you to identify the brand quickly.
Voila – your online store is ready!

How to Develop a Post Plan for Social Networks?
The organization is one of the most important factors when developing a social media strategy. An efficient community manager should consider and develop a detailed calendar to serve as a guide.
In many cases, companies do not manage to achieve the objectives set by the simple fact of not planning the campaign in detail, and therefore, in the medium term, they lose importance in the network. For that reason, every brand must have a plan so that these inconveniences do not occur.
Now, suppose a community manager wants to perform an effective job that meets the goals set by the company. In that case, he must follow the following steps and recommendations to develop a post plan for social networks.
Define the target.
First of all, before developing a planning calendar for social networks, you must know who is part of the target audience for the company. The reason is that knowing them, the content that is developed will be fully developed based on their interests.
In addition, it is not only important to know about their interests but also about their behavior on social networks. Knowing how many hours you connect to or the hours of greatest traffic are very important when preparing a calendar of publications.
Specifies the theme and content type.
Secondly, once you have the information you need about the users of the brand you manage, you will be able to be clearer about what kind of content to develop and what kind of words you should use, not only thanks to the knowledge about the user, but also thanks to the Google AdWords platform.
Read More: Graphics Design | How to Become a Pro on Graphics Design
Calendar of Publication or Post Planning
Now, when the community manager has all the above, it is time to develop the post planning, also known as the editorial calendar for publications on social networks. It would be advisable to use the Microsoft Office tool to develop it.
With this tool, the planning won’t be that complicated, as long as it includes the following:
- A detailed calendar that
- Highlight the content topic that will be developed on social networks (including a copy).
- Indicate what the purpose of that publication is.
- Mention the times at which such content will be published.
- Details of the days and weeks in which it will be published
- The name of the social networks on which the content will be developed.
- Report on a different specification.
On the other hand, it is important to summarize all the above information in graphs. In this way, the reading and understanding of the planning become easier for the brand representatives, and thus, there are possibilities to make faster and more efficient decisions.
Ideally, you should develop graphics that summarize what you’re looking for. That’s why the second template should include charts with the following information:
- Each social network has a different frequency of content.
- The most commonly used content format (including photos, videos, texts, and links)
- A graph displays which social networks the brand uses the most.
- A summary of all the publications that will be implemented each week
- The objectives that the brand seeks with each publication
Conclusion
Developing a calendar is very important to achieve the objectives proposed by a brand. It is important to develop in detail everything explained above because that way, you will have a clearer picture of what decisions to make to achieve the goals.

How Do I Find the Right Target for My Company?
Of all the variables that must be considered when making a marketing or advertising strategy, the most important one is that of the target. A company cannot start a business without first knowing the target market. It is of the utmost importance to investigate it because, otherwise, the path taken by the entrepreneur will lead him to failure.
Quantifying it, knowing how it acts, how it is, what it does, etc., is very important to achieve success for a social media campaign and any strategy inside or outside the network. Knowing the right target helps you figure out what kind of decisions to make.
But how to find it? Is it difficult? Is there a chance to have more than one? Finding it only depends on the research that is done. It is not difficult if a company looks at suitable and reliable sources. And yes, there is the possibility of having more than one. But to delve a little deeper into this topic, in the following article, we will explain in detail how it is possible to determine the best target for a brand:
Carry out a thorough study on the target target
First of all, and as we mentioned before, it is of the utmost importance to know the target of a brand. Knowing the common factors that your audience has will help determine what kind of actions to take to achieve the objectives set by a company.
For that reason, a brand must inquire about the likes or dislikes of its target. Where, how, and why do you perform certain actions? In this way, the implemented proposal will be as attractive and interesting as possible and will find and transmit what the consumer is looking for.
Determine the demographic and psychographic variables.
To offer a product or service, a brand must know the characteristics of the target market. Therefore, age, sex, socio-economic level, sentimental situation, income, and geographical location are important. By identifying these aspects, it will be possible to determine whether the public can acquire them or not.
As for the psychographic variable, knowing the target’s personality, their values, and their habits, among other aspects, would contribute even more to the competitive advantage of a company. The strategy would be more efficient with this data, and the objectives set would be met.
Identify the capabilities of the company.
Likewise, identifying the strengths, the most outstanding skills, or the differential advantage that a company has over its competition should also be part of implementing an appropriate marketing strategy. A brand must know if it has enough strengths and resources to please the consumer, and if it does not, think about reinventing itself.
Meet the competition
On the other hand, if a brand does not know the competition, it will not know how to differentiate itself from the other products. Knowing what you’re doing, how your target audience behaves, and what factors aren’t being satisfied by them is an advantage for any other brand. With this information, the brand will be able to take action on the matter and offer products that meet the potential market’s expectations.
Mode of specialization
Once the above variables have been determined, the company must choose which niche it can serve and therefore offer its product or service. It is not recommended that the brand’s target be very heterogeneous because, if so, personalization would be avoided, and it would be more difficult for the marketing strategy to work commonly.
One famous phrase summarizes this: “He who covers a lot, squeezes a little.” For that reason, the target market doesn’t have to be very large, but it doesn’t have to be small either. In addition, a company must evaluate how profitable its audience is since, if it were not so, it would have to redo its strategy and focus it on another target.
Brand perception
An important point to keep in mind is that if a brand is not known, it makes no sense to establish a strategy. Brands should investigate how users perceive them. From knowing the reputation of a brand and if its image is positive or not, it is very important to identify another type of strategy is proposed.
The brand must determine whether or not it can serve its intended audience. If you have the resources and time to reach it at the time the user wants it and if what the brand offers is to the taste of its target,
Conclusion
Knowing a brand’s target market is the most important variable within the digital marketing strategy. If one does not know him, it would be in vain to continue in business. The brand depends on the right target. Without it, he does not live. He does not persist. Every company should take into account all the above tips to succeed.

What Is the Difference Between a Community Manager and a Social Media Manager?
Many will think that a “community manager” and a “social media manager” are not different or that it is just another name for the person who sits in front of the computer and begins to manage social networks.
Furthermore, there are now more derivations and intersections between the two positions, causing more confusion than ever before. It even seems that these specialists have simpler tasks than they are. However, the reality is very different, so that we will see the specificity of each position, their differences, and their points in common.
What is the distinction between a social media manager and a community manager?
A community manager is the professional in charge of having constant contact with the users of a given social network. It represents the brand within a platform in which it interacts directly with customers.
As a social media manager, you can also do the same. But its main role is to elaborate on the marketing strategy that will be implemented on social networks, manage the publication of content, and perform the analysis of results.
What is a Community Manager (CM)?
He is the executor of the strategy for social networks. He is the one who represents the brand and watches over its image. A community manager is responsible for communicating and understanding the brand’s followers to know their positive and negative opinions. In addition, he is the person who constantly seeks the active participation of users to create engagement with the brand.
A community manager should keep up to date on the new tools available on online social media. You should also be aware of best practices, and other organizations and companies are active on social media. In this way, the company it represents can continue to be a pioneer in adopting emerging technologies.
In addition, the community manager must know public relations. You should participate in professional networks by interacting with your peers to liaison between the development and sales departments. Similarly, it would help contact thought leaders and communication professionals through online forums or attend events to boost brand awareness.
The Functions of a Community Manager
A Community Manager must be responsible for analyzing the context in which the market is and the results that the strategy is obtaining so that in this way, he can communicate it to the Social Media Manager.
In situations of negative interaction, the community manager must identify, correct errors, and contact users so that the situation does not become harmful to the brand’s image. Below, we give you a small list of their main responsibilities:
- Contribute to the development of the digital marketing strategy.
- Foster a sense of community around the brand and build relationships.
- Monitor online conversations and events to ensure that the company participates effectively and is being represented.
- Measure the impact of the actions you have been developing.
- Manage, maintain, and ensure the success of the company’s blog.
- Participate in the creation of the online community plan.
- Create engaging and quality content.
What reports does the community manager deliver?
The reports or reports that the community manager delivers are addressed to the Social Media Manager. With these reports, you can measure and analyze communication effectiveness between the brand and its audience. Among the most requested reports are the following:
- Report on social media results
- Create quantitative measures according to business objectives.
- Qualitative report of consumer responses and how they behave and what users think.
- See what the competition is doing.
- The number of interactions that have occurred on each social channel is the cost of advertising.
- Make suggestions and comments on the brand’s communication on social networks and during meetings with the managers and executives of the company.
The objectives of a community manager
The objectives will vary according to the requirements of each company, but some are practically indispensable:
- Improve the “engagement” between the community and the brand.
- Create and maintain user relationships.
- Take care of the online reputation of the brand.
- Create relationships with influencers or celebrities.
- Increase the number of followers.
- Increase conversions.
The skills and qualities of a community manager
Among the main qualities that every successful community manager must have are the following:
- Organize everything you do on social media.
- To make a good impression, you need to be empathetic and quick with responses to followers.
- Have patience and know-how to communicate properly.
- Be extremely strategic in your actions.
- I have a lot of creativity and know-how to improvise when necessary.
How to Become a Community Manager
Once you are clear about everything that goes into being a community manager, you can start looking for ways to become one. Although it is a relatively new profession, there are plenty of options to learn how to develop in this job. Many of the professionals dedicated to this work come from careers in marketing and social communication, such as advertising, journalism, audiovisual communication, or graphic design.
In any case, you must bear in mind that, like any career, it requires dedication and an interest in continuing to learn. For this, you can resort to community manager courses, books, websites, and events that help you become the best. You will notice that there is a lot of content and options to learn how to develop in this work. However, what is important is that you get the most out of all the information you acquire. Everything you learn can be complemented to help you forge a great professional profile.
Workspaces of a Community Manager
An expert community manager must be highly trained and prepared to face the various challenges that arise when building and safeguarding the brand’s identity on social networks. With this in mind, you may be able to carry out your work in various areas, such as the following:
- Design of strategies for communication in the various digital environments.
- Management of the brand’s virtual communities
- Evaluation and management of processes and projects of the brand.
- Crisis management, in the face of possible expressions of public dissatisfaction with the brand. There is also a notable difference between results and objectives.
- Communication management on social networks and brand websites. Get to know the Facebook and Instagram advertising platforms in depth.
- Copywriting is the strategic production of text for brand content.
- Web analytics: data analysis to evaluate traffic to the brand’s websites and fan pages.
Social Media Marketing (SMM) is
On the other hand, the Social Media Manager is responsible for elaborating the strategic part of the content plan on social networks. This specialist seeks to ensure that what will be communicated on the networks is given according to what the brand offers. It demonstrates a brand’s values and how committed it is to its target. We can say that the Social Media Manager mainly fulfills being involved in the “macro” decisions of social media, designing, implementing, and supervising the marketing strategy on social networks.
In addition, the Social Media Manager sets the tone with which the content will be transmitted on the platform and develops a specific plan for situations that threaten the brand’s integrity. In this sense, the Social Media Manager receives reports of the crises that the Community Manager has identified. So, based on this, it decides how to respond to the crisis and implement contingency plans.
The Functions of a Social Media Manager
Additionally, the SMM is responsible for managing, distributing, and controlling the budget as it deems best to achieve the marketing objectives proposed by the company. For the latter, he is in constant contact with the marketing area. Their job is to check if the social media strategy they are implementing is the right one, and if not, change it immediately so as not to lose visibility or participation in the advertising part. Here are its main functions:
- Conduct market research to identify people from different social networks, depending on what suits the company.
- Develop a social media marketing plan.
- Carry out a segmentation of the target audience and the social networks where you will work.
- Design the strategic plan, taking into account the most appropriate Social Media Mix, the company’s objectives, and its budget.
- Identify and establish the actions that the Community Manager will perform.
- Analyze the results obtained and the reports prepared by the community manager.
- Carry out advertising campaigns and tactics on social networks.
What are the reports the Social Media Manager delivers?
The reports that a social media manager produces are related to other company areas, such as marketing and sales. With these reports, you can control, analyze, and measure the effectiveness of the strategic actions of the brand. Among the most requested reports are the following:
- Develop a social media marketing plan.
- Control the execution of the content calendar.
- List of social channels on which the strategy will focus.
- Reports of the definition and segmentation of users to whom the communication and brand actions will be directed.
- You must define and control KPIs, conversion goals, and ROI. In coordination with the sales and marketing area of the company,
- Develop contingency plans to manage crises.
The objectives of a social media manager
A social media manager performs a strategic task that requires certain indispensable objectives:
- Design a social media strategy that is consistent with the brand’s identity, its audience, and its objectives.
- Design a plan to deal with reputation crises in social media.
- Define the SEO strategy.
- Guide research to determine market and sector insights, then apply them to the different strategies.
- Study and analyze the results of reports generated by the Community Manager. With them, you can detect threats opportunities and measure the effectiveness of different actions. Based on this, you can make decisions on each of these aspects: implement improvements, modifications, change of strategy, among others.
- Work intensively with the client and with the company’s different departments to analyze results and propose strategic improvements.
- Develop strategic alliances within the social media sector for future actions that help reinforce the brand’s growth and virtual communities.
The skills and qualities of a social media manager
Among the main qualities that every successful social media manager must have are the following:
- You should know the sector in which the company or business it manages is located.
- Be effective and efficient in managing and controlling the budgets allocated to the different actions of each strategy.
- Be strategic to build and increase your followers. It is also necessary to create channels that reinforce engagement.
- Have the vision to define contests, promotions, product launches, paid to advertise, and events disseminated on different platforms. Always in coordination with the marketing area.
- Be consistent in defining the content strategy and communication style.
- Select which tools and apps will be used to carry out the tasks.
- Ability to write content on social networks.
- Knowledge of SEO to increase web traffic to the company’s site.
- Skills to choose, create, and edit images.
How to Become a Social Media Manager
Since you have a better idea of everything that can involve becoming a social media manager, you can start looking to expand your knowledge in this area. Although it is a relatively new profession, typical of the environment and the digital age, there are also many options to learn the skills necessary for this job.
As we highlighted when talking about the Community Manager, many of the professionals dedicated to this work come from careers in marketing and social communication, such as advertising, journalism, audiovisual communication, or graphic design. And in the same way, to be a good social media manager, you need to be involved in your development and expand your knowledge through courses, websites, and events, mainly through self-learning.
Workspaces of a Social Media Manager
An expert in social media management must be highly trained, be a great strategist, and be prepared to face the various crises when establishing social media strategies for the brands or companies he manages. With this in mind, you may be able to carry out your work in various areas, such as the following:
- Design of digital marketing strategies.
- Evaluation and management of processes and strategic branding projects.
- Crisis management in the face of a notable gap between results and strategies
- To take advantage of your social media tools and measure results.
- Copywriting is the strategic production of text for brand content.
- Web analytics: data analysis to evaluate traffic to the brand’s websites and fan pages.
- I work directly and in conjunction with the following areas of the company: Board, Public Relations, Marketing, Production, and Sales.
Community Manager or Social Media Marketing?
To be a community manager within a company, it should be large. A small one would need more than one social media manager because they seek to have an effective presence in the digital medium quickly, and for this, they need to develop a good social media strategy and thus find the target most related to the brand and have a better return on investment.
Job Board: Social media manager wanted
Currently, the labor market for both community managers and social media managers is very competitive. But fortunately, these areas of work are in high demand due to the high potential that social networks have for brand communication with their customers. Therefore, we list some websites where you can find your ideal job and exploit your full professional potential.
Job Board
On this website, you can find the community manager or social media manager you are looking for. Whether in the main cities of Peru or abroad, You have to put into the search engine the position you are looking for, the position, and the area of specialization and click to search. In addition, you can find tips to improve your CV and links to specialization courses.
It is one of the most developed websites when looking for a new job or improving your professional profile. Linkedin acts as a contact network between professionals from all areas worldwide. Therefore, you can find a wide range of jobs that interest you. In addition, you can contact the profiles of the companies and learn a little more about them.
Currently, this well-known social network has been very useful when looking for and finding a job. It is as simple as putting the words in the search engine, and immediately you will see pages and publications related to the position you are looking for. In addition, large groups operate, especially as job boards for community managers, social media managers, and other professionals in the digital environment. In them, you will find constant publications about new jobs available.
Job portals
In this aspect, job search sites such as Bumeran, Computrabajo, Laborum, and Indeed, among others, are well known. On these websites specializing in job search, you can find a position in any city in different countries, depending on your skills and availability. You have to enter the websites, create your virtual CV, put the words into the search engine, and start looking for the job you want.
Remember that you can dedicate yourself to working in companies, agencies, or being a freelancer depending on your skills, dedication, and objectives. In each case, you will need to develop experience in the field and keep abreast of all the updates in your career.
Conclusion
In conclusion, the community manager is responsible for constant contact with the followers of a certain brand, and it is he who represents it in the eyes of others. If there is a problem or situation with the product or service, he responds to it.
In the case of Social Media, it is responsible for developing the marketing and content plan in conjunction with other company areas to implement it and achieve the proposed objectives. In simpler words, the SMM performs the strategy, and the CM executes it.


