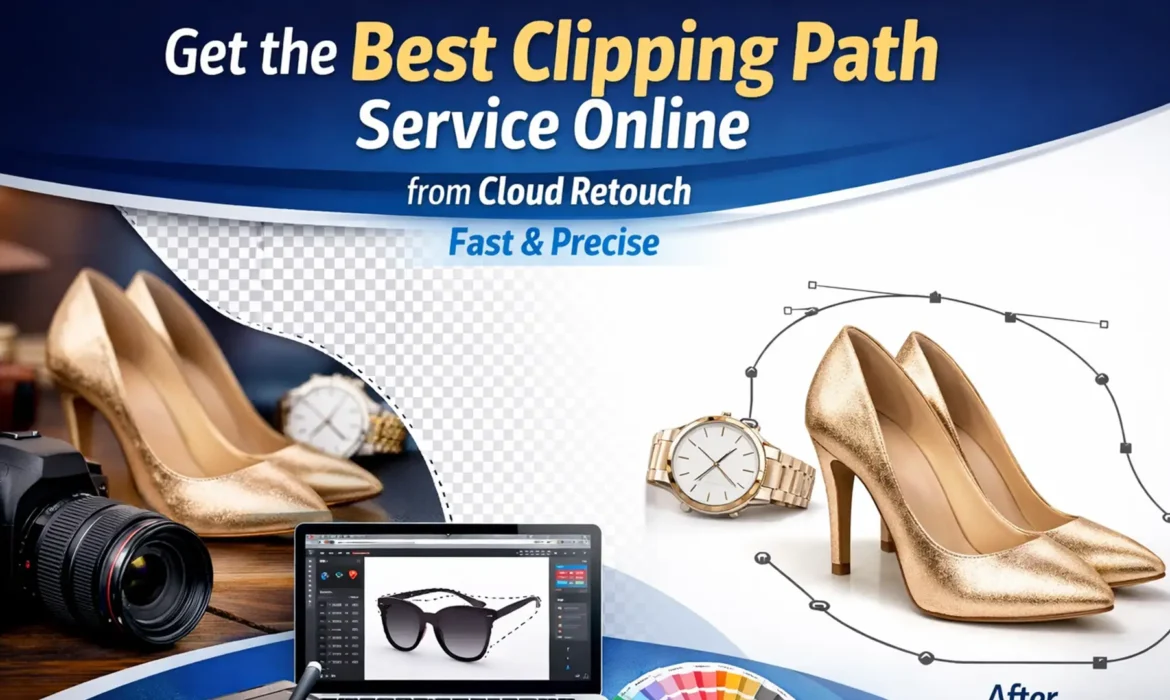
Get the Best Clipping Path Service Online from Cloud Retouch – Fast & Precise
If you sell products online, manage a brand, or work with images every day, you already know how important clean, professional visuals are. A single poorly cut image can reduce trust, hurt conversions, and make even the best product look average. At Cloud Retouch, we understand this better than anyone, because image quality is not just part of our service -it is our service. Finding the...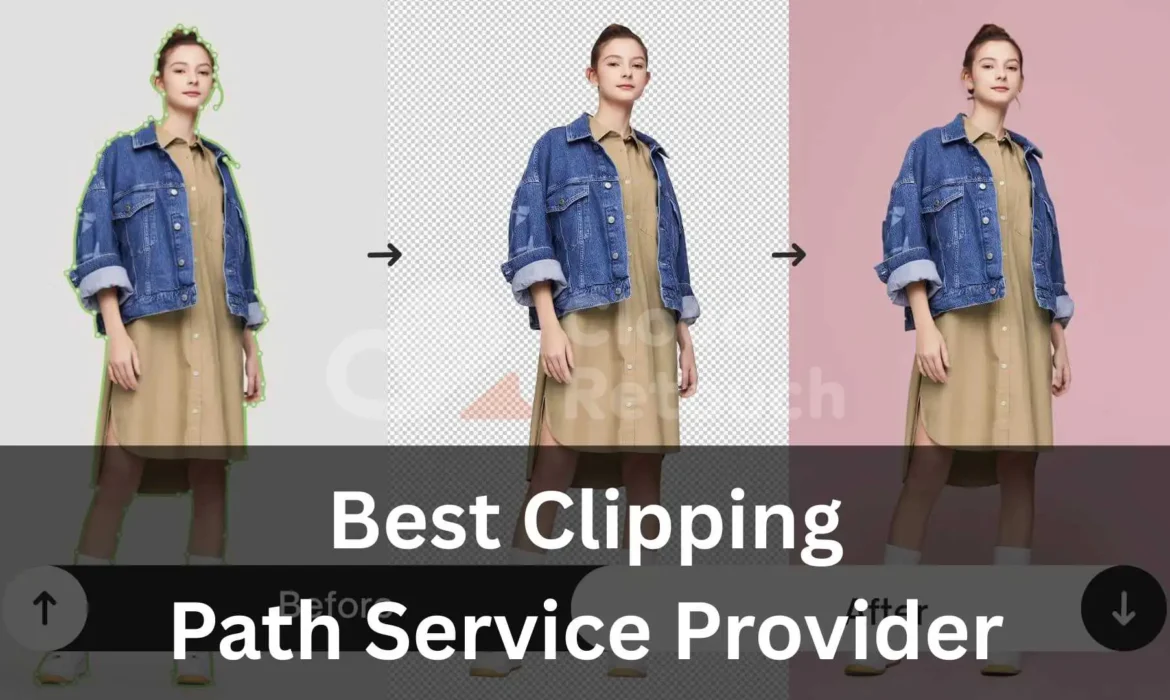
Affordable Clipping Path Service Provider – Best Quality Under Budget
Finding an Affordable Clipping Path Service Provider that still delivers high-quality results can feel challenging, especially when you are working with tight deadlines, multiple product images, or large-volume editing needs. Many businesses worry that choosing an affordable option means sacrificing precision, consistency, or professional retouching standards. The truth is, you do not have to...
Cloud Retouch: The Best Clipping Path Service Provider for Precision Edits
When you’re searching for the Best Clipping Path Service Provider, the options can feel overwhelming. So many companies claim to offer accuracy, speed, and impeccable quality, yet only a few truly deliver consistent, high-end results. That’s why Cloud Retouch has become a trusted name for businesses, eCommerce brands, professional photographers, and creative studios. Our reputation is built on...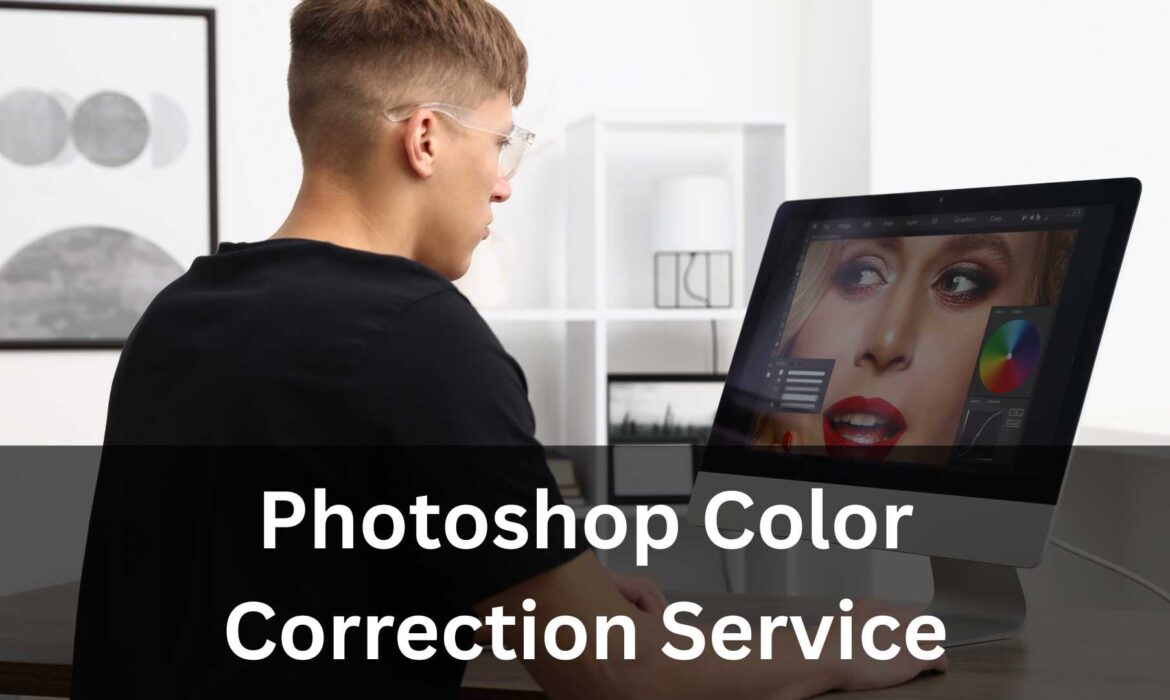
Professional Photoshop Color Correction Service from Cloud Retouch
If you work with product photos, portraits, fashion images, or any kind of visual content, you already know one thing: color can make or break a photo. Maybe your images look too dull, your whites are slightly yellow, or your skin tones never look quite right. Or maybe each batch of photos looks a little different, and it’s driving you crazy when you try to keep your brand consistent. That’s...
Professional Photo Color Correction Service Provider | Cloud Retouch
As Cloud Retouch, we know that color defines the first impression of every photograph. When tones look dull, inconsistent, or mismatched, even the best images lose their impact. That is exactly why choosing the right Photo Color Correction Service Provider matters more than ever. In a world where brands compete visually, photographers need reliable partners who can elevate every image with...
Why Cloud Retouch Is the Best Color Correction Service Provider
At Cloud Retouch, we understand exactly why brands, photographers, and eCommerce sellers search for the most reliable Color Correction Service Provider. In a market filled with promises, what clients truly need is consistency, speed, transparency, and the kind of editing quality that elevates a product image rather than simply adjusting it. That is the standard we operate with every single...
Outsource Photo Color Correction Service by Cloud Retouch
At Cloud Retouch, we understand how crucial high-quality, visually compelling images are for brands, photographers, and online businesses. In today’s highly competitive digital market, the way an image looks can directly influence buying decisions. This is one of the core reasons many professionals choose to Outsource Photo Color Correction Service to a trusted partner rather than spending...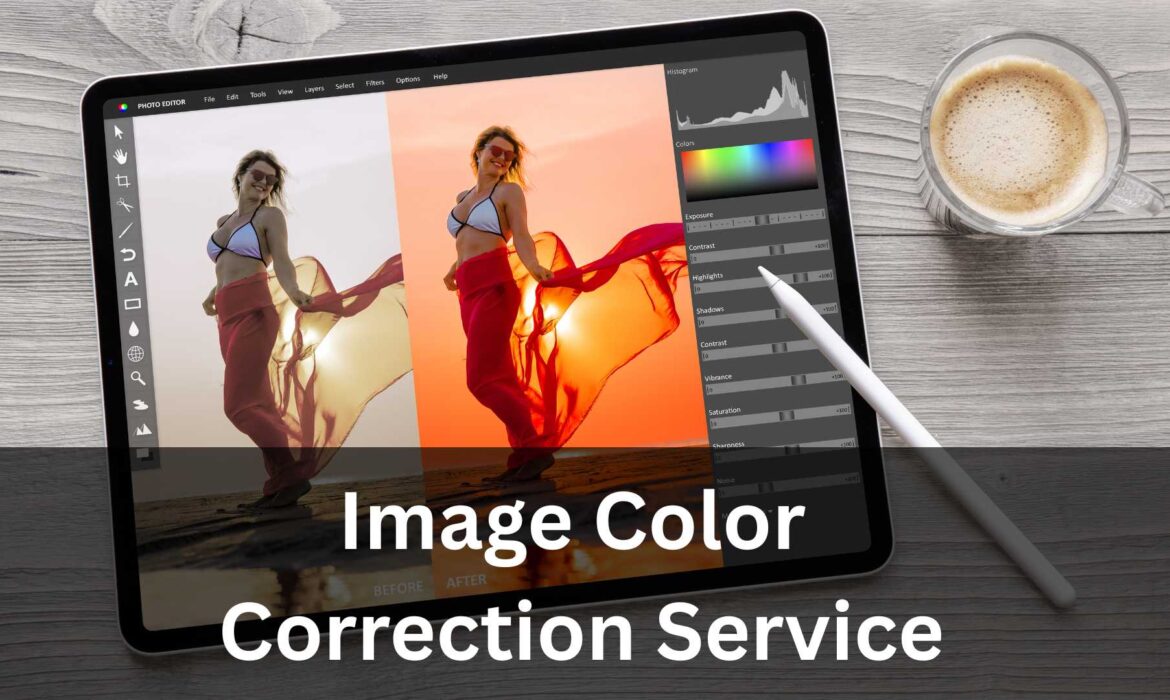
Affordable Image Color Correction Service from Cloud Retouch
When you are running an online store, managing a photography studio, or working with product catalogs daily, the quality of your images plays a huge role in how people perceive your brand. Even the smallest color mismatch can make a product look unreliable, dull, or inconsistent. That is why choosing the right Image Color Correction Service becomes a direct part of your sales strategy. At...
Premium Ghost Mannequin Photo Editing Services at Cloud Retouch
When apparel brands look for fast, clean, and professional visuals, one of the most trusted solutions is Ghost Mannequin Photo Editing Services. If you run an online clothing store or manage a product catalog, you already know how important it is to present your garments in the most polished, realistic way. At Cloud Retouch, we understand these needs deeply because we work with fashion labels,...
Professional Ghost Mannequin Photo Editing Company – Cloud Retouch
When you are running an online clothing store, presenting your products in the cleanest and most professional way is essential. At Cloud Retouch, we understand that shoppers want to see clothing in its purest form-without distractions, without mannequins, and without sloppy edges that reduce the perceived value of a product. This is exactly why choosing the right Ghost Mannequin Photo Editing...
Top 10 Best Ghost Mannequin Service Providers in UK | Cloud Retouch
Choosing the right Ghost Mannequin Service UK provider is one of the most important steps for any clothing brand or ecommerce store. Today’s online shoppers rely heavily on clean, professional, and realistic product images before making a purchase. That’s why ghost mannequin editing has become a standard need for both new and established fashion businesses across the UK. At Cloud Retouch,...
Top 10 Best Ghost Mannequin Service Providers | Cloud Retouch
When you’re running an online fashion, apparel, or product-based store, finding the right Ghost Mannequin Service Providers can make a massive difference in how your brand appears to your customers. Clean, consistent, and professionally edited ghost mannequin images help buyers trust your product quality and encourage them to take the next step-purchasing. As Cloud Retouch, we know exactly how...
Best Online Ghost Mannequin Service | Cloud Retouch
As Cloud Retouch, we take pride in offering the Best Online Ghost Mannequin Service for fashion brands, eCommerce stores, and professional photographers who want polished, studio-quality product images. In today’s competitive online market, customers rely heavily on product photos to make a buying decision, and the Best Online Ghost Mannequin Service plays a crucial role in helping your...
3D Ghost Mannequin Service for Fashion Brands | Cloud Retouch
Welcome to Cloud Retouch, and thank you for taking a moment to learn more about how our 3D ghost mannequin service can elevate your fashion brand. We’re truly excited to have you here. At Cloud Retouch, we understand how challenging it can be to stand out in the highly competitive world of fashion e-commerce. Every brand wants images that look clean, professional, consistent, and visually...
Professional Ghost Mannequin Service Provider | Cloud Retouch
Welcome to Cloud Retouch, your trusted Ghost Mannequin Service Provider for high-quality, professional, and brand-ready product images. In today’s competitive eCommerce industry, businesses are constantly searching for ways to stand out, attract more customers, and increase conversions. One of the most effective ways to achieve this is through clean, realistic, and visually appealing product...
10 Best Ghost Mannequin Services for Apparel Retailers | Cloud Retouch
When apparel brands search for the Best Ghost Mannequin Service, they want reliability, accurate garment shaping, professional-level composite work, and a service provider that understands the fast-moving demands of online retail. At Cloud Retouch, we work directly with fashion brands, studios, and e-commerce sellers every day, so we understand how important professional-quality ghost...
Product Shadow Creation Service for Premium Product Photos – Cloud Retouch
When you sell products online, your images are your first salesperson. Before a visitor reads your description or checks your price, they judge your product by how it looks. And a huge part of that “look” comes from one simple thing many brands overlook: the shadow. At Cloud Retouch, we’ve seen over and over how a well-created shadow can transform a flat, lifeless product shot into a...
Natural Shadow Creation Service for Premium Product Images – Cloud Retouch
When a customer shops online, the first thing they notice is the product image. Before reading the title, before checking the price, before deciding what to buy -their eyes land on the photo. That’s why brands invest so much time and effort into creating visuals that look real, polished, and professionally edited. One of the most powerful ways to make a product image stand out is by using a...
Clipping Path Services Shadow Creation from Cloud Retouch – Perfect Shadows, Perfect Sales
When you look at a product image online, what’s the first thing that catches your eye? It’s not just the product itself-it’s the presentation. A clean background, natural lighting, and most importantly, a realistic shadow make all the difference between an image that converts and one that doesn’t. That’s where Clipping Path Services Shadow Creation from Cloud Retouch comes in. In the...
Top-Rated Drop Shadow Creation Service Provider | Cloud Retouch
When it comes to showcasing your product images in the most professional way, one element often overlooked is the drop shadow. A well-crafted drop shadow gives your image a realistic and grounded appearance-it makes the product look as if it’s truly resting on a surface instead of floating unnaturally in space. That’s where a Drop Shadow Creation Service becomes essential. At Cloud Retouch,...
Cloud Retouch Offers the Most Reliable Cheap Shadow Creation Service for E-commerce
When it comes to running a successful e-commerce business, presentation is everything. A crisp, professional image can make the difference between a potential customer clicking “buy now” or scrolling past your product. One often-overlooked detail that can transform ordinary product photos into truly captivating images is the shadow. Shadows add depth, realism, and dimension, making products...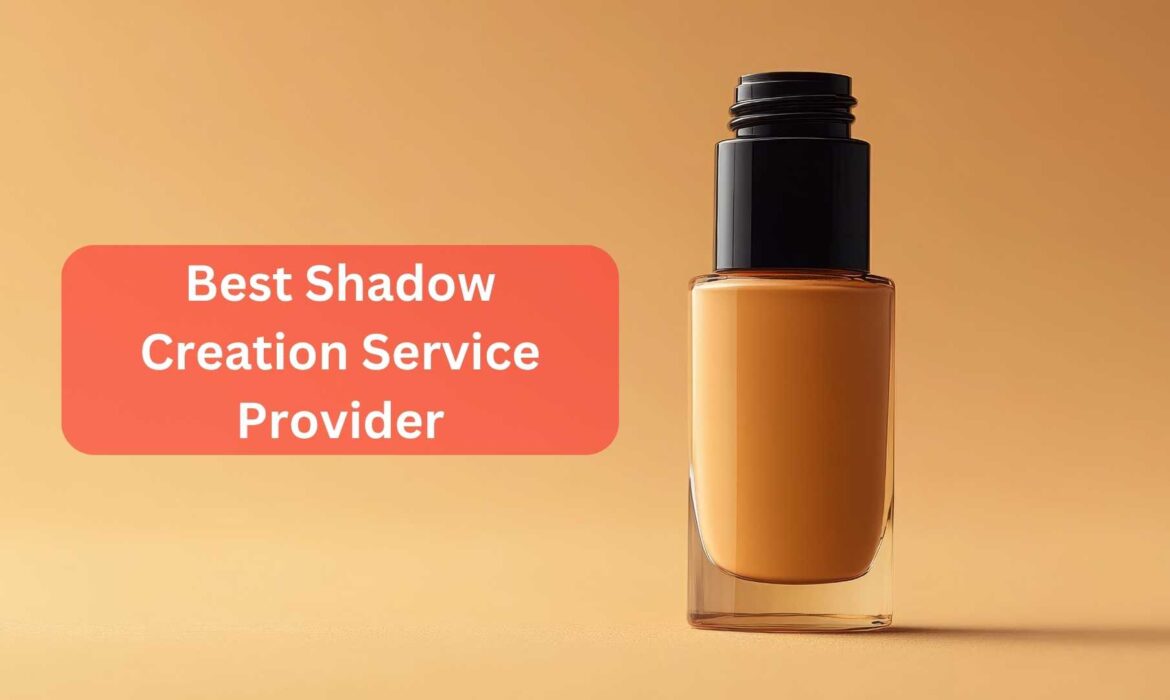
Top 10 Best Shadow Creation Service Providers in 2025: A Comprehensive Comparison
If you’ve ever looked at a product photo and thought, “Something’s off, but I can’t tell what,” chances are it was missing a shadow. A subtle, natural shadow makes an image feel grounded and real – like it belongs in the world instead of floating in space. That’s where a shadow creation service comes in. And trust me, not all services are created equal. Whether you’re an e-commerce...
Get the Best Reflection Shadow Creation Service at Cloud Retouch
When it comes to presenting your products online, every pixel counts. The right image can make a viewer stop scrolling, look closer, and eventually make a purchase. But sometimes, even high-quality product photos can look flat or lifeless. That’s where professional reflection shadow work comes in. It adds depth, realism, and polish to your visuals-making your products appear tangible and...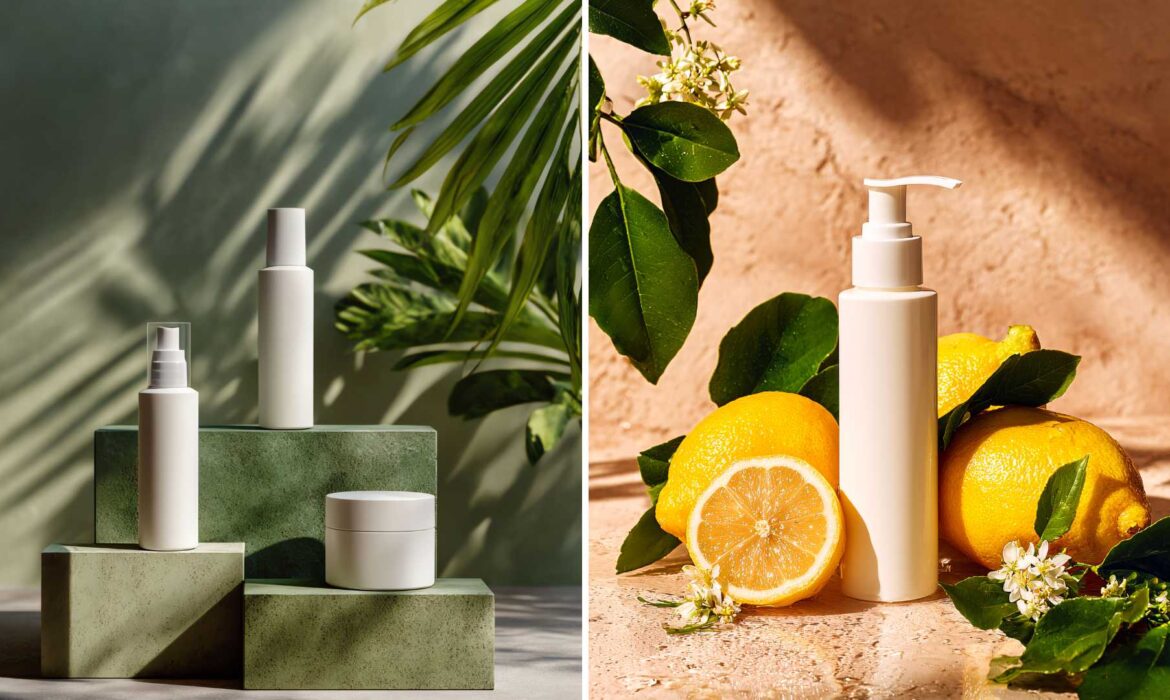
Get Expert Photo Shadow Creation Services with Cloud Retouch Today
In the world of professional photography and e-commerce, the smallest details can make the biggest difference. One element that can truly elevate your images is shadows. Shadows provide depth, realism, and a sense of authenticity to your visuals. But creating perfect shadows in photos isn’t always easy. Many photographers and online businesses struggle with uneven, unnatural, or distracting...
Boost Sales Instantly with Cloud Retouch Shadow Creation Service
In today’s competitive e-commerce and photography-driven world, every visual detail counts. When customers browse online, they are often influenced by the way products appear in images. A slight flaw or inconsistency in presentation can turn potential buyers away. That’s where professional editing services like Cloud Retouch’s Shadow Creation Service come into play. By adding realistic,...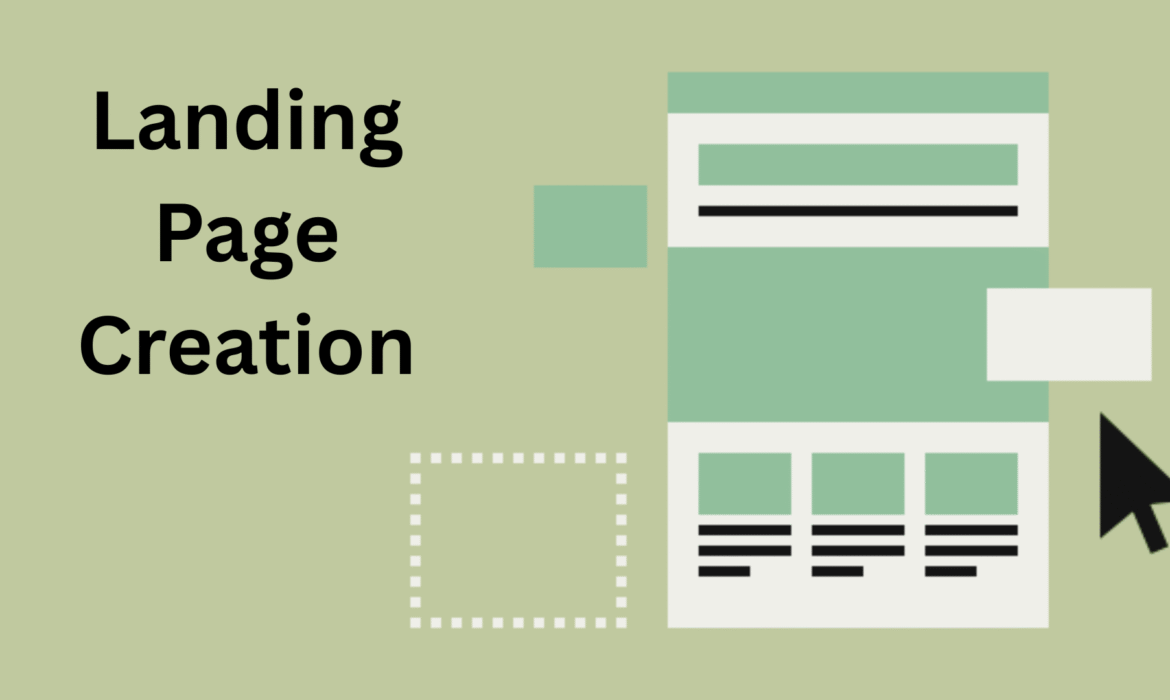
Landing Page Creation: Detailed Instructions Guide
In the digital era, a landing page is more than just a webpage—it’s a critical tool for driving conversions, capturing leads, and achieving business goals. A well-crafted landing page can mean the difference between a visitor leaving your site and turning into a loyal customer. In this detailed instructions guide for landing page creation, we’ll break down the essential steps to create...
Twitter Marketing Strategies and the Most Common Mistakes
Twitter is one of the social networks that you can use in your digital marketing strategies. While it does not have as much sales force, it can be considered that having a Twitter account brings a certain reputation to the brand. Besides that, it’s important that any digital marketing strategy, if at all possible, be used on a lot of different platforms. However, many companies that...
8 Secret Tips to Improve Your Facebook Campaign
Facebook is probably the most important tool for any Digital Marketing plan. It has all kinds of audiences and, no matter what your product is, your ideal customer is probably on this social network. Due to the number of companies running campaigns on this social network, it isn’t easy to stand out from the others. For these reasons, here are 8 tips that will help you with your advertising...
Get The Best Resume Templates Ideas – Cloud Retouch
The road to your dream job starts with a beautiful and impactful resume. It should showcase your skills and summarize your professional experience – all in the most concise format possible. While many still design their resume in word and pdf formats, more and more professionals are choosing to create a website with their resumes. Such a personal page has many advantages: The online resume...
A Step by Step Guide to Make a Good Digital Audit
More and more companies are using social media as part of their global strategy. However, most companies only focus on having more followers, content, and shares. But have you ever wondered if what you are investing in is producing some profit? The answer to this question can be found by doing a Digital Audit. If your company has a social media strategy, it’s important to do a digital...
The 9 Most Common Mistakes in Digital Marketing
Everything indicates that digital marketing is here to stay as more and more companies venture into this new way of promoting their products and services. However, due to its complexity, many marketers go so far as to make several mistakes. For this reason, we have created a list of the 9 most common mistakes you should avoid in digital marketing. 1. Write for search engines and forget...
How to Make Attractive Posts on Facebook
We will create a list of publications with which you will solve the doubt about how to make attractive publications on Facebook. Social networks should be part of your digital marketing strategies because they are considered important to publicize your brand’s existence on the Internet. Therefore, if you manage a business or company, one of the first steps you should take is to create your fan...
A Guide on Content-Type and Audience on Instagram
Several points must be raised beforehand for the publications made on Instagram to work and meet the objectives. Therefore, we will define the type of content and audience on Instagram. In addition, we tell them about the most popular categories within the platform. We also consider it important to define what publications are and how they can be effective. Instagram is a social network...
Facebook Ad Placements: What Are They and What They Do?
Facebook is the social network with the largest number of users. It is also the favorite platform for companies to publicize their products or services. Therefore, the following information will help you know what ad placements are on Facebook. This is an important concept for every digital marketing expert and community manager, as this way, you can determine strategic places to place your...
How to Organize Work from Home: 7 Helpful Tips
Most of us work remotely in pajamas, with the opportunity to sleep, a fee schedule, and no need to push twice a day in crowded transport. Sounds great in theory, but what about in practice? We will tell you how to adapt to this type of work, not lose motivation to go to the kitchen, and stay productive. Set a clear schedule And stick with it. List tasks for the week, prioritize them,...
11 Hidden Facebook Features That You Might Not Know
Facebook, the most important social network globally, is also used by many digital marketing professionals. And it is not surprising, since it has a good variety of useful functions, some of which are hidden from the average user, despite the great utility. For this reason, we provide you with a list of the 11 functions that you didn’t know about Facebook. 1. Find your comments or...
What Is Facebook Ads Manager, and What Are Its Advantages?
Facebook Ads are one of the most useful tools for any expert in digital marketing and social media business. The central objective of this platform is to allow businesses on Facebook to reach more customers and, therefore, increase their sales. So, due to the importance of this tool, we will help you discover what the Facebook Ads Manager is and what its advantages are. We consider it...
Motivating Staff: 5 Effective Ways
A strong and close-knit team can do great things – even launching a rocket into space. For the company to work like clockwork, just monetary compensation is not enough; non-material methods of motivation are also needed. Read more about how to increase staff motivation and their desire to work for the good of a common cause – in this post. 1. Working atmosphere Even if you don’t...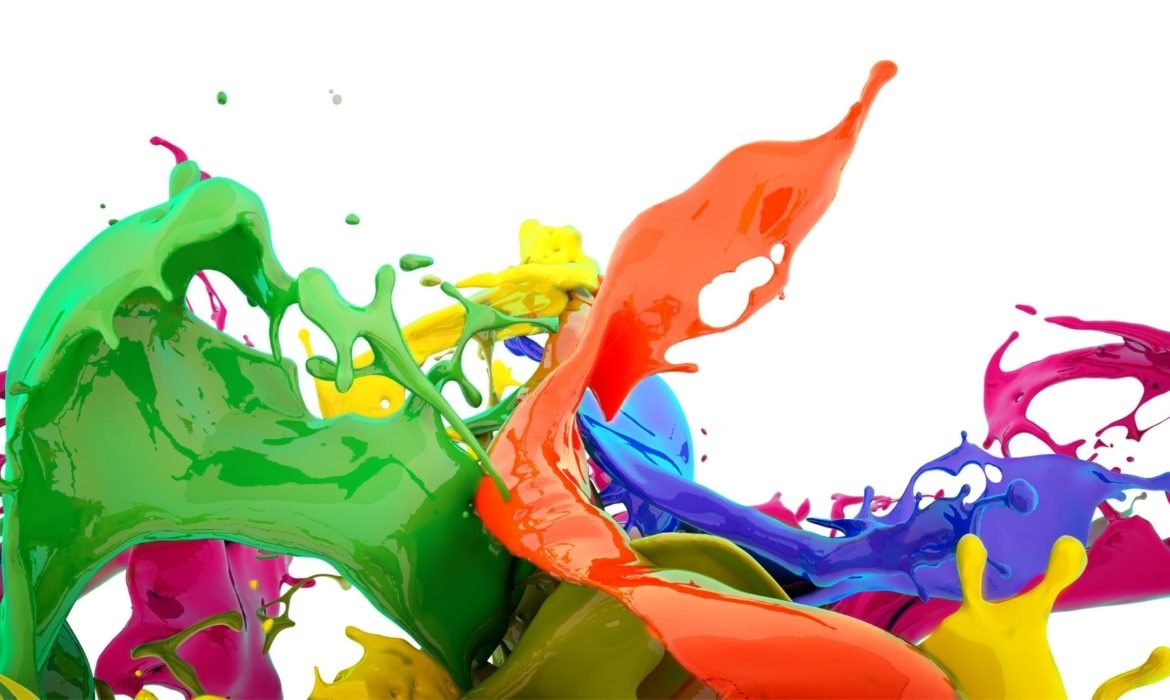
Color Psychology: Does It Affect How You Feel?
How colors affect the behavior and mood of people, what is the meaning of colors in psychology, and how to apply this knowledge to business development – read below. What Is the Psychology of Color? Color psychology examines our response to different colors. Its task is to understand how and why people change their moods and behavior depending on a particular shade. Designers and...
How to Create an Online Course
Online courses are rapidly gaining popularity, largely since people have spent much more time at home in the past year. Crossfit, yoga, cooking classes, vocal lessons, and even wine tasting – everything that was previously held in studios and classes is now available right on the laptop or smartphone screen. This interest in distance learning is an opportunity to make money on the Internet for...
How to Make Money from Your Blog
For many people, blogging is a hobby and a passion. An opportunity to share knowledge, experience, expertise, and just thoughts with people from all over the world. Companies and brands also run blogs to strengthen their market presence and build customer loyalty. Most often, the information in blogs is original, and then they rank well in search engines. Therefore, it is worth paying...
How to Create Wedding Invitations Online
Electronic wedding invitations are gaining more popularity and gradually replacing traditional cards. First, you can create a wedding invitation website for free and save on printing and shipping costs. Secondly, the wedding site can be used as a photo album, information resource for guests and a platform for managing the event as a whole. This article will show you how to create wedding...
How to Use Snapchat: a Complete Guide
Have you heard anything about Snapchat? It is one of the fastest-growing social networks. She has already bypassed Twitter in its daily audience and will soon begin to compete with Facebook for the first place in the hearts of the younger generation. Let’s be honest: for most adults, using Snapchat is like traveling abroad without knowing the language: disappearing photos and videos, and...
How to Cultivate a Digital Bond with Followers
Having a community on social networks is one of the most important factors for the success of all companies. For that reason, we have created a list of what a community manager must do to have a digital link with their followers. Remember that you can apply it on different platforms, such as Facebook, Google+, Twitter, and Instagram. If your brand is on social media, it’s a good idea to...
How to Use WhatsApp Business as a Marketing Tool
As we all know, WhatsApp is Facebook’s instant messaging app that has expanded worldwide. It has managed to position itself as the favorite messaging application for users. Therefore, companies have begun implementing it as a direct communication channel within their digital marketing strategy. As a result, WhatsApp Business was born for small and medium-sized companies. What is WhatsApp...
How to Optimize Your Personal Linkedin Account
LinkedIn is an excellent channel for developing your image and can provide you with the opportunity to establish a strong presence in the world’s largest professional social network. Also, LinkedIn has approximately 722 million professionals with whom you can promote yourself, especially if you know some tricks to find you easily and quickly. Here’s how to optimize your LinkedIn profile....
Secret Tips for Managing Your Brand or Company on Linkedin
We teach you how to manage your brand on LinkedIn for companies and thus obtain favorable marketing results. Many digital marketing professionals do the right thing and create an account on this social network. However, they don’t quite understand what they should be doing. Here are some handy tips for better managing a brand on LinkedIn. The importance of LinkedIn for companies LinkedIn...
10 Best Keyword Research Tools
Anyone with even a little knowledge of the basics of search engine optimization knows that the right keywords play a critical role in promoting a website. Adding keywords to its content is an important practice as it helps the site appear in search results via Google when someone searches there for information with your keyword phrase. Of course, choosing the right words is important here. Not...
10 Effective Ways to Promote Your Website for Free
You have just finished building your website, and it’s time to share it with the world. A logical question: how to make it so that it will be seen? The promotion of your site should not be an expensive operation. But there are many effective ways to promote your website for free. You’ve probably already seen articles with similar headings that promise to reveal the secret of free promotion....
Digital Marketing: Answers to Frequently Asked Questions
Digital marketing uses digital channels to promote a brand, company, product and attract customers. The goal is to communicate as much as possible with clients on the network, where they spend a considerable part of their time. Digital marketing is a multifaceted field that can be explored from different angles. This is due to the large number of online channels available for work. For...
SEO Promotion: The Complete Guide
According to the study, every Internet user searches for something on Google and other search engines at least 3-4 times a day. This means that for the success of any business, it is important to create a website and make sure that it shows up on the top lines of search engines for relevant queries. And for this, you need SEO promotion. SEO site optimization is a set of actions that helps to...
How to Create a Website with Services in 10 Steps
In the service industry, the Internet is the best place to attract new customers. This is a matter of efficiency and convenience: it is much easier for most clients to order a service on the website than to call the office, and even more so to come there in person. Successful businesses use online scheduling tools to meet customer expectations and increase sales. With their help, you can...
How to Build a Strong Brand
Successful branding is the key to the success of almost any business. Everyone needs a strong brand: companies large and small, independent professionals, creative people and even non-profit organizations. We have already written that working on a brand is an ongoing process and that it needs to be done every day. But this is understandable, and it is unclear another – where to start? As...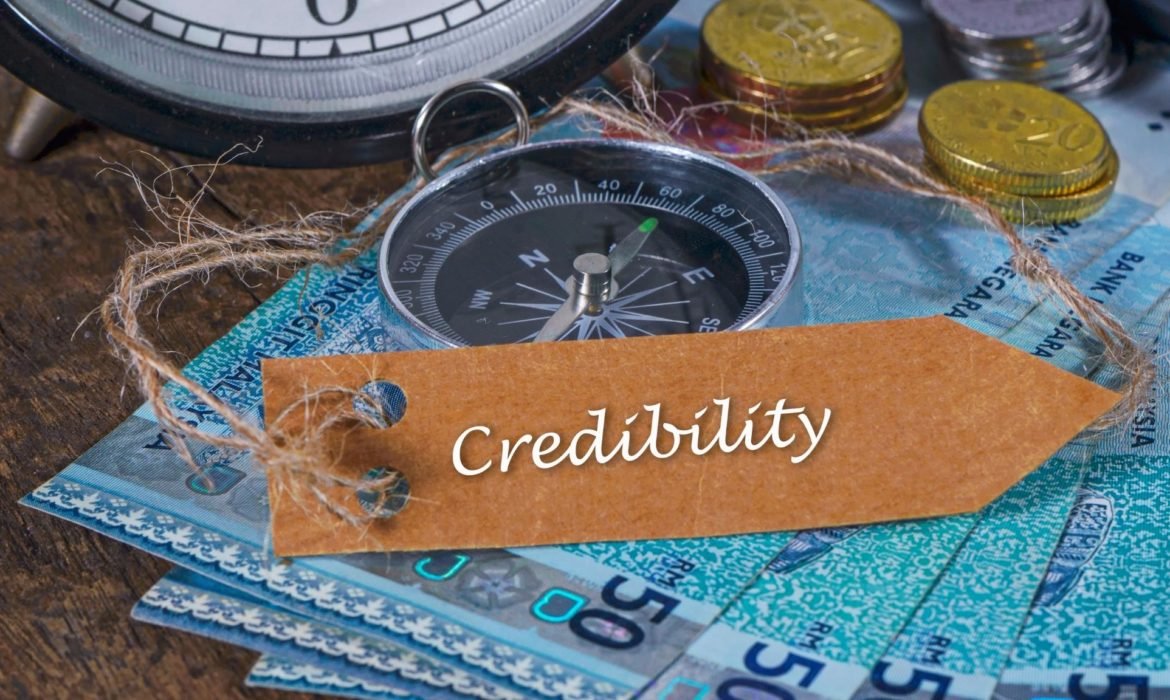
How to Increase Brand Credibility
According to the explanatory dictionary of Ozhegov, trust is confidence in someone’s honesty, sincerity and correctness. Consumer confidence in a brand is based on several key factors: quality products ethical production honest communication good reputation Building a website for your project is a great start to building long-term relationships with your customers. Here you...
What Is a Favicon and Why Are They Useful
Take a look at the tab menu right now – see those little logo icons on each of the tabs on the left? They help us understand which site is on each of the tabs, especially when there are a lot of them and the text no longer fits. A favicon, icon, or even a favicon is one name for such a small but important site element that plays a big role in the site’s usability, identity and...
What Is Bounce Rate and How to Reduce It
Every business owner wants to create a website that will attract leads and generate sales. It is important to measure your site’s performance using various metrics. One of the most important metrics is bounce rate. This article will tell you what it is and how to reduce this indicator to increase traffic. What is the bounce rate? Google defines bounce rate as “a session with a...
How to Use the Persona Method in Product Analysis
Determining the target audience and their behavior is one of the most important stages in creating a product, developing an application or website. The thorough analysis allows you to make smarter decisions and create a product that truly meets users’ needs and covers their pain. Product designers have developed several techniques for audience assessment and user portrait definition. One of...
Hashtags: Why Are They Needed and How to Benefit from Them
On the one hand, a hashtag is just a hash mark on the keyboard. On the other hand, it is a symbol of the digital age. Thanks to him, various social movements appeared, for example, #MeToo and #BlackLivesMatter, and people began to use this sign-in daily communication. In this article, how hashtags appeared, what value they have, and how to use them. How did hashtags come about? The...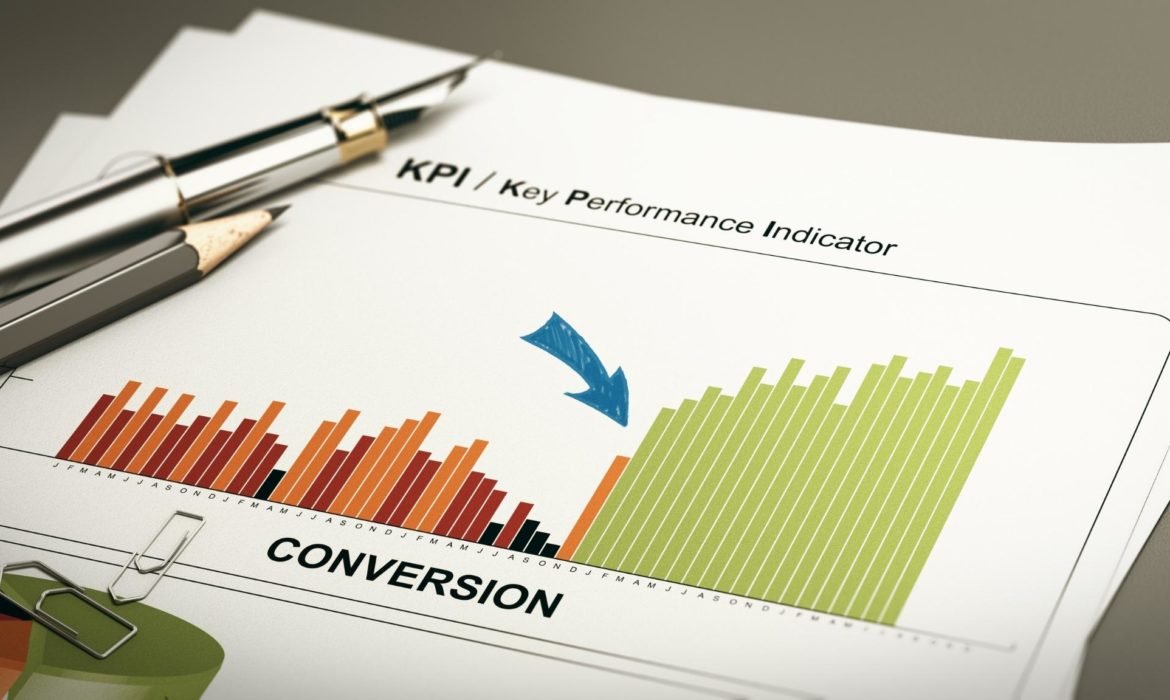
What Is Conversion, and How to Calculate It?
It’s not enough to create a website – you need to make sure that it fulfills the tasks you set. And one of the essential metrics that measure website performance is conversion. This article will tell you what a conversion is, how to calculate it, what conversion rates can be considered successful, and how to optimize your site so that more visitors make purchases and click on links. What is...
What Is CRM System
Website creation , a well-thought-out marketing strategy, competent promotion in social networks – all this helps a small business to attract more customers. However, the growing popularity of the brand creates new challenges. Large numbers of clients are difficult to manage – especially if you keep records in a notebook or Excel spreadsheet. This is where a CRM system will help you – a...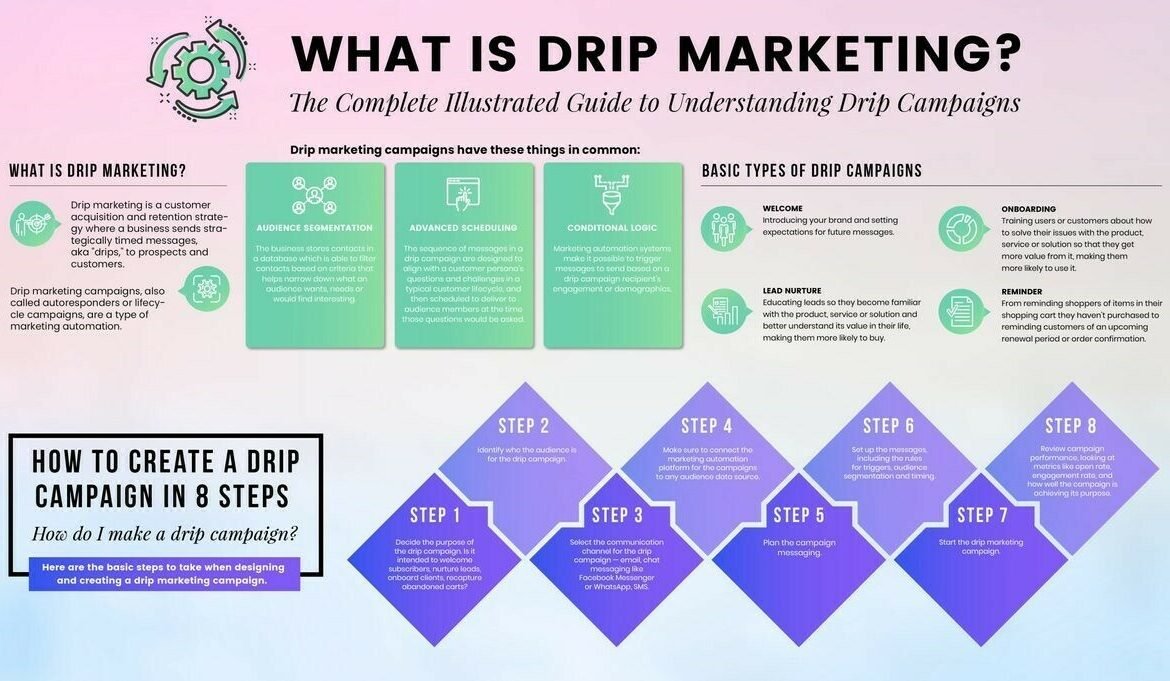
What Is Drip Marketing and How to Apply It
Effective lead generation is a complex process that involves many different marketing tools, including drip marketing. The term “drip marketing” originated as a direct translation of the English term “drip marketing” and is a scheduled automated email campaign. The goal of this strategy is to drive traffic to the site , increase user engagement, and, as a result, conversion. We’ve...
How to Become a Youtube Blogger: Step by Step Instructions
Wondering how to become popular on YouTube? Let’s be honest: it’s not as easy as ten years ago. You need to launch your YouTube channel and create unique content that is unlike the videos of competitors. They attract hundreds of thousands of subscribers, and with them – lucrative contracts with companies and brands. So if you are sure that a YouTube blogger is your calling, it is not too late...
Interesting Facts About 20 Famous Logos
What makes just a good logo legendary? Big dreams, creative minds, and, of course, exciting stories. Some iconic logos appeared almost by accident, some have undergone radical changes over the years, and some are fraught with secret messages that you never knew existed. If you’re thinking about creating a logo online, take inspiration from iconic brands and learn 20 fun facts about...
How to Use Instagram to Promote
Instagram has long ceased to be just a feed with photos of cats, children, and food. It is now a powerful communications platform, brand development platform, and sales tool. Collected a checklist of 8 points to help lead your account to success! Profile header design Engaging subscribers Creation of creative content Join collaborations Add action buttons Create a...
Tiktok: What It Is and Why Everyone Is Curious About It
Proponents of the alien invasion theory were wrong – the world was captured not by aliens but by TikTok. The platform for creating and sharing short videos didn’t just shoot but blew up familiar social media templates. Donald Trump has tried to ban it in the US, Louis Vuitton and Saint Laurent run shows there, and museums popularize science through short videos. Is this a new trend or a whole...
How to Turn a Hobby into a Small Business
Do you have a hobby? Fine! For some people, it’s just a way to spend their free time, but for you, it’s a real passion that inspires and fills life with meaning. It can be about anything – photography, roasting coffee, or making bouquets. This activity must give you joy and peace once you realize that you are seriously addicted and have already reached certain heights. And then a reasonable...
How to Write a Commercial Proposal
The ultimate goal of any business is to make a profit. To achieve this, you need to attract prospective customers interested in your products or services. If you don’t know where to start a business, start with a sales proposal to convince the client to choose you. This article will show you how to create a strong business proposal in 9 steps and stand out from the competition. What is a...
What Is a Hashtag and How to Use It on Social Media
# used to stand for the pound or pound sign. But then Twitter appeared and turned it into a hashtag – a concept without which it is now impossible to imagine social networks. Hashtags surround us everywhere. We see them in Twitter trends and captions to viral videos on TikTok, on advertising banners and flyers near the metro. For large corporations, hashtag selection is an important part of...
What Is Web Analytics
Building a website is always a good idea to promote a business or build a personal brand. However, how to understand that the created web resource works effectively and is generally worth its effort? For this, there is web analytics – it allows you to check site traffic, determines traffic sources, and calculate conversion and profit. In the article, we will tell you what web analytics is, how...
Facebook Ads: A Step-by-Step Guide
Advertising on Facebook requires making accurate decisions. Whether your ad will reach your target audience depends on the advertising post’s image, description, and price. Before beginning an advertising campaign, consider the following questions: who is your target audience? What is your monthly budget? Will my ads be optimized for mobile devices? With Cloudretouch, site...
How to Create a Copywriter Portfolio
The market for copywriting services is extremely saturated. To make sure of this, it is enough to go to any online exchange and see hundreds of copywriters offering their services for 2 kopecks per sign. In the face of such competition, how can you find good customers and get decent pay for your work? One effective way to do this is to create an online copywriter portfolio that showcases your...
How to Create a One-Page Website in an Hour
Unlike a multi-page site that provides comprehensive information about a company, a single-page site usually focuses on a specific purpose. For example, increasing sales or converting potential buyers into leads. In this article, we’ll show you how to create a one-page website for free in just an hour using the Cloud retouch Landing Page Builder and Design Templates. Why do you need a...
Landing Page: What Is It, and Why Is It Needed?
One of the most effective internet marketing tools is the landing page or landing page. This one-page site prompts the user to take a certain action, such as buying a product or booking a certain service. A landing page is a key brand promotion tool. It helps increase conversions, reach target audiences and take customers to the next level of the sales funnel. You don’t have to involve a...
Popular Types of Sites and Templates for Them
Many users think about what kind of sites there are and how to choose the right one. It often depends on the goals set, such as opening an online store, creating an online portfolio, or drawing public attention to an important issue. However, the first step is the same for everyone: choose a website builder with user-friendly functionality and a large library of customizable templates. In...
What Is a Facebook Ad Account?
We believe it is essential to establish a Facebook advertising account because this social network is the largest and most important. Although it was created for another purpose, Facebook has had unparalleled growth and positioned itself. Currently, it is the social network with the largest number of active users. These people usually share the content of interest and seek to relate to...
Tips for Being More Productive with Microsoft Office
Microsoft Office is still on the list of skills of an ideal worker. For that reason, knowing interesting tricks and functionalities will not only help you increase your job opportunities, but it will also increase your productivity and allow you to have more free time. Use older versions Microsoft Office allows you to install different versions on your computer and use them as you...
Secret Tools That Will Help You Manage Your Freelance Work
Being an efficient freelancer is a very difficult task since you must complete a myriad of functions, both related to work and unrelated, and project management and accounting. Fortunately, today many applications allow you to save time and facilitate responsibilities. Below, we give you the list of the best tools that will help you work as a freelancer. Mint All of Mint’s features are...
What Are the Main SEO Pillars?
To develop an effective SEO strategy, you have to consider the 3 SEO pillars on which it is based. These are SEO On Page, Link Building, and User Response. Without these pillars, web optimization would not be possible, and the company would not reach its goals. The importance of developing SEO strategies in digital marketing lies in achieving the efficient positioning of a website or blog...
Top 12 Most Popular Types of Digital Marketing
To implement a digital marketing strategy, you must first know the types of digital marketing that exist in the market. Today, content marketing is the most used. However, the other types are also important, but many times, due to a lack of information, they are not developed as they should be. Next, we will mention each of the types of digital marketing and comment on their specific...
How to Attract Customers on Social Networks
Currently, internet sales are constantly increasing, which also increases the likelihood that most of your customers or potential customers are on social networks, many of which also tend to buy online. These platforms offer businesses a cheaper way to reach their customers and influence their decisions. Here are some practical tips on how to attract customers on social networks. 1....
How to Create a Photographer Website
Anyone who makes a living with a camera needs a portfolio site at some point. After all, with its help, you can show galleries of works in high resolution and attract potential customers. This article will tell you how to make a website for a photographer without knowing the code – just by choosing a powerful website builder. We’ll walk through the basic steps, such as optimizing SEO, setting...
How to Open an Online Store
According to statistics, online sales will reach $ 4.8 trillion by 2021—large numbers, great opportunities, especially now that the world is increasingly moving online. We have prepared a detailed guide to tell you how to open an online store and make it successful, even if you have no experience at all. Action plan: Decide what you want to sell; Choose a platform for hosting your...
How to Develop a Post Plan for Social Networks?
The organization is one of the most important factors when developing a social media strategy. An efficient community manager should consider and develop a detailed calendar to serve as a guide. In many cases, companies do not manage to achieve the objectives set by the simple fact of not planning the campaign in detail, and therefore, in the medium term, they lose importance in the...
How Do I Find the Right Target for My Company?
Of all the variables that must be considered when making a marketing or advertising strategy, the most important one is that of the target. A company cannot start a business without first knowing the target market. It is of the utmost importance to investigate it because, otherwise, the path taken by the entrepreneur will lead him to failure. Quantifying it, knowing how it acts, how it is,...
What Is the Difference Between a Community Manager and a Social Media Manager?
Many will think that a “community manager” and a “social media manager” are not different or that it is just another name for the person who sits in front of the computer and begins to manage social networks. Furthermore, there are now more derivations and intersections between the two positions, causing more confusion than ever before. It even seems that these specialists have simpler...
Secret Tips to Start Your Web Project
Creating a web project takes time and dedication. It is not only about having an idea and putting it into action; you have to develop a strategy, organize, investigate the possible target audience of the page, and more so that in this way, you can achieve the desired web positioning. A web page has to be attractive enough to gain visibility over others. But how to do a project? What other...
The 9 Most Used Features of Google Analytics
Google Analytics has become an indispensable tool when analyzing the results of our web pages. This is important because it will let us know if the digital marketing strategy we have proposed is going in the right direction. Thanks to this tool, companies can know the performance of their brands and what decisions to make to achieve the objectives set. One of the advantages of Google...
How to Create a Headline That Ranks on Google
To position your website, it must have traffic, and for this, you need to have good articles with SEO titles. So, we wonder how to create a headline that ranks on Google. Therefore, this article will teach you everything you should consider to achieve it. Consequently, you can have relevant articles that will generate visits and increase traffic. Also, if a good strategy is followed, it would...
User-Centric Digital Marketing Strategies
The Internet and technologies offer multiple possibilities and digital marketing strategies for businesses and consumers. However, there are aspects to consider, such as technological knowledge, usability, and accessibility. If you don’t consider them, you can make an entire job unusable or have very little return. Therefore, one of the keys to ensuring that a digital project is successful...
10 Tips to Improve Your Email Marketing Strategies
If you are carrying out email marketing campaigns without success, you need to follow some tips to improve this strategy. With approximately 90% of consumers checking their email daily, businesses know that email marketing is one of the best ways to reach their target audience. Whether it’s reporting company news, promoting a sale, or highlighting a new product or service, having an...
What Is AMP and What Makes It Faster for Mobile Searches
What is AMP, and how will it improve the user experience on mobile devices? Below, we tell you all about the new Google project and its benefits. How did mobile searches work before AMP? Quick access to information has always worried Google. That is why its main mission is to give greater ease and speed to users in their search for information. Unfortunately, nowadays, mobile websites...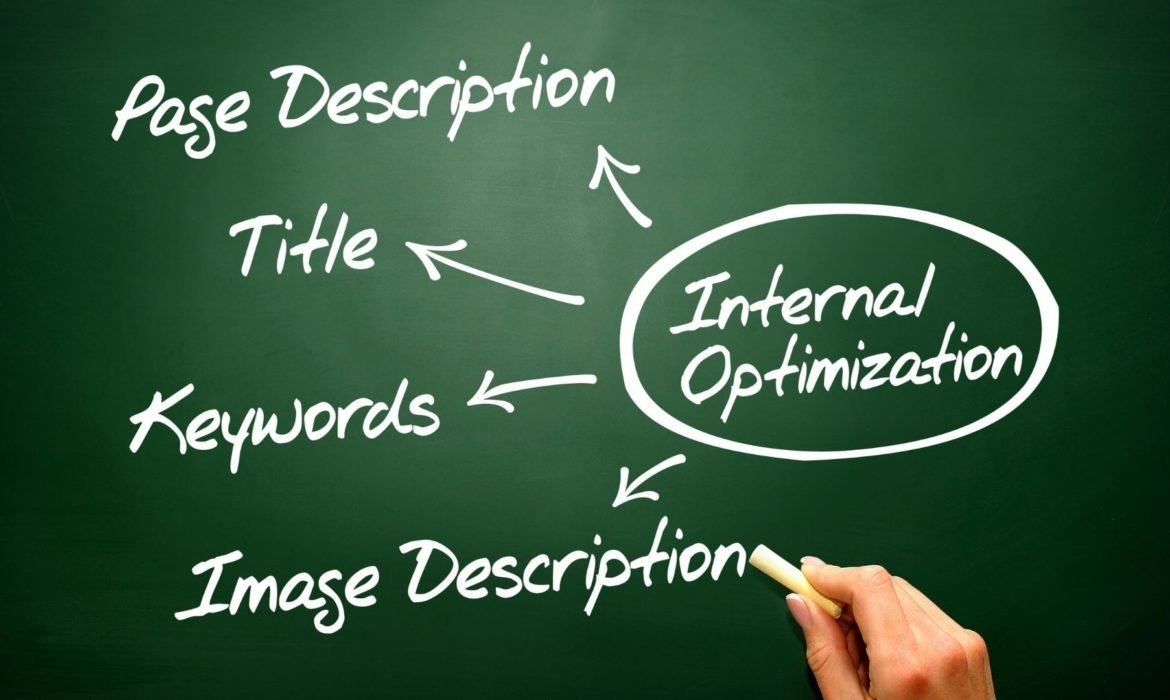
How to Optimize the Images of a Website?
One of the essential elements of a web page is images. Thanks to them, a website can capture the attention of users. That is why it becomes very important to optimize the images of a website. If the images on a web page were of poor quality or very heavy, they could cause a rejection of the website by the users and, probably, the brand. But how important is image optimization? Why optimize...
Four Keys to Making Your Youtube Videos Successful
Since Google bought YouTube 17 years ago, the platform has been catching on worldwide. Today, it is the second most important search engine, and, over time, it has shown us that the content that exists on this platform is very different from that which exists on television. This is of better quality than that of traditional media. Currently, the number of users on YouTube creates a great...
Understanding Facebook: Break Down of Facebook Posts
We have prepared a list of types of Facebook publications made directly from the fan page. It is worth mentioning that they are not direct ads made from Facebook Ads Manager and can be made easily. All fan pages seek to increase user engagement. Therefore, we must emphasize that it depends on the interaction that a user has with their fan page to appear first in the home section. Below,...
Best Wedding Invitation Templates
Online wedding invitations are a worthy replacement for traditional paper invitations. Firstly, this way, you save yourself from having to print dozens of postcards and manually send them to the addressees. Secondly, the wedding site can be used not only for invitations but also for posting photos and celebrations, adding a detailed guide to the wedding venue, and managing the list of guests....
Content Marketing How to Define This Strategy?
When planning a digital marketing strategy, you’ve probably heard of the term “content marketing.” The use of good content management is key to properly positioning your brand and increase traffic to your website and social networks. This is because the content is the most effective way for companies to communicate with their users. That’s why it’s so critical to have valuable content, as...
Secret Tips to Reduce the Cost of Social Media Advertising
Digital marketing is beginning to encompass all businesses. Nowadays, the value of social media advertising is becoming more and more apparent. Many businesses are discovering the benefits of the Inbound Marketing methodology. However, due to increased competition, advertising online has become more expensive. It is now more important to optimize your campaigns and try new things. Following...
Secret Tips Tactics to Boost Your Business’s Online Sales
Lately, many entrepreneurs are betting on starting an Internet business and boosting online sales in parallel with their company’s growth. Due to its effectiveness and relatively low cost, online trading is one of the most commonly used strategies in startups. Another advantage is that the Internet allows you to reach more people, both locally and internationally. So, to help you maximize...
SEO Tools: Best by Category
Web SEO Optimization for search engines is a very tedious job. However, it is becoming more and more common practice. Due to the complexity and time required to have a good SEO strategy, it is necessary to have an arsenal of tools as an ally. Below, we will give you a list of the best SEO tools for each category. Keyword Research SEMrush SEMrush allows you to find the...
The Best Applications for a Community Manager
Being a technology community manager, you should always be aware of new tools that can facilitate your work. In our era, smartphones are changing the way we interact, have a dominant presence globally, and are becoming increasingly important for our personal and work lives. As for our working lives, using it as a tool through applications can help your work as a community manager a...12 Qualities of a Community Manager and Why They Are Important
Even though community managers are increasingly necessary for companies, the consensus remains that they are “the person who is paid to spend all day on Facebook.” Fortunately, this is changing, and every time the community manager is viewed as a critical piece for the company’s growth because, without someone, someone must manage its perception. The functions of the community manager...
Advanced Formulas and Functions in Microsoft Excel
Microsoft Excel is a program that is part of the Microsoft Office package, which remains one of the most important and used tools at work. Therefore, we have prepared a list of 10 advanced Excel formulas so that you can perform broader statistical and numerical operations. We also define the user levels and the difference between them and the functions. What is Excel? Excel is a program...
Secret Tips for Choosing the Right Domain for Your Website
For many startups, an important factor in the success of a project depends a lot on the domain name they use for their website. There are a variety of good practices when choosing a name, and it is essential to apply them correctly to avoid later inconveniences. Here are some recommendations for choosing the right domain for your website. Consider keywords. When you start searching for...
How Can We Measure the Success of Our Web Content?
The main objective of every company is that the investment they make has an efficient return on investment. For this, it is important to analyze the results obtained during a content marketing strategy. With this, it would be possible to determine the current position that the company has in the market against the competition. Many people say that advertising on the web is much more...
Secret Tips for a Freelancer in Digital Marketing
What is a freelancer? Next, we will solve this and several more questions related to freelancers, in addition to giving you some useful tips that will help you better manage your jobs, whether you are a professional in digital marketing or a community manager. To begin, a freelancer, also known as a freelancer, works on their own time on projects related to their profession or occupation....
Tips for Using Twitter Analytics Like an Expert
If you want to be successful on social networks, you must measure the results since this will allow you to execute campaigns with greater effectiveness in the future. That is why, depending on which social network you use, it is important that you know the analysis and measurement tools that help you monitor your results and know if the objectives are being achieved. More and more brands...
Implement Link Building in Your SEO Strategy
One of the many factors that Google’s algorithm considers when displaying search results is the quantity and quality of websites’ backlinks. The better Link Building work you’ve done, the better your website is likely to rank positively in search engines. So, so that you can exploit this criterion, here are some practical tips for implementing a Link Building strategy that allows you to...
Why Is User Experience Important in Content Marketing?
Part of the actions you must take in your content marketing strategy is to develop interesting content to achieve a good user experience. But why is user experience so important in content marketing? Next, we will tell you the reasons. Reasons why the user experience is important in content marketing It helps you build a brand. Currently, a user spends most of their time connected on...
The Basics of Blogging Search Optimization
Want to know the one thing that every successful digital marketer does first to ensure they get the biggest return on their marketing budget? It’s simple: goal-setting. This is an absolutely essential practice for any digital marketer who knows how to execute their campaigns in a productive, cost-effective way. With a few. With a few simple tips, you can be doing the same in no time! In this...
Simple Ways To Optimize Your Website For SEO
Want to know the one thing that every successful digital marketer does first to ensure they get the biggest return on their marketing budget? It’s simple: goal-setting. This is an absolutely essential practice for any digital marketer who knows how to execute their campaigns in a productive, cost-effective way. With a few. With a few simple tips, you can be doing the same in no time! In this...
How to Increase Your ROI Through scientific SEM?
Want to know the one thing that every successful digital marketer does first to ensure they get the biggest return on their marketing budget? It’s simple: goal-setting. This is an absolutely essential practice for any digital marketer who knows how to execute their campaigns in a productive, cost-effective way. With a few. With a few simple tips, you can be doing the same in no time! In this...
Pinterest.se: Discover Recipes, Home Ideas
Pinterest is a website and app that helps users collect and share pictures. The website is free to use, and users can create boards called ” pins “, which are collections of images. Pins can be about anything – recipes, home ideas, fashion, etc. – and users can follow other people’s boards or create their own. What Exactly Is Pinterest.se? Pinterest is a visual bookmarking site that...
Guide to In-Home Lifestyle Newborn Photography
Welcoming a newborn into your life is one of the most beautiful and memorable experiences. As a parent, capturing those first precious moments in a natural and relaxed way is a priority. That’s where in-home lifestyle newborn photography comes into play. This type of photography has gained massive popularity over the years because it provides a real, authentic look into your family’s everyday...
Best Camera for Newborn Photography: Top Picks for 2025
Capturing the delicate beauty of a newborn baby is one of the most precious and rewarding types of photography. The soft skin, tiny fingers and toes, sleepy yawns, and the peaceful stillness of a newborn’s early days deserve to be preserved with the highest quality. That’s where choosing the best camera for newborn photography comes into play. In 2025, camera technology has advanced...
Fall Newborn Photography: Ideas for Cozy Shots
As the leaves change color and the crisp autumn air sets in, there’s something incredibly heartwarming about capturing the magic of new life amidst the beauty of the fall season. Fall newborn photography combines the warmth of family moments with the earthy charm of autumn landscapes and cozy textures. For photographers and parents alike, this season offers endless opportunities to create...
Best Lenses for Newborn Photography in 2025
Capturing the precious early days of a newborn’s life is a magical experience. For photographers, whether amateur or professional, choosing the best lens for newborn photography is a crucial step in ensuring every little detail — from delicate eyelashes to tiny toes — is perfectly preserved. In 2025, camera technology has advanced even further, but lenses remain the true workhorses behind...
Flow 2025 Recap: Highlights from a Year of Creative Evolution
As we bid farewell to 2023, it’s time to reflect on the vibrant and transformative journey that the creative world embarked upon during the past year. Flow 2023, a year marked by innovation, collaboration, and unprecedented creativity, brought forth a myriad of highlights that shaped the landscape of various artistic disciplines. Let’s dive into the recap of Flow 2023 and explore the key...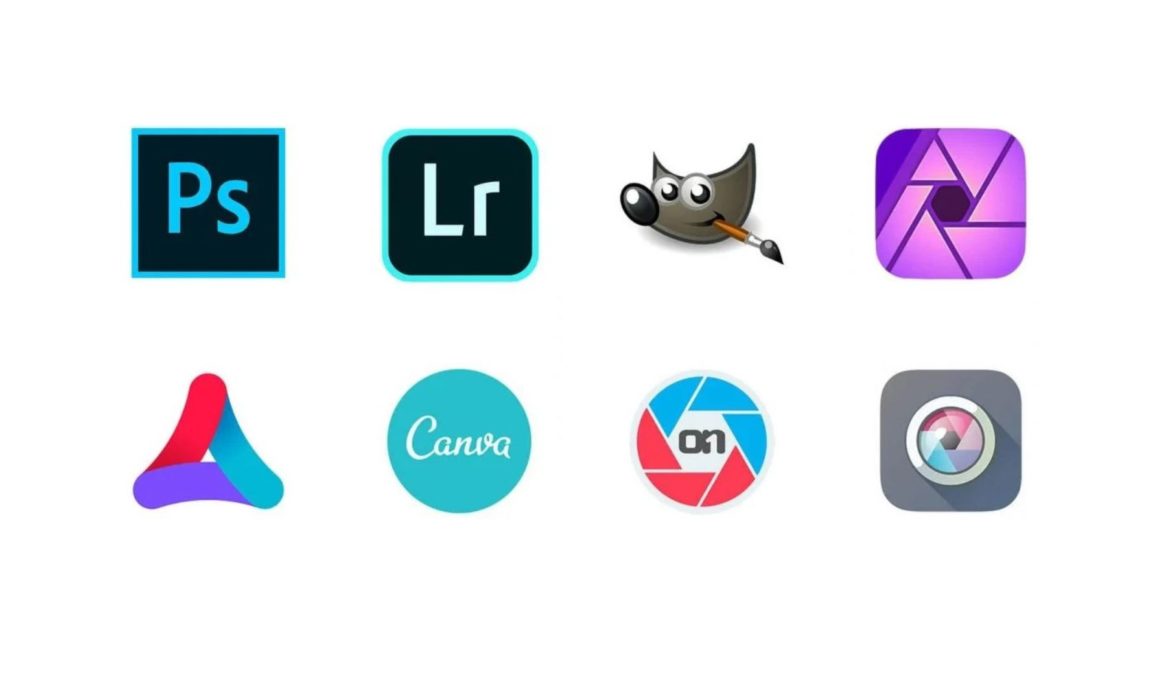
10 Best Free Photo Editing Software in 2025
Professional photo post-processing software can be expensive, complex, cumbersome, and cause a little panic attack with its overwhelming number of buttons and functions. If you are just at the beginning of your journey as a photographer and want to learn more about simpler and more affordable ways to process images, then you should use this 10 best free photo editing software. 10 Best Free...
Top 10 Shoe Photo Editing Services Companies 2025
Top 10 Shoe Photo Editing Services Companies 2025 If you are in the market for a good shoe photo editing service, you have come to the right place. In this blog post, we will discuss the Top 10 Shoe Photo Editing Services Companies for 2025. These companies provide excellent services because will help you get the most out of your shoe photos. So, without further ado, let’s get started!...
How to Become a Photographer in 2025
Modern smartphones shoot no worse than DSLRs – so today, everyone can feel like a photographer. This does not require any special skills – take a couple of pictures and choose the right filter. Some even create their website for a photographer, sharing their work with the world. Still, taking pictures with your phone and being a professional photographer are two completely different things....
Free Video Editing Software 2025
A high-quality video will decorate a photographer’s portfolio, help display products from an online store in the best possible light, and, in general, be useful to anyone who will create a website. You don’t even need to hire a professional editor to make your video. On the Internet, you can find a variety of video processing programs that will be accessible and understandable even...
How to Become a Blogger in 2025: A Step-by-Step Guide
Blogging is a great opportunity to hone your writing skills, tell the world what you love, and become famous online. Bloggers inspire, entertain and educate readers – and the more popular a blog becomes, the more chances you have to make money from it. If you are thinking about becoming a blogger and how to create your blog, you have come to the right place. In this guide, we’ll show you how...
10 Best WordPress Plugins in 2025
10 Best WordPress Plugins in 2025 As for the Content Management Systems (CMS), WordPress is the most used today, and it is no surprise since it offers many things that competitors lack. Currently, it has approximately 60% of the market, and everything seems to be continuing to advance as more and more companies join the WordPress platform. Several behemoths among the companies that use the...
6 SEO Tools You Should Consider Using 2025
To develop our brand in the market, it is essential to carry out a thorough analysis of the objectives, which allows us to determine if the SEO Web Positioning strategy is the most appropriate. For this, some tools make known the current panorama, and, consequently, we can execute a more appropriate strategy and optimize the resources desired by the company. Google Home Page...
Top 10 Background Removal Service Companies in 2025
In 2024, when it comes to background removal services, you have numerous options to choose from. But how can you determine which one is the perfect fit for your specific needs? In this article, we will provide a comprehensive ranking of the top 10 background removal service companies for the current year. Our evaluation will consider essential factors such as pricing, service quality, and...
Top 10 Best Clipping Path Service Companies in 2025 (Update Today)
If you’re looking for the best clipping path companies, you’ve come to the right place. In this blog post, we will discuss the top 10 clipping path companies in 2024. We’ll go over what makes each company stand out from the rest, and help you decide which one is right for your project. So without further ado, let’s get started! Today, the clipping path providers’ industry is fast-paced and...
Top 10 Best Jewelry Retouching Services Companies in 2025
In the world of fashion and glamour, jewelry is one of the most important accessories. No outfit is complete without a stunning piece of jewelry to accentuate it. However, sometimes even the most beautiful pieces can use a little retouching. If you are looking for the best jewelry retouching service providers, look no further! In this article, we will list the top 10 providers in 2024. In...
Top 10 Ghost Mannequin Services Companies 2025
If you’re in search of the finest Ghost Mannequin Services Companies, you’ve landed in the perfect spot. These companies offer exceptional services that enable you to create breathtaking product images, leaving a lasting impression on your customers. In this article, we will delve into the 10 best Ghost Mannequin Services Companies for the current year, 2024. Additionally, we will explore the...
Top 10 E-Commerce Photo Editing Services Companies in 2025
In this article, we present the top 10 E-Commerce Photo Editing Services Companies for 2024. These companies have established themselves as leaders in the industry, offering a wide range of professional editing solutions to enhance the visual appeal of your product catalog. By leveraging their expertise, you can create images that captivate customers, increase conversions, and ultimately drive...
18 Examples of Brand Books for Inspiration
The key to a successful brand is a well-thought-out strategy and recognizable design. With their help, it is easier for a brand to establish an emotional connection with customers and increase its awareness. However, how do you ensure that everyone on your team — from the chief designer to the salesperson — understands your branding the same way? For this, a brand book is created – a...
The Ultimate Guide to Successfully Rebranding in 2025
People love makeovers. Our favorite scenes from movies are where the hero goes from humble and quiet to stylish handsome. Like these heroes, brands have their own identities and sometimes need a refresh and makeover. Many companies reach a point where their corporate identity no longer matches the original vision and limits growth opportunities. Either way, it’s a sign that your business is...
Top 10 Eyeglass Photo Editing Services Companies of 2025
When it comes to eyeglass photo editing services, choosing the best company can make all the difference. In this article, we present the top 10 eyeglass photo editing service companies for 2024. These companies are known for their exceptional quality and value, making them the perfect choice for editing your old eyeglass photos or creating new glasses designs. Trust these reputable companies...
Top 10 Best Furniture Photo Editing Companies of 2025
If you are in the business of selling furniture, then you know that good-quality photos are essential for success. Furniture is a big purchase. And people want to be sure they are getting what they are paying for before they buy it. That’s where furniture photo editing comes in. A good photo editing service can make your furniture look its best, and help you sell more products. In this...
Top 10 Clothing Photo Editing Services Companies of 2025
If you are involved in the clothing business, you understand the importance of having outstanding product photos. High-quality images not only drive traffic to your website but also have a significant impact on boosting sales. That’s why selecting a reliable clothing photo editing service is crucial. In this article, we will explore the top 10 clothing photo editing services for the current...
Top 10 Photo Retouching Service Companies of 2025
If you’re looking for the best photo retouching service companies in 2024, look no further! We’ve compiled a list of the top 10 companies that will help you take your photos to the next level. Professional photo retouching can make a big difference in the overall appearance of your images, and these companies are some of the best in the business. So whether you need to fix a blemish, remove an...
Top 10 Product Photo Editing Service Companies 2025
If you are a business owner who is looking for a reliable and professional product photo editing service, finally you have come to the right place. In this blog post, we will discuss the Top 10 Product Photo Editing Service Companies of 2024. Moreover these companies are the best in the industry and offer high-quality services that will meet your needs and exceed your expectations. So, without...
40 Best Birthday Shoot Ideas in 2025
Look no further, if you’re looking for fun and creative & best birthday shoot ideas ! Here are a few of our favorites: Use natural light to capture natural, beautiful portraits. Try different backdrops or props to add interest and flavor to your shots. Shoot outdoors in scenic areas for a more rustic feel. Shoot indoors in some sleek and modern settings for a high-end look....
Best Image Resizer for Twitter: Top Free Tools to Use in 2025
In 2025, social media continues to dominate online interactions, and Twitter remains one of the most powerful platforms for sharing content. Whether you’re a casual user, influencer, digital marketer, or business owner, visuals on Twitter matter more than ever. But here’s the catch—Twitter has specific size requirements for images. Uploading photos without resizing them can result in awkward...
Resize Images for Discord Effortlessly: Top Tools for Gamers & Streamers
In the fast-paced world of online gaming and streaming, communication platforms like Discord play a vital role in keeping communities connected. Whether you’re a gamer showing off your latest screenshots, a streamer sharing event announcements, or a moderator uploading server banners and emojis, you’ll often face one annoying hurdle—image size limitations. That’s where a Discord image resizer...
How to Batch Resize Images on Mac Using Preview and Automator
If you’re working with lots of images, you know how time-consuming it can be to resize them one by one. Whether you’re a photographer, content creator, online seller, or just organizing photos, knowing how to batch resize images on Mac can save you hours of work. Fortunately, macOS offers two simple built-in tools—Preview and Automator—that make batch resizing easy and efficient. In this...
The Ultimate Guide to Twitch Image Resizers: Tools to Perfect Your Stream Visuals
In today’s competitive streaming world, having perfect visuals on Twitch is more important than ever. Your graphics, overlays, banners, and thumbnails represent your brand. However, creating images that fit Twitch’s exact size and quality requirements can be tricky without the right tools. This is where a Twitch image resizer comes in. Whether you’re a beginner or a seasoned streamer, using...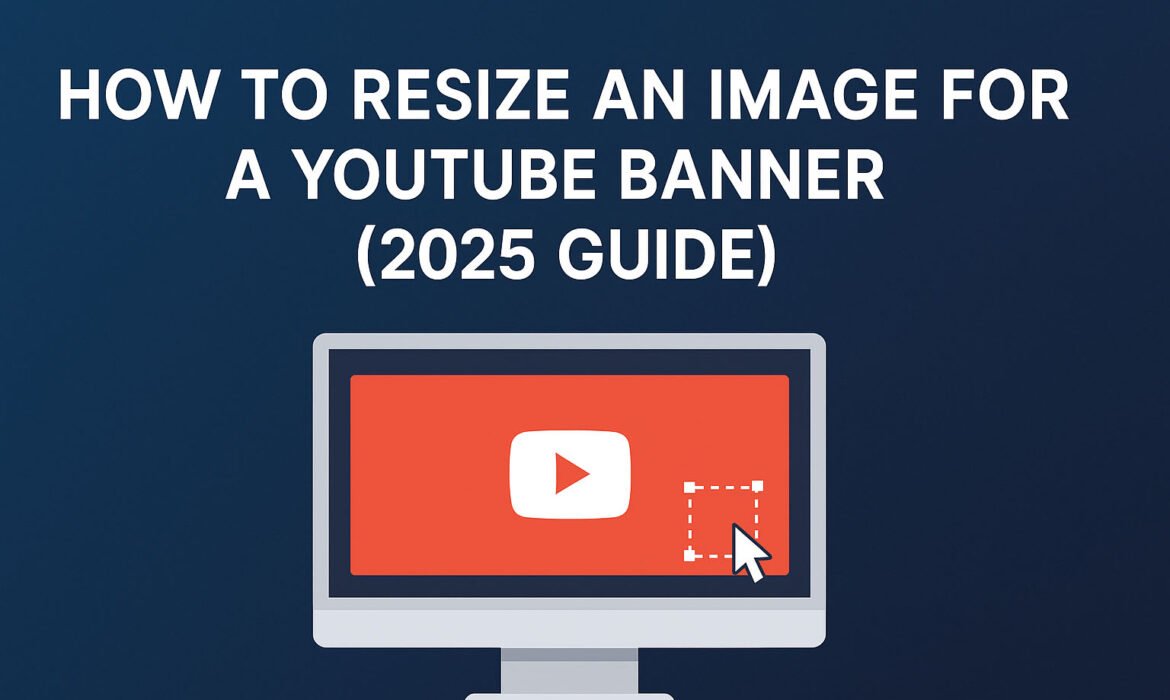
How to Resize an Image for a YouTube Banner (2025 Guide)
Creating an eye-catching YouTube banner is essential for establishing your channel’s identity and attracting viewers. One of the most crucial steps in this process is ensuring your image is the correct size. In this comprehensive guide, we’ll walk you through how to resize an image for a YouTube banner, covering everything from ideal dimensions to practical tools and tips. Understanding...
How to Resize a Layer in GIMP: A Step-by-Step Guide
If you’re learning how to use GIMP, one of the first skills you’ll likely want to master is how to resize image layer GIMP. This task might sound technical, but it’s actually quite simple once you get the hang of it. Whether you’re editing personal photos, working on design projects, or preparing images for a website or presentation, knowing how to resize image layer GIMP can help you achieve...
How to Resize an Image for Your LinkedIn Company Page (Step-by-Step Guide)
In today’s digital world, LinkedIn serves as a powerful platform for companies looking to showcase their services, engage with clients, and build their brand presence. Whether you’re using LinkedIn for networking, sharing company updates, or recruiting top talent, the visuals on your company page play a vital role. One of the most important aspects of presenting your company online is the way...
How to Resize My Images on Printify: A Step-by-Step Guide
Creating stunning products on Printify is a fantastic way to bring your designs to life, whether you’re making t-shirts, mugs, or posters. But one thing that can trip up even the most enthusiastic creators is figuring out how to resize my images on Printify. If your images aren’t the right size, they might end up blurry, pixelated, or awkwardly cropped when printed. Don’t worry—this guide is...
How to Resize Images for Instagram Without Cropping: A Complete Guide
Instagram is one of the most popular platforms for sharing photos, but getting your images to fit perfectly can sometimes feel like a puzzle. If you’ve ever uploaded a photo only to see parts of it chopped off, you know the frustration of cropping. The good news? You don’t have to lose any part of your image. In this guide, we’ll walk you through everything you need to know about how to resize...
TNPSC Photo Resize: Choose the Best Tool for Your Application
When applying for the Tamil Nadu Public Service Commission (TNPSC) exams, one small but crucial detail can make or break your application: the photo you upload. The TNPSC has strict guidelines about photo size, dimensions, and format, and failing to meet these can lead to rejection. That’s where TNPSC photo resize tools come in handy. These tools are designed to help you adjust your photo to...
GATE Photo Resizer 101: Your Complete Guide to Application-Ready Images
Preparing for the GATE (Graduate Aptitude Test in Engineering) exam is no small feat. Between studying complex topics and gathering documents, the last thing you want is a hiccup in the application process. One critical step that often trips up applicants is getting the photo just right. The GATE application has strict rules about image size, format, and quality, and failing to meet them can...
Resize Images for WhatsApp Profile Like a Pro: A Step-by-Step Guide
WhatsApp is one of the most popular messaging apps in the world, and your profile picture is often the first thing people notice about you. Whether it’s a selfie, a family photo, or a cool graphic, you want it to look just right. But here’s the catch: if your image isn’t the perfect size, it might get cropped awkwardly or look blurry. That’s where learning how to resize images for WhatsApp...
From Amateur to Pro: Elevate Your Images with Color Grading Photo Online Tools
Photography is an art that anyone can enjoy, whether you’re snapping pictures with your smartphone or wielding a professional camera. But there’s one secret that separates amateur snapshots from pro-level masterpieces: color grading. If you’ve ever wondered how photographers make their images pop with vibrant hues or create a moody, cinematic vibe, the answer often lies in color grading photo...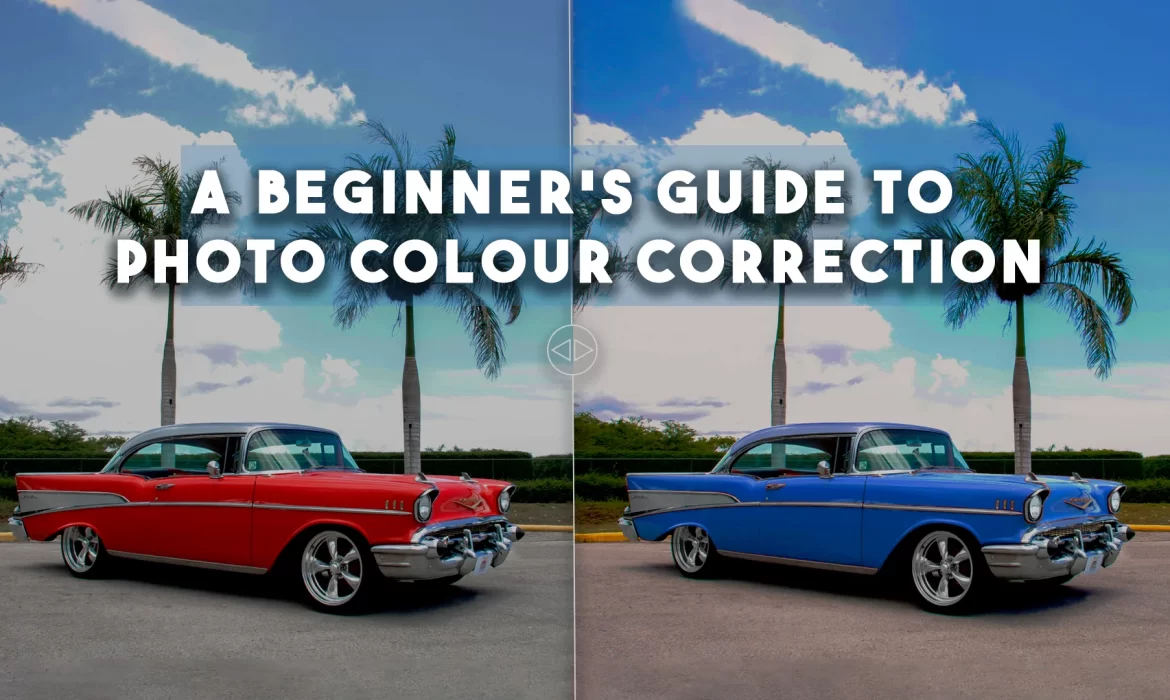
A Beginner’s Guide to Photo Colour Correction: Enhancing Your Images
Photo colour correction is one of the most crucial steps in photo editing. Whether you’re a budding photographer, a content creator, or an e-commerce business owner, understanding how to correct and enhance the colours in your images can make all the difference. Colour correction can transform a dull, flat photo into something vibrant, visually appealing, and professional. In this guide, we’ll...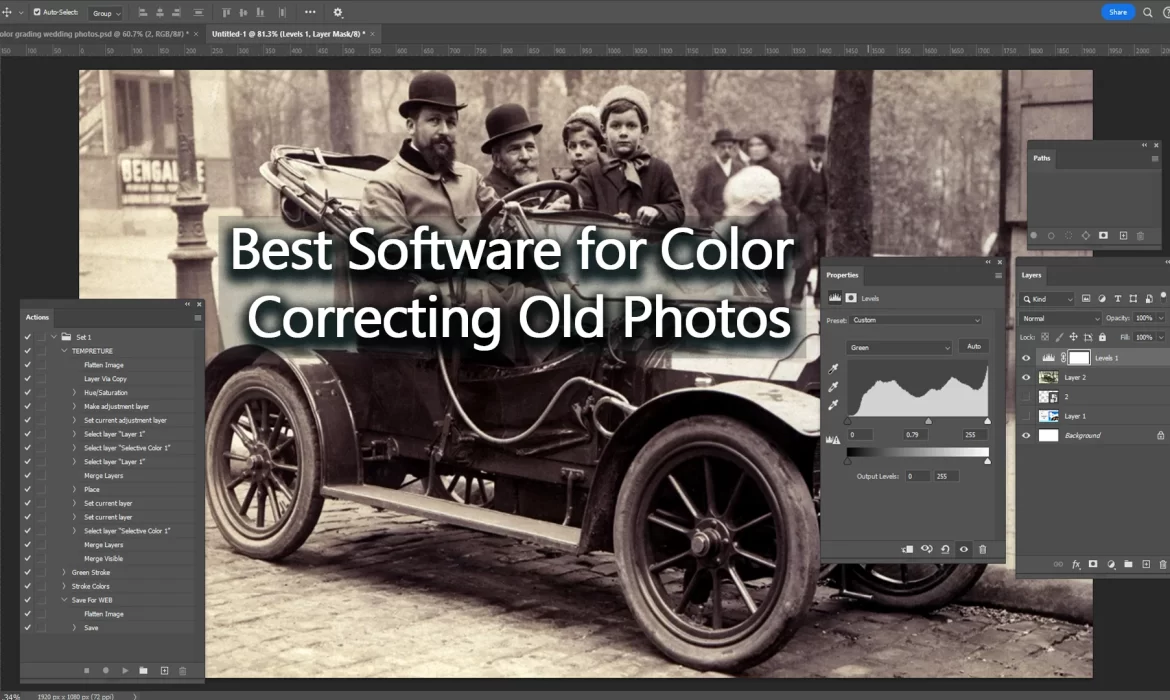
Best Software for Color Correcting Old Photos: A Comprehensive Review
Old photographs, whether cherished memories or historical records, often show signs of deterioration over time. From faded colors to yellowing edges, the passage of time can significantly affect the quality of these photos. Thankfully, modern technology has given us powerful tools to restore these memories, especially when it comes to color correction. Whether you’re a photographer, a history...
Best Software for Post Production Photo Editing
When you take a beautiful photo with your camera, the work does not stop there. The real magic often happens after the photo is captured — during the editing process. This is why post production photo editing software is so important for photographers, both professionals and beginners. If you want to make your photos look perfect, you need to choose the right post production photo editing...
How AI is Revolutionizing Product Photo Editing
In today’s digital world, businesses need high-quality product images to attract customers and boost sales. But editing product photos manually is time-consuming, expensive, and requires advanced skills. This is where artificial intelligence (AI) is making a huge impact. AI-powered tools now make it possible to edit product photos quickly, efficiently, and professionally with minimal effort....
How to Edit Product Photos Online for Free
In the world of e-commerce, high-quality images are essential for attracting customers. A product with clear, vibrant, and professional-looking photos can significantly increase sales and customer trust. However, hiring a professional editor or buying expensive software may not always be an option, especially for small businesses and startups. The good news is that you can achieve stunning...
Why Outsourcing Product Photo Editing is a Game-Changer
In today’s competitive e-commerce world, high-quality product images are essential. A great photo can make the difference between a sale and a missed opportunity. But editing product photos to perfection is time-consuming, expensive, and requires technical expertise. This is where outsourcing product photo editing becomes a game-changer. Businesses can focus on sales and marketing while...
Editing Product Photos in Canva: A Complete Tutorial
Are you ready to take your product photos to the next level but don’t have professional editing skills or expensive software? You’re in the right place! In this easy-to-follow guide, we will show you how to edit product photos in Canva, a powerful and user-friendly design tool that’s perfect for beginners and seasoned professionals alike. Whether you’re an online business owner, a social media...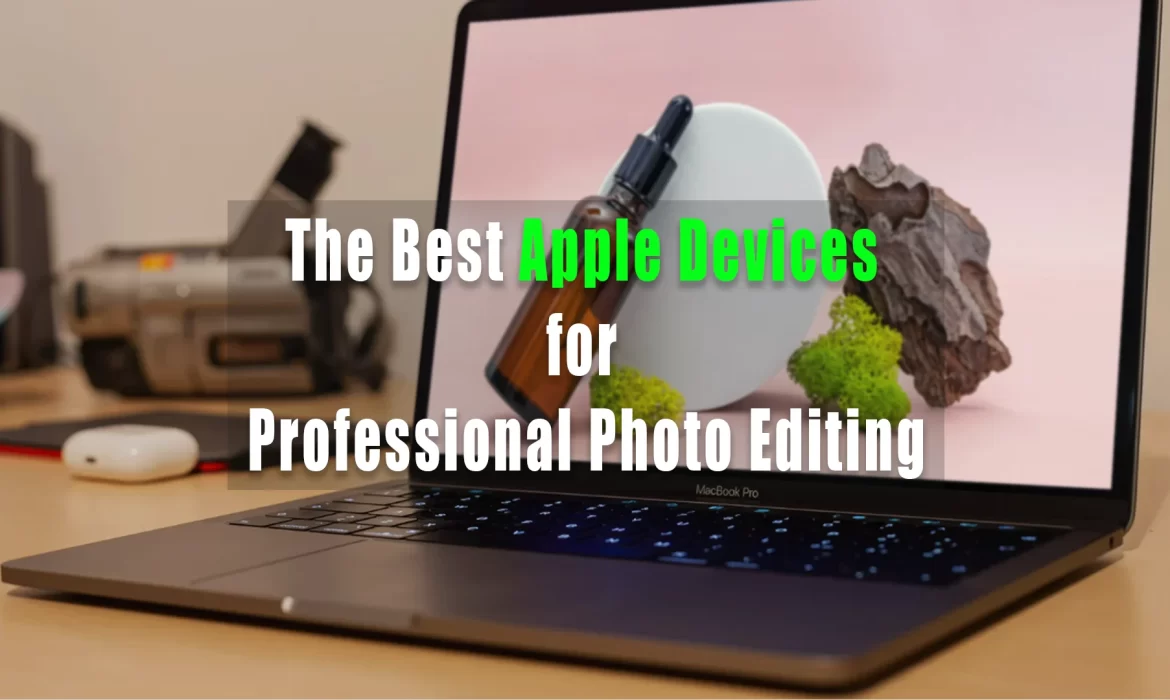
The Best Apple Devices for Professional Photo Editing
If you are a professional photographer or a creative artist, choosing the best Apple product for photo editing can significantly impact your workflow. Apple has built a reputation for offering high-quality devices with powerful performance, stunning displays, and optimized software that cater to photo editing needs. Whether you work with Lightroom, Photoshop, or Capture One, Apple devices...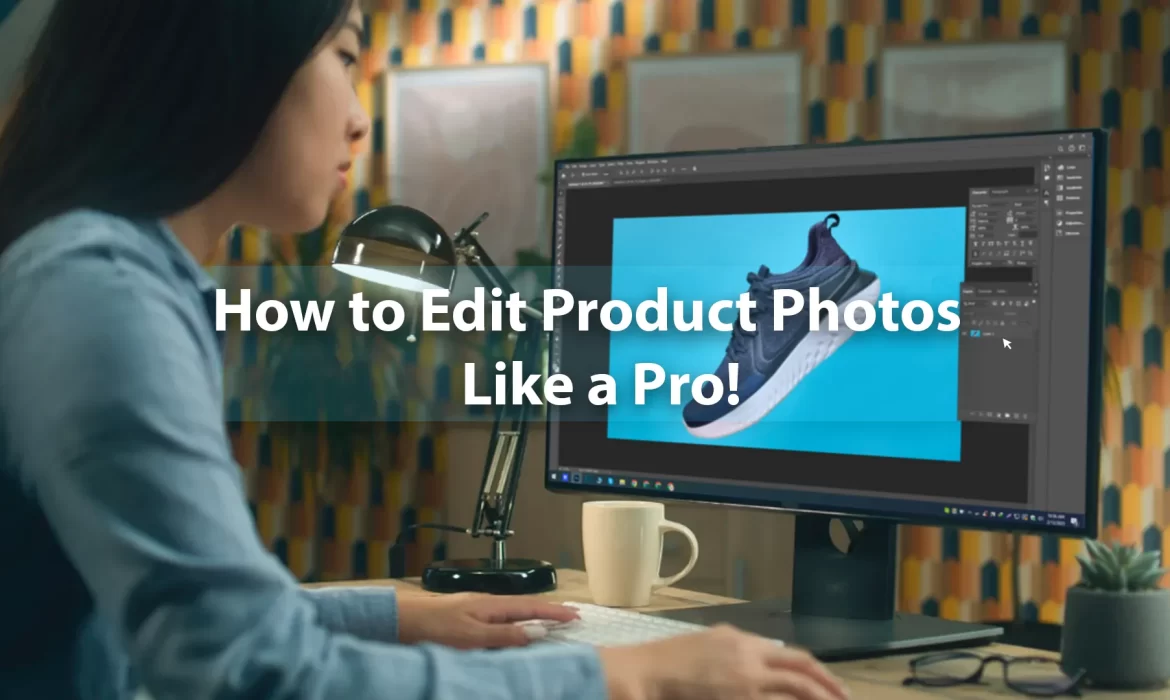
The Ultimate Guide: How to Edit Product Photos Like a Pro
Have you ever looked at a product photo and wondered how it looks so polished and professional? It’s not magic—it’s the result of careful editing. If you’re selling products online, mastering how to edit product photos can make a huge difference in attracting customers and boosting sales. In this guide, we’ll take you step by step through the process, showing you how to edit product photos...
Top Free Apps to Edit Product Photos Like a Pro
In today’s digital age, great product photos can make or break an online business. Whether you’re a seasoned e-commerce seller or just starting your side hustle, ensuring your product images look sharp and professional is crucial. But here’s the good news: You don’t need an expensive photo editing software or a graphic designer to get those polished images. With the best free app for editing...
Outdoor Furniture Photography: A Complete Guide
Imagine walking into a beautiful outdoor space, where cozy furniture pieces are surrounded by lush greenery, and the sun is gently casting its warm light over the setting. It’s a perfect scene, and if you’re a photographer, capturing that image through the lens can be quite the rewarding experience. But here’s the thing – taking stunning photographs of outdoor furniture isn’t as simple as...
AI Furniture Photography: The Future of Image Editing
The way furniture photography is done is changing fast, and AI furniture photography is leading the way. Imagine taking furniture pictures that look professional without needing expensive cameras, lighting setups, or hours of editing. This is exactly what AI technology is making possible. Businesses, photographers, and designers are now using AI tools to create stunning images in just a few...
360-Degree Furniture Photography: Techniques and Tools
Capturing furniture in the best light is essential for showcasing its beauty, details, and functionality. But in today’s digital world, static images are no longer enough. Customers want a complete view of the product before making a purchase. This is where 360-degree furniture photography comes in. It allows viewers to interact with a rotating image, providing a full, immersive experience. If...
Innovative Furniture Photography Ideas to Try Today
If you’re a furniture enthusiast or a photographer looking to explore new techniques, you’re in for a treat. The world of furniture photography is a vibrant one, filled with endless possibilities to showcase the beauty and functionality of furniture in creative ways. Whether you’re photographing a new collection for a catalog, posting on social media, or just looking to capture your favorite...
AI-Driven Virtual Staging Apps: Best Free Tools in 2025
Imagine transforming an empty room into a beautifully designed living space with just a few clicks on your device. Thanks to the advancements in technology, virtual staging AI apps have revolutionized the real estate and interior design industries. These innovative tools allow you to stage a property digitally, making it visually appealing and market-ready without the hassle of physical...
Using Props for Furniture Photography: Ideas for Adults
Furniture photography is an art that requires creativity, attention to detail, and the right set of props to bring each piece to life. Whether you are a professional photographer, a furniture retailer, or someone who wants to showcase their home decor beautifully, using photography furniture props for adults can make your images more engaging and visually appealing. The right props create a...
Creative Home Staging Ideas with Stunning Pictures
When it comes to selling your home or simply refreshing your living space, home staging is one of the most effective ways to make your property shine. One of the best ways to find inspiration and visualize your ideas is through home staging ideas pictures. These stunning images offer a visual representation of what can be done to elevate a room, and they can help you decide what style works...
Top Free Virtual Staging Apps for Designers and Photographers
In the world of real estate and interior design, virtual staging has revolutionized how properties are presented to potential buyers. Thanks to the rise of digital technology, designers and photographers can now use innovative tools to stage a home or space without the need for physical furniture or decor. This has made the process more affordable and efficient, allowing for more creativity...
Expert Tips for Stunning Furniture Photography
Furniture photography is an essential skill for anyone in the interior design or furniture industry. Whether you’re a professional photographer, a business owner selling furniture online, or simply someone looking to capture your personal collection of home décor, knowing the right techniques can make all the difference. In this article, we’ll explore expert furniture photography tips to help...
The Best Camera for Interior Photography in 2025
Interior photography has gained significant popularity over the years. Whether you’re a professional photographer, an interior designer, or simply someone who enjoys capturing beautiful indoor spaces, the right camera can make all the difference. In this article, we will explore the best cameras for interior photography in 2025, examining the features and qualities that make them ideal for...
Top Cameras for Furniture Photography: A Buyer’s Guide
When it comes to furniture photography, having the right camera can make a world of difference. Whether you’re a professional photographer or someone just getting started in capturing furniture for online stores or catalogues, selecting the best camera for furniture photography is essential. This guide will help you understand the important factors to consider and highlight the top cameras...
Cheap Image Editing Service Providers: Your Go-To Solution for Affordable Quality
In today’s digital age, high-quality images are more important than ever. Whether you’re running an e-commerce store, managing social media campaigns, or working on personal photography projects, polished visuals can make all the difference. However, professional image editing services often come with hefty price tags, which can be discouraging for small businesses, startups, or individual...
10 Tips for Professional-Level Interior Photography
Interior photography is a captivating art form that showcases the beauty and design of spaces. Whether you’re photographing for real estate listings, design portfolios, or just for the love of architecture, mastering interior photography can significantly improve your work and attract more clients. If you want to elevate your skills and create stunning images that reflect the true essence of a...
The Best Lighting for Furniture Photography
Furniture photography is an essential part of marketing, whether you’re a furniture retailer, interior designer, or online seller. High-quality images are crucial to showcasing the beauty and functionality of your furniture, and one of the most important factors that contribute to these images is the lighting. The best lighting for furniture photography can make a huge difference in how your...
Top 10 Best Image Editing Service Companies
In today’s world, images speak louder than words. Whether you’re a professional photographer, a business owner looking to enhance product photos, or just someone wanting to improve personal pictures, having access to top-notch image editing services is key. From minor touch-ups to complex image manipulations, professional editing can make a significant difference in how an image is perceived....
Top 10 Best Image Editing Service Providers
In the digital age, visuals play a critical role in communication. Whether you’re a professional photographer, a business owner, or simply someone looking to enhance personal images, having access to high-quality image editing services is key. With the rise of social media, e-commerce, and online marketing, more people than ever are seeking ways to make their photos stand out. This is where...Antique Furniture Photography: Capturing Vintage Charm
Antique furniture has a special allure. Its unique designs, intricate details, and history make it a highly prized possession for many. Whether you’re a collector, a seller, or simply someone who admires these timeless pieces, capturing the essence of antique furniture through photography is essential. Antique furniture photography not only preserves the beauty of these items but also tells...
Newborn Photography Furniture Props: Adorable Ideas to Enhance Your Photoshoot
When it comes to newborn photography, the little details can make a huge difference in creating stunning, memorable images. One of the most important elements of a newborn photoshoot is the use of props, and when we talk about props, newborn photography furniture props stand out as some of the most effective and adorable choices. These props not only add charm and style to your photographs but...
Furniture Photography Studio Setup: A Step-by-Step Guide for Beginners
Setting up a furniture photography studio is essential for anyone looking to capture high-quality images of furniture. Whether you’re a professional photographer or a beginner, the right studio setup can make a significant difference in the final product. In this article, we will guide you through the process of creating a furniture photography studio from scratch. You’ll learn about the...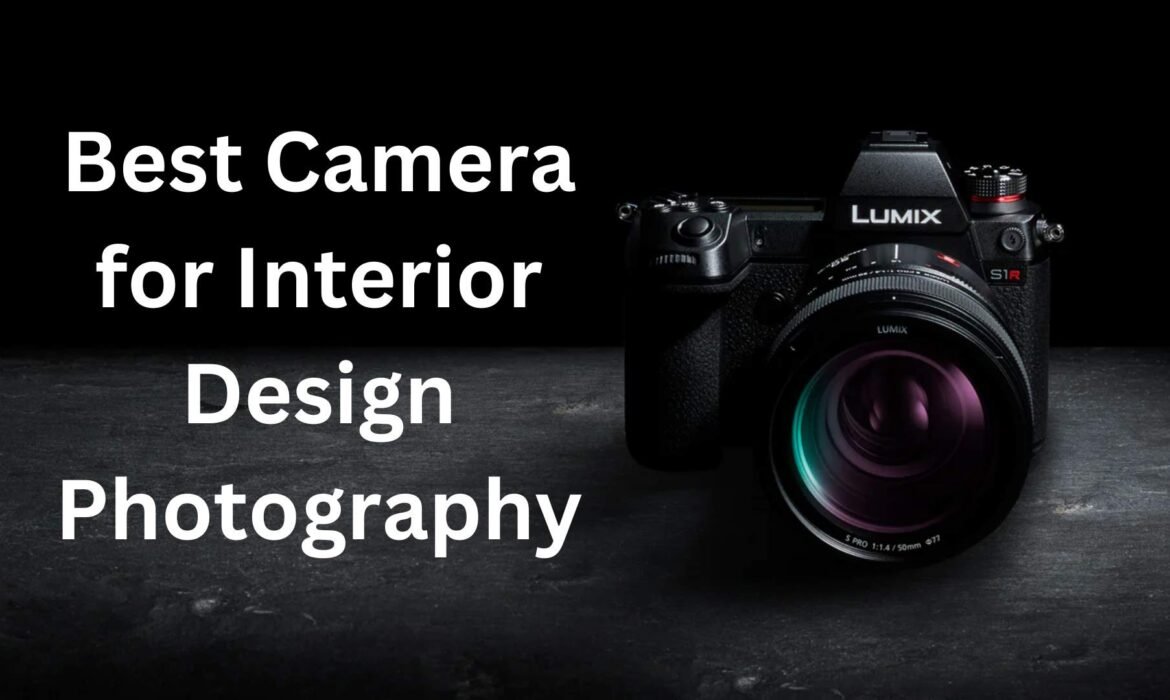
Top 5 Best Cameras for Interior Design Photography: A Complete Guide
When it comes to capturing the beauty and essence of interior spaces, choosing the best camera for interior design photography can make a world of difference. The right camera can highlight the architectural features, textures, and lighting in ways that are simply not possible with lower-quality equipment. This article will guide you through the top 5 cameras for interior design photography...
Magical Winter Maternity Family Photos: Creative Ideas for Your Family Shoot
When it comes to capturing memories, maternity photos are among the most cherished moments in a family’s life. For expecting parents, the joy and excitement of welcoming a new member into the family are often best reflected through a photo session. While maternity photos can be done at any time of the year, winter maternity family photos offer a unique charm. The cold, crisp air, snow-covered...
Stunning Large Family Winter Photo Ideas to Capture Heartwarming Memories
Winter is a magical time of year. Snowflakes drift gently from the sky, and the chilly air brings families together in cozy gatherings. It’s also the perfect season for capturing beautiful family moments that will last a lifetime. For large families, winter offers a unique opportunity to create unforgettable memories, especially with some creative large family winter photo ideas. In this...
10 Creative Winter Family Photo Ideas to Capture the Magic of the Season
Winter is a time of magic, warmth, and wonder. The season brings about a special kind of beauty, with sparkling snow, cozy indoor moments, and the joy of holiday festivities. If you want to capture these precious moments with your family, creative winter family photos are a fantastic way to preserve the magic of the season. Whether it’s a snow-covered landscape, twinkling Christmas lights, or...
Casual Winter Family Photo Outfit Guide: Stay Warm and Look Great
Winter is a magical time of year, especially when it comes to capturing beautiful family moments. Whether you’re taking pictures outdoors in the snow or indoors by a cozy fire, finding the right attire for your family can be a challenge. You want to ensure your outfits are stylish, comfortable, and most importantly, warm. That’s where casual winter family photo outfits come in. These outfits...
Indoor Winter Family Photography: How to Make the Most of Your Space
When winter arrives, it’s easy to think that your opportunities for family photos are limited. The cold weather, snow, and shorter days might make you believe that your photography options are confined to the outdoors. However, indoor winter family photos can be just as magical, capturing the warmth and coziness of your home while showcasing the special bond within your family. In this...
20 Creative Fall and Winter Family Photo Ideas to Treasure Forever
When the crisp air of fall arrives and the winter chill sets in, it’s the perfect time to create beautiful memories with your loved ones. Fall and winter offer unique backdrops and cozy vibes that make for the most stunning family photos. Whether you’re planning a holiday photo shoot, capturing the golden hues of autumn, or embracing the snowy wonderland of winter, there are endless Fall...
Winter Beach Family Photos: Capturing Cozy Moments by the Shore
Winter beach family photos are an excellent way to preserve the warmth of family bonds while enjoying the crisp and serene beauty of the beach during the colder months. While most people associate the beach with warm, sunny weather, winter brings a unique charm to coastal landscapes that can enhance the magic of family portraits. If you’re considering capturing family memories at the beach in...
10 Neutral Winter Family Photo Outfit Ideas for Timeless Memories
Winter is a season that brings a unique charm to family photos, offering an opportunity to capture moments of warmth, togetherness, and joy. One of the best ways to ensure your family photos look timeless and elegant is by choosing the right outfits. Neutral Winter Family Photo Outfits are an excellent choice for creating photos that are both classic and stylish, regardless of trends. These...
Snow, Smiles, and Memories: Perfect Family Photo Ideas for Winter
Winter is a season of wonder. The crisp air, the blanket of snow covering the ground, and the holiday spirit make it one of the most beautiful times of the year. For many families, winter also means the perfect time to capture memories through family photos. Whether you’re celebrating the holidays, enjoying snowy adventures, or simply spending time together, winter provides a stunning backdrop...
10 Creative Winter Family Photo Ideas for a Picture-Perfect Season
Winter is a magical time of year, offering a beautiful backdrop for family photos. The snow-covered landscapes, festive holiday decorations, and cozy atmosphere make it the perfect season to capture memories. If you’re looking for inspiration for your winter family photos, you’ve come to the right place. In this article, we’ll explore 10 creative winter family photo ideas that will help you...
Top 5 Trendy Winter Family Photo Color Schemes for 2025
Winter is a season that offers a beautiful backdrop for family photos. The cold air, the snow-covered landscapes, and the cozy atmosphere create the perfect setting for capturing memories. When planning your winter family photos, one of the most important decisions you’ll make is choosing the right color scheme. The colors you choose for your outfits will set the tone for your photos and help...
From Sweaters to Scarves: How to Dress for Winter Family Photos
Winter is the perfect season for creating beautiful memories with your family. There’s something magical about the crisp air, the sparkling snow, and the cozy vibes of wintertime. Winter family photo outfits play a big role in ensuring your photos look amazing, capturing your family’s warmth against the chilly backdrop. Whether you’re planning a holiday photo shoot or a winter family portrait,...
How to Set Up Product Photography Lighting for E-commerce Success
In the competitive world of e-commerce, visuals are everything. High-quality images can make or break a customer’s decision to purchase a product. Among the many elements that go into creating compelling product images, the product photography lighting setup plays a critical role. Lighting not only highlights the product’s features but also conveys its texture, color, and quality. Let’s dive...
Top 10 Studio Lighting Kits for Beginner Photographers
Starting your photography journey can be an exciting adventure, but understanding the importance of good lighting is crucial. A well-selected studio lighting kit for beginners can transform your photos, elevating them from simple snapshots to professional-quality images. Whether you are photographing portraits, products, or creative setups, having the right tools can make all the difference....
Portable Studio Lighting: A Comprehensive Buyer’s Guide
In the world of photography and videography, lighting is an essential element that can make or break your shot. Whether you’re a professional photographer or a hobbyist, achieving the right lighting is crucial to capturing stunning images. Portable studio lighting is an invaluable tool for those who need flexibility, mobility, and convenience. It allows you to create studio-quality lighting...
How Much Does a Full Body Mannequin Cost? A Detailed Price Breakdown
When shopping for mannequins, one of the most common questions that arise is, “How much does a full body mannequin cost?” Understanding the price of a full body mannequin is important whether you are an entrepreneur looking to display your clothing line, a visual merchandiser trying to create an attractive store display, or an individual simply wanting to showcase your clothing collection. A...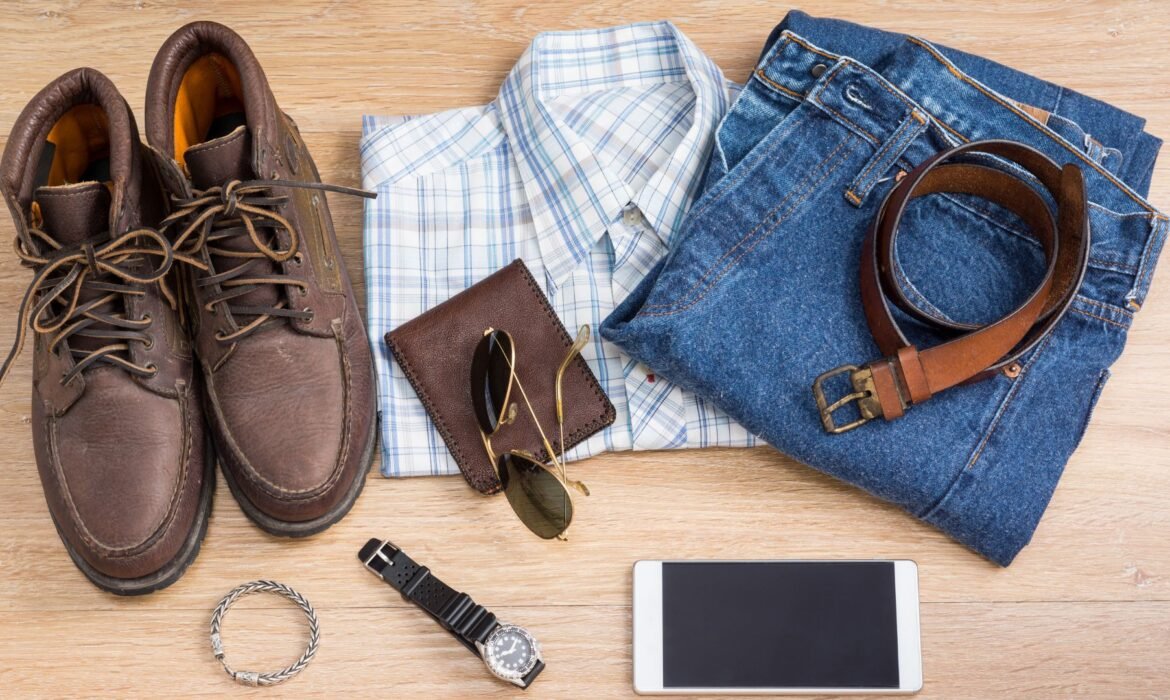
Best Clothes for Professional Headshot: Your Ultimate Style Guide
When it comes to creating the perfect professional headshot, choosing the best clothes for professional headshot plays a vital role in ensuring that you present yourself in the best possible light. A professional headshot is not just about how you look in the image; it also reflects your personality, style, and even your career. Whether you’re updating your LinkedIn profile, building a...
How to Capture the Best LinkedIn Headshot: A Step-by-Step Guide
Your LinkedIn profile picture is often the first thing that potential employers, clients, or professional connections will see when they visit your profile. Having the best LinkedIn headshot can make a significant difference in how you’re perceived in a professional setting. A great LinkedIn headshot gives an impression of professionalism, approachability, and confidence. But how do you choose...
The Ultimate Guide to Ballet Headshots: Capturing Grace and Elegance
Ballet headshots are an essential part of every dancer’s portfolio. These images are not just simple photographs; they are a representation of a dancer’s grace, elegance, and unique artistry. Whether you are an aspiring ballerina auditioning for a dance company or an experienced performer updating your professional portfolio, understanding the nuances of ballet headshots can make all the...
Best Professional Headshot Outfit Ideas: The Ultimate 2025 Guide
A professional headshot is often the first impression you make on potential clients, employers, or colleagues. Whether you’re updating your LinkedIn profile, preparing for a business website, or adding a personal touch to your resume, the outfit you choose for your professional headshot plays a significant role. Selecting the right Professional Headshot Outfit can help convey confidence,...
Male Modeling Headshots: Best Practices for Confidence and Style
Male modeling headshots are essential for anyone aspiring to build a successful career in the modeling industry. These images serve as your first impression, showcasing your unique look, personality, and versatility. Whether you’re preparing your portfolio or applying for casting calls, your headshots can make or break your chances of standing out in a competitive market. Achieving the perfect...
Professional Business Headshots for Women: What to Wear and How to Pose
In the professional world, a high-quality business headshot can make a lasting impression. For women, it’s an essential tool for personal branding, whether it’s for LinkedIn, company websites, resumes, or any other professional platform. A great business headshot showcases your confidence, personality, and professionalism. But getting the perfect business headshot involves more than just...
20 Modern Corporate Group Photoshoot Ideas for Stunning Team Pictures
Corporate group photo shoots have become an essential part of building a company’s brand identity, boosting morale, and creating a unified and professional image for businesses. Whether you’re looking to update your company’s website, enhance your social media presence, or just document your team’s success, a corporate group photoshoot is a fantastic way to capture your team’s spirit and...
What to Wear and How to Prepare for Your Photoshoot for Acting
When preparing for a photoshoot for acting, every detail matters. Your photoshoot for acting is one of the most important tools in your career as an actor or actress. It’s a way for agents, casting directors, and other industry professionals to see your potential and the range you can offer. The photos you create during this session will speak volumes about you, which is why preparing and...
Top Corporate Photoshoot Ideas to Boost Your Brand Identity
In today’s competitive business world, a strong brand identity is crucial for success. One of the most powerful tools to elevate your brand’s presence is through visual content, particularly corporate photoshoots. A well-executed corporate photoshoot can reflect your company’s values, mission, and professionalism, helping you make a lasting impression on clients, customers, and employees....
Commercial Headshots 101: Everything You Need to Know
In the modern business world, a commercial headshot is a powerful tool for creating a professional image. Whether you’re a business owner, a corporate executive, or someone looking to build your personal brand, a commercial headshot plays a key role in how others perceive you. In this comprehensive guide, we’ll explore everything you need to know about commercial headshots, from what they are...
Top 15 Creative Headshot Ideas to Showcase Your Unique Style
Headshots are often the first impression others have of you, whether they’re for your professional portfolio, social media profile, or personal brand. However, traditional headshots can sometimes feel too stiff or standard. If you want to stand out and convey a bit more of your unique personality, creative headshots are the way to go. These photos go beyond the basics and add an artistic flair...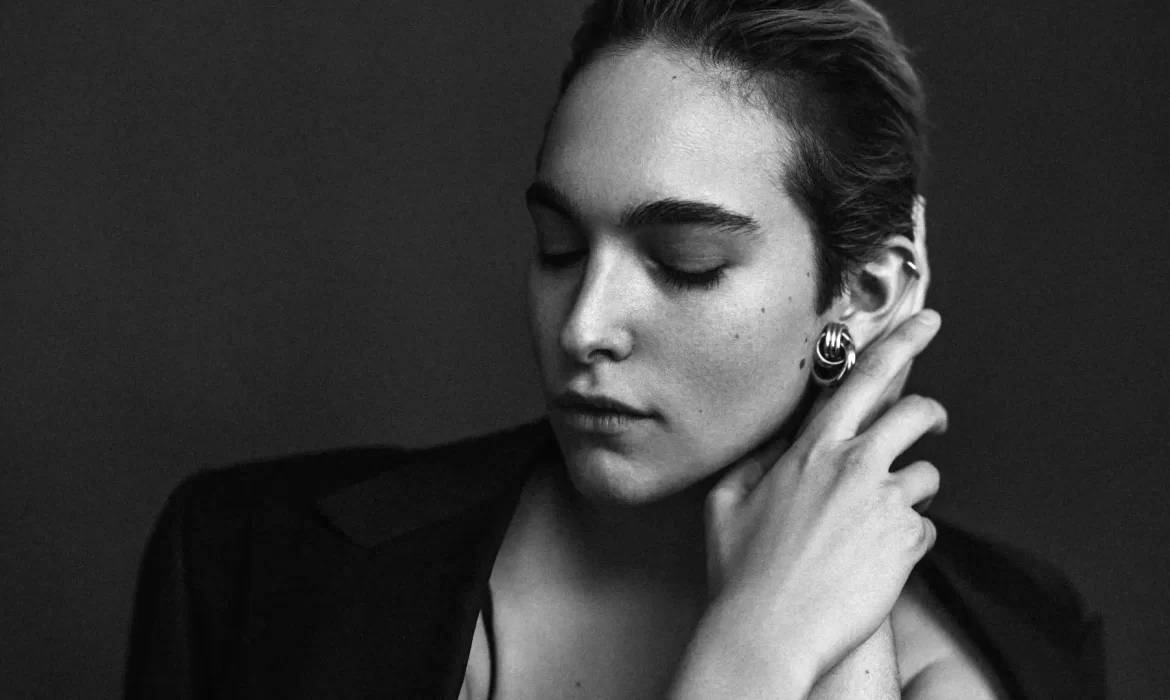
Mastering Black and White Headshots: A Guide to Timeless Portraits
Black and white headshots are a powerful way to capture the essence of a person in a timeless and elegant manner. While color photography may grab attention, black and white headshots have a unique ability to convey emotion, depth, and sophistication. These portraits have stood the test of time, remaining relevant in various fields such as business, acting, and personal branding. Whether you...
The Ultimate Guide to Actor Headshots: Tips, Poses, and More
Actor headshots are essential in an actor’s career. They are one of the first things casting directors see when considering someone for a role. A strong headshot can make all the difference between getting an audition or being passed over. But how do you take the perfect actor headshot? What do you need to keep in mind when posing? This ultimate guide will walk you through everything you need...
Corporate Video Editing: Polishing Business Presentations for Impact
In the fast-paced digital landscape, the significance of corporate video editing cannot be overstated. As businesses strive to make a lasting impression, leveraging the power of well-crafted visual content is paramount. In this comprehensive guide, we delve into the intricacies of corporate video editing, providing insights and tips to enhance your business presentations for maximum impact....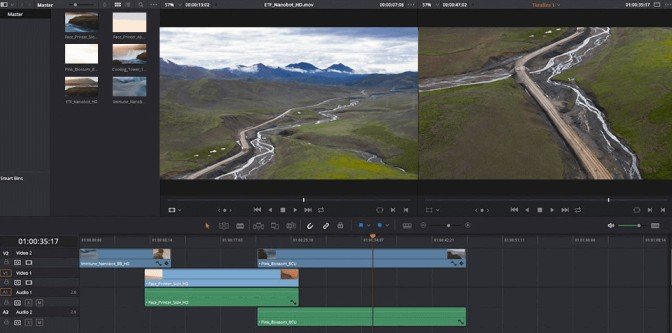
Drone Video Editing: Elevating Aerial Footage to New Heights
In the realm of visual storytelling, drone videography has revolutionized the way we capture breathtaking moments from unique perspectives. With the surge in popularity of aerial footage, mastering the art of drone video editing has become essential for photographers and videographers alike. In this comprehensive guide, we will explore the intricacies of drone video editing, from landscape...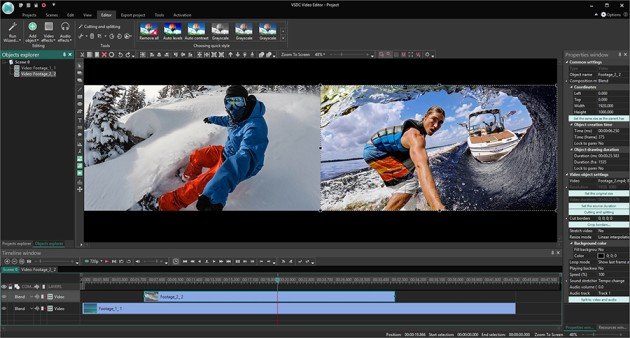
GoPro Video Editing: Transforming Adventure Footage into Stories
In the age of adventure and exploration, GoPro cameras have become synonymous with capturing breathtaking moments in the great outdoors. From mountain peaks to deep-sea dives, GoPro footage allows enthusiasts to relive and share their adventures. However, the true magic lies in the editing process, where raw clips are transformed into compelling stories. In this comprehensive guide, we’ll...
Craft Personal Videos: Home Video Editing Tips | Pro Touch
In an age dominated by visual storytelling and social media, the ability to craft compelling personal videos has become a valuable skill. Home video editing allows individuals to transform their raw footage into polished, engaging content with a professional touch. Whether you’re documenting family moments, creating vlogs, or showcasing your creative endeavors, understanding the fundamentals...
Product Video Editing: Highlighting Features through Engaging Visuals
In the fast-evolving digital landscape, product video editing has become an indispensable tool for businesses aiming to captivate their audience. With the surge in online marketing, a visually appealing product video can make all the difference in showcasing features and enhancing brand identity. In this comprehensive guide, we delve into the art of product video editing, unraveling tips,...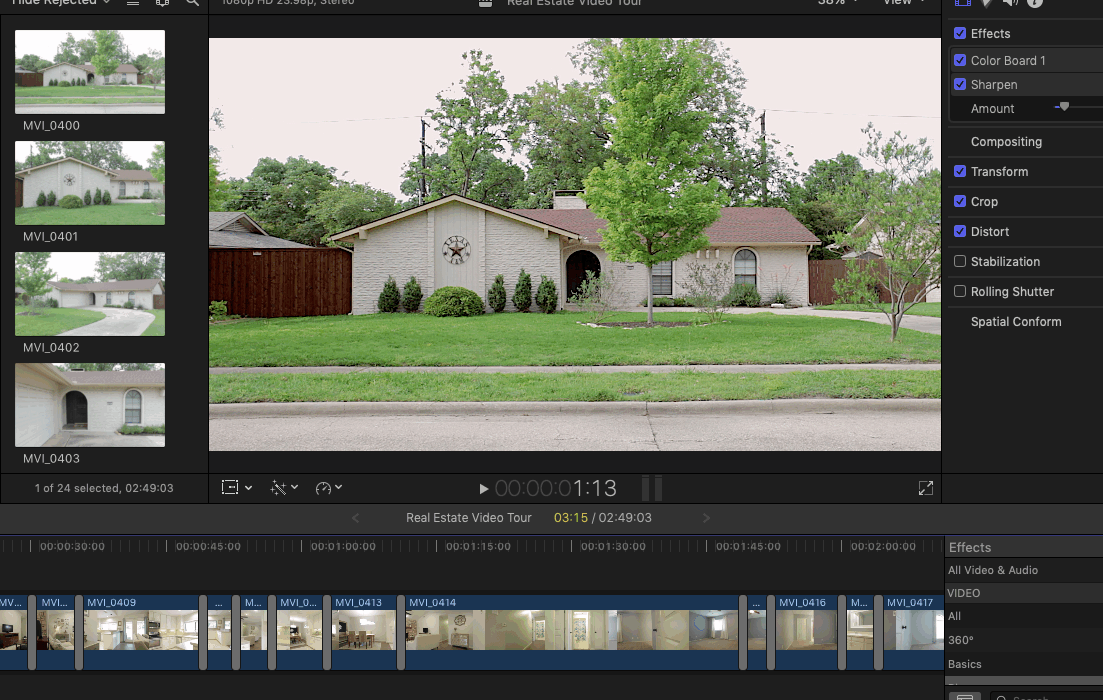
Real Estate Video Editing: Showcasing Properties in Cinematic Brilliance
In the dynamic world of real estate, where first impressions matter the most, the art of showcasing properties has evolved with the advent of technology. One powerful tool that has taken the industry by storm is real estate video editing. In this comprehensive guide, we will explore the intricacies of this art form, providing valuable insights and tips to elevate your property presentations to...
Unlock Your Creativity: Video Editing Freebies for Stunning Productions
In the ever-evolving landscape of video content creation, the right tools can make a significant difference in the quality and appeal of your productions. Fortunately, there is a plethora of free resources available that can take your video editing skills to the next level. This comprehensive guide explores the world of video editing freebies, providing insights into how you can enhance your...
Master Video Editing: Essential Steps for Beginners
In the dynamic world of digital content creation, video post-production stands as the final and transformative stage where raw footage evolves into a polished and captivating narrative. Professional editing is the key to crafting seamless stories that resonate with audiences and leave a lasting impact. In this comprehensive guide, we’ll explore the intricacies of video post-production,...
Virtual Renovation Ideas to Transform Your Home
In an era dominated by technological advancements, the marriage of creativity and digital innovation has given rise to virtual renovation—an exciting frontier that allows us to reimagine spaces through digital redesign. This revolutionary approach goes beyond traditional renovations, offering a glimpse into the potential of a digitally enhanced world. From interior spaces to expansive...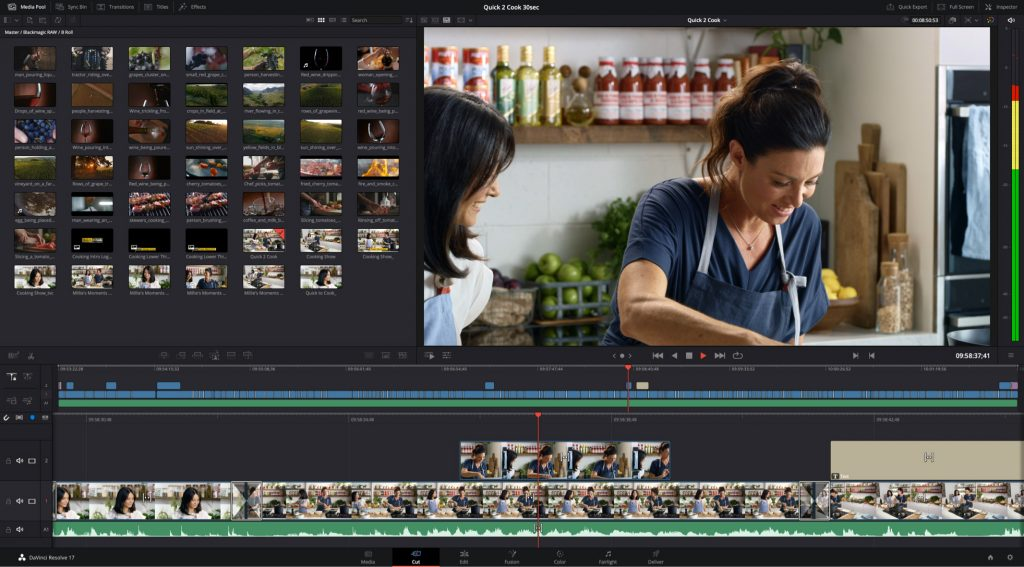
Master YouTube Branding: Your Ultimate Guide
In the expansive realm of online content creation, vlogging has emerged as a powerful medium for self-expression and storytelling. As a vlogger, creating a strong visual identity for your channel is crucial to captivate your audience and leave a lasting impression. One key aspect of this visual identity is video editing, which plays a pivotal role in enhancing the overall quality and appeal of...
Wedding Video Editing Services: Reliving the Moments in Cinematic Glory
In the vast realm of wedding videography, the art of capturing and editing precious moments holds unparalleled significance. Beyond mere documentation, it involves transforming raw footage into a cinematic masterpiece that immortalizes the emotions, joy, and love shared on that unique day. Professional wedding video editing services play a pivotal role in ensuring that every frame tells a...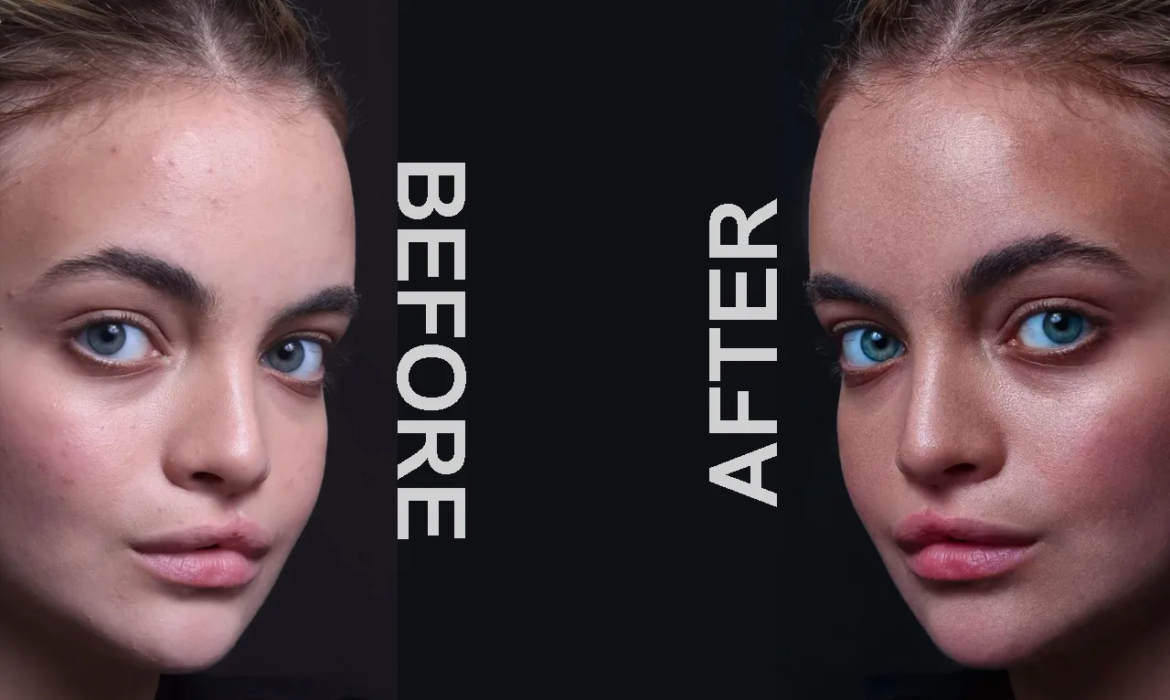
10-Minute Ultra-Fast Retouching Turnaround: Scaling Efficiency in Image Editing
In the fast-paced world of digital content creation, efficiency is the key to success. Whether you are a professional photographer, graphic designer, or content creator, the ability to deliver high-quality images quickly is crucial. In this article, we explore the concept of a 10-minute ultra-fast retouching turnaround and how it can revolutionize the way we approach image editing, allowing...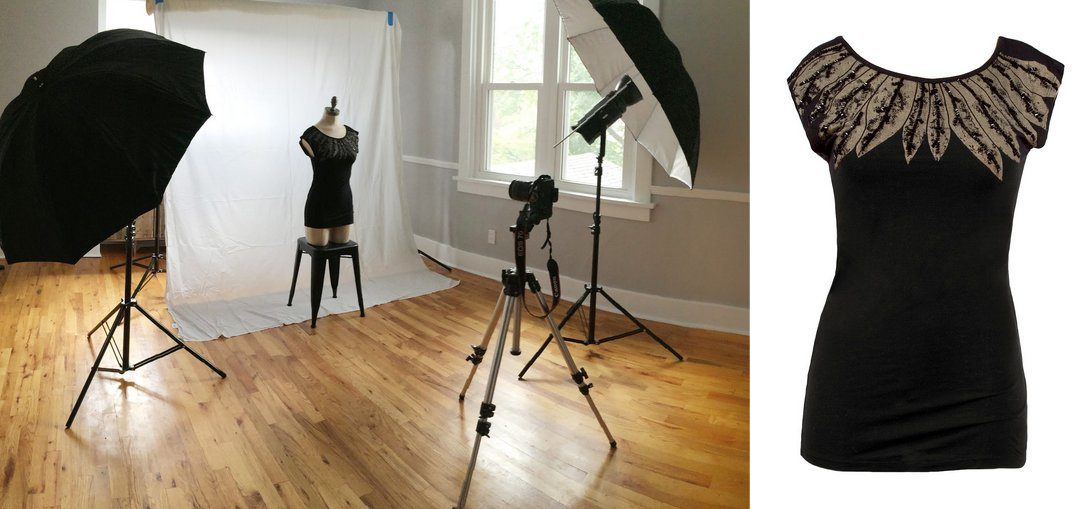
Lighting Setups for Apparel: Making Your Photos Shine
In the world of e-commerce and visual storytelling, high-quality product photography is essential, especially when it comes to showcasing apparel. The right lighting can make all the difference, elevating your images and capturing the essence of your clothing line. In this guide, we’ll explore three versatile lighting setups tailored to enhance the appeal of your apparel, making your photos...
7 Easy Steps to Create Professional Apparel Product Photos with Live Models
Capturing professional product photos with live models adds a dynamic and relatable touch to your apparel marketing. Whether you’re running an e-commerce store or promoting your clothing line on social media, showcasing your products on models can significantly enhance their appeal. In this guide, we’ll walk you through seven easy steps to create stunning and professional apparel product...
7 Steps to Optimize Your Product Images and Boost Visibility on Google Shopping
In the highly competitive landscape of e-commerce, optimizing your product images is crucial for standing out and attracting potential customers. Google Shopping, with its visually oriented platform, places a premium on high-quality images. Here are seven steps to help you optimize your product images and improve your visibility on Google Shopping. 1. High-Quality Images are...
Academy Quality: Achieving Consistency and Rapid Onboarding with Cloudretouch
In the ever-evolving landscape of digital content creation, maintaining high-quality visuals is paramount. Whether you are a professional photographer, e-commerce entrepreneur, or part of a creative team, achieving consistency in image quality and ensuring a swift onboarding process for new team members are essential factors. Cloudretouch emerges as a solution that not only upholds...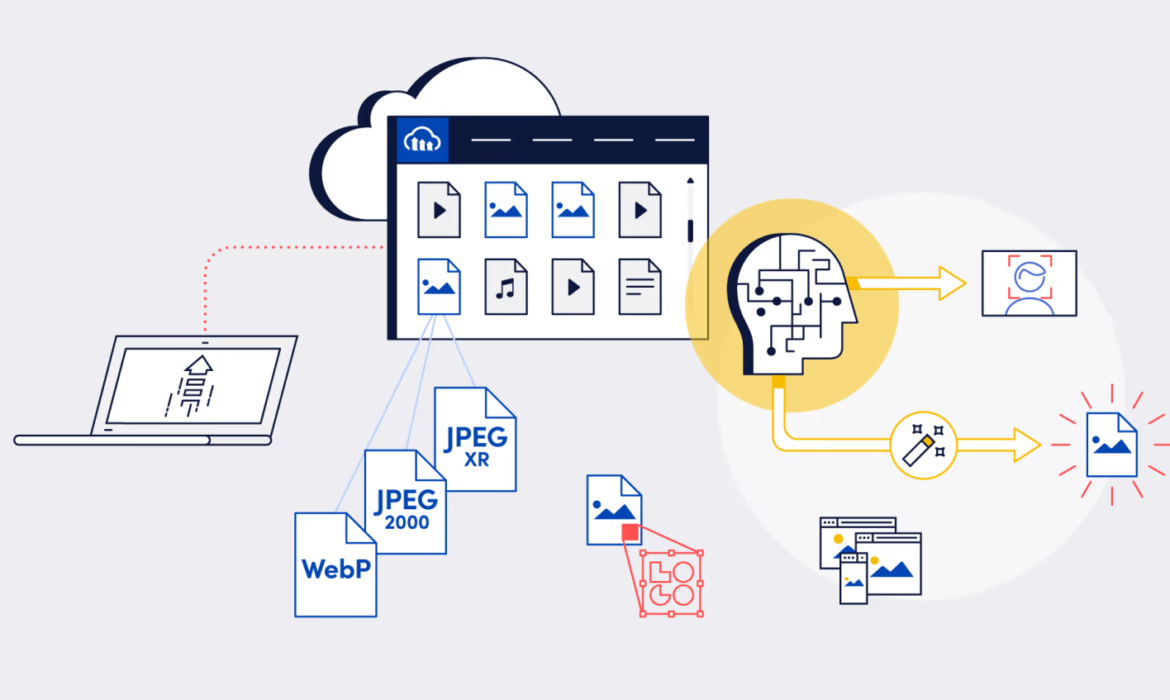
AI Algorithms and Automations: Transforming Image Editing Workflow
In the fast-paced world of image editing, the integration of artificial intelligence (AI) algorithms and automation tools has brought about a revolutionary shift in how professionals approach their workflows. This transformative combination is not only streamlining processes but also enhancing the overall efficiency and creativity of image editing tasks. In this exploration, we delve into how...
AI Automate Product Image Retouching: Streamlining Processes for Efficiency
In the fast-paced world of e-commerce, visual appeal plays a crucial role in attracting customers and driving sales. High-quality product images can significantly impact a customer’s perception of a product, influencing their purchasing decisions. However, the process of retouching and enhancing product images can be time-consuming and resource-intensive. This is where the power of artificial...
AI Automate Retouching: Enhancing Speed, Consistency, and Quality
In the dynamic world of digital imagery, the need for high-quality visuals is paramount, especially in industries like e-commerce where product presentation is a critical factor influencing consumer decisions. As businesses strive to create visually compelling content, the process of image retouching has traditionally posed challenges in terms of time, consistency, and quality. However, with...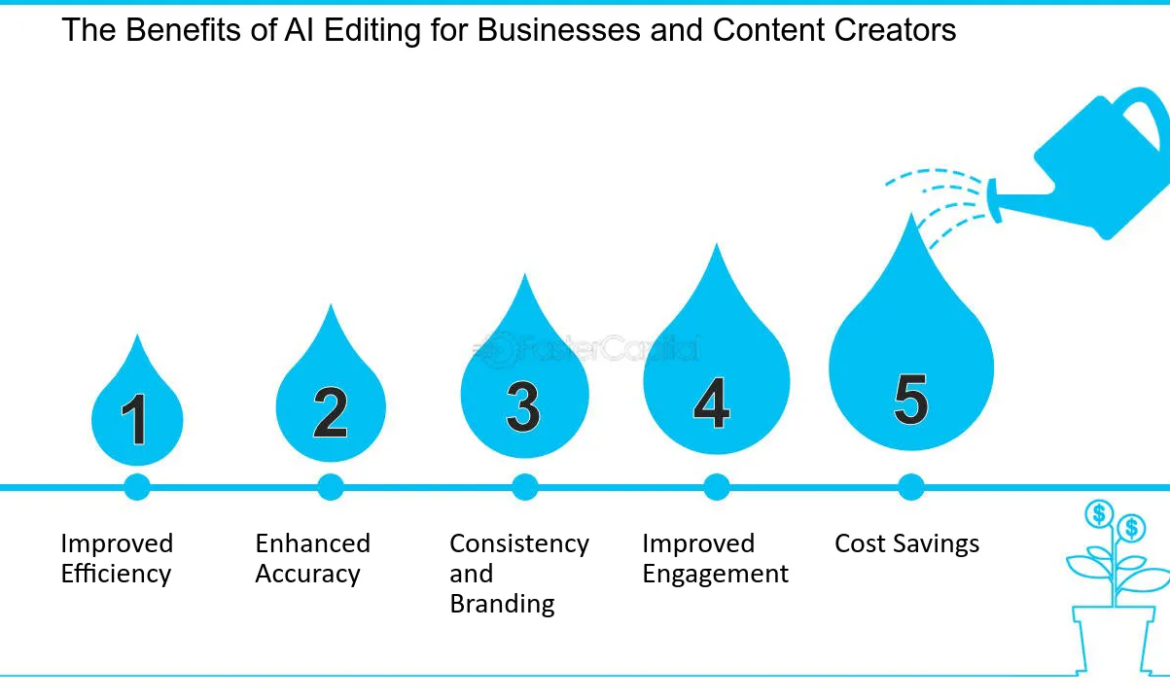
AI Consistency: Quality and Faster Delivery in Image Editing
In the realm of image editing, achieving a delicate balance between speed and quality has always been a challenge. Businesses, particularly those in e-commerce and digital marketing, constantly seek ways to enhance their visual content efficiently without compromising on the overall quality. The advent of artificial intelligence (AI) has brought about a paradigm shift in image editing,...
AI Automate Product Image Retouching: Streamlining Processes for Efficiency
In the fast-paced world of e-commerce, visual appeal plays a crucial role in attracting customers and driving sales. High-quality product images can significantly impact a customer’s perception of a product, influencing their purchasing decisions. However, the process of retouching and enhancing product images can be time-consuming and resource-intensive. This is where the power of artificial...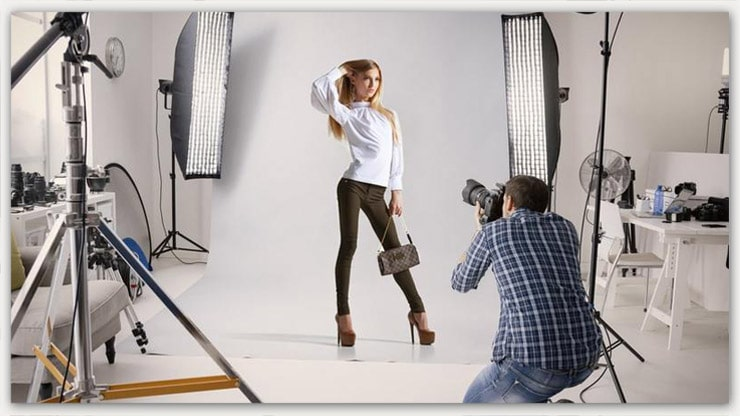
Align Your Apparel Product Images: Tips for Visual Harmony
In the competitive world of e-commerce, the visual presentation of your apparel products plays a pivotal role in capturing the attention of potential customers. Achieving visual harmony in your product images is crucial for creating a polished and professional online store. One key element in enhancing the overall visual appeal is proper alignment. In this article, we’ll explore tips and...
Be Ready for Rakuten in a Few Quick Clicks: Optimizing Your Presence
As the e-commerce landscape continues to expand, platforms like Rakuten offer businesses unique opportunities to reach a global audience. However, merely having a presence on Rakuten isn’t enough—optimizing your store is essential to stand out in the crowded online marketplace. In this article, we’ll explore quick and effective strategies to ensure you’re ready for Rakuten, maximizing your...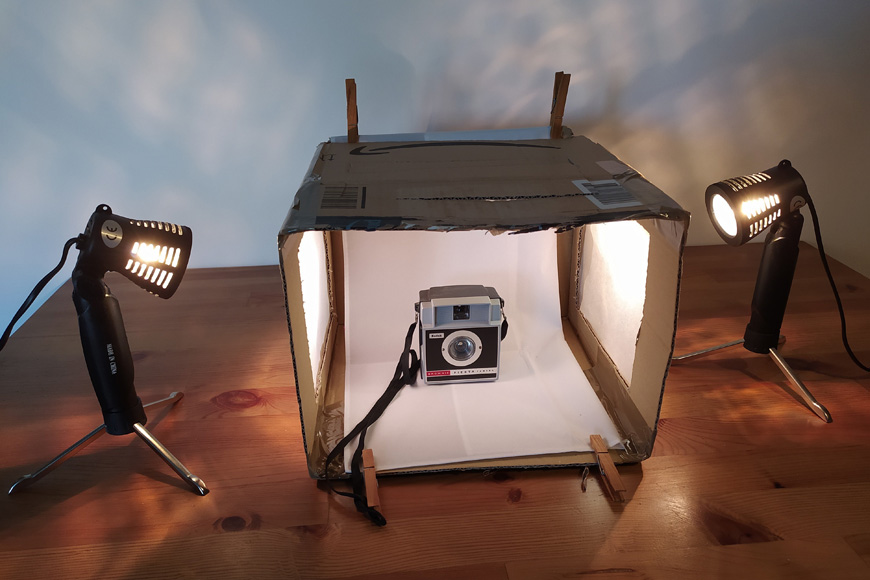
Beautiful Light: Creating and Using a Soft Lightbox for Photography
In the world of photography, achieving beautiful and soft lighting is often the key to capturing stunning images. A soft lightbox is a versatile tool that can significantly enhance the quality of your photographs by providing even, diffused lighting. In this article, we’ll explore the process of creating a soft lightbox and share tips on how to effectively use it for various photography...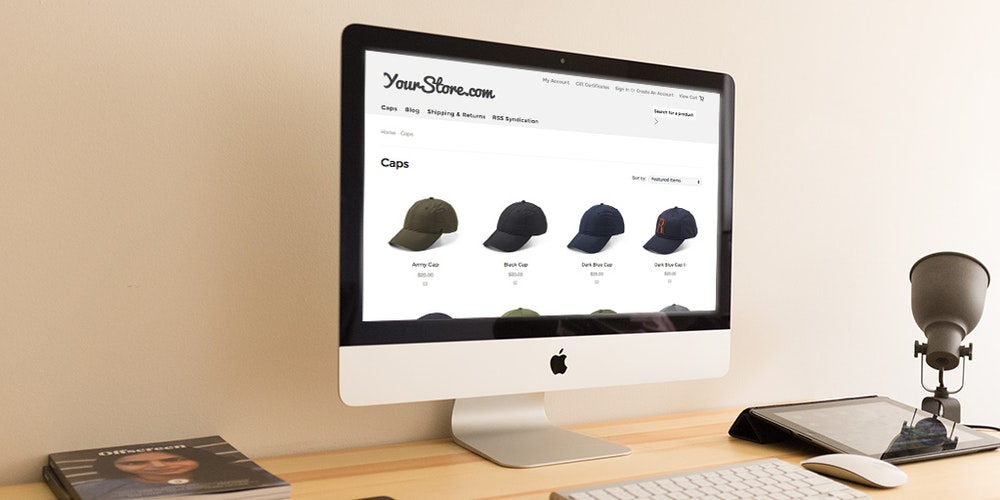
3 Steps to Save Time and Money on Product Image Editing for BigCommerce
For online retailers using BigCommerce, the importance of visually appealing product images cannot be overstated. However, the process of editing and optimizing these images can be time-consuming and costly. In this article, we’ll explore three steps to streamline and economize your product image editing workflow on BigCommerce, helping you save valuable time and resources. 1. Integrate...
Create a Captivating GIF: 8 Simple Steps for Product Images
In the dynamic world of digital marketing, capturing attention quickly is paramount. A captivating GIF can be a powerful tool to showcase your product in an engaging and dynamic way. In this article, we’ll guide you through eight simple steps to create an eye-catching GIF using your product images. Step 1: Select Your Product Images Start by choosing a set of high-quality images that...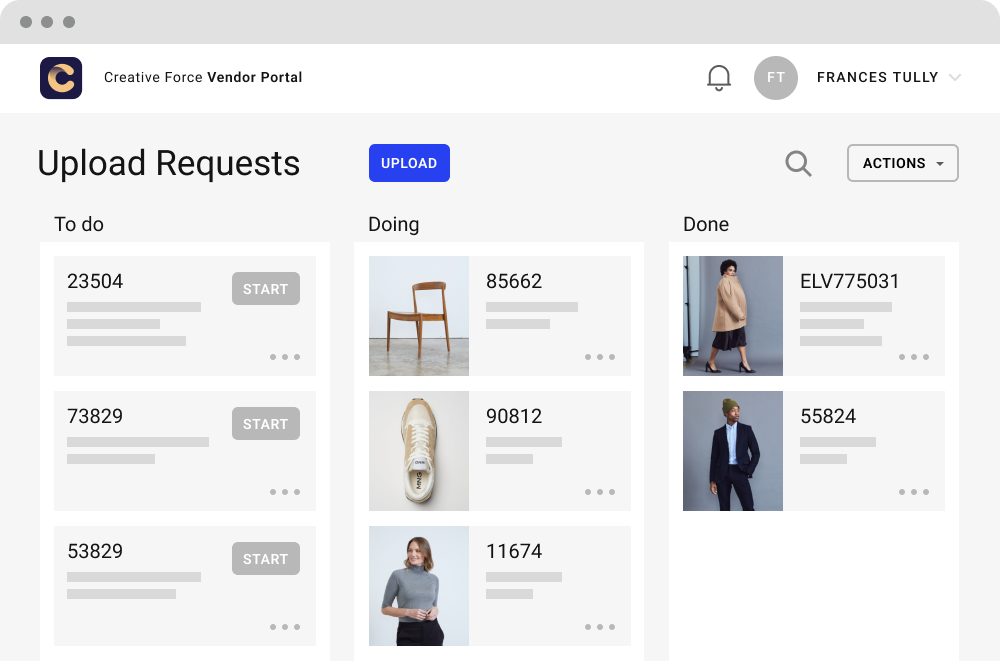
Streamlining Studio Management: Creative Force Software Overview
In the dynamic world of creative industries, efficient studio management is crucial for success. As technology continues to advance, businesses are turning to innovative solutions to streamline their operations. One such solution gaining prominence is Creative Force Software. In this article, we will provide a comprehensive overview of Creative Force Software, exploring its features, benefits,...
Efficient Creative Operations: The Impact of Background Removal Services
In the ever-evolving landscape of creative industries, efficiency is paramount. Creative professionals, whether in photography, e-commerce, or graphic design, constantly seek ways to streamline their operations and enhance productivity. One such impactful solution that has gained prominence is background removal services. In this article, we will delve into the significance of background...
CSR in Post-Production: A Deep Dive into DDD Outsourcing
In a world increasingly aware of social and environmental issues, the post-production industry is undergoing a transformation towards corporate social responsibility (CSR). This article explores the intricate relationship between CSR and DDD (Design, Development, and Deployment) outsourcing, delving into the practices that foster sustainability and ethical conduct. Introduction CSR in...
Data Science in Creative Operations: Boosting Efficiency and Quality
In the realm of creative operations, the integration of data science has emerged as a game-changer, bringing about a paradigm shift in how creative professionals manage their workflows. Data science, with its analytical and predictive capabilities, is revolutionizing the creative process, leading to enhanced efficiency and improved quality in various aspects of creative operations. In this...
Beautiful Light for Beautiful Shots: Using a Soft Lightbox
Photography is an art that relies heavily on lighting. Whether you’re a professional photographer or an amateur looking to enhance your shots, the right lighting can make all the difference. In this guide, we’ll explore the benefits of using a soft lightbox to achieve beautiful, well-lit photographs. 1. Understanding the Soft Lightbox A soft lightbox is a tool designed to create soft and...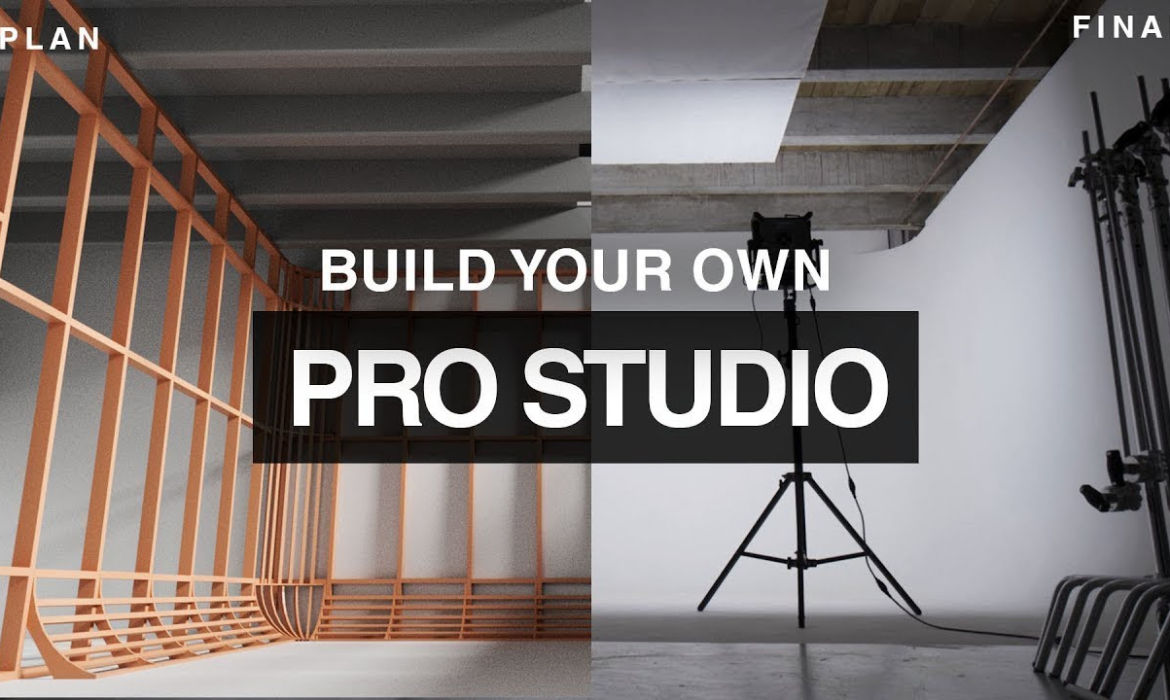
DIY Photo Studio on a Budget: Building with Mini Budget
Building your own photo studio doesn’t have to break the bank. In fact, with a bit of creativity and resourcefulness, you can create a stunning DIY photo studio on a shoestring budget. From crafting your own backdrops to finding affordable lighting solutions, this guide will take you through the steps of building a budget-friendly photo studio that doesn’t compromise on quality....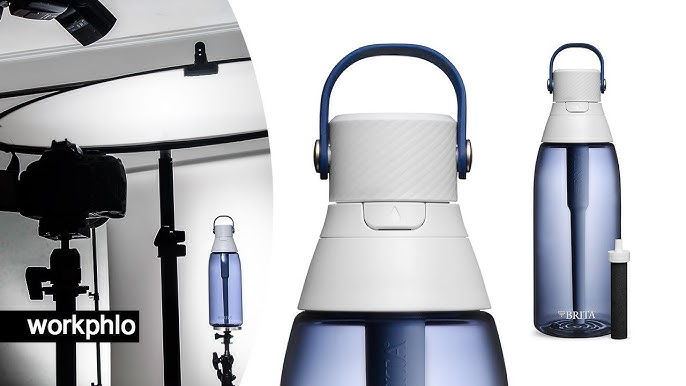
DIY Product Image Editing: 3 Essential Steps
In the world of e-commerce and digital marketing, the importance of high-quality product images cannot be overstated. An appealing and professionally edited product image can significantly impact a customer’s decision-making process. However, hiring a professional photo editor for every product may not always be feasible, especially for small businesses or individual sellers. That’s where DIY...
Guide to In-Home Lifestyle Newborn Photography
Welcoming a newborn into your life is one of the most beautiful and memorable experiences. As a parent, capturing those first precious moments in a natural and relaxed way is a priority. That’s where in-home lifestyle newborn photography comes into play. This type of photography has gained massive popularity over the years because it provides a real, authentic look into your family’s everyday...
How to Use Beds in Newborn Photography
Newborn photography is one of the most delicate and beautiful forms of photography. Capturing the innocence and beauty of a baby in their first few weeks of life is both a joy and a challenge. Among the many props used in this genre, beds are a standout favorite for many professional photographers. Newborn bed photography creates a cozy and peaceful setting that enhances the natural charm of a...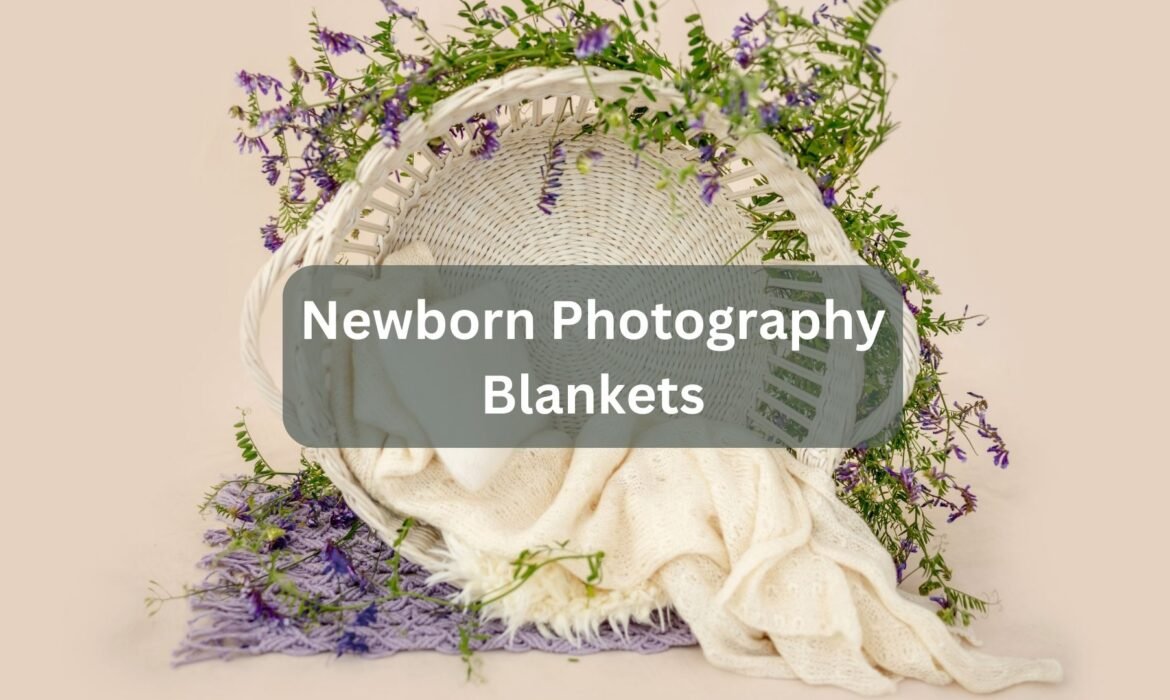
Best Blankets for Newborn Photography
Newborn photography is one of the most heartwarming genres in the photography world. Those first few days of a baby’s life are filled with precious expressions, tiny fingers, and moments that pass far too quickly. Capturing these memories through professional photos is a cherished tradition for many families. But while a skilled photographer and a peaceful baby are key components, the...
Dad and Newborn Photography: Heartwarming Ideas
The bond between a father and his newborn child is one of the most touching and powerful connections in the world. Capturing that bond through dad and newborn photography has become a cherished way to preserve those early moments. Whether it’s the soft touch of a father’s hand cradling his baby or the gentle look in his eyes, these photos hold deep emotional value for families. In this...
10 Creative Lifestyle Photography Ideas to Inspire Your Next Shoot
Lifestyle photography is an art form that captures the essence of life, focusing on real moments, real people, and natural beauty. If you’re a photographer looking for some fresh inspiration, you’re in the right place. In this article, we will explore 10 creative lifestyle photography ideas to help you elevate your next shoot and capture stunning, meaningful moments. Whether you’re...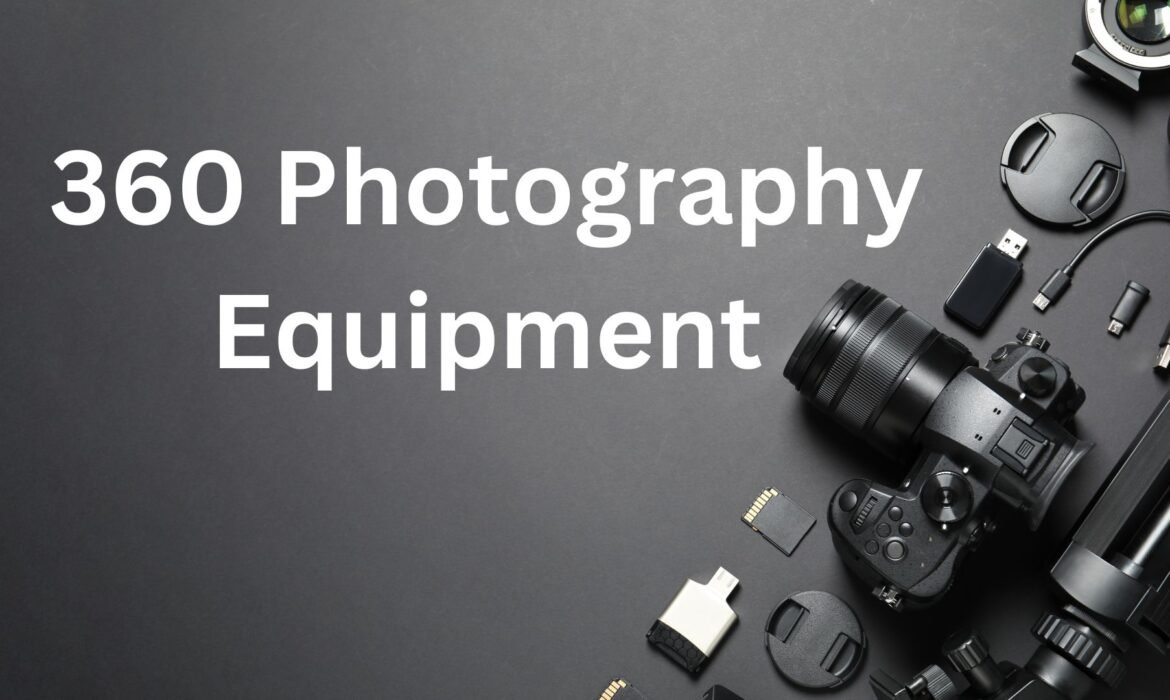
A Comprehensive Guide to Choosing the Best 360 Photography Equipment
360 photography is an exciting way to capture and share immersive, panoramic images and videos. Whether you’re a professional photographer or an enthusiast looking to dive into this innovative field, selecting the right 360 photography equipment is crucial. The equipment you choose will directly impact the quality of your photos and videos, as well as the ease of use, budget, and your overall...
Mastering Lifestyle Product Photography: A Comprehensive Guide for 2025
In the ever-evolving world of e-commerce and digital marketing, lifestyle product photography is emerging as one of the most essential tools to grab customers’ attention. Lifestyle images breathe life into products, showing them in real-life scenarios that resonate with the audience. Whether you’re a professional photographer, an online seller, or simply someone looking to upgrade their...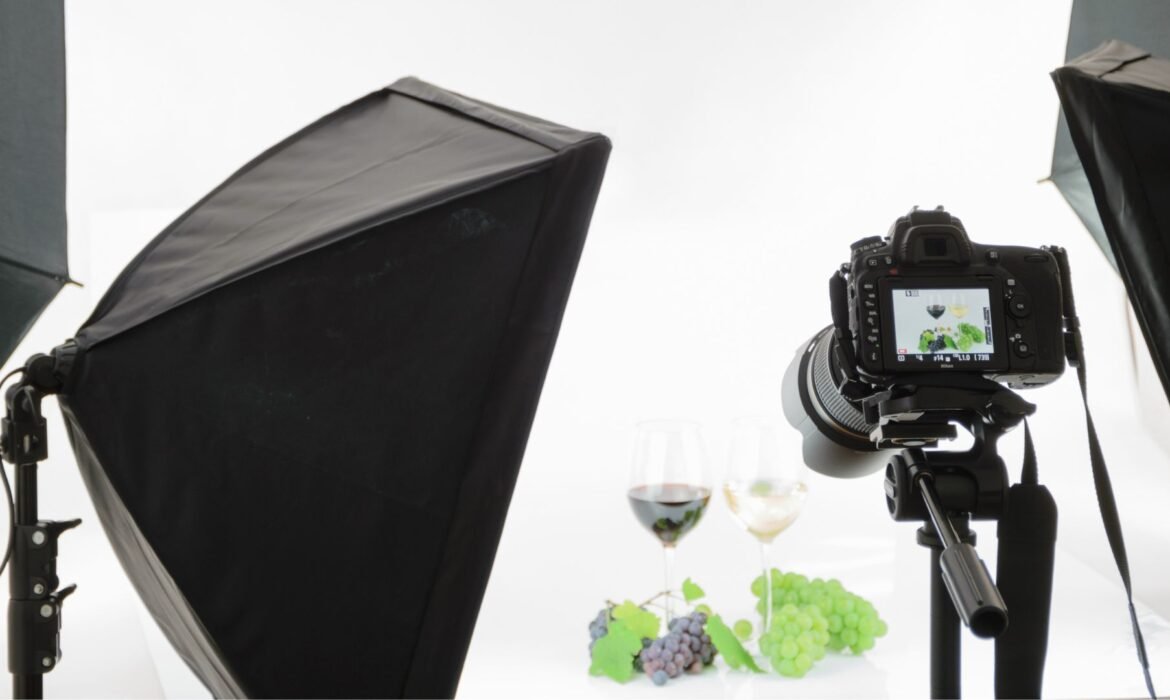
The Ultimate Guide to 3d Degree Product Photography
In the world of e-commerce, visual content plays a pivotal role in how products are perceived and sold. Among the various types of product photography, 3D product photography has gained significant traction due to its ability to showcase products from all angles, offering a virtual “hands-on” experience for customers. If you’re looking to enhance your online store or product listings,...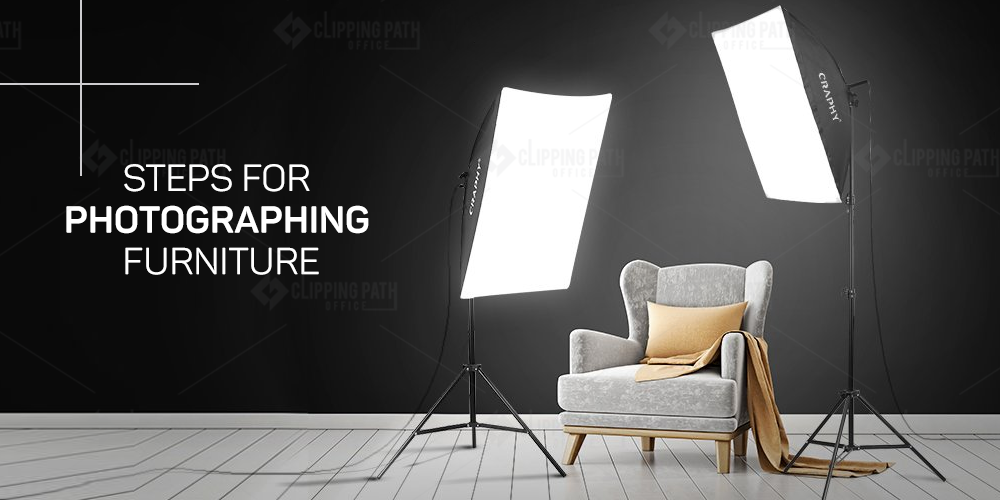
7 Steps to Optimizing DIY Furniture Product Photography
In the competitive world of online retail, captivating product photography is essential for showcasing DIY furniture and attracting potential customers. Whether you’re a small business owner or a passionate DIY enthusiast, these seven steps will guide you in optimizing your furniture product photography to create compelling and professional visuals. 1. Plan Your Setting and Style...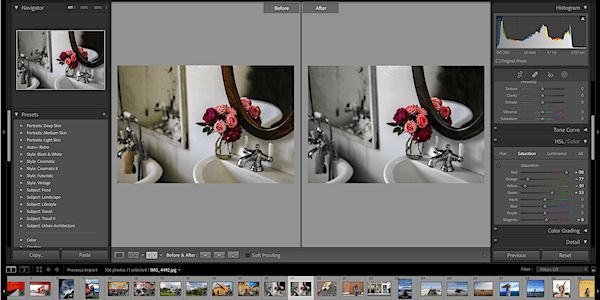
Adobe Lightroom for Product Photography: Unleashing Editing Potential
In the realm of product photography, capturing visually appealing images is just the first step. To truly make your products stand out and leave a lasting impression, effective post-processing is essential. Adobe Lightroom emerges as a powerhouse tool, offering a myriad of features that can elevate your product photography to new heights. In this exploration, we delve into the capabilities of...
Mastering Product Photography: A Guide to Men’s Necktie Shots
In the world of e-commerce, compelling product photography is a key factor in attracting customers and driving sales. When it comes to men’s neckties, showcasing the details, colors, and textures is essential for making a lasting impression. In this guide, we’ll walk you through the essential steps to master product photography for men’s neckties, ensuring your images are visually captivating...
Optimizing DIY Furniture Photography in 13 Simple Steps
Furniture DIY projects can be immensely rewarding, but showcasing your creations through captivating photography is equally important. Whether you’re a hobbyist or looking to sell your handmade furniture, optimizing your photography can significantly enhance your presentation. In this guide, we’ll explore 13 simple steps to elevate your DIY furniture photography game. 1. Set the Scene:...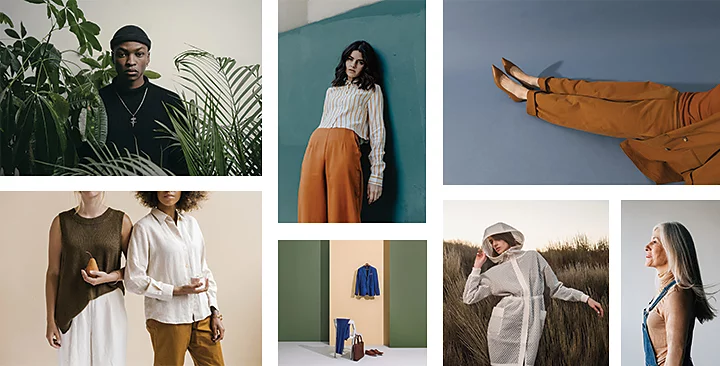
Fashion Photography: Essential Tips for Clothing Shots
Fashion photography is a dynamic and expressive form of art that goes beyond merely capturing clothing; it’s about conveying a story, evoking emotions, and showcasing the essence of style. Whether you’re an aspiring fashion photographer or looking to enhance your clothing shots, mastering these essential tips will take your fashion photography to the next level. 1. Understand the Brand and...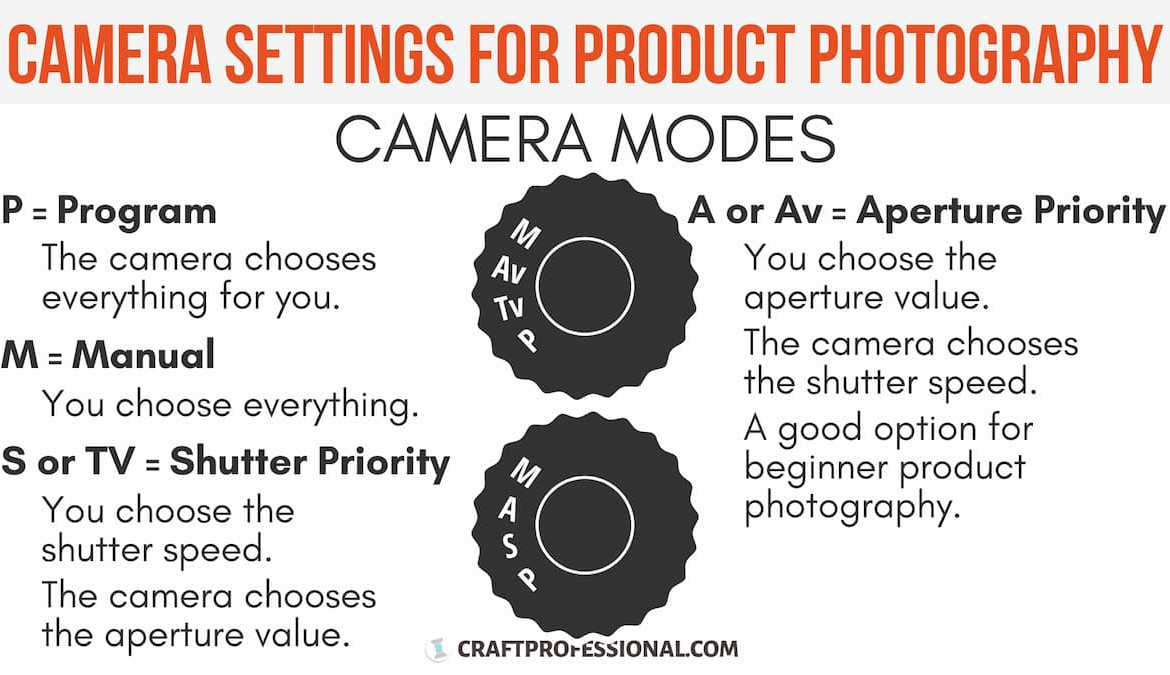
Choosing the Right ISO for Product Photography
In the dynamic world of product photography, one crucial element often overlooked is the ISO setting. ISO, or International Organization for Standardization, plays a pivotal role in determining the quality of your product images. Understanding how to choose the right ISO for product photography is essential for achieving optimal results. I. Introduction A. Importance of ISO in Product...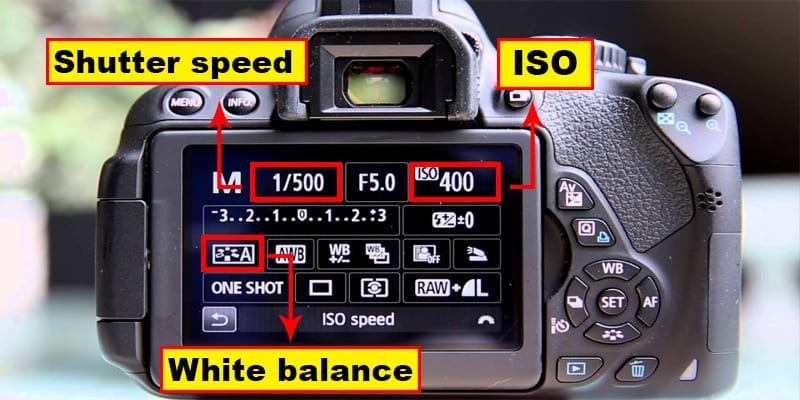
Understanding Aperture Settings for Product Photography
In the fast-paced world of e-commerce and visual marketing, capturing the essence of a product through compelling images is crucial. One fundamental aspect that significantly influences the outcome of product photography is the aperture setting of your camera lens. Introduction In the realm of product photography, where every detail matters, understanding and mastering aperture settings...
Common Mistakes in Product Photography and How to Avoid Them
In the competitive world of e-commerce, captivating product photography is a non-negotiable element for attracting customers. However, even with the best intentions, many sellers fall prey to common mistakes that can adversely affect the visual appeal of their products. In this guide, we’ll explore these pitfalls and provide insights on how to avoid them, ensuring your product images shine and...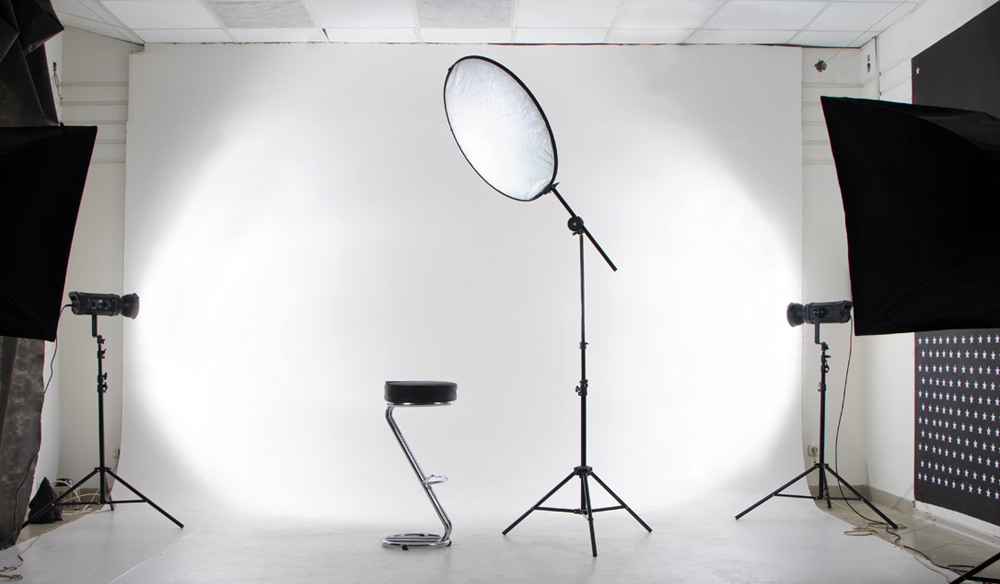
High Key Photography: Showcasing White Products on White Backgrounds
In the world of product photography, creating a clean and sophisticated look for white products against a white background is an art form in itself. High key photography, particularly when applied to showcase white products, offers a timeless and elegant aesthetic. In this guide, we’ll explore the techniques and considerations involved in high key photography, providing insights on how to best...
Top 10 Best Photographers in San Jose
San Jose, a city brimming with life and diversity, is a canvas for photographers who specialize in capturing the beauty of the everyday. We present to you the crème de la crème, the top 10 best photographers in San Jose, who have transformed moments into timeless pieces of art. From wedding celebrations to intimate portraits and sweeping landscapes, these photographers are at the pinnacle of...
Top 10 Best Photographers in Los Angeles
Discover the Top 10 Best Photographers in Los Angeles who excel in capturing moments with their creative and artistic approach. From dazzling celebrity portraits to breathtaking landscapes, these photographers are experts in their field, turning dreams into captivating images. The dynamic energy of Los Angeles is reflected in the work of these photographers, who have a remarkable ability to...
The Top 10 Best Photographers in New York
New York City, the city that never sleeps, isn’t just a busy place; it’s a thriving hub for talented artists. Among these artists, photographers have a special role. With so many great photographers capturing the heart of the Big City, it can be tough to find the very best. But don’t worry, we’ve put together a list of the top 10 photographers in New York City to help you out. These...
Top 10 Best Photographers in Las Vegas
In a city that thrives on spectacle and glamour, capturing the essence of Las Vegas requires a special set of skills behind the lens. We present to you the top 10 best photographers in Las Vegas, who have mastered the art of turning moments into timeless visual tales. From weddings and events to stunning portraits and breathtaking landscapes, these photographers possess the talent to...
Top 10 Best Photographers in Sacramento
When it comes to capturing life’s most beautiful moments, the right photographer can make all the difference. Sacramento, with its rich tapestry of sights and emotions, demands a special talent behind the lens. We’ve curated a list of the top 10 best photographers in Sacramento who have an exceptional knack for turning moments into timeless art. From weddings and family portraits to landscapes...
Top 10 Best Photographers in San Francisco
Are you in search of the most skilled and creative photographers in the vibrant city of San Francisco? Look no further! We’ve curated a list of the top 10 best photographers in San Francisco who have an incredible knack for capturing moments that last a lifetime. Whether you’re planning a wedding, looking for a portrait session, or seeking breathtaking landscape shots, these photographers have...
Top 10 Best Photographers in Miami
Miami, Florida: a vibrant metropolis where the sun kisses the shores, the rhythm of life beats to a Latin-infused tempo, and every street corner is a canvas for artistic expression. With its iconic skyline, sun-soaked beaches, and cultural fusion, Miami stands as a photographer’s playground, offering a myriad of captivating subjects waiting to be captured through the lens. In this...
Top 10 Best Photographers in San Diego
Nestled along the picturesque coast of Southern California, San Diego is a haven for artists of all kinds, including photographers who possess a unique ability to capture the city’s essence through their lenses. With a vibrant blend of stunning landscapes, diverse cultures, and a rich history, San Diego serves as an inspiring backdrop for photographers to showcase their talents. In a...
Get Professional Photo Retouchers at Cloud Retouch
If you’re looking for professional Photo Retouchers, you need look no further than Cloud Retouch. Our team of experts can help you fix any photo mistakes, turning your photos into high-quality pieces of art. We offer a range of services, so you can choose the one that best suits your needs. Whether you need to fix a mistake in a photo taken by a friend, or need help creating a new portrait,...
About You: The Best Clothing Stores In Germany 2025
Aboutyou! Do you love shopping for clothes but don’t have the time to go to the mall or wait in long lines? Online shopping is a great way to get what you want without having to leave your home. In this article, we will discuss some tips for online shopping for clothes, including finding the right online store and finding the best prices. What are the benefits of ABOUT YOU online...
ASOS – The Best Clothing Brands in 2025 – Up to 50% Off
If you’re looking to shop for clothes online, there’s no better place than ASOS. With a huge selection of clothes, shoes, and accessories, you’re guaranteed to find what you’re looking for. Plus, ASOS always has the latest trends in fashion, so you can stay up-to-date with the latest styles. Discover the latest fashion trends with ASOS. Shop women’s clothing, men’s fashion, and more. With...
Why You Should Buy Clothing Booztlet Reviews 2025
Booztlet.com is your one-stop shop for outlet clothing, accessories, and home decor. You can find up to 70% off select brands across a wide variety of categories, so you can save money without sacrificing quality. Plus, Booztlet offers free shipping on orders over $50, so you can save even more. What is Booztlet.com? Booztlet.com is an online outlet that offers up to 50% off select...
FARFETCH | The Global Destination For Modern Luxury
If you’re looking for a luxury shopping experience, look no further than Farfetch.com! With express shipping available and 20% off full price, this website is the perfect place to find the latest fashion trends and accessories. Plus, if you spend over $1,000 in total on your purchase, you can get a free luxury bag! FARFETCH is recognized as a leading global platform for the luxury fashion...
John Lewis: Homeware, Fashion, Electricals & More
John Lewis is a well-known and much-loved British retailer, with stores all over the country. They operate a loyalty scheme called Clubcard, which allows their customers to earn points and use them to purchase items in the store. What is johnlewis.com? John Lewis is a British department store chain with over 900 stores across the UK. The company was founded in 1864 by John...
JackandJones – Official Online Store
Jack & Jones is an online store that focuses on men’s fashion. With a range of male clothing, accessories, and homewares, Jack & Jones offers something for everyone. Since it is an online store, Jack & Jones relies on its website to draw customers and sell its products. What is jackjones.com? Jackjones.com is the official online store for the clothing company Jack &...
Sephora: Makeup, Skincare, Fragrance, Hair & Beauty Products
Sephora is a retail store that specializes in makeup, skincare, fragrance, and hair products. They offer a wide variety of brands and styles to choose from, as well as a wide range of prices. Whether you’re looking for a new eyeshadow or the perfect foundation, Sephora has what you need. How Does Sephora Do It? Sephora is a retail store that relies on its customers to bring in their own...
Sneakersnstuff.com :Limited Edition Sneakers
Sneakersnstuff.com has been around since 1999, and it has quickly become one of the go-to retailers for limited edition sneakers and streetwear. Whether you’re a sneakerhead or just interested in fashion, Sneakersnstuff.com is a must-visit site. What Is Sneakersnstuff.com? Sneakersnstuff.com is an online retailer that specializes in limited edition sneakers and streetwear brands. The...
Stadium Outlet – Billig Sport Online!
Have you ever been to a stadium and found that the prices for concessions and merchandise are quite high? If so, you’re not alone. Stadiums have long been known for their expensive prices, which can be a turnoff for some fans. However, there are several options available to you if you want to buy items at a stadium without spending too much money. In this article, we’ll tell you about...
Nike. Just Do It. Nike.com
Nike.com has been in business since 1978 and is one of the world’s leading sports apparel retailers. The website is home to an extensive online catalog, which allows customers to purchase Nike products from around the world. Nike also offers a wide range of services, such as online store shipping, returns and exchanges, and product customization. What is nike.com? Nike.com is the...
Missguided: Women’s Clothes | Online Fashion Shopping
Missguided is a UK-based online fashion retailer that appeals to women of all ages. With an extensive range of stylish clothes, Missguided allows you to find the perfect outfit for any occasion. From dresses and skirts to tops and bottoms, there’s something for everyone at Missguided. What is missguided.co.uk? Missguided is one of the UK’s leading online fashion retailers for women....
Shopstyle: Search and Find the Latest in Fashion Trends
Are you looking for the latest fashion trends? ShopStyle has you covered! With updated trends and reviews of different brands, ShopStyle is the perfect place to find what you’re looking for in fashion. What is Shopstyle.com? ShopStyle is a fashion search engine that helps you find the latest trends and styles in clothing, accessories, home decor, and more. You can browse by brand, style,...
Shopstyle: Search and Find the Latest in Fashion
Shopping for clothes can be a daunting task, especially if you’re not sure what sizes to buy or what styles will look good on you. However, with the help of Shopstyle, you can easily find the latest trends in fashion and get the perfect outfit for any occasion. What is Shopstyle.co.uk? Shopstyle is a fashion website that helps you find the latest in fashion. It has a search engine that...
Calvin Klein The Best Place to Shop for Clothes Online
Today, Calvin Klein is one of the most popular brands in the world. Calvin Klein Inc. is an American fashion house founded in 1968. It specializes in leather, lifestyle accessories, home furnishings, perfumery, cosmetics, and ready-to-wear. The company was founded by Calvin Klein and his childhood friend Barry K. Schwartz. The brand’s first store was a boutique located in the York...
500 LEVEL: Officially Licensed Sports Apparel & T-Shirts
If you’re a fan of any sport, you know that gear is essential. Whether you’re rooting for your favorite team or just trying to look good while you watch them, it’s important to have the right apparel. But what if you don’t want to break the bank? Or what if you only want official gear? No problem! You can find high-quality sports apparel and accessories at 500 LEVEL. At 500 LEVEL, we...
MQ Marqet Clothing Store
MQ Marqet is a marketing automation platform that allows businesses of all sizes to easily create, send, and track email campaigns. With MQ Marqet, you can create customized email sequences, track open and click rates, and measure the success of your campaigns in real time. What is mq.se? MQ.se is a cloud-based managed messaging solution that helps businesses manage their messaging...
ModeSens: Your Fashion Shopping Assistant
Looking to buy some new clothes but don’t know where to start? ModeSens is here to help. ModeSens is a fashion shopping assistant that uses AI and big data to help you find the best clothes for your body type, style, and budget. What Is Modesens.com? ModeSens is a website that provides fashion shopping advice and shopping information to help you find the perfect clothes for...
A Pea in the Pod: Designer Maternity Clothes, Dresses & Post
It’s no secret that pregnant women everywhere are looking for stylish and comfortable clothes. For many, finding maternity clothes that fit properly can be a challenge. Plus, the styles in stores change so frequently that it’s hard to know what will look good on you once you’re ready to give birth. Thankfully, there are plenty of online stores that offer designer maternity clothes. And because...
08 Left | The Top Brand for Aviation & Design Lovers
08 Left is a brand that caters to aviation and design lovers. From their website, it’s easy to see why. They have a wealth of knowledge and products that are perfect for those who love airplanes and beautiful design. What makes 08 Left stand out from other brands is their dedication to quality. Every product they offer is designed with meticulous care, ensuring that you get the best possible...
Photoshop Portrait Retouching – Step By Step Guide For Beginners
If you’re a photographer, you know that good portrait photography requires a lot of detail and precision. To achieve this level of quality, you need to be able to retouch portraits in Photoshop. We will teach you the basics of retouching portraits in Photoshop. We’ll cover everything from how to correct skin tone to enhancing features and more. So whether you’re a beginner or an experienced...
Photoshop Tutorials for Beginners: 11 Simple Techniques
Photoshop is a very useful program with many useful tools for creating and editing images. It is especially useful for those who will create a website: after all, in Photoshop, it is easy to crop a photo, make a transparent background and shadows, stretch a picture, cut out an object, and much more. Of course, the skills of a designer are required to master the program seriously. However,...
Shoes Online at Dinsko.se – Fantastic Selection from Dinsko
It’s Tuesday! Time to buy socks at Dinsko.se! We have a fantastic selection of socks from all of the major online retailers, and it’s difficult to choose between them.You can shop directly on our website, via our app, or by visiting our website.Choose the best profile for you and head over to our shop to start shopping! What is Dinsko.se? If you’re looking for a great selection of shoes,...
& Other Stories – Create your own fashion story – Online shop
Stories.com is a social media platform that allows users to create and share short stories. Stories.com was founded in 2012 by former Yahoo! executive Dan Rosensweig. Stories.com Brand Evaluation? When it comes to finding a trustworthy brand, Stories.com is definitely one to consider. Aside from being an up and coming website with a great user base, the brand has been around for...
Spartoo | Shoes, Bags and Clothes | Free Shipping
Spartoo is a great place to find stylish shoes, bags, and clothes at discounted prices. Plus, with free shipping on all orders over $50, you can’t go wrong! What Is Spartoo.se? Spartoo is a website that sells shoes, bags, and clothes. Spartoo also offers free shipping on all orders over $50. How to Use Spartoo.se? To use Spartoo.se, first enter your email address and...
Footway.com – 30,000 Shoes from 650 Brands
Footway is a retailer that specializes in shoes online. They have a wide selection of shoes from 650 different brands, and they offer free shipping on orders over $50. What is footway.com? Footway.com is an online shoe retailer that offers a wide variety of shoes from a number of different brands. Footway.com is an online shoe retailer that offers a wide variety of shoes from a number...
Stylist: Shop Fashion & Clothing in USA at Stylicy
Shopping for fashion can be a daunting task, with so many different brands and styles to choose from. But with the help of online shopping tools, it can be much simpler and easier to find what you’re looking for. In this article, we’ll take a look at some of the best shopping tools out there so that you can get the most out of your fashion shopping experience! What Exactly Is...
Forever 21 for the Latest Trends and the Best Deals
Are you looking for the latest fashion trends and the best deals? If so, then you should head to Forever 21! This store is always updating its selection of clothes, accessories, and home decor to provide customers with the latest trends and the best deals. Whether you’re looking for something for yourself or for a gift, Forever 21 has got you covered. What is forever21.com? Forever21.com...
Shpock | The Joy of Selling
Selling products or services can be a very difficult task. You have to create a persuasive argument for why your product or service is valuable, you have to be able to understand the customer’s needs and wants, and you have to convincingly convey all of this information in a way that gets the customer to buy. But don’t worry-with the help of Shpock, selling will be a lot easier than ever...
Eleven: Beauty, Skincare & Haircare Online
The internet has made it possible for people from all over the world to connect and share their views on various topics. This open-mindedness has also led to a proliferation of online content, including beauty reviews. If you’re looking for something to watch while you’re getting ready in the morning or browsing through your evening routine, you’re in luck-there are plenty of beauty review...
Sellpy – to Better Use | Handla Second Hand Online Enkelt På
Selling second-hand items online can be a great way to make money, but it can be tricky to do it successfully. That’s where Sellpy comes in: our AI-powered software makes it easy for you to find and sell secondhand items online. With Sellpy, you can quickly and easily list your items for sale, track the sales of your items, and make money from your sales! What is sellpy.se?...
Selfridges.com – New In Fashion Trends
Selfridges.com is a website dedicated to fashion, and as such, it is packed with information on the latest trends and what to look for when shopping for clothes. In this article, we will be taking a look at some of the new fashion items that are currently available at Selfridges.com. What Is Selfridges.com? Selfridges.com, a UK-based luxury online retailer, is a new player in...
Scorett: Shoes, Sneakers & Accessories Online
We know that there is no better way to stay up-to-date on the latest fashion trends than by browsing through our blog section. Here, you will find everything from trendy clothing to stylish shoes. We also have a variety of posts that focus on different parts of the fashion world, so you can find what you’re looking for no matter your style. Keep an eye out for our upcoming posts and be sure to...
Harman Audio.com – JBL, Harman Kardon, Infinity & AKG
HarmanAudio.com is the leading source for high-end audio products, from car stereos to home theater systems. With brands like JBL, Harman Kardon, Infinity, and AKG, they have everything you need to build the perfect audio system. And if you’re in the market for a new car stereo or home theater system, don’t forget to check out HarmanAudio.com! They have all of the latest models and offer...
Buy Windows and Doors online | Fönster24sju.se
Buying windows and doors online can save you time and money. Not only that, but you can be sure that the product you receive is of the highest quality. Fönster24sju.se offers a wide range of products, from single windows to entire doors, and specializes in both new and used windows and doors. Browse through our selection to find the perfect window or door for your home or business. Order today...
A-Dsgn Is a Unisex Brand That Aspires Everyone to Be Able To
A-DSGN is a unisex brand that aspires to everyone being able to dress in whatever way they want. This wasn’t always the case. In fact, one of the earliest iterations of A-DSGN was actually geared toward men. But as the brand evolved, it decided that gender shouldn’t dictate how someone can dress. A-DSGN offers clothing for both men and women, with no restrictions on body shape or size. This...
Sportshopen: Sportswear, Shoes & Fitness Gear Online
With so many choices available when it comes to sportswear, it can be tough to know where to start. That’s why Sportshopen.com is here to help you find the perfect outfit for every activity you have planned. From running errands to hitting the gym, we’ve got you covered. So what are you waiting for? Start shopping now! What Exactly Is Sportshopen.com? Sportshopen.com is a sportswear...
Spreadshirt: T-shirt med tryck, trycka t-shirts
If you’re in the market for a new T-shirt, there’s no need to go anywhere else but Spreadshirt! With an incredible selection of designs and sizes, you’re sure to find the perfect shirt for your unique fashion sensibilities. And if you need help finding the right one for you, our customer service team is always happy to assist. So don’t wait any longer — check out Spreadshirt today! What...
The Best Sports Brands at Sportamore.com
For many people, one of the best things about sports is the camaraderie that develops between fans. Sports teams offer a sense of belonging and shared experiences that can be hard to come by in other areas of life. But what makes sports fans so special? In this article, we take a look at some of the best sports brands out there and why they’re so popular. What Exactly Is...
Target: Clothing, Electronics & Home Essentials Online
Target’s new “Pay Less, Expect More” campaign, the retailer is aiming to attract loyal customers by promising to offer discounts and special offers on a regular basis. So how does Target plan to do this? By using AI to analyze customer behavior and preferences. What is target.com? Target is a leading retailer with over 1,700 stores across the United States. Target offers...
Stylingwebben.se – Vehicle styling and PC modding
Stylingwebben.se is a website that offers vehicle styling and PC modding services. Vehicle styling refers to modifying the exterior appearance of a car, while PC modding refers to modifying or adding components to a computer. The website offers a wide variety of services, including modifying the color, style, and date of a car; installing new lighting and taillights; re-styling the car’s...
Stenhagengard.se: Fire Ring Creative Trend Vintage Cool Gift Euro
Sweden has always been known for its stylish and innovative fashion, so it’s no surprise that trendsetters around the world visit the Scandinavian country to find the latest fashions. If you’re looking for a unique gift idea for a friend or loved one, consider purchasing them a fire ring from Stenhagengard.se. This online store specializes in trendy vintage and modern accessories, and...
StockX: Buy & Sell Sneakers, Streetwear & Accessories
StockX is a stock trading and investment platform that’s quickly gaining a following among sneakerheads, streetwear aficionados, and card collectors. With its wide selection of products, StockX makes it easy for customers to buy and sell sneakers, apparel, and accessories from anywhere in the world. What is Stockx.com? StockX is a stock market for sneakers, streetwear, trading...
Stayhard.se | Fashion & Brand Clothing for Men Online
Looking for a trendy and affordable fashion brand that you can trust? Stayhard.se is the place to be! This online store offers a wide range of stylish clothing options, all at an incredibly low price point. Plus, their return policy is incredibly generous, so you can be sure to get your money’s worth when shopping here. What Exactly Is Stayhard.se? Stayhard.se is a fashion blog that...
The Next Sole: Sneakers, Shoes & Footwear Online
No matter how often you go on Google, there’s always something new to discover. That’s why the sneakers search engine Thenextsole was created so you can easily find the latest sneakers and other athletic shoes. Whether you’re looking for a specific brand or style, or just want to see what’s popular in the market, Thenextsole is your go-to source. What Exactly Is...
Skoman: Look at Your Shoes, Others Do
Shoes are a part of everyday life. But how do you make sure that your shoes look good? And what about the other people in your life, including your friends and family? In this article, we’ll be taking a look at how to take care of your shoes so that they look good and last longer. What is Skoman.se? Skoman.se is a website that provides consumers with information about the health and...
The North Face | Outdoor Clothing, Backpacks & Shoes
If you’re looking for a brand that can be counted on for quality outdoor clothing and backpacks, look no further than The North Face! From hats and jackets to sleeping bags and tents, the company has something for everyone. Plus, their prices are incredibly reasonable, making them a great option for budget-minded hikers and climbers alike. What Exactly Is Thenorthface.se?...
New Look – Women’s, Men’s & Teen fashion Online
Spring is here, and with it comes a new look for women’s and men’s fashion. There are so many new trends to follow and learn about this season, so read on to find out all you need to know! What is Newlook.com? Newlook.com is a new fashion website that offers clothing for both women and men. The site has a modern, streamlined design that is easy to use. There are a variety of...
New Black: Premium Quality Streetwear Online – Shop Online
Online shopping has become ubiquitous, and for good reason. It’s convenient, affordable, and there are a plethora of options to choose from. But what about the quality of the products you’re buying? In this article, we’ll be taking a look at one of the latest trends in streetwear—premium quality products that are available online. We’ll be explaining what these products are and how you can...
Mytheresa – Luxury Fashion & Designer Shopping
If you’re looking for high-quality luxury fashion, look no further than Mytheresa. This online store stocks some of the most stunning and amazing styles in the industry, and their prices are definitely fair. Plus, they offer free shipping on all orders over $150, so you can’t go wrong with this choice! What is mytheresa.com? Mytheresa.com is a luxury fashion website that provides...
New York Magazine – Trending News Site
According to New York Magazine, copywriters may soon be replaced by AI-powered software in many industries. In fact, the magazine cites a study by content marketing firm Content Marketing Institute that found that nearly half of businesses surveyed will have replaced human copywriters with AI within two years. Why are businesses making this switch? According to the study, AI-powered...
News.com.au: Latest News, Entertainment & Lifestyle
News.com.au is one of the leading news sites in Australia, with a team of experienced and dedicated journalists who work tirelessly to provide quality news coverage to its readers. However, with the advent of online news sources and blogs, it’s becoming increasingly difficult for News.com.au to keep up with the competition. That’s where AI comes in! According to News.com.au CTO, David...
Next Sweden | Shop Online For Fashion & Clothing
Sweden is a country that is often considered to be at the forefront of fashion, both in terms of design and trends. You can find anything you might be looking for when shopping online in Sweden, from high-end fashion to designer clothes and accessories. If you’re looking to buy something special online, or just want to save some money, be sure to check out Sweden’s online shopping...
Nk: Fashion, Beauty & Lifestyle – Nordiska Kompaniet | Nk
With October coming to a close, it’s time to start thinking about the holidays! Whether you’re planning on hosting a party or just going out with friends, dressing up can be fun and exciting. But, what if you don’t have a lot of time to shop for clothes or get your hair done? No problem! Here are five quick and easy fashion tips that will help you look your best no matter what. What...
Nlyman.com: Menswear and Designer Brands Online
There’s a reason men’s fashion is so popular—it’s always been stylish and current. But what if you’re not in the market for high-end designer clothes? Or, maybe you’re looking for something different from what you usually see on the runway? Nlyman.com is here to help! With an extensive selection of designer menswear brands, as well as their own line of clothing, NLYMAN.COM has everything you...
NordstromRack : Shop Clothes, Shoes, Jewelry, Beauty
Nordstrom Rack is a Nordstrom department store that specializes in selling clothes, shoes, and accessories. With over 350 locations across the United States, it’s one of the most popular department stores on the continent. Nordstrom Rack offers shoppers a variety of benefits not found at other department stores. For example, Nordstrom Rack has full-service beauty shops where you can get...
OddBalls – The Underwear Brand Everyone is Talking About.
OddBalls is a new underwear brand that’s quickly gaining popularity on social media. But what’s so special about these undies? Let’s take a closer look and find out! What is Myoddballs.com? Myoddballs.com is an online underwear brand that has been making waves on social media and in the fashion world. The brand was started by two friends, Nick and Dan, who wanted to create a unique...
Oliver Bonas | Fashion, Jewellery, Homeware & Gifts
Oliver Bonas is an award-winning fashion and homeware designer who has worked with some of the UK’s top retailers. He shares his insights into the industry, his design process, and how to get started in this fascinating field. What Exactly Is Oliverbonas.com? Oliver Bonas is a luxury e-commerce store with a focus on contemporary fashion, jewelry, and home accessories. The collection...
Flipkart: Online Shopping Site for Mobiles, Electronics, Furniture
Do you love shopping on the internet but hate the hassle of traipsing through hundreds of pages of search results? Look no further—our online shopping site is specifically designed to help you shop for mobile phones, electronics, furniture, and more from the comfort of your own home. What is Flipkart.com? Flipkart.com is an online shopping site for mobile phones,...
ONLY – Official Online Store
ONLY-Official Online Store is a fashion retailer that offers a wide variety of clothing, accessories, and home decor products. Their entire website is built with AI-powered technology that helps the store personalize its content for each visitor, which in turn keeps them coming back. What exactly is only.com? ONLY-Official Online Store is a unique online store that offers an...
Monki – Discover a Different World of Fashion – Shop Online
Monki is a fashion brand that sells online. The company was founded in early 2016 by two friends who wanted to create a unique and stylish fashion line that appealed to both men and women. Monki offers clothing for all body types, including plus sizes. With the help of AI, Monki is able to quickly scan through billions of images each day to find the latest trends and designs. This allows...
ChicMe: Women’s Fashion Online Shopping
Women’s fashion is an ever-changing industry, and with that comes a never-ending need for new clothes. But what if you don’t live in a city where designer clothing is readily available? What if you want to shop without spending hours on the phone or in line? ChicMe is the solution for you! ChicMe works as an online fashion store for women who want to buy designer clothes without leaving their...
MYER | Shop Fashion, Homewares, Beauty, Toys & More
Looking for the best deals on fashion, homewares, beauty products, and toys? MYER is the place for you! From trendy clothing to baby essentials, we have everything you need at unbeatable prices. Plus, our team of experts is here to help you make the best choices for your needs. What is Myer.com.au? Myer.com.au is a website owned and operated by Myer Ltd, an Australian...
Myntra: Online Shopping for Women, Men, Kids Fashion
Women have come a long way since the days when they were limited to wearing skirts and dresses that were either too tight or too large. In today’s society, women can choose from a wide variety of clothing styles and colors, and they’re not afraid to show off their curves. If you’re looking for stylish clothing for yourself or for your loved ones, you’ll want to check out Myntra. Myntra is...
Modegallerian: Fashion Online – Shop Fashion Online from Several
With the ever-growing popularity of online shopping, fashion brands have taken notice and are now offering their products online. In this article, we will take a look at some of the best fashion websites out there that allow you to shop for clothing, accessories, and cosmetics online. We also recommend some of our favorite fashion magazines that you can read online. What is...
Metro Mode – Fashion, Beauty, Health and Interior Design
Metro Mode is a new way of decorating that will forever be associated with health and happiness.It is a new trend that stems from the desire of the miljösamfundet to live on a less energy-intensive basis while also having a healthy and beautiful inredning system. What is metromode.se? Metro Mode is a website that offers tips and advice on how to improve your lifestyle by adopting a...
Men’s Clothing Online | Trendy Clothes for Men | Brothers.se
Brothers.se is one of the leading men’s clothing retailers online, specializing in trendy and stylish clothes for men of all ages. You’ll find everything from formal wear to sportswear, making it the perfect place to find the perfect outfit for any occasion. What is brothers.se? Boys, get ready to shop like a man! Brothers.se is a clothing retailer that specializes in...
Matalan: Online Clothes Shopping – Shop Latest Fashion
Matalan has been a popular online clothes retailer for many years now, and they continue to grow in popularity each year. With an enormous range of clothing items, as well as sales and discounts all the time, Matalan is the perfect place to find stylish clothing at affordable prices. What is Matalan.co.uk? Matalan is a British online clothing retailer founded in 2003. The company...
Online Fashion Shop Mango USA
Do you love fashion? Did you know that there is an entire industry centered around it, and that it is growing faster than any other industry? In fact, the global fashion market was estimated to be worth US$ 205.7 billion in 2017. That’s why it’s important to get your fashion information from reliable sources, and Mango USA is one of the best places to do just that. Mango USA offers a...
Marks & Spencer Online Store – Shop From Marks & Spencer
Marks is the world’s first artificial intelligence-powered copywriting tool. With its simple interface and intuitive features, Marks makes it easy for you to write great content without having to learn how to write from scratch. Whether you’re a beginner or an experienced writer, Marks will help you produce quality content that will rank higher in Google search engines. What...
Rizzo | Suitcases, Shoes, Bags, Gloves and Accessories
Rizzo is a suitcase and accessory company that offers stylish and practical luggage, shoes, bags, and gloves. With a wide range of options to choose from, you’re sure to find the perfect piece of luggage, shoe, or accessory for your needs. What is Rizzo.se? If you’re looking for stylish luggage, accessories, and more, Rizzo.se is the right place for you! Founded in 2002 by...
River Island: Fashion Clothing for Women, Men, Boys and Girls
River Island is a fashion retailer that offers clothing for women, men, boys and girls. They have a wide range of clothing items, from basics like jeans and tees to more stylish clothes such as dresses, skirts, tunics, and blouses. With so many different types of clothing to choose from, River Island has something for everyone. And with their online store, you can shop from the comfort of...
Reserved Brands – The Latest Fashion Trends
Reserved is a new fashion trend that’s quickly gaining popularity. Reserved clothing is made up of layers that can be added or removed as needed, giving you the freedom to wear whatever you feel like at any time. With so many variations of this trend to choose from, there’s no reason not to start incorporating it into your wardrobe! What Exactly Is Reserved.com? Reserved is...
Pull&Bear: Trendy Clothing, Shoes & Accessories Online
When it comes to web design, there are a lot of choices out there. How do you know which one is right for your business? At Pullandbear.com, we believe in offering our clients top-of-the-line web design services. That’s why we offer a wide range of options, including Tops web design. What Is Pullandbear.com? Pullandbear.com is a website that sells clothing, accessories, and...
Pricerunner: Compare Prices and Find the Best Deal in Sweden
PriceRunner is a nifty little app that allows you to compare prices and find the best deal on whatever you’re looking for in Sweden. Whether it’s groceries, clothes, or travel arrangements, PriceRunner can help you save some serious cash. And if you need help deciphering Swedish pricing schemes, the app has handy translations all ready for you. Pricerunner.se: What Is It?...
Prisjakt – All Products and Prices in One Place
It can be hard to keep track of all the different prices for products and services out there. With PriceHunt, you can search for products and prices from all over the web in one place, so you can find what you’re looking for quickly and easily. What is Prisjakt.nu? Prisjakt.nu is a price-hunter website that lets you compare prices on products from different stores. You can also find...
PrettyLittleThing: Women’s Fashion Clothing & Dresses
Women’s fashion clothing is a big industry, and there are many different brands and styles to choose from. Whether you’re looking for something professional or casual, PrettyLittleThing has got you covered. PrettyLittleThing is a fashion clothing retailer that caters to women of all ages and styles. They carry clothes for both work and play, from dresses and skirts to jeans and tanks. You...
Poshmark: Buy and Sell Fashion, Home Decor, Beauty & More
If you’re interested in buying or selling high-end fashion, home decor, or beauty items, Poshmark is the perfect site for you! With a catalog of over 5 million items, Poshmark lets you search by brand, style, or color. You can also post items for sale yourself, or browse and buy items from other users. Plus, with free shipping on all orders over $50, Poshmark is a great way to make some...
Premium Clothing at Their Best | Madlady.se
Madlady.se is a Swedish fashion website that focuses on pants. They have a large selection of pants, from skinny jeans to chinos, and they also have a variety of colors and styles. They also have a lot of different sizes, so you’re sure to find the perfect pair of pants for your body type. Is Madlady.se a Good Brand? Madlady.se is a Swedish retailer that specializes in affordable...
Pacsun Is the Go-To for the Latest Jeans
If you’re in the market for a new pair of jeans, PacSun is definitely the place to go. They always have the latest trends, and their selection is vast. Plus, their prices are really reasonable. What Is Pacsun.com? PacSun is a retailer of jeans and other apparel. They are known for their latest jeans styles, as well as their low prices. With over 1,000 stores across the...
OutletSverige: Discounted Fashion, Shoes & Accessories
You may have seen the commercials for outlet clothing stores like Zara or H&M. These stores are known for their low prices on designer clothes, and they offer a great selection of clothes to choose from. If you’re looking for designer clothes at a cheap price, check out outlet stores! What Is outletsverige.se? Outletsverige.se is a website that provides the opportunity...
Pinterest UK Shop: Discover & Buy Trending Products
Pinboards are a great way to store all of your favorite ideas and recipes, but they can also be a great way to sell products! If you’re looking to get started selling on Pinterest, we’ve got some tips for you. What is Pinterest.co.uk? Pinterest is a social media platform where users can save and organize images. The site has over 159 million monthly active users (MAUs) as of March...
Maison Threads- Luxury Shopping Store
Maison Threads is a luxury shopping store that specializes in selling high-quality threads and fabrics. They offer both online and in-store customers a wide range of products, including numerous types of thread, fabric, and sewing supplies. If you’re looking to buy high-quality materials for your next sewing project or want to spruce up your wardrobe with some new threads, be sure to check out...
Beautymone ⋆ Beauty Blog, Makeup & Skincare Reviews
If you’re anything like us, you love taking care of your skin. But that doesn’t mean you don’t have to take care of it sometimes-especially when you’re traveling. That’s why we’re so excited to be able to offer our readers a BeautyMone subscription service. What is beauty more? A Beautymone is a beauty blog, makeup, and skincare review service that will help you take better care of your skin...
LightInTheBox – Global Online Shopping for Dresses, Home
Looking for a great way to shop for dresses and home decor items online? Look no further than LightInTheBox! This online store offers an impressive variety of items, all of which are available at incredibly low prices. Plus, with free shipping on orders over $50, you can always save money while shopping here. What Is Lightinthebox.com? LightInTheBox is a global online...
Love the Sales – The World’s Biggest Online Sale & Clearance
Love the Sales! One of the biggest benefits of online shopping is that you can buy things from all over the world without ever having to leave your home. Plus, there are always deals available on popular items, so you can save lots of money without sacrificing quality. If you’ve been thinking about getting into online sales but don’t know where to start, check out these four tips for...
Lager157 | Sweden’s largest clothing brands
Denim, one of the most popular materials for clothing, can be used in a variety of looks. Whether you’re looking for something edgy and rebellious or something more classic and professional, denim can give you the look that you desire And with Lager157’s selection of brands that specialize in denim, there’s a brand for everyone! What is lager157.com? Lager157 is a website dedicated...
Jewelry and Accessories for Men – Trendhim.se
Trendhim.se is a website dedicated to helping men & women find the best jewelry and accessories for them. With an extensive catalog of options, Trendhim.se makes it easy for you to find the perfect piece of jewelry or accessory for any outfit. Whether you’re looking for something flashy or subtle, Trendhim.se has you covered! What Exactly Is Trendhim.se? Trendhim.se is a blog...
Kicks: Makeup, Perfume, and Skin Care Online
Kicks is a Swedish e-commerce company that specializes in makeup, perfume, and skincare products. They offer an easy and convenient way for customers to buy products online. Kicks also offer a wide range of products, including high-end brands like MAC and L’Oreal. Their customer service is excellent, and they offer free worldwide shipping on orders over $50. Kicks.se Brand Review? If...
SHEIN: Women’s Clothing, Women’s Fashion Sale
Swedish clothing company SHEIN has just released a campaign featuring models of different shapes and sizes. The purpose of the campaign is to break down the idea that all women have to fit into a certain mold and to show people that there is absolutely no need to conform to societal standards when it comes to what they wear. According to SHEIN’s marketing manager, Tove Lundström, “We...
Lenna Sports: A real sports shop online
Länna Sport is a Stockholm-based sportswear retailer that specializes in providing high-quality sporting goods to both professional athletes and everyday consumers. With an online presence that has been growing rapidly, Länna Sport is looking for new ways to keep up with the ever-growing demand for its products. The company recently completed a project in which it created an AI chatbot...
Kohl’s: Shop Clothing, Shoes, Home, Kitchen, Bedding
Kohls is one of the leading retailers in the United States and is known for its wide variety of clothing, shoes, home goods, and kitchen appliances. Kohl’s offers shoppers something for everyone, whether they’re looking for clothes for work or weekend wear. With Kohl’s online store, customers can shop from the comfort of their homes. In this article, we’ll take a look at some of the best...
JJ’s House: Wedding Dresses, Party Dresses, Prom Dresses
JJ’s House is a top online destination for women looking for wedding dresses, party dresses, and prom dresses. With over 8,000 dresses in stock and over 20,000 in the pipeline, JJ’s House has something for everyone. Plus, because JJ’s House is an online store, you can shop from the comfort of your own home—no need to travel to a store or wait in line! What Exactly Is Jjshouse.se?...
Junkyard – Everything You Need Within Streetwear and Skate
Junkyard Streetwear and skate fashion have come a long way in recent years, with new designers and trends constantly popping up. If you’re looking to get in on the action, you’ll need to know about all the different brands and products out there. In this article, we’ll provide you with everything you need to know about Junkyard-their history, their collections, and what they’re currently...
Joom: Online Shopping: Easy shopping, fast shipping
Joom Easy shopping, fast shipping—that’s what you can expect with Joom. Shopping has never been easier than with Joom. Just enter the item you want to buy and our search engine will help you find the best deals on the web. We also offer fast shipping so that you can get your purchase quickly and without any hassles. What is Joom.com? Joom.com is an online shopping platform...
Johnells.se – Brings Make You Look Brilliant
Johnells.se is a Swedish online retailer that specializes in making you look brilliant. The company sells high-quality products such as eyeglasses, contacts, sunglasses, and more. They have a wide range of prices and a variety of payment options, so you can find what you’re looking for without breaking the bank. Johnells.se Brand Evaluation? Johnells.se is a Swedish designer and...
EMP Shop | Musik, Film & Gaming | Powered by Sweden Rock
If you’re in the market for some new music or just want to catch up on your favorite films, then EMP Shop is the perfect place for you. With over a million tracks and movies to choose from, there’s sure to be something for everyone. What Exactly Is emp-shop.se? Emp-shop.se is a Swedish website that specializes in selling EMP products. These products are usually used to protect...
JD Sports: Sports fashion, clothing & accessories
JD Sports is a Sweden-based retailer that specializes in sneakers. They offer a wide variety of Adidas sneakers, as well as a few other brands. The sneakers come in a variety of sizes, and the prices are very reasonable. One thing to note about JD Sports is that they do not carry any Nike products. This may be something to consider if you’re looking for a specific Nike sneaker. However, if...
JFR- Edgy Clothes, Shoes & Accessories Online
JFR is a Swedish fashion brand that has been creating stylish and edgy clothing since 2009 With their latest collection, JFR has introduced a line of sporty clothing that will be sure to turn heads. What Exactly Is Jfr.se? JFR is a young and edgy fashion retailer. They carry clothes for men, women, and kids of all ages. In addition to clothing, they also sell accessories and home...
Magasin | Buy Fashion, Home, Beauty, and Gifts from +1000 brands
Magasin.se is a Swedish online shop that offers a wide range of products from different brands. You can find the best prices on thousands of products and choose between a variety of payment methods. The delivery time is usually within 24 hours. Brand evaluation for magasin.se? Magasin is a Swedish online store with a wide range of products for all kinds of people. They have a great...
Faire | Online Wholesale Marketplace for Retailers & Brands
Faire is an online wholesale marketplace that connects retail businesses with suppliers of products and services. It offers a variety of tools and resources to help its customers manage their business, including a marketplace for product listings, order management, and customer service. With so many different businesses out there vying for your attention, it can be hard to know who to...
Hugo boss Official Online Shop, Menswear & Womenswear
Hugo Boss Menswear is known for its unique and stylish designs. Whether you’re looking for a formal outfit or something more casual, the Hugo Boss Official Online Shop has everything you need. Plus, our delivery options make it easy to get your new Hugo Boss outfit delivered right to your home! Hugoboss.com’s Environmental Commitments Hugoboss.com is a popular online store that...
GOXIP – Fashion, Beauty and Lifestyle Online Shopping …
GOXIP, you can browse through a wide variety of products from all over the web without ever leaving your comfortable home. And since GOXIP is an all-inclusive platform that offers fashion, beauty, and lifestyle products from around the world, you’re sure to find something that fits your unique style. What is Goxip.com? Goxip is a fashion, beauty, and lifestyle online shopping website...
End Clothing – The Trendy Clothing Store
End clothing is exactly what it sounds like-clothing designed to be worn at the end of your wardrobe after all other pieces have been replaced or worn out. This type of clothing can be difficult to find, but if you’re looking for something different and unique, end clothing is definitely worth considering. What is endclothing.com? End Clothing is a clothing company that provides...
Cocopanda.se | Sweden’s Beauty Shop Online!
Cocopanda.se is Sweden’s top online shop for beauty products. With a wide selection of products from major brands as well as a curated selection of Swedish indie brands, Cocopanda.se is the go-to destination for anyone looking for high-quality beauty products at an affordable price. What Is Cocopanda.se? Cocopanda.se is Sweden’s first and largest online beauty shop. We offer a wide...
Billiga Arbetsklader: Sweden’s largest selection
When it comes to finding affordable work clothing, Sweden is definitely a country to look into. Billiga Arbetsklader is Sweden’s largest selection of discounted clothes, with everything from formal wear to everyday clothes. Plus, if you’re looking for cheap leftovers, Billiga Arbetsklader has you covered! What is Billiga-arbetsklader.se? Billiga Arbetsklader work clothes is Sweden’s...
Fanny chaussures: Women’s, Men’s, and Children’s shoes
Looking for the perfect pair of shoes? Fanny chaussures has you covered. We have a wide selection of women’s, men’s, and children’s shoes in all styles, colors, and sizes to fit your needs. With our easy online checkout, fast shipping, and low prices, you’re sure to find the perfect pair of shoes for you. What is Fanny-chaussures.com? Fanny-chaussures.com is a French site that sells...
Brightside: Women’s Fashion Boutique – Brightside Boutique
Are you always looking for unique and trendy fashion? If so, then you need to check out Brightside Boutique! This boutique is always up to date on the latest trends in women’s fashion, and they have a wide selection of clothing that you won’t find at any other store. Plus, their prices are definitely reasonable. What is Shopbrightside.com? Shopbrightside.com is a women’s fashion...
Beautiful Robes: Kimonos robes for everyday
Beautiful Robes: Kimono robes for every day are perfect for special occasions, weddings, or just a relaxing day. We have robes for men and women of all ages and every style imaginable. Our robes are made of the highest quality fabric and construction, so you can be sure they will last a long time. Come check out our selection today! Beautiful-robes.com Brand Review? Beautiful Robes...
AliExpress – Online Shopping for Popular Electronics, Fashion
Looking for a great place to buy electronics, fashion accessories, and other items? Look no further than AliExpress! This online shopping destination has something for everyone, and it’s easy to use. What is Aliexpress.com? Aliexpress is a Chinese e-commerce website that specializes in selling popular electronics, fashion, and home products. It has a global reach, with users in more...
Exclusive Menswear Online | CareOfCarl.com
Carlofcarl is a new online menswear store that offers high-quality, stylish clothing at an affordable price. With over 6000 products from the most popular brands in menswear, CareOfCarl is the go-to source for stylish clothes for men. What is careofcarl.se? CareofCarl.com is a website dedicated to providing high-quality men’s fashion at an affordable price. All of the clothing offered on...
Fashion and Designer Clothes – Shop Online at Peter Hahn
Peter Hahn is a Swedish online luxury fashion store that specializes in designer clothes. The site offers a wide variety of designer brands, including Ralph Lauren, Calvin Klein, Burberry, and more. You can browse through the site’s collection of clothing by type (e.g. dresses, skirts, pants), or by brand (e.g. Michael Kors, Saint Laurent). You can also filter the selection by price...
Footish – If You Like Sneakers – Nike,Adidas, Reebok,Puma
Footish is a new and innovative shoe recommendation app that has caught the attention of many. If you’re like most people, you have a closet full of sneakers from different brands. Which ones should you buy and wear? Footish lets you choose any of your sneakers. It takes into account things like the style, color, size, and type of sneaker. Then the app recommends other sneakers similar to...
GANT – Official GANT Online Shop
Looking for the perfect outfit to wear this season? Look no further than GANT! They have an amazing selection of clothes for men and women, and their prices are definitely reasonable. Plus, their customer service is top-notch—if you have any questions about an item, they’ll be more than happy to help you out. So why not head on over to their website and check them out? What is...
Lyco: Find Hair Care Products and Skin Care Online at Great Prices
Shop for hair care and beauty products online at Lyco and get amazing deals on top brands like L’Oreal, Revlon, and Neutrogena. You’ll find everything you need to keep your hair and skin looking great, all at great prices. So what are you waiting for? Get started today! What is Lyko.com? Lyko.com is a great place to find hair care products and skin care products online at great...
Evanette: Bikini & Underwear for All Shapes
Summertime is the perfect time to be sporting some colorful bikinis! Evanette Bikini has all of your tropical needs covered with their selection of bikinis for women. Whether you’re looking for a cheeky one-piece or something more modest, Evanette has you covered. Browse their selection today and find your perfect bikini! What Exactly Is Evanette.com? Evanette.com is a...
Feelunique: Beauty & Cosmetics Makeup & Haircare
There are so many great beauty products on the market these days, it can be hard to decide what to buy. Which of those products is best for your skin type? How do you know which facial cream will work best for you? Luckily, there are plenty of online resources that can help you figure all of this out. Sites like Feelunique, which focus on providing high-quality beauty products at affordable...
Intersport – Sweden’s Largest Chain of Sports Stores
Intersport is a chain of sports stores in Sweden with over 220 locations. The company was founded in 1966 and is currently owned by the investment company Kinnevik. Intersport is one of Sweden’s largest retail chains, with annual sales of SEK 1.5 billion (USD 215 million). Intersport sells a wide range of sports and fitness products, from running shoes to basketballs. The company also...
Glamour UK – Beauty and Lifestyle Trends, Hair and Makeup
Looking to step up your beauty game this year? Check out Glamour UK for all the latest beauty trends and advice. From hair and makeup tutorials to skincare tips, these pages have everything you need to look your best. Whether you’re new to trying out new beauty products or just want to refine your current routine, Glamour UK has you covered! What is Glamourmagazine.co.uk?...
Fashionette | Designer Handbags, Shoes, Accessories
Fashionette, you can always find the most recent skirts from the most famous designers. Consider what your favorite designers have to offer with their new collections, and then shop! What is Fashionette.se? Fashionette is a website that specializes in designer handväskor, skor, and other fashion accessories. The site offers a selection of high-quality designer handbags, shoes, and...
Eskor.se: Shoes for Women, Men, and Children
Eskor.se is a Swedish-based online retailer that specializes in selling shoes to anyone, whether they are women, men, or children. They have a wide range of styles and sizes for everyone, and their prices are very reasonable. Not only do they have a great selection of shoes, but they also have a variety of other products such as clothing and accessories. If you’re looking for a...
Famous Footwear, Shoes for Women, Men & Kids
Famous Footwear is a company that specializes in shoes for women, men, and kids—everything from sneakers to high heels. They have a wide selection of shoes to choose from, and their prices are very reasonable. What is famousfootwear.com? Famousfootwear.com is a website that sells high-end shoes for women, men, and children. The site features a variety of brands such as Jimmy...
Etsy – Shop for Handmade, Vintage, Custom, and Unique Gifts
If you’re looking for a unique gift idea, you should definitely check out Etsy. This online marketplace is full of handmade and vintage items as well as custom and unique gifts. Whether you’re in the market for a special present for a friend or family member or are just curious about what’s available on Etsy, this article is for you. What Is etsy.com? Etsy is an online...
Fashion, Clothes, Home & Interior – Buy online at Indiska.com
Indiska whether you’re dressing for work or a fun night out, there are a lot of different options to choose from. In this article, we’ll take a look at some of the latest trends in fashion, clothing, and home decor. Spring is in the air, which means it’s time to start thinking about fashion and what to wear. What Exactly Is Indiska.com? Indiska.com is a fashion and lifestyle blog...
Fyndiq: Bargains Online – Low Prices & Fast Delivery
Fyndiq is a website that specializes in finding the best deals online. Not only do they have a wide range of products to choose from, but they also offer a user-friendly search engine that makes it easy to find what you’re looking for. Whether you’re looking to buy something specific or just want to find a good deal on general products, Fyndiq is the place to go! What is...
GQ: Men’s Fashion, Style, Grooming, Fitness, Lifestyle
GQ is one of the foremost magazines in men’s fashion, style, grooming, fitness, and lifestyle. Each issue is jam-packed with information on everything from what to wear to a formal event to how to keep your body in peak condition. So if you’re looking for tips and advice on how to dress and look your best, GQ is the magazine you need to check out! What is gq.com? GQ is a...
Esprit Fashion for Women, Men & Children in the E-Shop
Esprit is a fashion line that caters to both women and men. With the help of AI, Esprit is able to create stylish clothing for all types of people. Not only does this save Esprit time and money, but it also allows them to create clothing that reflects the current trends in fashion. What Exactly Is Esprit.se? Esprit is a global fashion brand that was founded in Sweden in 1988 by Per...
Glitter.se – Shop Jewelry And Accessories
With Valentine’s Day right around the corner, it’s time to start thinking about what gifts to get your loved ones. But if you’re like most people, you don’t know what you want. That’s where Glitter.se comes in! This online store offers a wide variety of stylish and unique items, all ready for your shopping convenience. So why wait? Get started on your shopping today! What is...
Hunkemöller – Underwear, swimwear and even more online!
Hunkemöller is a German lingerie and swimwear retailer that has been expanding its online presence in recent years. We’ll take a look at their range of products and show you some of the best ways to shop with Hunkemöller online! What is Hunkemoller.se? Hunkemoller.se is an online store that specializes in underwear, swimwear, and more. The site offers a variety of different...
House of Fraser – Fashion, Beauty, Gifts, Home, Electricals …
House of Fraser is a UK-based retailer that sells a wide variety of fashion, beauty, gifts, home products, and electricals. With online shopping becoming increasingly popular, House of Fraser has seen an increase in online sales. In this article, we will look at how the House of Fraser online store functions and how it can be used to improve your online marketing efforts. What...
Get Big Brand Wins at Small Prices Tkmaxx Online
Then check out T.K. Maxx online! Not only does this store carry a wide range of high-quality items at affordable prices, but they also offer a variety of marketing opportunities that will help you get your brand in front of more people. What Exactly Is Tkmaxx.com? Tkmaxx.com is a British high-street fashion and home furnishings retailer with over 1,000 stores in the United Kingdom...
Bangerhead: Hair care, skincare, makeup, perfume online
Bangerhead.se is an online store that specializes in hair care, skincare, makeup, and perfume products. With over 12,000 products to choose from, you’re sure to find the right product for your needs. Plus, thanks to Bangerhead’s free shipping on orders over $50, you can save big on all your beauty needs! What is Bangerhead.se? Bangerhead.se is a Swedish online store that...
Google Chrome’s 10 Most Popular SEO Extensions
Digital Marketing and Social Media professionals are constantly searching for resource optimization to achieve the goals proposed by their company and thus achieve an adequate SEO web positioning. For that reason, the tools they use to achieve this must be as efficient as possible. It is recommended that these tools can facilitate the work of professionals. That’s why, when digital...
BikBok: The Latest Shopping Deals and Best Prices
BikBok is a live fashion shopping experience that allows you to chat with experts about denim, as well as purchase items directly from the Bik Bok app. Whether you’re a seasoned denim lover or just starting out, this live shopping experience is sure to be a blast! What is bikbok.com? Bik Bok is a lifestyle website and online boutique devoted to high-quality denim and other clothing...
Adidas : The Best Place to Shop for Clothes Online
Adidas is about more than sportswear and workout clothes. The company sells a range of products, from shoes and sneakers to t-shirts, leggings, and more. You can find everything you need to complete your look, whether you’re headed to the gym or out for a night on the town. Adidas offers free shipping on orders over $50 and has a great return policy if you’re not satisfied with your...
Afound.com – Fashion From Famous Brands
Afound.com is a website that offers users the opportunity to purchase high-end fashion items from well-known brands, often 20-70% off the original price. The site has a wide selection of clothing and accessories, as well as an online store where users can purchase items in bulk. What is Afound.com? On afound.com, you can find clothes from popular brands like Nike, Adidas, and Calvin...
Ahlens Online Shopping for the Latest Clothes Fashion
Ahlens is a Swedish fashion retailer with a wide range of clothing and accessories for men, women, and children. The online shop offers the latest trends in fashion from around the world. Ahlens gives free shipping on orders over €50, and all customers can return items for free. Why use Ahlens.se? Ahlens offers a wide range of clothing, footwear, and accessories for both men and women....
American Eagle: The Best Place to Shop Online – Cloud Retouch
American Eagle On Wikipedia The American Eagle is an American lifestyle, clothing, and accessories retailer headquartered at SouthSide Works in Pittsburgh, Pennsylvania. American Eagle Outfitters, Inc. operates in the United States, Canada, Mexico, China, Hong Kong, and the Middle East, providing their customers with high-quality, on-trend clothing, shoes, and accessories at affordable...
Asics The Best Place to Shop for Clothes Online
Asics is a Japanese multinational corporation that produces sports equipment designed for a wide range of sports, generally at the upper-end of the market. Asics is one of the world’s largest sporting goods manufacturers. The company was founded in 1949 as Onitsuka Co., Ltd. by Kihachiro Onitsuka and was later renamed to Asics Corporation in 1977. The name Asics is an acronym for the Latin...
Carhartt The Best Place to Shop for Clothes Online
Looking for a durable workwear and outdoor apparel option? Look no further than Carhartt! Carhartt has been creating quality clothing for over 100 years, and their products are known for their durability. From jackets to pants, you’ll be able to find everything you need to stay warm and comfortable while working outdoors. Carhartt is well-known for its high-quality, durable clothing....
Bubbleroom Fashion – Clothing Shoes – Trendy Clothing
Bubbleroom Fashion is a clothing retailer that specializes in eco-friendly and sustainable clothing options. The company was started by two sisters in 2009, who wanted to create a clothing line that was friendly to the environment and affordable for everyone. Bubbleroom has a wide variety of clothing options, from shirts and dresses to skirts and tops, all made from natural materials such as...
Boohoo Women’s and Men’s Clothes Shop Online Fashion
If you’re looking for fashionable, trendy clothing at an affordable price, Boohoo is the online shopping destination for you! Boohoo offers a wide selection of clothing for women, men, and children, as well as accessories and home decor. You can find everything from dresses and skirts to jeans and T-shirts on Boohoo’s website. Plus, the prices are unbeatable! Boohoo frequently offers sales...
Ellos: Stylish Plus Size Womens Clothing & Apparel
If you’re looking for fashionable plus-size clothing, try Ellos. They have a wide selection of both clothes and accessories, and their prices are very reasonable. Plus, their clothes are made from high-quality materials, so you can be sure that they’ll look good on you no matter what your weight or size. What is Ellos? Ellos is a stylish plus-size women’s clothing store that caters to...
Columbia: Outdoor Clothing, Jackets & Footwear
The Columbia Sportswear Company is an American company that manufactures and distributes outerwear, sportswear, and footwear, as well as headgear, camping equipment, and accessories. Columbia was founded in 1938 by Paul Lamfrom, an immigrant from Germany. Columbia has become one of the largest sportswear companies in the world, with over two billion dollars in annual sales and distribution in...
FASHIOLA: Online Shopping Has Never Been This Easy
Shopping for clothes has always been a hassle. You have to search through racks and racks of clothing, trying to find the perfect fit. And even if you do find the perfect outfit, it can be expensive to buy. But that’s all about to change with FASHIOLA. FASHIOLA is an online shopping platform that makes shopping for clothes easy and affordable. All you have to do is search through the...
Kappahl: Online Shopping for the Latest Clothes Fashion
When you go shopping for clothes, do you ever feel like you’re missing out on some of the best deals because you can’t be in one place at the same time? Well, now there’s a solution! Kappahl is an online shopping platform that lets you shop and compare clothes from different retailers all in one place. You can find the latest styles and designs from around the world and get discounts on your...
Lindex: Online Shopping for the Latest Clothes Fashion
Lindex.com is a fashion retailer that specializes in high-quality Scandinavian clothing. They have an online store with more than 12,000 items, and they ship to over 180 countries. Lindex.com offers free shipping on orders over $75 and 15% off orders over $200. What is Lindex fashion? Lindex Fashion is a website that allows users to buy and sell Scandinavian clothing. In 2008, two...
Lyst: Online Shopping for the Latest Clothes Fashion
Lyst is a fashion retailer that offers customers access to a wide variety of clothing, accessories, and home decor items. With more than 450 brands represented, Lyst has something for everyone. Plus, with its easy-to-use search engine, finding the clothes you’re looking for is a breeze. What is Lyst? Lyst is a fashion website that allows users to find and buy clothes from different...
Miinto Online shopping for the Latest Clothing
With the holidays fast approaching, it’s time to start thinking about what you’re going to wear. And if you’re like most people, you’ll want to shop for clothes online. But with so many different websites and shopping platforms to choose from, how can you know which one is best for you? In this article, we’ll take a look at Miinto, a clothing shopping platform that has quickly become one of...
NA-KD Online Shopping for the Latest Clothes
Clothing is the second most important consumer product after food. It has been said that we buy it to present ourselves to others. Clothing also helps us stay cool in the summer and warm in the winter, while keeping us safe from harm. One retailer that manages this is NA-KD, an online clothing store for women that offers a wide selection of fashion at affordable prices. NA-KD is a...
ARKET – Shop for Women, Men, Children, Homeware & Travel Online
If you’re looking to shop for women’s, men’s, and children’s clothes, accessories, and home goods, the Arket is the online store for you! With a wide selection of products and prices that are both fair and competitive, Arket is the perfect place to buy gifts for anyone on your list! Plus, with free shipping on orders over $75, Arket is sure to meet your needs! What Exactly Is...
Alissa: Discover Trendy fashion online
If you’re looking for a stylish and affordable way to keep up with the latest trends, you’ll love alissa.se. This online store sells trendy clothes, shoes, and accessories from top brands like Zara, H&M, and Topshop, all at unbeatable prices. Plus, every purchase comes with free shipping and easy returns, so you can always look your best. Whether you’re in need of a new dress...
Babyshop: Children’s clothes & Baby clothes online
In this article, we’re going to take a look at Babyshop, a children’s clothing store that specializes in providing stylish and affordable clothes for babies and toddlers. What is babyshop.se? Babyshop.se is a Swedish website that offers children’s clothing, shoes, and accessories. It was founded in 1998 by Christina and Gunnar Persson. The website has a global presence with...
CDON: Why You Should Buy Clothing At CDON.SE!
Cdon.se is a Swedish website that offers a great deal on products and services. When a customer finds a great deal, they are encouraged to share it with others. This creates a community of people who are interested in finding the best deals out there. Cdo.se Brand Review? When you’re looking for a great deal, CDON.SE is the site for you. Cdon.se offers products at unbeatable prices,...
Puma: Casual Footwear, Apparel and Accessories
Puma is a German multinational corporation that designs and manufactures athletic and casual footwear, apparel, and accessories and is headquartered in Herzogenaurach, Bavaria. Puma is the third largest sportswear manufacturer in the world. Rudolf Dassler founded the company in 1948. In 1924, Rudolf and his brother Adolf Dassler jointly formed the company Gebrüder Dassler Schuhfabrik...
Reebok Official Shop Sportswear & Footwear
Reebok International Limited is an American fitness footwear and clothing manufacturer and a subsidiary of the German company Adidas. Reebok produces and distributes fitness, running, and CrossFit sportswear, including clothing and footwear. It is the official sponsor of UFC, CrossFit, Spartan Race, Reebok CrossFit Games, Zumba, and the TRX Training System for shoes and clothing. Reebok...
Shopalike All Fashion & Furniture Shops Brand Review
If you’re looking for the best online fashion store, look no further than Shopalike.it! With a wide variety of brands and styles, this site is perfect for anyone looking for their next outfit. Plus, with free shipping on orders over $50. What is Shopalike.it? Shopalike.it is an online store that sells high-quality replica products. The site offers a wide variety of items, including...
The North Face Brand Review Free Shipping Available
The North Face has made activewear and outdoor sports gear that exceeds your expectations. Their online store has everything you need for your next hike, camping trip, or just a day out on the town. The North Face® has the latest styles in men’s and women’s clothing, so you can look good while you’re exploring the great outdoors. The North Face ® is committed to protecting the...
Under Armour® Official Store FREE Shipping Available
If you’re looking for the best place to shop for Under Armour clothes online, you’ve come to the right place. Under Armour is one of the leading sports apparel companies in the world, and their clothing is designed to keep you comfortable and stylish whether you’re working out or just running errands. Their website is easy to navigate, and you can filter your search by activity, so you...
Stylight − Made For Stylish Shopping, Made For You
Finding the perfect outfit can be a daunting task. Whether you’re looking for something to wear to work or going out on a date, finding the right outfit can be tricky. With so many options and styles, it can be hard to find what you’re looking for. But don’t worry! Stylight is here to help. Stylight is an AI-powered app that helps you find stylish outfits for all occasions. With its...
Stadium.se – Sports and Sports Fashion at The Best Price
Stadium.se is a website that specializes in providing sports news and information. They have an extensive database of articles, podcasts, videos, and more to help you stay up-to-date on all the latest sports happenings. Whether you’re a sports fan or just looking to learn more about a certain topic, Stadium is the perfect site for you! What is Stadium.se? Stadium.se is a website that...
Zalando- Shoes and Fashion Online Shop Review
Online shopping is growing in popularity by the day, and no one knows this better than global fashion retailer Zalando. With over 700 million registered users and more than 2,000 brands represented, Zalando offers shoppers a unique shopping experience that allows them to buy designer shoes and clothing from anywhere in the world. Zalando’s success can be attributed to the company’s...
Vero Moda Donna: 20% OFF Clothing for Every Day
VERO MODA is an online store that offers a wide range of stylish clothing, accessories, and home decor. The company was founded in 2006 by two fashion designers who wanted to create a place where people could find unique and high-quality pieces at an affordable price. With more than 2 million customers around the world, VERO MODA is one of the best online stores in the world right now. What...
Nasty Gal: Women’s Clothes Women’s Fashion Online
If you’re looking for the latest fashion trends, Nastygal is the online store for you. With a huge selection of stylish clothes and accessories, Nastygal has something for everyone. Whether you’re looking for a new dress for a special occasion or some trendy jeans to wear every day, Nastygal has it all. Plus, their prices are unbeatable! So if you’re looking to shop online for clothes,...
New Balance: Athletic Footwear and Fitness Apparel
New Balance is an American sports footwear and apparel brand that was established in 1906. New Balance is known for making unique designs, making high-quality products, and caring about the world around them. Their mission is to “help athletes achieve their goals.” New Balance offers a wide variety of shoes for men, women, and children. They also have a clothing line that includes athletic...
Next Official Site: Online Fashion, Kids Clothes Homeware
Looking for the latest and greatest fashion and kids’ clothes? Next Brings you the latest trends in online fashion, from children’s clothes to maternity clothes. We also have a variety of articles on how to save money on kids’ clothing as well as tips on choosing the right kids’ clothing size. So whether you’re looking for new clothes for your little ones or a stylish selection of maternity...
Nike : The Best Place to Shop for Shoes -Nike. Just Do It
Nike, Inc. is an American multinational corporation that is engaged in the design, development, manufacturing, and worldwide marketing and sales of footwear, apparel, equipment, accessories, and services. The company is headquartered near Beaverton, Oregon, in the Portland metropolitan area. It is one of the world’s largest suppliers of athletic shoes and apparel and a major manufacturer of...
Nordstrom Online & In Store: Shoes, Jewelry, Clothing
Nordstrom Online is one of the most popular online stores for luxury fashion items. It offers a wide variety of clothing, accessories, and home decor. The site is easy to use, with categories organized by type of item (clothing, home decor, etc.), so you can find what you’re looking for quickly. Nordstrom also has an amazing selection of Nordstrom Credit Cards, which come with great...
Oakley® Official Store: Sunglasses, Goggles & Apparel
Oakley! Oakley sunglasses, goggles, apparel, and other products are available on the Oakley official website. Make your order now and receive free shipping! Oakley is the best place to shop for clothes online because of the variety of items they sell and the quality of their products. Oakley has everything you need to keep your wardrobe up-to-date, whether you’re looking for a new pair...
Gina Tricot – Clothing and Fashion in Stores and Online
Gina Tricot clothing is popular among women of all ages. The brand has steadily gained a following over the years, with Gina herself becoming a fashion icon. Whether you’re looking for something to wear out on a date or just want to add a little bit of glamor to your everyday outfits, there’s a good chance you’ve at least heard of Gina Tricot. We’re going to take a look at everything you...
Elle.se – Fashion, Trends, Shopping and Beauty! | Elle.se
Elle.se is a website that provides fashion, beauty, and lifestyle content for women around the world. With articles on trends, shopping advice, and reviews of top products, Elle.se is a one-stop shop for any woman looking to up her style game. With all the different fashion options available today, it can be hard to decide which pieces to buy. With Elle.se‘s helpful fashion advice, you’ll be...
Cellbes.se : Free Shipping on Purchases Over Sek 799
Online shopping can be a fun and rewarding experience, but it can also be expensive. That’s why Cellbes.se offers free shipping on purchases over SEK 799. With Cellbes.se, you can shop for anything and everything without having to worry about pesky shipping costs. Plus, with the fast and reliable delivery that Cellbes.se provides, you can be sure that your items will arrive quickly and in...
KLINGEL Clothing Online | Buy clothes from KLINGEL.se
KLINGEL.se is one of the largest online stores in Sweden, selling a wide variety of clothes, shoes, and accessories. You can buy clothes from KLINGEL.se both through the website and through their app, which makes it easy to find what you’re looking for and order your purchases quickly and easily. What is Klingel.se? Klingel.se is a clothing shopping website that allows users to shop...
Cubus: Clothes for Children, Women, Men
Cubus.com has a variety of clothing styles for children, women, and men. Their clothing is made with high-quality materials so that your child will stay comfortable and look stylish while wearing cubus.com clothes. You can also find cubus.com clothes on sale frequently, so you can save money while still getting high-quality clothing for your child. Cubus.com Brand Review? Cubus is a...
Dealdoodle: the Latest Shopping Deals and Best Prices
Dealdoodle is a shopping brand that helps you find the best deals on products from your favorite stores. You can search for deals by store, category, or even specific products. Plus, Dealdoodle offers up to 75% off select items in some cases. So what are you waiting for? Download Dealdoodle and start saving today. What is Dealdoodle.co.uk? Dealdoodle is a website that allows users to...
Debenhams UK – Fashion, Beauty & Gifts Online
Debenhams is a popular British department store that has been in operation since 1832. The company offers a wide range of fashion, beauty, and home products, as well as a variety of services such as consultations and fragrances. In this Debenhams UK fashion, beauty and home review, we’ll take a look at the latest arrivals, discuss the best products available, and give you our expert tips on...
DefShop: Streetwear & Sports fashion
Streetwear has evolved over time, and with it, the fashion needs of those who wear it. From sportswear to outerwear, there’s a style for everyone when it comes to streetwear. And the best part is that you can find this type of clothing all over the place—from high-end department stores to popular online retailers. Looking to get into streetwear? Don’t miss our guide to the best places to...
Deichmann Online Shop | Cheap shoe fashion | DEICHMANN
Looking for fashionable and affordable shoes? Look no further than Deichmann. Our shoe store has everything you need to find the perfect pair of shoes for any occasion. From designer shoes to affordable sneakers, we have a wide variety of styles and brands to choose from. Plus, our prices are unbeatable! So shop with confidence-you’ll be sure to love what you find at the DEICHMANN online...
Dillard’s-The Style of Your Life: Official Site of Dillards
When it comes to clothes, there’s no one quite like Dillard’s. Not only do they have an unbelievable selection of clothing for all body types, but their prices are also quite reasonable. Plus, their customer service is unbeatable. If you’re looking for stylish clothing that will make you look and feel your best, then Dillards is the place to go. What is Dillards.com? Dillard’s-The...
Dressmann Is the Nordic Region’s Leading Fashion Chain for Menswear
Dressmann is the leading fashion chain in the Nordic region, and they have been thriving since it first opened its doors in 1994. With more than 190 stores across Sweden, Norway, Denmark, Finland, and Iceland, Dressmann offers a wide range of menswear options to suit every taste and budget. What is dressmann.com? Dressmann is a leading fashion chain for menswear in the Nordic region....
Dunken.se: Rock clothes, T-shirts and Cool Clothes Online
Dunken.se is a Swedish online clothing store that specializes in cool clothes. They have a wide range of men’s, women’s and kids’ clothes, as well as accessories like hats, bags and shoes. Dunken.se allows you to browse their items by category (clothes, accessories, etc.), or by brand (H&M, Nike, etc.). You can also filter the items by price, color, and size. Once you’ve located the...
EBay Uk: Buy & Sell Electronics, Cars, Clothes, Collectibles & More
If you’re looking to buy something on eBay, there are a few things you need to keep in mind. First of all, make sure that the item you’re considering is in stock and available for purchase. If not, be sure to check the seller’s other items for sale so that you can get an idea of their inventory. Once you’ve found an item that you’re interested in, be sure to read the seller’s description...
Cashbacker: Read This Before You Buy – Cloud Retouch
Shopping is a huge part of our lives, and as much as we might love it, there’s no getting around the fact that it can be expensive. That’s where cashbacker comes in-giving you money back for your purchases, whether you’re shopping online or in-store. What is Cashbacker.se? Cashbacker.se is a Swedish online cashback platform that allows you to earn money back on your...
Carlings: Why You Should Buy Clothing at Carlings Online Store
If you’re ever in the market for a new pair of jeans, there’s a pretty good chance that Carlings.com will have them in stock! This online store offers jeans from all the most popular brands, as well as a wide range of colors and styles to choose from. Plus, they always have special offers available, so be sure to check out their website regularly! What is Carlings.com?...
Bloomingdale’s : Why You Should Buy Clothing at Bloomingdales
If you’re searching for high-end fashion at an affordable price, then you need to check out Bloomingdale’s! This store offers designer clothing, shoes, and handbags at prices that are sure to make your wallet happy. In addition, Bloomingdale’s has a wide range of sizes and styles to choose from, so you’re sure to find exactly what you’re looking for. What is...
Bergqvist Skor: Why You Should Buy Clothing At Bergqvist Skor!
Bergqvistskor.se is a Swedish online retailer that specializes in selling Bergqvist skor, a type of boot made of calfskin. The company was founded in 1946 by Ingvar Bergqvist, and it has since grown to become one of the country’s largest fashion retailers. Bergqvist skor are known for their distinctive style and comfortable fit, and they’re often worn by celebrities and other high-profile...
The Iconic | Sports, Beauty & More Online | the Iconic
The iconic.com.au website is one of Australia’s leading online fashion retailers, with a wide range of products available to purchase. The website offers a great selection of clothing and accessories for men, women, and children, as well as a wide selection of home furnishings. The website also offers a wide range of fashion advice and tips, as well as a forum where users can share their...
Bershka: Why You Should Buy Clothing At Bershka!
Bershka Worldwide is a fashion retailer with a strong presence in over seventy countries. The company offers a range of high-fashion products, including clothing, accessories, and home decor. Bershka operates through retail stores, direct-to-consumer sales, and online channels. In the fiscal year 2018, Bershka reported revenue of €8.2 billion. Bershka operates through retail stores,...
Bonprix Fashion, Shoes and Furniture at Best Prices
Bonprix is a Dutch online fashion store that has been around since 1995. They offer a wide range of clothes, shoes, and furniture at great prices, and their online store is one of the most popular in the Netherlands. With over 1 million customers, Bonprix is a go-to source for affordable fashion and accessories. What is Bonprix? Bonprix is a Dutch fashion chain with over 230 stores in 14...
Why Is User Experience Important in Content Marketing?
Part of the actions you must take in your content marketing strategy is to develop interesting content to achieve a good user experience. But why is user experience so important in content marketing? Next, we will tell you the reasons. Reasons why the user experience is important in content marketing It helps you build a brand. Currently, a user spends most of their time connected on...
What Is Experience Marketing, and How Does It Help?
With a digital and technological world that advances by leaps and bounds, everything seems to indicate that only company with high-quality products and carry out experienced marketing campaigns will stand out. They also need to offer consumers a personalized service. In addition, give your customers sensory experiences that they will never forget. This will help you sell more and build...
Best Way to Develop a Social Media Content Plan
The realization of a well-developed social media content plan is a fundamental part of the success of your campaigns. To accomplish this, it is necessary to begin by thoroughly understanding the target they are addressing. The process from here on out is as simple as possible, and the strategy is implemented as efficiently as possible. Today, the media has changed dramatically. Mass media...
How to Manage Your Online Reputation Correctly
Have you ever felt desperate because you couldn’t get a malicious customer’s negative comments removed or Googled your name, and the first results are homonyms with embarrassing images? The Internet is a fascinating world that helps us with thousands of things. However, we cannot control everything, much less if there are malicious people who are looking to damage our image. Therefore, you...
Best Ideas to Start a Startup and Achieve a Profitable Business
To start a business, you must be persistent and have a lot of patience. This will help you achieve the desired goal. You’ll have a great time as long as you use the right tools to move your business forward and make it profitable. The first thing that must be imparted is innovation. The business needs to differentiate itself from others to exist over time. Now, the question is: what can be...
How to Enhanced Product Photos with Attractive Decorations
Product photos can be photographed without reflection and shadow with a light cube. This plays an important role, especially for the viewer and potential customers. In general, good pictures say more than a thousand words. The first-class photo of a product is extremely sales-promoting. In many cases, the product photos are not different from each other. They are usually recorded on a neutral...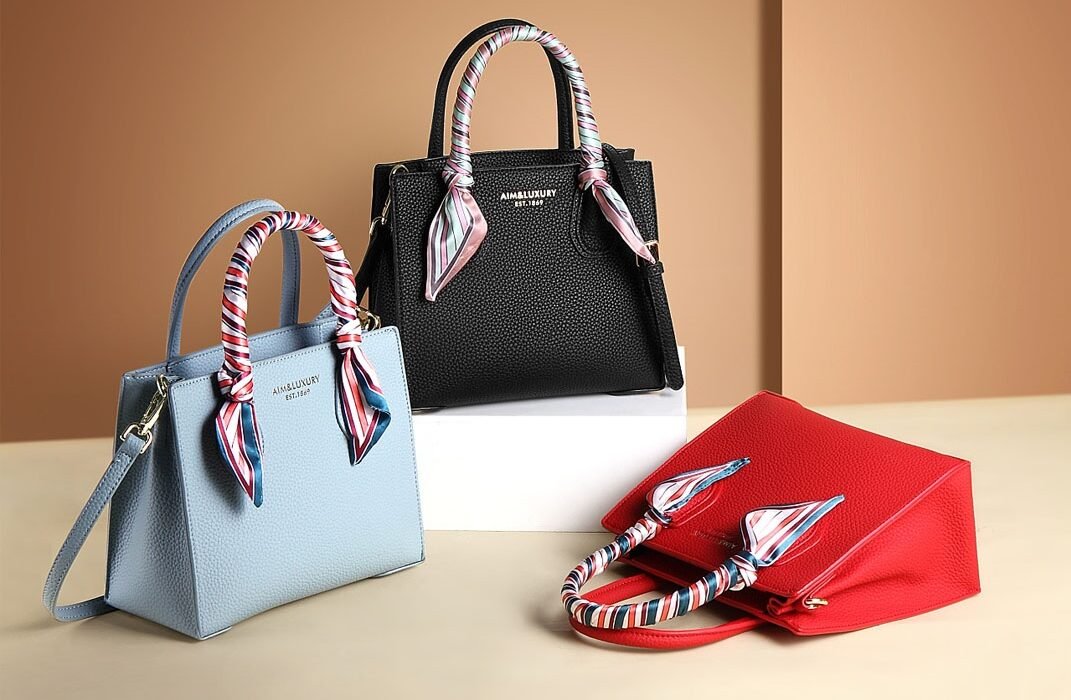
Pocket Photos Made Easy: Practical Tips for Good Pictures
A particular difficulty in product photography is the so-called “pocket photos.” For example, if you want to properly stage handbags and shoulder bags, you will notice that many bag models do not simply stand alone in a light tent or on a pedestal. But there are some helpful tips for this. The right positioning for pocket shots Let’s take, as an example, a little shoulder bag or shoulder...
Light Tent Comparison: the Best Photo Tents with Lighting
A photo tent with lighting is the ideal solution to create product shots. These light tents offer you a white background in front of which you can place your articles. Thanks to additional lighting, you benefit from shadow-free and low-reflection photos. Light tents are available in different sizes. You can either fold them up to save space or put them back together like a tent. In the...
Focal length and shutter Speed when photographing with a light cube
If you want to take your product pictures in a light tent, you probably ask yourself which lens or focal length is best suited. The focal length of a lens is usually given in millimeters. For example, with a focal length of 28 mm and below, one speaks of a wide-angle lens or a short focal length, and with a focal length of 200 mm and above, of a telephoto lens or a long focal length. Normal...
What Is a Hot Shoe Adapter? What Do You Have to Pay Attention To?
Many modern digital cameras have an integrated flash and can also be operated with a plug-on flash. The most important requirement here is an appropriate hot shoe. Hot-shoes with and without contacts are used on cameras. The main task is using an external flashlight device, which is much more powerful than the integrated flashlight. This is synchronized and triggered via the center contact...
How to Create Product Photos for Online Shop
If you want to run your online shop, you should use meaningful product photos. Most use a modern digital camera that offers a resolution of at least 10 megapixels. If you look at these photos on your home computer with an image viewer, you will be impressed by the wealth of detail. Unfortunately, many shop operators make a mistake uploading these photos directly from the camera to their...
10 Best and Free Ways to Driving Traffic to Your Website
Building a website is only half the battle. For your page to find a sufficient number of visitors, you need to know how to drive traffic to the site. This article will show you how to drive traffic to your website faster with paid advertising and organic promotion. How to drive traffic to the site Tell your loved ones about the site Be active on the platforms where your target...
How to Become a Food Blogger
A food blogger is a calling that combines a love of writing and cooking. Interesting articles with recipes will help you gather an interested audience around you, earn credibility in the industry, and even find a new source of income. In this article, we will tell you how to become a food blogger: Create a food blog without the help of a designer. Set up content production. Attract...
How to Choose the Perfect Background for a Site
Any designer knows that choosing a background is indispensable for creating a website. The background is the foundation of the design; it helps evoke certain emotions in the reader, serves as a frame for images, and helps convey a certain concept. The article will talk about the most popular backgrounds for websites and their impact on users. We will also give some tips on choosing a...
What Is Parallax Scrolling?
Parallax scrolling was first talked about in 2011, and it immediately became widespread and popular among web designers. Web design trends have come and gone, changed and evolved, but parallax has always been a sought-after effect. With the advent and widespread use of HTML and CSS, it has become much easier to create more interesting and memorable elements for the design of Internet pages,...
10 Email Etiquette Rules Every Professional Should Know
We send dozens of emails every day. Sometimes these are very short messages, for example: “Let’s go to lunch?”. Sometimes – mailings, with the help of which you present your business or website. When there are a lot of letters and time is short, we begin to rush and make mistakes. Usually small, like a typo, but sometimes some can harm your reputation and ruin your relationship with a client...
5 Useful Gmail Features You Didn’t Know About: Boost Your Productivity
Gmail is one of the most popular email services in the world. It is loved not only for its pleasant interface, convenient settings, and security but also for various additional features. Google tools help out a lot when you need to parse work correspondence, add important meetings to your calendar, or make a to-do list for the day. If you don’t know that all this can be done without leaving...
10 Best Easy Photo Editing Steps: Quick Guide for Beginners
Taking a photo is only half the job. The other half is digital photo processing in the editor. So if your pictures don’t look like those on the sites of your favorite photographers, don’t be discouraged: you may need a little retouching of the photo. Photo editing is different. Some change the pictures completely and create a fantasy world. But photographers mostly correct imperfections to...
What Is a Layer and How to Create It in Photoshop: Complete Beginner’s Guide
For a beginner, it can be challenging to grasp the essence of this concept, but upon closer examination, everything turns out to be primitively simple. If your knowledge of layers is a bowl of vinaigrette, this material is especially for you! If you feel pretty “mastery” in this area, read it anyway; perhaps you will find something useful. What is a layer? The concept of “layer” in...
How to Photograph Lightning with a Camera
What a thrill to catch a bolt in the sky as a storm rages in the distance! But the doubt must be resolved to obtain a good result: how to photograph a lightning bolt with the camera? You have to consider using a professional tool capable of handling the parameters needed to capture lightning in the sky. Can I capture a lightning bolt with my cellphone? Something can be achieved, but nothing...
How to Become a Beauty Blogger
Your dream: find out how to become a beauty blogger and be successful on Instagram. This is the goal of many people, especially women and girls but without forgetting that the sector is also open to men. Because the concept is clear: being an influencer means reaching a world of potential customers who touch any sphere and sector. Beauty blogging is a sector in full expansion because it goes...
Instagram Promotion: a Guide for Companies
To ensure the success of your business on the Internet is not enough just to create a website. You also need to ensure that you attract a steady stream of visitors to your page. Who is your target audience? One of the best ways to find such people is to go to their habitat – social media. Cloud Retouch users report that social media has doubled traffic to their sites. And the most...
How to Become an Event Hostess
You want to find out how to become an event hostess because you like to experience public atmospheres. You want to work in contact with the public to be able to discover the world at any time. Be careful. It’s not that easy. One thing is the passion for the fashion, events, and congresses sector. Another is working as a hostess at fairs and congresses. However, it is undeniable that it is a...
How to Become an Interior Designer: Everything You Need to Know
If you want to be an interior designer, here is one of the common requests that come to our training school. And that is why we have already given various information on the subject, explaining how becoming an interior designer transforms passion into a job. Because interior design does this: it improves spaces with taste and style, transforms a house into a place that belongs to you, and...
How to Become a Wedding Dress Wearer
Finding out how to become a wedding dress wearer is important for those who have decided to make their aesthetics, bearing, and personal style the fundamental tool to have the opportunity to develop a profession. That’s right. You can earn not only with fashion shows (which remain a coveted sector) but also by becoming a reference point for those who want to choose a dream dress. Anyone who...
How to Become a Costume Designer for a Theater
Having more information on becoming a theatrical costume designer is essential. If you love fashion and the magical world of the stage. Of course, you can also decline this passion for cinema and television. Indeed, it is desirable to gain experience in these fields – but we must speak clearly: theater always has its charm. And that’s why there are always many people looking for information on...
How to Become an Event Manager
The request to become an event manager – the professional figure who takes care of organizing and managing an event – embraces different professional figures and concerns different sectors, for example, the world of fashion, architecture, and design. Photography must also be promoted and sponsored through the organization of unique exhibitions and events. Many people want to know how to...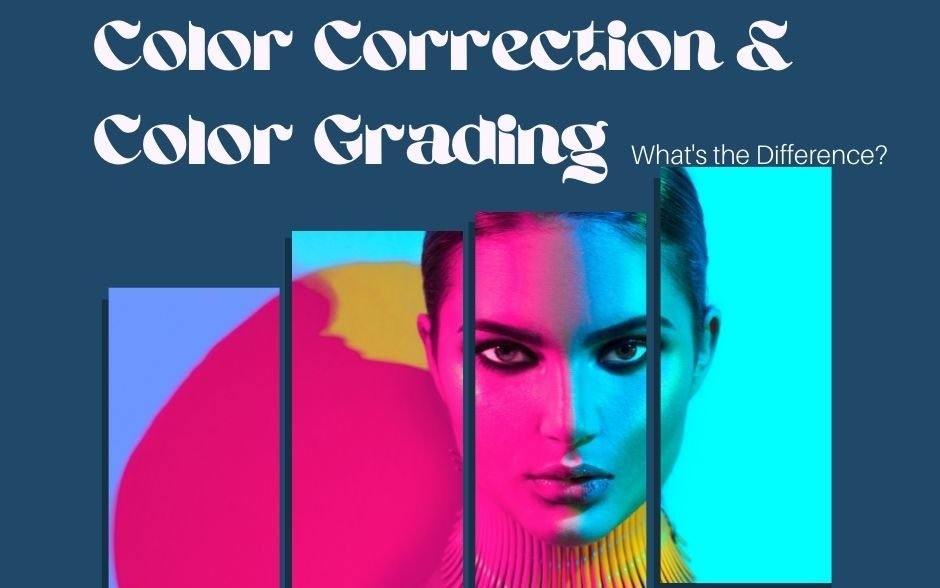
Color Correction and Color Grading, What’s the Difference?
Color grading and color correction are two terms that are always and perpetually confused with each other, and I hope today to do some clarity with this post.We call the operator colorist, who in the editing and post-production phase goes to work on the colors of the various images. Generally performs two types of intervention on the film: color correction and color grading. Among the...
How to Become a Professional Nail Artist
Many people today want to find out how to become a nail artists and work in the world of nail technology. Namely, the sector deals with the care, reconstruction, and decoration of nails. Memories? Once upon a time, there was only talk of manicure: the improvement of the nails with the application of polish and filing. Then the technique went on. Fashion began to take its cue from science to...