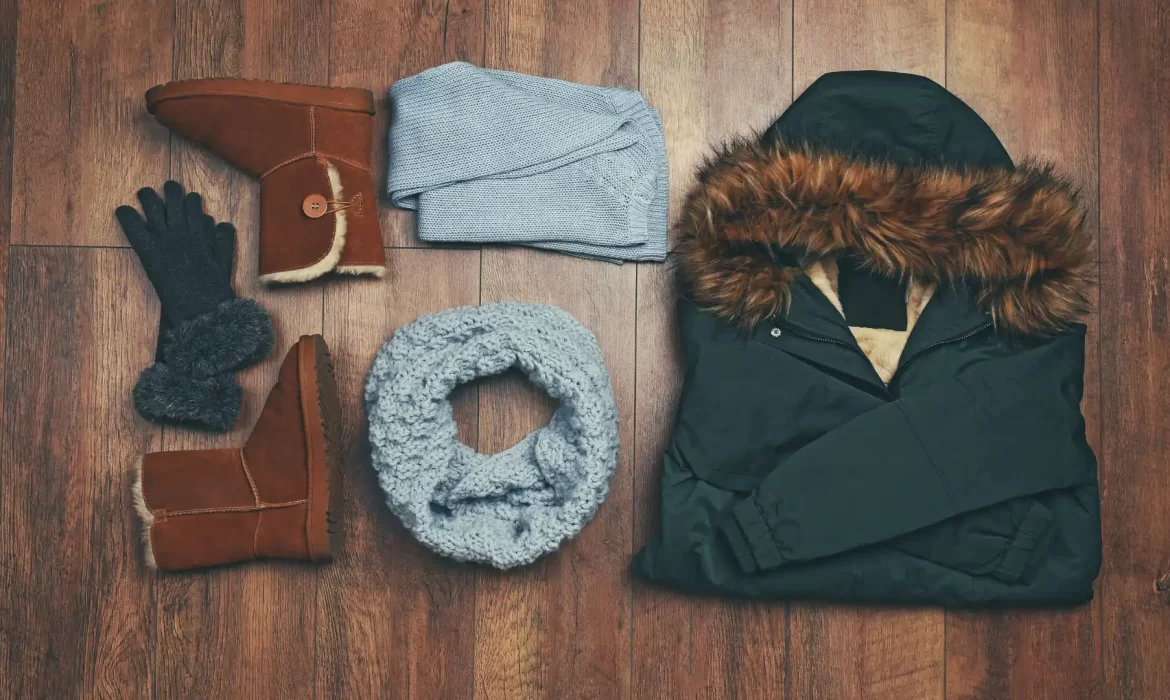
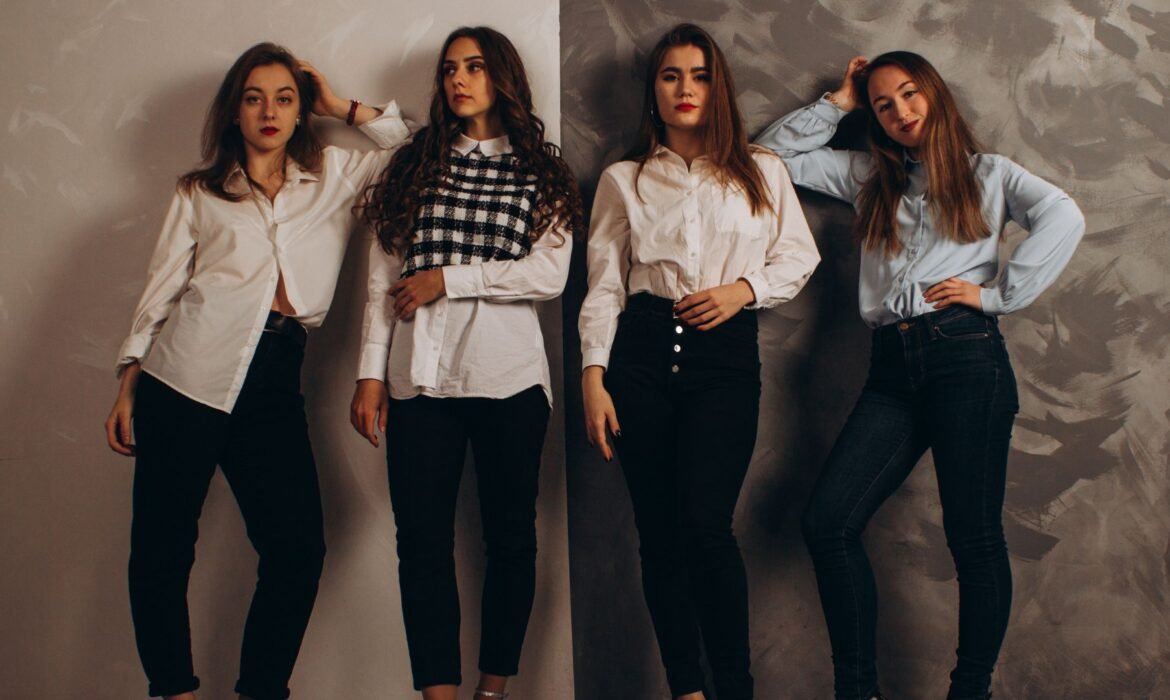
From Sweaters to Scarves: How to Dress for Winter Family Photos
Winter is the perfect season for creating beautiful memories with your family. There’s something magical about the crisp air, the sparkling snow, and the cozy vibes of wintertime. Winter family photo outfits play a big role in ensuring your photos look amazing, capturing your family’s warmth against the chilly backdrop. Whether you’re planning a holiday photo shoot or a winter family portrait, selecting the right outfits can elevate your photos and make them truly memorable.
In this article, we will guide you through the best winter family photo outfit ideas to ensure your family looks stylish, comfortable, and ready for stunning winter photos. Let’s dive into how to choose the perfect winter family photo outfits for every member of your family, from the little ones to the adults, while keeping everyone cozy and fashionable.

Choosing the Right Colors for Winter Family Photo Outfits
When planning winter family photo outfits, one of the first things you’ll need to consider is the color scheme. Winter offers a variety of color options that can make your photos pop while still blending beautifully with the snowy landscape or wintery background. Opting for earthy tones like deep greens, rich browns, and warm reds works wonderfully with the white and neutral hues of winter. These colors create a natural, timeless look.
You can also go for a more festive vibe with classic Christmas colors such as red, green, and gold. These colors evoke feelings of warmth and holiday cheer, making them perfect for family photos during the holiday season. Another great choice is to incorporate darker shades like navy blue, charcoal, or burgundy, which can look elegant against a winter backdrop without being too harsh.
For a more contemporary, minimalist look, you might consider neutrals such as white, gray, beige, and soft pastels. These colors help keep the focus on your family members while complementing the natural winter surroundings. Winter family photo outfits that feature these subtle tones work especially well when shooting against snowy or forested environments.

Layering for Style and Comfort in Winter Family Photo Outfits
Layering is key to ensuring everyone stays warm and comfortable in their winter family photo outfits. Winter weather can be unpredictable, so layering your outfits not only adds to the style but also helps you adjust to changing temperatures. The best way to layer winter family photo outfits is to start with a soft base layer such as long-sleeve shirts or thermal tops. These layers will provide warmth without adding bulk.
Next, add sweaters or cardigans to your outfits. Chunky knit sweaters are a classic choice for winter photos. They look cozy and chic and will keep everyone warm throughout the shoot. For a more polished look, you can add a tailored blazer or a knitted vest. These items not only add an element of sophistication to your winter family photo outfits but also ensure that no one is too cold during the shoot.
For the outermost layer, consider stylish winter coats. A classic wool coat or a puffer jacket can be a perfect addition to your family’s winter outfits, depending on the style you prefer. Coats with a simple, elegant design tend to photograph well, while brightly colored or patterned jackets can add a fun, lively touch to your family’s overall look. Just make sure the coats you choose match the color scheme you’ve chosen for your winter family photo outfits.

Footwear That Complements Winter Family Photo Outfits
The right footwear is an important element to complete your winter family photo outfits. While style is important, comfort and practicality should be prioritized since you may be standing or walking in the snow or on icy ground. Boots are a must for any winter family photo outfits. Whether you choose chic knee-high boots, cozy ankle boots, or rugged snow boots, make sure they are both functional and stylish.
For a more elegant look, consider pairing your winter family photo outfits with leather boots or faux fur-lined boots. These options can complement both casual and more formal winter outfits, adding a touch of sophistication. If you’re planning a more laid-back shoot, cozy woolen socks paired with stylish boots will provide both warmth and comfort.
Children’s footwear should also be chosen carefully. Make sure their boots are waterproof, warm, and easy to walk in. Since kids love to play in the snow, their boots should be sturdy enough to handle all the fun while still complementing the family’s overall look. Look for boots in neutral tones, like black, brown, or gray, to keep everything in sync with the rest of your winter family photo outfits.

Hats and Accessories to Complete Winter Family Photo Outfits
Accessories are the perfect way to add some personality and flair to your winter family photo outfits. Hats are an essential winter accessory, and they can add a fun, cozy touch to your photos. Consider stylish knitted beanies, woolen berets, or elegant fur hats. For a more whimsical touch, opt for pom-pom hats, which add texture and fun to your winter family photo outfits.
Scarves are another great way to add warmth and style to your photos. A chunky knit scarf or a patterned infinity scarf can be wrapped around necks, adding a cozy and fashionable detail. If you prefer a more elegant look, a cashmere scarf in a neutral tone can add sophistication without overpowering the overall outfit.
Gloves are not only practical but can also be a stylish addition to your winter family photo outfits. Choose matching gloves for a coordinated look or go for a contrasting color to add a pop of fun. Mittens can also work well, especially for children, as they’re easier to keep on and help keep little hands warm. Be sure to choose gloves that complement the overall color palette of your winter family photo outfits.

Winter Family Photo Outfits for Kids
When it comes to kids, comfort is key when selecting winter family photo outfits. You want them to be able to move freely and enjoy themselves during the photo shoot, so avoid outfits that are too tight or stiff. Warm, stretchy sweaters and cozy leggings or jeans are perfect for creating a cute, comfy look that still looks polished.
For winter family photo outfits, consider layering a cute sweater with a quilted vest or a cozy faux fur jacket. These pieces not only keep kids warm but also add texture and visual interest to their outfits. For girls, winter dresses with tights or leggings can create a chic and sweet look, while boys can look dapper in a plaid shirt layered under a sweater or jacket.
Boots are a must for kids’ winter outfits, especially if there’s snow. Look for boots that are both stylish and durable, ensuring they keep the kids warm and dry. Don’t forget to accessorize with cute hats and scarves that tie into the overall theme of the family’s outfits.

Winter Family Photo Outfits for Adults
For adults, winter family photo outfits should strike the right balance between warmth, comfort, and style. Men can look dashing in a tailored wool coat or a stylish puffer jacket, paired with a simple sweater or shirt. Choose a classic color palette like navy, gray, or burgundy for a refined look. If you want a more casual vibe, opt for a cozy knitted sweater and pair it with dark jeans or chinos for a timeless look.
For women, winter family photo outfits can be elegant yet cozy. A woolen coat, a chic sweater, or a knitted dress paired with leggings or thick tights is an excellent option for creating a sophisticated, yet comfortable look. Accessories such as scarves, gloves, and hats can add warmth and style to the outfit.
To tie it all together, make sure the outfits for all family members complement each other in terms of color, texture, and layering. Matching outerwear can help unify everyone’s look, while individual accessories like scarves and hats can add a personal touch to each person’s outfit.

Coordinating Winter Family Photo Outfits Without Being Too Matchy
While coordinating outfits for the entire family is important, it’s also essential to avoid making the outfits look too “matchy-matchy.” Instead of dressing everyone in the exact same outfit, opt for a coordinated color scheme or theme. For example, you might choose winter family photo outfits that feature shades of red, gray, and white. This allows everyone to express their personal style while still looking cohesive in the photos.
For larger families, you can create balance by pairing similar colors or textures in different variations. For instance, some family members might wear sweaters in shades of red, while others might opt for scarves or accessories in coordinating colors. The key is to have everyone’s outfits complement one another, creating a harmonious look without making everyone appear identical.
Final Tips for Stunning Winter Family Photos
To ensure your winter family photos are perfect, remember a few final tips. First, keep comfort in mind. If your family members are comfortable in their winter family photo outfits, it will reflect in the photos. Second, don’t forget to layer! Layering is essential for warmth and also helps with styling. Lastly, have fun! Winter family photo shoots are about making memories, so relax, enjoy the moment, and let your family’s personality shine through in your winter family photo outfits.
In conclusion, choosing the right winter family photo outfits can make all the difference in creating stunning photos that will be cherished for years to come. By selecting the right colors, layering your outfits, and coordinating your looks, you can ensure that your family looks its best against the beautiful winter backdrop. Whether you opt for cozy sweaters, stylish boots, or fun accessories, your winter family photo outfits will help capture the warmth and love that make winter such a special season.
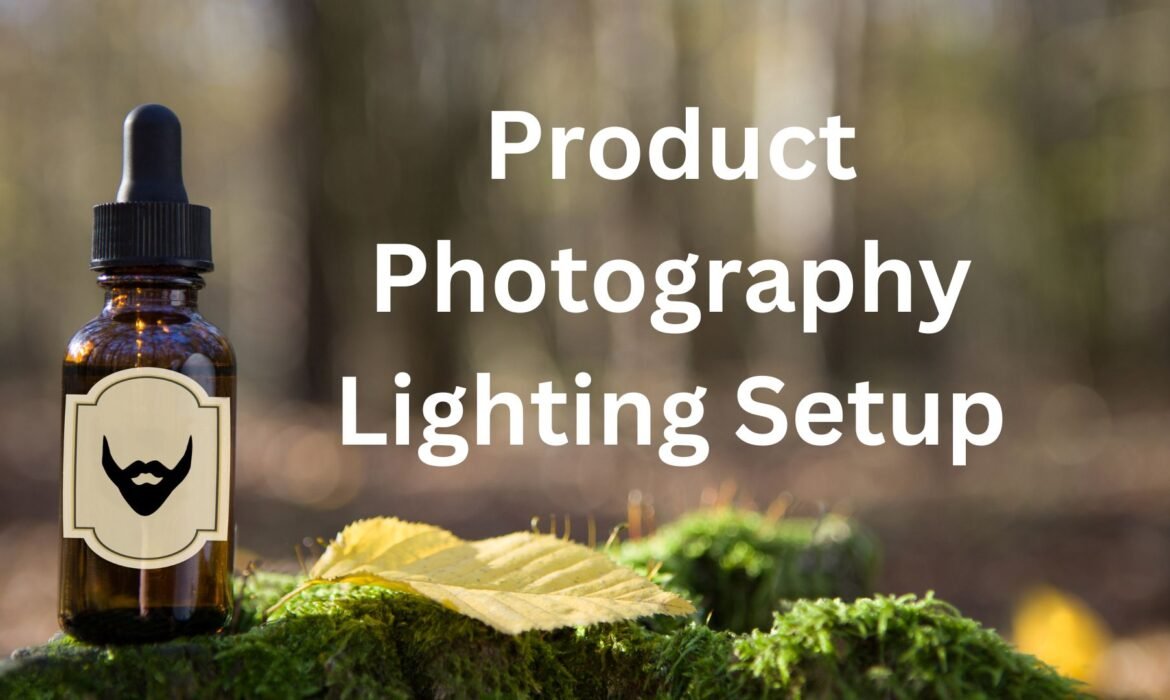
How to Set Up Product Photography Lighting for E-commerce Success
In the competitive world of e-commerce, visuals are everything. High-quality images can make or break a customer’s decision to purchase a product. Among the many elements that go into creating compelling product images, the product photography lighting setup plays a critical role. Lighting not only highlights the product’s features but also conveys its texture, color, and quality. Let’s dive deep into how to achieve the perfect product photography lighting setup for e-commerce success.
Why Lighting Matters in E-commerce Photography
Good lighting ensures that your product is showcased in the best possible way. It eliminates shadows, reduces glare, and brings out the true colors of the product. A poorly lit image can distort a product’s appearance, leading to customer dissatisfaction and increased return rates. Therefore, mastering your product photography lighting setup is essential for building trust and increasing conversions.
Lighting influences the mood and style of the image. Whether you’re photographing a shiny piece of jewelry or a textured fabric, the right lighting setup can enhance the visual appeal and help the product stand out. For e-commerce platforms, where customers rely solely on visuals to make decisions, your product photography lighting setup becomes a silent salesperson.

The Basics of Product Photography Lighting Setup
Before setting up your lighting, you need to understand the types of lighting available. The two primary sources are natural light and artificial light. Both have their advantages and can be used effectively depending on your product and setting.
Natural light works best for lifestyle product shots where you want to capture the product in a real-world scenario. It’s free, widely available, and produces soft, natural tones. However, it’s less consistent, as it depends on the time of day and weather conditions. For more control and precision, artificial lighting is your go-to solution. Studio lights, softboxes, and LED panels allow you to create a consistent and repeatable product photography lighting setup.
Choosing the Right Equipment for Your Lighting Setup
To create an effective product photography lighting setup, you need the right lighting equipment. There are various types of lighting that can help you achieve the best results, depending on your product and the mood you want to create.
The most common types of lighting used in product photography are continuous lights and strobes. Continuous lights provide a constant light source, which is ideal for beginners because they allow you to see exactly how the light will affect your product. Strobes, on the other hand, offer a more powerful burst of light and are often used by professional photographers.
When setting up your product photography lighting setup, you should also consider the type of light source. Softboxes and umbrellas are popular options because they diffuse the light, creating a softer, more even illumination that reduces harsh shadows. Ring lights are another great option, especially for smaller products, as they provide a uniform light that wraps around the product.

Creating a Consistent Lighting Environment
Consistency is key in e-commerce photography. Customers expect uniformity when browsing through product listings. A controlled environment eliminates variables and ensures that every shot is consistent in tone and quality. To achieve this, set up your lights in a fixed position and maintain a uniform distance between the light source and the product. Mark these positions with tape for easy replication in future shoots.
Using a plain background, preferably white or neutral, enhances the product’s visibility. Light tents or shooting tables can help create a controlled environment, reducing unwanted reflections and ensuring that the light is evenly distributed. Remember, a consistent product photography lighting setup not only improves image quality but also reduces post-processing time.
Key Elements of a Product Photography Lighting Setup
Now that you understand the importance of a proper product photography lighting setup, let’s take a closer look at the key elements that will help you achieve the perfect lighting for your photos.
The Main Light: Key Light
The key light is the most important light in your product photography lighting setup. It is the primary light source that illuminates your product. The placement and strength of the key light will have the most significant impact on the overall look of your photos.
For most products, it is best to place the key light at a 45-degree angle to the front of the product. This will create soft, flattering shadows that highlight the shape and texture of your product. You should experiment with the distance and angle of the key light to find the setup that works best for your specific product.

Fill Light
The fill light is used to soften the shadows created by the key light. Without a fill light, you may end up with harsh shadows that can distract from the product. A fill light helps to brighten up those shadowed areas, creating a more balanced look.
When setting up your product photography lighting setup, the fill light should be placed on the opposite side of the key light. The fill light should be less intense than the key light to avoid overexposing the product. This allows you to maintain contrast and dimension in your images while ensuring that all details of the product are visible.
Background Light
Another important element of your product photography lighting setup is the background light. While your focus should be on lighting the product itself, you also want to ensure that the background looks clean and professional. A well-lit background helps your product stand out, especially if you’re using a white or neutral backdrop.
To set up a background light, position a light source behind or slightly above the background. This will create a subtle glow that prevents the background from looking flat. You can also use gels to change the color of the background light and add a creative touch to your photos.
Light Modifiers
Light modifiers are accessories that help control and shape the light in your product photography lighting setup. Some common light modifiers include softboxes, diffusers, and reflectors.
Softboxes are a popular choice because they diffuse the light, creating a soft, even glow that eliminates harsh shadows. Diffusers are similar, but they are often used to soften the light even more, especially when using a hard light source like a flash. Reflectors are used to bounce light back onto the product, filling in shadows and brightening up dark areas.
By incorporating light modifiers into your product photography lighting setup, you can have more control over the quality of your light, ensuring that it enhances the product without creating unwanted distractions.

Understanding Light Placement and Angles
The placement of lights plays a significant role in how your product is perceived. For most e-commerce photography, a three-point lighting setup works wonders. This involves using a key light, a fill light, and a backlight.
- The key light is the primary source of illumination and is usually positioned at a 45-degree angle from the product. This light highlights the product’s features and creates depth.
- The fill light reduces shadows created by the key light. It’s softer and positioned on the opposite side of the key light.
- The backlight adds dimension by separating the product from the background. This is particularly useful for highlighting transparent or reflective objects.
Experimenting with the distance and angle of these lights can help you achieve the perfect balance for your product photography lighting setup.
Adapting Lighting for Different Products
Different products require different lighting techniques. For shiny or reflective items like jewelry and glass, use diffused lighting to minimize glare and reflections. A light tent can be particularly useful for such products. For textured items like fabrics or leather, side lighting helps emphasize the texture, adding depth and realism.
When photographing food, warm-toned lighting creates a more appetizing look. For electronics, neutral and sharp lighting works best to highlight details without creating distractions. Understanding the unique requirements of your product is vital for optimizing your product photography lighting setup.

The Role of Shadows and Reflections
Shadows and reflections can either enhance or detract from your product photos. While harsh shadows are generally undesirable in e-commerce photography, soft shadows can add depth and make the product appear more realistic. Using diffusers or adjusting the angle of the light can help control shadows.
Reflections, particularly for shiny objects, can be tricky. Positioning the lights at an angle and using a polarizing filter on your camera can reduce unwanted reflections. A well-thought-out product photography lighting setup ensures that shadows and reflections are balanced to enhance the overall image.
Using Natural Light in Your Product Photography Lighting Setup
If you’re just starting out or working with a limited budget, natural light can be a great option for your product photography lighting setup. Natural light is soft and flattering, making it an excellent choice for capturing product images. You can use natural light from a window, especially during the day when the light is diffused.
However, while natural light can work well, it can also be unpredictable. The quality and intensity of natural light change throughout the day, and cloud cover or other weather conditions can affect the lighting. For a more consistent setup, consider using a combination of natural and artificial lights to supplement the natural light and ensure a consistent look.
Creating the Right Mood with Product Photography Lighting Setup
The lighting you choose for your product photography lighting setup can also affect the mood of your images. Different types of lighting can create different emotional responses in customers. For example, soft, diffused lighting can create a calm, inviting atmosphere, while harsher lighting can give a product a more dramatic or edgy look.
Think about the message you want to convey with your product photos. If you’re selling a luxurious or high-end product, you may want to use lighting that creates a dramatic effect with strong shadows and highlights. On the other hand, if you’re photographing a casual or everyday product, softer, even lighting may be more appropriate.

Post-Processing and Enhancing Your Lighting Setup
Even with the perfect product photography lighting setup, some level of post-processing is often required. Editing software like Adobe Photoshop or Lightroom can help fine-tune the brightness, contrast, and color balance. Avoid over-editing, as it can lead to unrealistic images that misrepresent the product.
Consistency in editing is as important as consistency in lighting. Create presets or templates to apply uniform adjustments across all your images. This not only saves time but also ensures a cohesive look for your product catalog.
Common Mistakes to Avoid in Lighting Setup
While setting up your lighting, be mindful of common mistakes that can compromise image quality. Overexposure or underexposure can distort the product’s appearance. Always check the histogram on your camera to ensure proper exposure.
Using inconsistent light sources can create color imbalances. Stick to one type of light source, and ensure that the color temperature matches. Overcomplicating the setup with too many lights can create unnecessary shadows and reflections. A simple and well-planned product photography lighting setup often yields the best results.
Conclusion
A proper product photography lighting setup is crucial for e-commerce success. Great lighting not only enhances the appearance of your products but also helps build trust with your customers. By choosing the right lighting equipment, positioning your lights correctly, and using modifiers to control the light, you can create professional-quality product images that capture your product’s best features.
Remember, practice makes perfect. Experiment with different lighting setups to see what works best for your products. With the right product photography lighting setup, you can create stunning images that will help drive sales and make your e-commerce business stand out from the competition.
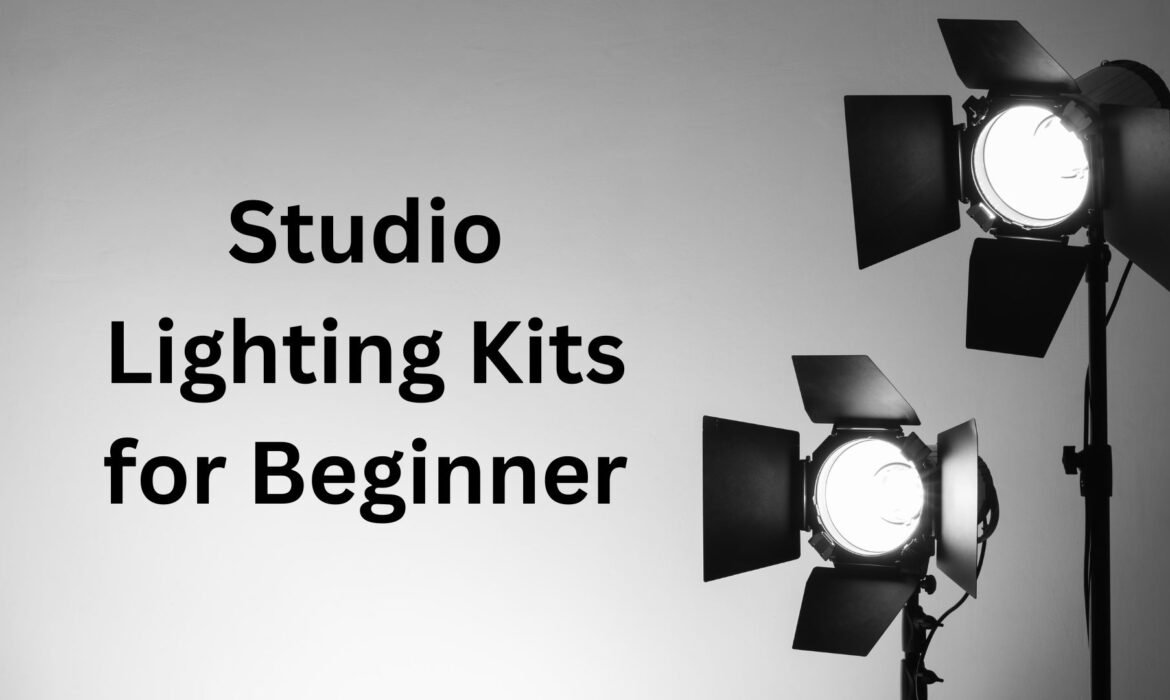
Top 10 Studio Lighting Kits for Beginner Photographers
Starting your photography journey can be an exciting adventure, but understanding the importance of good lighting is crucial. A well-selected studio lighting kit for beginners can transform your photos, elevating them from simple snapshots to professional-quality images. Whether you are photographing portraits, products, or creative setups, having the right tools can make all the difference. In this article, we’ll explore the top 10 studio lighting kits designed specifically for beginners and discuss why they are essential for honing your skills.
What is a Studio Lighting Kit
Lighting is the foundation of photography. While natural light is beautiful, it’s not always reliable. A studio lighting kit allows you to have complete control over your light sources, enabling you to create consistent and professional results. For those new to photography, these kits offer an affordable and straightforward way to learn about lighting setups without getting overwhelmed by overly complex equipment.
A good studio lighting kit typically includes essential items like softboxes, umbrellas, stands, and light sources. These tools help you understand the effects of different lighting angles and intensities, making it easier to bring your creative vision to life.
Why Do Beginners Need a Studio Lighting Kit?
For beginners, natural light often isn’t enough to achieve professional-looking photos, especially if you’re shooting indoors. A studio lighting kit for beginners helps you control the light and create a consistent environment for your shoots. Unlike relying on unpredictable sunlight, artificial lighting gives you full control over the intensity, direction, and color temperature of the light.
Additionally, studio lighting kits are designed to help beginners understand the fundamentals of lighting in photography. They provide a range of tools, such as softboxes, umbrellas, and reflectors, that can modify and diffuse the light. With these tools, you can experiment with hard light, soft light, shadows, and highlights, all of which are essential for creating stunning images.
Features to Look for in a Studio Lighting Kit for Beginners
When choosing a studio lighting kit for beginners, there are several factors to consider. Look for kits that include adjustable light stands, durable construction, and versatile light modifiers like softboxes or umbrellas. Continuous lighting options are especially beginner-friendly because they let you see the effects of the light in real-time. Portability and ease of setup are also important for those who may not have a permanent studio space.
Investing in a quality studio lighting kit for beginners can also save you money in the long run, as you’ll likely use many of the same pieces as you progress in your photography journey.

How to Choose the Best Studio Lighting Kit for Beginners
When searching for a studio lighting kit for beginners, there are a few key factors to consider:
1. Ease of Use: As a beginner, you want a lighting kit that’s simple to set up and use. Look for kits with clear instructions and tools that are easy to assemble and adjust.
2. Affordability: Photography gear can get expensive quickly, so as a beginner, it’s important to stay within your budget. Fortunately, many affordable studio lighting kits offer great value for the money.
3. Versatility: A good studio lighting kit for beginners should allow for a variety of lighting setups. This means it should include different types of lighting modifiers and be adjustable to suit various needs.
4. Build Quality: While you don’t need to invest in the most expensive gear, it’s still important to choose a kit made from durable materials. A solidly built studio lighting kit will last longer and provide better stability during your shoots.
5. Included Accessories: Many studio lighting kits for beginners come with all the necessary accessories, such as light stands, softboxes, and reflectors. Make sure the kit includes everything you need for a complete setup.
Now that we’ve covered the basics, let’s dive into the top 10 studio lighting kits for beginners.
1. Neewer 2-Pack Dimmable LED Softbox Lighting Kit
The Neewer 2-Pack Dimmable LED Softbox Lighting Kit is an excellent choice for beginners looking to improve their photography skills. It includes two LED lights with adjustable brightness, two softboxes for diffusing light, and sturdy light stands. This studio lighting kit for beginners is perfect for portrait photography and video shooting.
What makes this kit stand out is its LED lights, which are energy-efficient and long-lasting. The softboxes provide even light distribution, making it easier to capture professional-looking photos. Additionally, the setup process is straightforward, making it ideal for those just starting.
Another significant advantage of this kit is its portability. The lightweight design ensures you can easily transport and set up the lights in various locations. For beginners looking to experiment with studio photography without committing to heavy equipment, this kit offers a perfect balance of quality and convenience.

2. Emart 600W Continuous Lighting Kit
The Emart 600W Continuous Lighting Kit is another popular option among beginner photographers. This studio lighting kit for beginners includes two adjustable light stands, two umbrellas, and two 45W daylight-balanced bulbs. The kit is easy to use and provides soft, diffused light for your photography projects.
Umbrellas are a great starting point for those new to studio lighting because they are lightweight and simple to set up. This kit is perfect for portrait and product photography, offering excellent value for its price. The daylight-balanced bulbs ensure that your images have natural and accurate color tones.
In addition to its functionality, the Emart 600W kit is highly durable, making it a reliable choice for long-term use. Whether you are practicing at home or on a small project, this kit delivers consistent results without breaking the bank.
3. LimoStudio Photography Lighting Kit
For those seeking affordability and versatility, the LimoStudio Photography Lighting Kit is a fantastic choice. This studio lighting kit for beginners includes three light stands, three daylight-balanced bulbs, and two umbrellas. It also comes with a backdrop support system, making it an all-in-one solution for a home studio setup.
The inclusion of a backdrop system makes this kit ideal for portrait and product photography. Beginners can experiment with different backgrounds to create diverse and engaging visuals. The continuous lighting ensures consistent results, allowing beginners to focus on improving their techniques.
Furthermore, this kit is designed for simplicity and ease of use. The components are lightweight and easy to assemble, making it an excellent option for those who are just starting their journey into studio photography.

4. Fovitec StudioPRO Softbox Lighting Kit
The Fovitec StudioPRO Softbox Lighting Kit offers a higher-quality option for those willing to invest a little more. This studio lighting kit for beginners includes three softboxes, three light stands, and energy-efficient CFL bulbs. The softboxes provide soft, even lighting, perfect for capturing stunning portraits or detailed product shots.
One of the key benefits of this kit is its durability and professional-grade components, making it a great choice for beginners who want a reliable setup to grow with. The adjustable light stands allow for flexible positioning, enabling you to experiment with various lighting angles and intensities.
Additionally, the energy-efficient bulbs reduce power consumption while delivering consistent brightness. This kit is perfect for beginners who are serious about building their skills and want equipment that can keep up with their growth.
5. Godox SL-60W LED Video Light Kit
If you are looking for a compact and high-quality lighting solution, the Godox SL-60W LED Video Light Kit is worth considering. This studio lighting kit for beginners includes a powerful LED light, a softbox, and a light stand. The LED light offers adjustable brightness and a consistent color temperature, making it suitable for both photography and videography.
The compact design of this kit makes it ideal for those with limited space. It’s easy to set up and transport, allowing beginners to experiment with lighting in various environments. The LED technology ensures a longer lifespan compared to traditional bulbs, making this kit a cost-effective choice.
Moreover, the high-quality LED light ensures consistent and professional results. This kit is perfect for beginners who want to achieve a polished look in their photos and videos without investing in bulky equipment.

6. Julius Studio Umbrella Lighting Kit
The Julius Studio Umbrella Lighting Kit is a budget-friendly option for beginners. This studio lighting kit for beginners includes two light stands, two umbrellas, and two daylight-balanced bulbs. It’s lightweight and portable, making it a convenient choice for those just starting out.
Umbrella lighting is a great way to achieve soft and diffused light, perfect for portrait and product photography. The simplicity of this kit makes it an excellent entry point into the world of studio lighting. Beginners can quickly learn the basics of lighting without feeling overwhelmed by complex setups.
Another advantage of this kit is its affordability. It’s a cost-effective solution for those who want to practice studio photography without a significant upfront investment. Despite its low price, the kit delivers reliable performance for everyday use.
7. RALENO Softbox Lighting Kit
The RALENO Softbox Lighting Kit is another top choice for beginner photographers. This studio lighting kit for beginners features two softboxes, two adjustable light stands, and two energy-efficient LED bulbs. The kit is designed for ease of use, with a simple setup process and durable construction.
The softboxes provide even and diffused lighting, making it easier to capture professional-quality photos. This kit is particularly suitable for portrait and video shooting, where soft lighting is essential for creating flattering results. The adjustable stands allow for flexibility in positioning the lights.
Additionally, the LED bulbs are energy-efficient and long-lasting, making this kit a practical choice for beginners. Its user-friendly design ensures that you can focus on your photography without worrying about technical difficulties.

8. MountDog Softbox Lighting Kit
The MountDog Softbox Lighting Kit is a versatile and affordable option for beginners. This studio lighting kit for beginners includes two softboxes, two light stands, and two daylight-balanced bulbs. The kit is lightweight and easy to set up, making it ideal for home studios.
The softboxes provide consistent and even lighting, perfect for a variety of photography projects. Beginners can experiment with different lighting setups to understand the impact of light angles and intensities on their photos. The sturdy construction of the stands ensures stability during use.
In addition to its functionality, this kit is highly portable, making it an excellent choice for those who may need to move their studio setup frequently. It’s a reliable and budget-friendly option for newcomers to studio photography.
9. YICOE Softbox Lighting Kit
The YICOE Softbox Lighting Kit offers excellent value for beginner photographers. This studio lighting kit for beginners includes two softboxes, two adjustable light stands, and two energy-efficient LED bulbs. The kit is designed for portability and ease of use, making it a great choice for small studios.
The softboxes provide soft and diffused lighting, ideal for capturing high-quality portraits and product shots. Beginners will appreciate the straightforward setup process, allowing them to focus on their photography rather than complicated equipment. The adjustable light stands offer flexibility for various shooting scenarios.
Furthermore, the energy-efficient LED bulbs ensure consistent and natural lighting, making this kit a dependable choice for everyday use. It’s an excellent option for those who want a balance of quality and affordability.

10. StudioFX Softbox Lighting Kit
The StudioFX Softbox Lighting Kit is a professional-grade option for beginners. This studio lighting kit for beginners includes three softboxes, three light stands, and daylight-balanced CFL bulbs. The kit is designed for durability and ease of use, making it suitable for a wide range of photography projects.
The three softboxes allow for versatile lighting setups, enabling beginners to experiment with different angles and intensities. This flexibility is perfect for portrait, product, and creative photography. The sturdy stands ensure that your setup remains stable throughout your shoot.
Additionally, the daylight-balanced bulbs provide consistent and natural lighting, ensuring that your images have accurate colors. This kit is ideal for those who want a comprehensive solution to elevate their studio photography skills.
Conclusion
Choosing the right studio lighting kit for beginners can significantly impact your photography journey. Each of the kits mentioned above offers unique features and benefits, making it easier to find one that suits your needs and budget. By investing in a quality studio lighting kit for beginners, you’ll gain the tools and confidence needed to create stunning images. Take your time to explore the options and start experimenting with different lighting setups to enhance your skills.
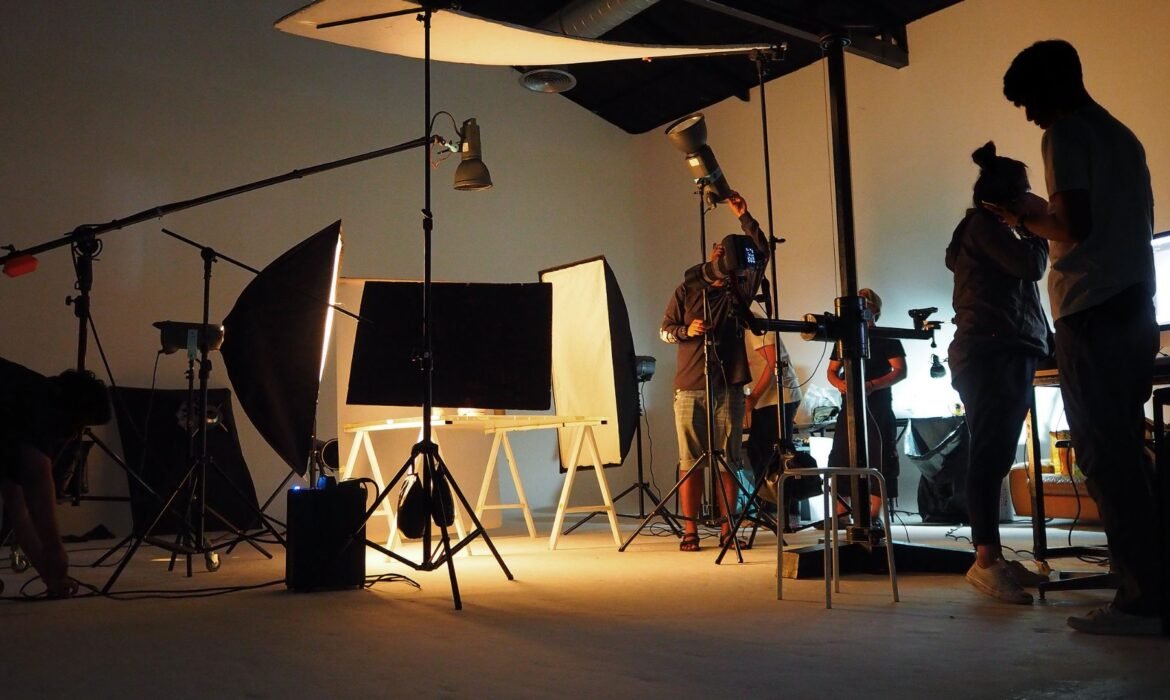
Portable Studio Lighting: A Comprehensive Buyer’s Guide
In the world of photography and videography, lighting is an essential element that can make or break your shot. Whether you’re a professional photographer or a hobbyist, achieving the right lighting is crucial to capturing stunning images. Portable studio lighting is an invaluable tool for those who need flexibility, mobility, and convenience. It allows you to create studio-quality lighting anywhere, whether you’re shooting in a studio or on location.
This comprehensive buyer’s guide will explore everything you need to know about portable studio lighting, from understanding its features to choosing the right setup for your needs. By the end of this guide, you’ll have a clear understanding of how to pick the perfect portable studio lighting system for your photography or videography projects.

What Is Portable Studio Lighting?
Portable studio lighting refers to lighting equipment designed to be easily transportable and set up for various shooting scenarios. Unlike traditional studio lighting, which is often bulky and fixed in one location, portable studio lighting offers the convenience of taking your lighting setup wherever you go. This is ideal for photographers and videographers who need to work in different environments or need to travel with their gear.
The primary function of portable studio lighting is to provide consistent, high-quality light in situations where natural light or built-in camera lights might not be sufficient. It is versatile and can be used for portrait photography, product shoots, interviews, YouTube videos, and much more. Portable studio lighting typically includes light sources, modifiers, and power sources that are easy to transport and set up.
Why You Need Portable Studio Lighting
Portable studio lighting offers several benefits, especially for photographers and videographers who work in various locations or need flexibility in their setups. One of the biggest advantages of using portable studio lighting is that it allows you to have full control over the lighting conditions, regardless of your environment.
For instance, if you’re shooting a portrait in a location with harsh or inconsistent lighting, portable studio lighting gives you the ability to create a well-lit environment. Additionally, if you’re working on a video shoot and need to adjust the lighting quickly, portable studio lighting makes it easy to achieve the desired effect. Its portability also makes it ideal for on-location shoots, such as outdoor events, studio setups, or travel photography.

Key Features to Look for in Portable Studio Lighting
When shopping for portable studio lighting, there are several features you need to consider to ensure you choose the best lighting setup for your needs. Understanding these features will help you make an informed decision when purchasing your equipment.
Light Type
The type of light source is one of the most important factors to consider. Portable studio lighting typically comes in two types: LED lights and flash/strobe lights. LED lights are popular for their continuous light source, making them ideal for both photography and videography. They provide consistent, steady illumination, allowing you to see the lighting effect in real time.
On the other hand, flash/strobe lights are more commonly used in photography. These lights emit a powerful burst of light, which freezes motion and provides a high level of control over exposure. When choosing between LED and strobe lights, think about your specific needs. If you mainly shoot videos, LED lights are a great option. If you primarily take still photographs, flash lights might be the better choice.
Brightness and Power
The brightness of your portable studio lighting will have a significant impact on your shots. A light that is too dim will result in underexposed images, while overly bright lights can cause harsh shadows or overexposure. When purchasing portable studio lighting, check the specifications to ensure the brightness level meets your requirements.
The power of the light is also an essential consideration. Portable lights are typically powered by rechargeable batteries, AC adapters, or both. Rechargeable batteries allow for greater mobility since you won’t need to be tethered to an electrical outlet. However, ensure the battery life is long enough for your shoots to avoid interruptions. Some models offer additional features, such as battery-saving modes or the option to charge while in use, which can be especially helpful for extended shooting sessions.

Color Temperature and Color Accuracy
Color temperature is another crucial factor to consider. It refers to the warmth or coolness of the light and is measured in Kelvin (K). A lower Kelvin number (around 3200K) produces a warmer, yellowish light, while a higher Kelvin number (around 5600K) produces a cooler, blue-toned light.
In most cases, you want your portable studio lighting to have an adjustable color temperature so you can match it to your environment or achieve a specific look. This is particularly important for video shoots, where color accuracy can make a significant difference in the final product. Additionally, check the Color Rendering Index (CRI) rating of the light. A higher CRI rating (90 or above) ensures that the light accurately renders colors, making it ideal for portrait photography or product shoots.
Portability and Weight
As the name suggests, portability is a key feature of portable studio lighting. When considering the portability of the light, think about how easy it will be to carry, set up, and break down. Lightweight and compact lights are ideal for photographers and videographers who need to travel frequently or work in different locations.
Some portable studio lighting kits include carrying cases or bags, which make transportation even more convenient. Additionally, consider the size of the light and how much space it will take up when packed. A bulky light might be harder to transport, while a smaller, more compact light can be more convenient for quick setups.

Adjustability and Control
The ability to adjust the intensity and direction of your portable studio lighting is essential for achieving the best lighting effects. Many models offer dimming controls, allowing you to fine-tune the light output to match your creative vision. Additionally, portable studio lighting with adjustable stands, softboxes, or umbrellas gives you more control over how the light falls on your subject.
For videographers, adjustable lights that offer dimming and color temperature controls can be particularly useful when shooting in changing environments or adjusting for different scenes.
Durability and Build Quality
Since portable studio lighting is often used in a variety of settings, durability is an important factor to consider. Look for lights made from high-quality materials that can withstand the wear and tear of frequent use and transportation. Many models feature robust frames, protective cases, and heat dissipation systems to ensure longevity and safe operation.
Types of Portable Studio Lighting
Portable studio lighting comes in several types, each suited to different types of photography or videography. Understanding the different types of portable lighting will help you make the best choice for your needs.
LED Lights
LED lights are the most popular type of portable studio lighting, especially for videographers and photographers who need continuous light. They are energy-efficient, produce minimal heat, and offer adjustable color temperature settings. LED lights are ideal for shooting videos, live streaming, and even portrait photography, as they provide a consistent light source without the need for frequent adjustments.

Flash and Strobe Lights
Flash and strobe lights are powerful, high-intensity lights that deliver brief bursts of light, perfect for capturing motion and freezing action in still photography. These lights are commonly used for portrait sessions, product shoots, and fashion photography. While not continuous, flash lights can be used with triggers or modifiers to create precise lighting effects.
Ring Lights
Ring lights are a popular choice for close-up portraits, beauty shoots, and video conferencing. Their circular design provides even, flattering lighting, reducing shadows on the subject’s face. Many ring lights are portable, making them perfect for on-the-go use, such as vlogging, TikTok videos, or makeup tutorials.
Softboxes and Umbrella Kits
Softboxes and umbrella kits are modifiers that help diffuse light, creating soft, even illumination. These are often used in conjunction with other light sources, such as flash or LED lights. Softboxes and umbrellas are ideal for portrait photography, as they soften harsh light and reduce shadows, providing a more flattering look for the subject.

How to Choose the Right Portable Studio Lighting
When choosing portable studio lighting, it’s important to consider your specific needs and budget. Here are a few tips to help you make the right decision:
- Determine Your Primary Use: Are you mostly shooting photos or videos? Do you need continuous light or strobe flashes? Understanding your primary use will help you choose between LED lights, flash lights, or other types of portable lighting.
- Consider Your Budget: Portable studio lighting can range from affordable to expensive, depending on the features and brand. Set a budget and try to find a lighting setup that fits your needs without overspending.
- Check Reviews and Recommendations: Look for feedback from other photographers or videographers who have used the lights you’re considering. Reviews can give you insight into the performance, reliability, and ease of use of the equipment.
Conclusion
Portable studio lighting is an essential tool for any photographer or videographer who needs high-quality, flexible lighting solutions on the go. Whether you’re capturing portraits, shooting product photos, or creating content for YouTube, portable studio lighting provides you with the control and consistency needed to create professional results.
By considering factors such as light type, brightness, portability, and durability, you can find the perfect portable studio lighting setup for your needs. With the right lighting, you can elevate your work and ensure your shots always look their best, no matter where you are.
How Much Does a Full Body Mannequin Cost? A Detailed Price Breakdown
When shopping for mannequins, one of the most common questions that arise is, “How much does a full body mannequin cost?” Understanding the price of a full body mannequin is important whether you are an entrepreneur looking to display your clothing line, a visual merchandiser trying to create an attractive store display, or an individual simply wanting to showcase your clothing collection. A full body mannequin is an essential tool that helps in showcasing apparel, accessories, and other fashion items. However, the price of a full body mannequin can vary significantly depending on various factors. In this article, we’ll explore the different aspects that influence the price of a full body mannequin and provide a detailed breakdown of what you can expect to pay.

Factors Affecting the Price of a Full Body Mannequin
Before diving into the price range of full body mannequins, it’s important to consider the different factors that affect the price. So, how much does a full body mannequin cost really depends on these aspects.
Material plays a huge role in determining the price of a mannequin. Mannequins can be made from a variety of materials, including plastic, fiberglass, and more premium options like silicone and resin. Plastic mannequins are typically the least expensive, while those made from fiberglass and silicone tend to cost more due to their durability and high-quality finish. In addition to the material, the design and features of the mannequin can significantly influence the price. For instance, mannequins that are more life-like or feature more intricate designs, such as realistic facial features or posable limbs, will be on the higher end of the price spectrum.
The brand and manufacturer can also affect the price of a full body mannequin. Established brands with a reputation for producing high-quality mannequins will often charge more, while lesser-known manufacturers may offer similar mannequins at lower prices. Furthermore, the size and poseability of the mannequin can influence its price. Full body mannequins that are posed in dynamic stances or are adjustable tend to be more expensive than static models. Some mannequins also offer features like detachable heads, hands, or feet, which can impact the cost.

How Much Does a Full Body Mannequin Cost Based on Material?
One of the first things to consider when asking, “How much does a full body mannequin cost?” is the material used to make the mannequin. The material determines not only the cost but also the mannequin’s durability and appearance.
1. Plastic Mannequins: Plastic is often the most affordable material for mannequins. Mannequins made from plastic are lightweight and durable but may not offer the most realistic appearance. The price of plastic full body mannequins typically ranges from $50 to $200, depending on their design and quality. A basic plastic mannequin without any additional features will generally be on the lower end of the price range.
2. Fiberglass Mannequins: Fiberglass mannequins are more durable and can be made to look more realistic. They are more expensive than plastic mannequins, with prices typically ranging from $150 to $500. These mannequins are perfect for stores that need something sturdy but also want a more polished look. Fiberglass mannequins are often used by professional clothing retailers due to their versatility and higher-end appearance.
3. Silicone and Resin Mannequins: Silicone and resin mannequins are the most expensive types. These mannequins often offer the most life-like appearances and can have realistic textures and poses. These mannequins are popular in high-end fashion stores and for personal collections. The cost of silicone and resin mannequins can range from $300 to over $1,000, depending on the brand, features, and level of realism. If you’re asking, “How much does a full body mannequin cost?” and want a top-tier option, silicone or resin will be your highest investment.

How Much Does a Full Body Mannequin Cost Based on Design?
The design of the mannequin can also impact its price. A basic, standard mannequin is going to be much more affordable than one that features intricate details or a highly realistic appearance.
1. Standard Mannequins: Standard mannequins are simple in design and generally have minimal detailing. These mannequins are often in neutral poses, such as standing with arms down by the sides. A standard full body mannequin can cost anywhere from $50 to $300, depending on the material used.
2. Realistic Mannequins: Realistic mannequins are designed to look as lifelike as possible. These mannequins feature realistic facial features, proportions, and even skin textures. The more lifelike the mannequin, the higher the cost. Realistic mannequins can be priced anywhere from $200 to $1,000, with high-end realistic mannequins made from materials like silicone and resin reaching the top of this range.
3. Posable Mannequins: Poseable mannequins have joints that allow them to be positioned in various ways, offering flexibility for creating different displays. These mannequins typically cost more than static mannequins, with prices ranging from $150 to $600 or more, depending on the quality and material used.

How Much Does a Full Body Mannequin Cost Based on Size?
Another aspect that influences the price of a full body mannequin is its size. Full body mannequins come in various sizes, from child-sized models to extra-large adult mannequins. The size of the mannequin directly impacts its production cost, as larger mannequins require more materials and labor to create.
1. Adult-sized Mannequins: Most full body mannequins are designed to fit standard adult clothing sizes. These mannequins typically range from $100 to $500, depending on the material and features. A simple adult mannequin without posable limbs or realistic features will be on the lower end of this price range, while a more sophisticated model with realistic details or adjustable joints will be at the higher end.
2. Child-sized Mannequins: Child mannequins are generally less expensive than adult mannequins. Prices typically range from $50 to $200. However, child mannequins with detailed features or customizable parts can push the price higher.
3. Plus-sized Mannequins: Plus-sized mannequins are designed to showcase clothing for larger body types. These mannequins can range from $200 to $600 or more, depending on the material and level of customization. Due to the specific needs of the plus-size market, these mannequins may have more specialized features, such as adjustable limbs or removable parts.

How Much Does a Full Body Mannequin Cost for Specific Purposes?
When asking, “How much does a full body mannequin cost?” it’s also important to consider the purpose of the mannequin. Different purposes may require specific types of mannequins that can affect the price.
1. Retail Display Mannequins: Mannequins used for retail displays are typically designed to attract attention and showcase clothing in an appealing way. These mannequins can range from $150 to $500 or more. Retail mannequins can have special features such as detachable hands, heads, or feet, which allow for more flexible and customizable displays.
2. Fashion Show Mannequins: Mannequins used for fashion shows often need to be adjustable, with dynamic poses that showcase the clothes in the best possible light. These mannequins can range from $300 to over $1,000. The more advanced the mannequin (e.g., those that can simulate movement or adjust to various poses), the higher the price.
3. Photography Mannequins: Photography mannequins are designed specifically to create the best visual effect for photoshoots. They often have flexible limbs and realistic features. These mannequins can range from $200 to $1,000 depending on their flexibility, material, and design.
Conclusion: How Much Does a Full Body Mannequin Cost?
In conclusion, when asking, “How much does a full body mannequin cost?” The answer depends on various factors such as material, design, size, and purpose. Prices for full body mannequins can range from as low as $50 for a basic plastic mannequin to well over $1,000 for high-end silicone or resin mannequins with realistic features and advanced poses. If you are looking for a full body mannequin for a retail display, you can generally expect to pay between $100 and $500 for a standard model. However, if you’re after something more customized or with special features, the price could be significantly higher.
Ultimately, the cost of a full body mannequin is determined by the specific needs of your display, the type of material you prefer, and the features you’re looking for. Whether you’re looking for a simple mannequin for personal use or a more sophisticated option for a professional setting, there are options available at a wide range of prices to meet your needs.
Best Clothes for Professional Headshot: Your Ultimate Style Guide
When it comes to creating the perfect professional headshot, choosing the best clothes for professional headshot plays a vital role in ensuring that you present yourself in the best possible light. A professional headshot is not just about how you look in the image; it also reflects your personality, style, and even your career. Whether you’re updating your LinkedIn profile, building a personal brand, or preparing for a job interview, wearing the best clothes for professional headshot is crucial to making a lasting impression.
In this ultimate style guide, we will dive deep into the factors that influence your wardrobe choices, what works best for different types of professional headshots, and how you can make the most of your photoshoot by selecting the right clothing.
Why the Right Clothes Matter for a Professional Headshot
A professional headshot is often the first impression someone will have of you in a business or professional context. From potential employers to clients or colleagues, the best clothes for professional headshot are essential because they convey your professionalism, confidence, and attention to detail.
When you wear the right clothes for a headshot, it ensures that the focus remains on you, not your attire. In contrast, the wrong clothes can distract from your face, create an unflattering image, or even project an unprofessional image that doesn’t align with your career goals. Therefore, choosing the best clothes for professional headshot goes beyond simply picking a shirt or jacket — it’s about selecting pieces that represent your personality and fit within the context of your industry.
Factors to Consider When Choosing the Best Clothes for Professional Headshot
1. Industry and Profession
The best clothes for professional headshot vary depending on the industry you’re in. If you work in a formal setting like law, finance, or corporate business, a classic suit or blazer is often the best choice. On the other hand, creative fields such as marketing, photography, or tech startups allow for more flexibility in wardrobe choices.
If you’re in a more creative or casual industry, you might opt for stylish yet approachable outfits, like a well-tailored blazer paired with a simple shirt or a blouse with clean lines. It’s crucial to tailor your clothing to the type of job you’re aiming for.
For example, an attorney might choose a navy or black suit and a white shirt for their professional headshot, while someone in tech might opt for a smart jacket paired with a simple tee. Understanding your profession’s standards will help you choose the best clothes for professional headshot that are appropriate and appealing.
2. Color Choices
When selecting the best clothes for professional headshot, color plays a significant role in how you will be perceived. Bright, bold colors like red or orange can make you appear too intense or aggressive, while overly muted tones can make you look dull and washed out.
For most professional headshots, solid colors work best because they don’t compete with your face for attention. Neutral colors such as navy, black, gray, and white are timeless, professional, and versatile. These colors not only complement a wide range of backgrounds, but they also create a polished look without distracting from your face.
If you want to add a little personality to your outfit, you can include subtle shades like deep blues, greens, or earth tones. However, it’s crucial to avoid overly busy patterns such as large florals or stripes, as they can distract from your face and may not look great in photos. The best clothes for professional headshot will be those that enhance your appearance without overshadowing you.
3. Fit and Tailoring
The best clothes for professional headshot should be well-fitted and flattering to your body shape. Clothes that are too loose or too tight can create a sloppy or uncomfortable appearance, which can negatively affect your overall look. On the other hand, clothing that fits properly enhances your posture and gives you a polished, confident appearance.
Tailoring is key to ensuring the perfect fit. Whether it’s a jacket that fits snugly at the shoulders or pants that break just above your shoes, the right tailoring can make all the difference in how your headshot turns out. Well-tailored outfits allow you to move freely and naturally, helping you appear relaxed and confident in your photos.
4. Avoiding Distractions
When selecting the best clothes for professional headshot, it’s important to remember that the focus should be on you, not your clothes. Avoid clothing with logos, loud prints, or excessive embellishments that might divert attention away from your face. While certain patterns or textures can work well in headshots, it’s best to keep things simple and classic.
It’s also wise to avoid clothes that are too trendy. Fashion trends can date quickly, and what’s considered fashionable now might look outdated in a year. When choosing the best clothes for professional headshot, aim for timeless pieces that will remain relevant regardless of changing trends. Classic cuts and colors will keep your headshot looking fresh and professional for years to come.
5. Layering for Depth and Interest
Layering is another great way to enhance the best clothes for professional headshot. A well-chosen blazer or jacket can add dimension to your look, giving it depth and structure. A blazer can also lend a sense of formality and professionalism, which can be especially important for corporate or business-related headshots.
If you’re wearing a shirt or blouse, ensure that it has a clean and smooth fit. A crisp button-up shirt under a blazer, for instance, creates a polished and professional appearance. Accessories, like a simple necklace or a tie, can also help add interest without overwhelming the image. However, be mindful not to overdo it — keep accessories minimal and understated to keep the focus on you.
Choosing the Best Clothes for Professional Headshot by Gender
For Men
Men’s outfits for professional headshots typically include a well-fitted suit, a dress shirt, and possibly a tie. The best clothes for professional headshot for men should be simple and tailored to fit well. A classic suit in a neutral color like navy or charcoal gray is a great option, as it exudes professionalism without being overly flashy.
A white or light blue dress shirt under the suit is often a safe bet. If you choose to wear a tie, go for something understated — avoid busy patterns or loud colors. Solid colors or subtle stripes are ideal for a more polished and timeless look.
The most important thing when choosing the best clothes for professional headshot as a man is the fit. The jacket should sit properly on the shoulders, and the pants should break just above the shoes. Avoid overly tight or baggy fits, as they will look unflattering in photos.
For Women
Women have a bit more flexibility when it comes to professional headshot attire, but that doesn’t mean you can throw on just anything. A blouse or shirt paired with a blazer is always a great choice for a business headshot. You can also consider a professional dress with clean lines for a more polished, modern look.
The best clothes for professional headshot for women should be neat, fitted, and avoid excessive frills or distractions. Stick to solid colors or subtle patterns, and make sure your clothing isn’t too low-cut or revealing. Opt for a neckline that complements your face shape and doesn’t draw attention away from your expression.
Consider pairing your outfit with simple, understated jewelry. A pair of stud earrings or a thin necklace can add a touch of elegance without overwhelming your look. Just like with men’s outfits, the key is to keep things balanced and elegant.
Fabrics to Consider for Professional Headshots
The material of your clothing can significantly impact how it looks in your headshot. Fabrics that are too shiny or reflective can cause glare or make the photo appear unbalanced. When selecting the best clothes for professional headshot, aim for fabrics with a matte finish. Cotton, wool, and silk are great options because they absorb light evenly and don’t cause any distracting reflections.
Avoid clothing made from materials that wrinkle easily, such as linen, as this can make you appear untidy in your headshot. On the other hand, clothes made from fabrics that hold their shape, like tailored wool or a structured cotton blend, are ideal for creating a polished and professional appearance.
Accessories and Grooming
While the best clothes for professional headshot should be the focus of your outfit, accessories can still play a role in enhancing your overall look. For example, a watch, simple earrings, or a delicate necklace can add subtle sophistication. However, keep it minimal. Over-accessorizing can clutter your look and distract from your face.
Grooming is also essential when preparing for a professional headshot. Make sure your hair is neat and styled, and that your nails are clean and trimmed. If you wear makeup, keep it natural and understated to avoid looking overly done. A fresh, well-groomed appearance is just as important as the best clothes for professional headshot.
Final Thoughts
Choosing the best clothes for professional headshot is about selecting outfits that make you look confident, polished, and approachable. By understanding the nuances of color, fit, and fabric, and tailoring your choices to your profession and personal style, you can ensure that your headshot reflects the best version of yourself. Always remember that your headshot is an investment in your personal brand, and the right clothes can make all the difference in how you’re perceived.
By following this ultimate style guide, you’ll be well on your way to selecting the best clothes for professional headshot, allowing you to put your best foot forward in any professional setting.
How to Capture the Best LinkedIn Headshot: A Step-by-Step Guide
Your LinkedIn profile picture is often the first thing that potential employers, clients, or professional connections will see when they visit your profile. Having the best LinkedIn headshot can make a significant difference in how you’re perceived in a professional setting. A great LinkedIn headshot gives an impression of professionalism, approachability, and confidence. But how do you choose the best LinkedIn headshot? What should you wear? How should you pose? And what are some tips for making sure your LinkedIn photo stands out for all the right reasons? In this article, we will walk you through everything you need to know to capture the best LinkedIn headshots.
Why the Best LinkedIn Headshot Matters
Before we dive into the specifics of choosing the best LinkedIn headshot, let’s discuss why it’s so important. In today’s digital world, many employers and recruiters will check your LinkedIn profile before reaching out to you. Your LinkedIn photo is often the first impression you’ll make. A high-quality, professional headshot can make you look more credible and approachable, while a poor-quality photo might lead people to question your professionalism.
The best LinkedIn headshots help build trust and show your personality, which is crucial when you’re trying to establish connections in the business world. A good LinkedIn headshot can even improve your chances of being noticed by hiring managers, leading to better job opportunities or professional connections.

What to Wear for the Best LinkedIn Headshots
The right clothing can significantly impact how you are perceived in your LinkedIn headshot. Choosing the best LinkedIn headshot clothing requires careful consideration of your industry, role, and personal style.
When selecting an outfit for your LinkedIn headshot, aim for something that is simple, professional, and flattering. Avoid wearing overly bright colors or bold patterns, as they can distract from your face. Neutral tones like black, navy, white, or gray are classic choices that work well in almost any setting.
For men, a button-down shirt or a suit jacket can project a sense of authority and professionalism. Women may want to consider a blouse, a tailored jacket, or a professional dress. Avoid wearing clothing with logos or excessive branding, as these can make the image appear less polished.
Keep in mind that the goal is to look polished but not too formal. You want to seem approachable and approachable. Choose clothing that fits well, without being too tight or loose. The best LinkedIn headshot outfits should help you look comfortable and confident.

How to Pose for the Best LinkedIn Headshot
Your pose is another critical element of the best LinkedIn headshots. A good pose can make you appear confident, approachable, and professional. Here are a few tips on how to position yourself for your LinkedIn photo.
First, always stand or sit up straight. A slouched posture makes you appear less confident and can detract from the professionalism of your photo. Think about standing tall, with your shoulders back. Keep your chin level and avoid tilting your head too far up or down.
Next, make sure your face is visible and clearly lit. Looking directly into the camera gives the impression that you’re engaged and confident. A slight smile can also help you appear approachable, but avoid overly wide or forced smiles, as these may appear unnatural.
When deciding where to place your hands, it’s best to keep them relaxed. If you’re standing, place your hands naturally by your sides or clasped in front of you. If you’re seated, one hand may rest gently on your lap, while the other can rest on the armrest or your knee. Keep your arms relaxed and avoid crossing them over your chest, as it can create a barrier and make you appear closed off.
Your expression should reflect your personality and your role. If you work in a creative industry, a more relaxed pose with a slight smile may be appropriate. However, if you’re in a more formal field, such as finance or law, a more serious expression may be better. The key is to show confidence while still appearing approachable.

Backgrounds Matter: Choosing the Right Setting for the Best LinkedIn Headshots
The background in your LinkedIn headshot can also make a big difference in how your photo is perceived. The best LinkedIn headshots feature a clean, simple background that doesn’t distract from your face. Ideally, you should choose a backdrop that complements your professional look and aligns with your industry.
For example, an office setting or a neutral-colored wall can work well for most professionals. If you’re in a creative field, a backdrop that hints at your work environment, such as a studio or workspace, may add personality to your image. However, be mindful not to let the background take center stage. The goal is to keep the focus on you.
Avoid backgrounds that are too busy or cluttered, as they can distract from your face. Similarly, outdoor backgrounds, like parks or streets, might seem too casual and can introduce unwanted elements (such as traffic or other people) into the photo. Opting for an indoor, controlled setting with good lighting will always be a safe bet.

Lighting for the Best LinkedIn Headshots
Good lighting is essential to the best LinkedIn headshots. Lighting can make a huge difference in how you look in your photo, highlighting your features and creating a flattering effect. Natural light is usually the most flattering, so if possible, take your LinkedIn headshot near a large window or outdoors during daylight hours.
However, if you’re taking your photo indoors or during nighttime, it’s important to use artificial lighting that mimics daylight. You can achieve this by using soft box lights or ring lights. Avoid harsh lighting that creates shadows or bright spots on your face. The goal is even lighting that enhances your natural features without making you look too harsh or too washed out.
When setting up your lights, make sure they are positioned slightly above eye level to reduce shadows and create a more flattering angle. Position the light source in front of you to illuminate your face. If you have access to multiple light sources, use one to highlight your face and the other to fill in any shadows. This will help create a balanced and professional appearance in your best LinkedIn headshots.

Camera Quality and Angle for the Best LinkedIn Headshots
The quality of the camera you use is another important factor in achieving the best LinkedIn headshot. If you have access to a professional camera or a high-quality smartphone with a good camera, use it. A high-resolution image will ensure that your photo looks sharp and professional, even when viewed in larger formats.
If you don’t have access to a high-quality camera, consider hiring a professional photographer to help you get the best LinkedIn headshot. A professional photographer will know how to capture the best lighting, angles, and poses to make you look your best.
When it comes to the angle, always make sure the camera is at eye level. Avoid angles that are too high or low, as they can distort your features. A straight-on shot or slightly turned position is ideal. Remember, the goal is to look professional, confident, and approachable.

Editing and Retouching for the Best LinkedIn Headshots
Once your LinkedIn headshot has been taken, it may need some editing to ensure it looks its best. Some light retouching can help improve the clarity of your photo, but be careful not to overdo it. You want to look natural and authentic in your LinkedIn headshot.
Adjust the brightness and contrast to make sure the photo is well-lit and sharp. You can also remove any distracting blemishes, but avoid excessive airbrushing that could make you appear artificial. The best LinkedIn headshots maintain your real appearance while enhancing your natural features.
If you’re not sure how to edit your photo, you can use online tools or hire a professional image editor to help. The goal is to have a photo that is crisp, clear, and professional but still represents you as you are.

Common Mistakes to Avoid in LinkedIn Headshots
To ensure that you have the best LinkedIn headshot, avoid common mistakes that can make your photo appear unprofessional. For instance, don’t use selfies, as they often appear less polished. Likewise, avoid using old or outdated photos that no longer represent your current appearance.
Also, avoid overly casual clothing or distracting accessories, such as sunglasses, hats, or jewelry that takes away from the overall professionalism of the image. Always ensure that your LinkedIn headshot is focused on your face and does not feature other elements like pets or excessive background noise.
Lastly, don’t choose a LinkedIn headshot where you’re too far away from the camera or too zoomed in. Your face should be clearly visible and occupy a good portion of the frame.
Conclusion
The best LinkedIn headshots can significantly impact your professional image, helping you to make a great first impression. By choosing the right clothing, background, lighting, and pose, you can create a photo that is both professional and approachable. Remember, your LinkedIn headshot is a representation of your brand, so make sure it reflects the best version of yourself. With careful attention to detail and a little bit of planning, you can have a LinkedIn headshot that will help you stand out in the competitive professional world.
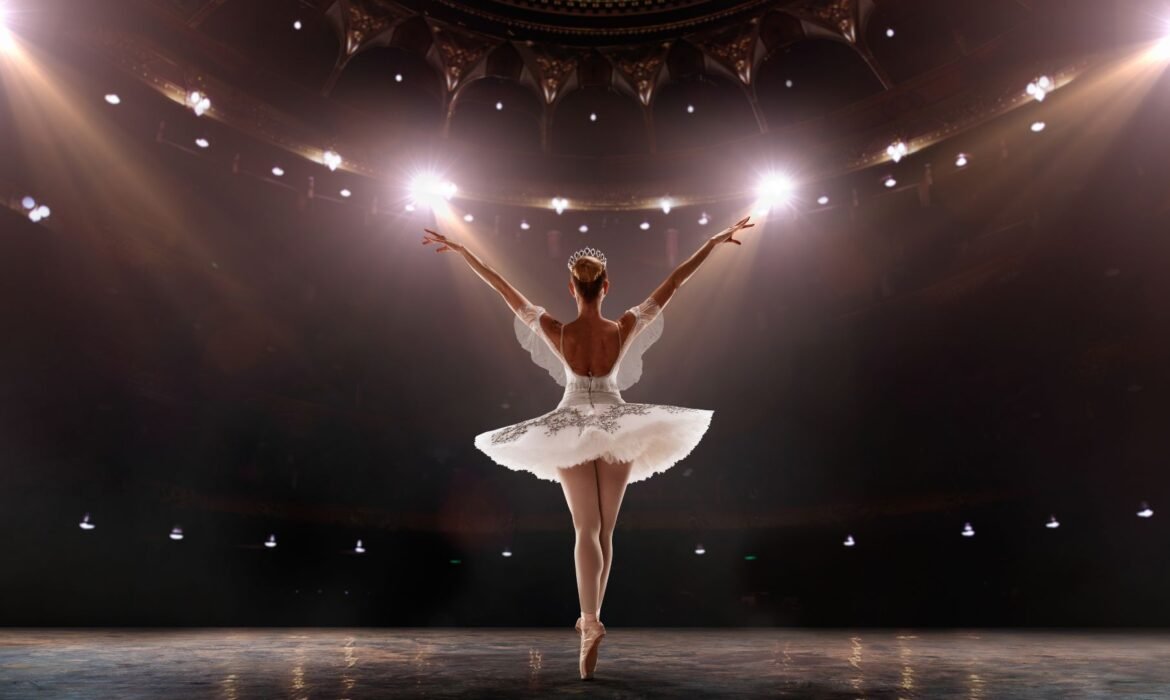
The Ultimate Guide to Ballet Headshots: Capturing Grace and Elegance
Ballet headshots are an essential part of every dancer’s portfolio. These images are not just simple photographs; they are a representation of a dancer’s grace, elegance, and unique artistry. Whether you are an aspiring ballerina auditioning for a dance company or an experienced performer updating your professional portfolio, understanding the nuances of ballet headshots can make all the difference. This guide will take you through everything you need to know to ensure your ballet headshots truly stand out.
What Are Ballet Headshots?
Ballet headshots are professional photographs specifically tailored for dancers. Unlike traditional portraits, ballet headshots focus on highlighting the dancer’s poise, expression, and personality. These images often convey a sense of movement, even in stillness, reflecting the essence of ballet—grace, precision, and emotion. They are not mere snapshots but carefully curated representations of your artistry, dedication, and individual charm as a dancer.
The purpose of ballet headshots is to capture the dancer in a way that showcases their individuality and technical prowess. Casting directors, choreographers, and agents often use these photographs to gauge a dancer’s suitability for roles or programs. Therefore, it is crucial that your ballet headshots leave a lasting impression. These images are a visual resume that speaks volumes about your discipline and creativity, setting the tone for your professional journey in dance.

Why Are Ballet Headshots Important?
Ballet headshots serve as your first introduction to decision-makers in the dance industry. They provide a visual representation of your commitment, artistry, and professionalism. A well-executed ballet headshot can set you apart from other dancers and open doors to opportunities that might otherwise be missed. In a field as competitive as ballet, where first impressions matter immensely, these photographs can significantly influence the trajectory of your career.
In addition to being used for auditions and applications, ballet headshots are often featured in promotional materials such as programs, posters, and websites. This makes it even more important to ensure that your headshots reflect your best self. They may also be used in press releases or media coverage, further amplifying your presence in the dance community. Each headshot becomes a silent ambassador of your brand, showcasing your essence as a performer.
Preparing for Your Ballet Headshots Session
Preparation is key when it comes to achieving stunning ballet headshots. The first step is to choose a professional photographer who specializes in dance photography. A photographer with experience in this niche will understand the unique requirements of ballet headshots, such as capturing movement and highlighting a dancer’s posture. Their expertise can make a remarkable difference in translating your vision into reality.

Before your session, take time to discuss your goals with the photographer. Share your vision and any specific requirements you have. For example, if you are auditioning for a classical ballet company, you may want headshots that emphasize your classical training and elegance. On the other hand, contemporary dancers might prefer headshots that showcase versatility and a modern aesthetic. Clear communication ensures that your photographer aligns their style with your aspirations, making the session productive and enjoyable.
Pay attention to your grooming and attire as well. Ballet headshots should reflect your polished and professional appearance. Keep your makeup natural and minimal, focusing on accentuating your features. Your hair should be neatly styled, often in a classic ballet bun, to highlight your face and neck. Choose simple, fitted clothing that compliments your physique without being distracting. Avoid bold patterns or loud colors that could overshadow your natural beauty and elegance.
Additionally, ensure you are well-rested and hydrated before the session. Taking care of your physical and mental well-being will reflect in your posture and expressions, contributing to the overall success of your headshots. Bring a few outfit options and touch-up tools like a compact mirror or hairpins to the session for last-minute adjustments.

Posing Tips for Ballet Headshots
The way you pose in your ballet headshots can greatly impact the final result. Ballet is all about lines and posture, and your headshots should reflect this. Practice poses that elongate your neck and highlight your profile. Even in a headshot, the alignment of your head, shoulders, and neck plays a critical role. These subtle details can create a striking visual impact, drawing attention to your elegance.
Maintain a relaxed yet confident expression. Smiling softly or maintaining a serene gaze can convey warmth and approachability. Avoid overly dramatic expressions, as they can detract from the natural elegance that ballet headshots aim to capture. Work with your photographer to find angles and poses that best showcase your features and personality. They can guide you in adjusting your posture to achieve the most flattering results.
To add depth to your headshots, experiment with slightly varying expressions that reveal different aspects of your personality. Let your face communicate stories of resilience, joy, or introspection—whatever aligns with your artistic identity. Subtle shifts in your gaze or the tilt of your chin can make a remarkable difference in conveying emotion and individuality.

Lighting and Background for Ballet Headshots
The choice of lighting and background can significantly influence the mood and quality of your ballet headshots. Natural light often works well, creating a soft and flattering effect. Studio lighting, when done correctly, can also produce stunning results by emphasizing your features and creating a professional look. Discuss these options with your photographer to choose a setup that complements your vision.
Backgrounds should be simple and uncluttered to keep the focus on you. Neutral tones such as white, gray, or soft pastels are popular choices for ballet headshots. These colors provide a clean canvas that enhances the elegance and timelessness of the image. However, depending on your personal style or audition requirements, you may also explore slightly textured or colored backgrounds for a unique touch.
Proper lighting can sculpt your face and highlight key features, adding dimension to your headshots. Soft shadows can accentuate the contours of your face, while even lighting ensures a balanced and polished appearance. Trust your photographer’s expertise to make the most of these elements.

The Role of Expression in Ballet Headshots
Expression is a vital element of ballet headshots. Your face should convey a sense of emotion and connection, drawing viewers into your world. Think about the story you want to tell through your headshot. Are you portraying a confident and determined dancer, or are you emphasizing your softer, more lyrical side? Tailoring your expression to your goals adds authenticity and depth to your photographs.
To achieve authentic expressions, try thinking of a specific moment or feeling from your dance performances. This can help you channel the right emotions and create a headshot that resonates with viewers. Remember, the best ballet headshots are those that evoke a sense of artistry and individuality. These subtle emotional cues make your image compelling, inviting others to envision your presence on stage.

Common Mistakes to Avoid
When it comes to ballet headshots, there are several pitfalls to avoid. One common mistake is over-editing. While some retouching can enhance your image, excessive editing can make the photo look unnatural and detract from your authenticity. Aim for a polished yet realistic appearance. The goal is to present the best version of yourself, not an idealized or altered depiction.
Another mistake is choosing a photographer who lacks experience in dance photography. Ballet headshots require a unique understanding of posture, movement, and aesthetics, which not all photographers possess. Investing in a skilled dance photographer is essential. Their familiarity with ballet nuances will ensure your headshots align with industry standards and personal aspirations.
Lastly, avoid neglecting your preparation. Rushing into a headshot session without proper grooming, attire, or practice can result in photos that fail to capture your best self. Take the time to prepare thoroughly to ensure your ballet headshots meet your expectations. Treat the session as a collaborative effort, where your preparation complements the photographer’s expertise.

How to Use Your Ballet Headshots
Once you have your ballet headshots, it’s important to use them effectively. Include them in your portfolio, both in print and online formats. Many dancers create professional websites or social media profiles to showcase their work. High-quality ballet headshots can serve as a focal point on these platforms, attracting the attention of industry professionals. They help build a cohesive personal brand that reflects your artistry and achievements.
When submitting applications or audition materials, ensure your ballet headshots align with the specific requirements of the organization. Some companies may request a particular format or style, so be prepared to tailor your submission accordingly. Keeping multiple versions of your headshots—each emphasizing a different facet of your identity—can provide flexibility when addressing diverse requirements.
Updating Your Ballet Headshots
As you grow and evolve as a dancer, your ballet headshots should reflect these changes. It’s a good idea to update your headshots every one to two years or whenever you experience significant changes in your appearance or career. Keeping your headshots current ensures they accurately represent who you are today. Updating your portfolio signals your dedication to maintaining professionalism and staying relevant in the industry.
Consider collaborating with the same photographer for updates to maintain consistency in style or exploring new photographers for fresh perspectives. Each update can reflect your growth and renewed aspirations, adding depth and dynamism to your portfolio.

Final Thoughts
Ballet headshots are more than just photographs; they are a powerful tool for self-expression and career advancement. By investing time and effort into creating headshots that capture your grace and elegance, you can set yourself apart in the competitive world of dance. These images are visual poetry that narrates your journey as a performer, embodying your discipline, creativity, and passion.
From selecting the right photographer to perfecting your pose and expression, every detail matters. With careful preparation and attention to detail, your ballet headshots can become a true reflection of your artistry and dedication. Remember, these images are not just about how you look—they are about who you are as a dancer. Let your ballet headshots tell your story, and let them open doors to the opportunities you deserve. By showcasing the elegance within you, these headshots will leave a lasting impression and propel your career to new heights.
Best Professional Headshot Outfit Ideas: The Ultimate 2025 Guide
A professional headshot is often the first impression you make on potential clients, employers, or colleagues. Whether you’re updating your LinkedIn profile, preparing for a business website, or adding a personal touch to your resume, the outfit you choose for your professional headshot plays a significant role. Selecting the right Professional Headshot Outfit can help convey confidence, approachability, and professionalism. In this ultimate 2025 guide, we will explore some of the best outfit ideas that can elevate your professional headshot and ensure that you look your best.
Why Your Professional Headshot Outfit Matters
Before diving into the outfit ideas, it’s essential to understand why your Professional Headshot Outfit is so important. A headshot is more than just a photo – it’s a visual representation of who you are, what you do, and the level of professionalism you bring to the table. Your Professional Headshot Outfit should reflect your industry and personal style while maintaining a clean, polished, and put-together appearance.
The right Professional Headshot Outfit can set the tone for how people perceive you. It should communicate trust, confidence, and competence. It’s crucial to make sure that your outfit doesn’t distract from your face but instead complements it. The goal is to look your best while keeping the focus on your expression and personality.

Key Factors to Consider When Choosing a Professional Headshot Outfit
There are several key factors to consider when selecting your Professional Headshot Outfit. The right clothing can enhance your image and make sure that your headshot leaves a lasting impression. Here are some essential tips to keep in mind:
1. Color Choices for Your Professional Headshot Outfit
The colors you choose for your Professional Headshot Outfit can significantly impact how you’re perceived. Neutral colors such as black, white, navy, gray, and beige are always safe choices for a Professional Headshot Outfit. They give off a sophisticated, clean, and professional vibe that is ideal for a business-oriented headshot.
Bright colors can also be effective, but they should be chosen carefully. Red, for example, can convey energy and confidence, but it can also be overwhelming if used excessively. When choosing a Professional Headshot Outfit, avoid overly bright or neon colors that can distract from your face. Opt for shades that flatter your complexion and align with the message you want to communicate.

2. Keep It Simple: Avoid Busy Patterns
A simple, solid-colored Professional Headshot Outfit works best. Avoid loud patterns or intricate designs, as they can draw attention away from your face. Your goal is to create a clean, polished look, and busy patterns often take away from that. Stick to simple and timeless pieces that will always remain stylish and professional.
For example, a classic button-down shirt or a tailored blazer can be a great addition to your Professional Headshot Outfit. These pieces are versatile and can be worn across various industries, from corporate settings to creative fields.
3. Fit Is Everything
When choosing a Professional Headshot Outfit, make sure the clothes fit you well. Ill-fitting clothes can make you appear sloppy or unprofessional, so take the time to ensure that your outfit is tailored to your body. A Professional Headshot Outfit should complement your figure and allow you to feel comfortable and confident.
Avoid outfits that are too tight or too loose, as they can be distracting in your headshot. A properly fitted jacket, shirt, or dress will help highlight your best features and ensure that you look sharp and polished in the photo.
4. Choose Timeless Styles for Your Professional Headshot Outfit
Trends come and go, but a Professional Headshot Outfit should be timeless. Avoid overly trendy pieces that might date your headshot. Instead, focus on classic clothing items that will look great now and in the years to come. Classic styles such as a well-tailored suit, a blouse, or a simple dress are perfect for your Professional Headshot Outfit.
Stick to clean lines and avoid anything too flashy or trendy. Remember, the goal is to create a professional image that will stay relevant for a long time.

Professional Headshot Outfit Ideas for Different Industries
Different industries have different expectations for a Professional Headshot Outfit. Below are some outfit ideas based on your career field, ensuring that you’re dressed appropriately for your specific industry.
1. Corporate/Business Professionals
If you work in a corporate or business environment, your Professional Headshot Outfit should reflect professionalism, trust, and competence. For men, a well-fitted suit, white shirt, and tie are standard choices. A navy or charcoal suit works well, and you can experiment with tie colors depending on your personal style. Women can opt for a blazer and blouse combination, with a pencil skirt or tailored pants. Stick to neutral colors like black, gray, or navy, and avoid bright or distracting patterns.
2. Creative Professionals (Artists, Designers, Writers)
In creative industries, there is more room for personal expression in your Professional Headshot Outfit. However, it’s still important to maintain a professional appearance. A good choice could be a smart blazer paired with a casual shirt or a stylish dress. Play with colors that suit your personality and add subtle accessories that highlight your creativity. While it’s okay to step away from traditional corporate attire, avoid looking too casual or unkempt. Your Professional Headshot Outfit should still give the impression of someone who is reliable and serious about their work.

3. Entrepreneurs and Small Business Owners
As an entrepreneur or small business owner, your Professional Headshot Outfit should strike the right balance between professionalism and approachability. A crisp, well-tailored shirt with a jacket can create an authoritative look, while also showing that you are down-to-earth and personable. You may also opt for a smart sweater or a casual but polished jacket. Focus on showcasing your unique style while maintaining a professional tone in your Professional Headshot Outfit.
4. Real Estate Professionals
In real estate, it’s important to look confident, approachable, and polished. A classic suit, dress shirt, and tie for men is a great choice. Women can wear a professional dress or a blouse with a jacket. The key is to look stylish without being too flashy. A well-chosen Professional Headshot Outfit will convey that you’re knowledgeable and trustworthy – qualities that clients look for in a real estate agent.
5. Healthcare Professionals
Healthcare professionals need a Professional Headshot Outfit that reflects trust and expertise. A white lab coat over a dress shirt or blouse is a classic look for doctors, nurses, or therapists. The clean, crisp appearance of a lab coat conveys authority and professionalism. For non-medical healthcare professionals, such as personal trainers or wellness coaches, business casual attire works well. A neat polo shirt or button-down shirt, paired with slacks or a skirt, creates a polished and approachable look.

Accessories and Grooming for Your Professional Headshot Outfit
While your Professional Headshot Outfit is the main focus, accessories and grooming can also make a big difference. Choose accessories that enhance your appearance without being too distracting. A simple watch, subtle necklace, or minimal earrings can add a touch of elegance to your look.
Grooming is just as important. Make sure your hair is clean and styled neatly, and if you wear makeup, keep it natural and subtle. The goal is to look like the best version of yourself without overdoing it. Your Professional Headshot Outfit should complement your appearance, not overshadow it.
Common Mistakes to Avoid with Your Professional Headshot Outfit
While planning your Professional Headshot Outfit, it’s essential to avoid common mistakes that can ruin your headshot. Some of these include:
1. Too Casual or Too Formal
Striking the right balance is key. Avoid dressing too casually, as it can make you appear unprofessional. On the other hand, overdressing can make you look stiff and uncomfortable. Aim for an outfit that feels natural and suits the setting.

2. Overly Bold Patterns
As mentioned earlier, busy patterns can be distracting. Stick to solid colors or subtle patterns that won’t draw attention away from your face. Your Professional Headshot Outfit should enhance your image, not compete with it.
3. Unflattering Fits
An ill-fitting outfit can make you appear disheveled or unpolished. Ensure that your Professional Headshot Outfit fits well, highlighting your best features without being too tight or too loose.
4. Neglecting Grooming
Your outfit might be perfect, but poor grooming can still affect your headshot. Make sure your hair is styled, nails are clean, and facial hair is neatly trimmed. Clean grooming will complement your Professional Headshot Outfit and complete the look.
Conclusion
Choosing the right Professional Headshot Outfit is crucial for making a great first impression. By considering your industry, selecting flattering colors, and avoiding common mistakes, you can ensure that your headshot conveys professionalism and confidence. Remember, your Professional Headshot Outfit should reflect who you are and the work you do. Whether you choose a classic suit, a casual blazer, or a creative combination, make sure your outfit aligns with your personal style while maintaining a polished appearance. With the right Professional Headshot Outfit, you’ll be sure to stand out and leave a positive, lasting impression.
Male Modeling Headshots: Best Practices for Confidence and Style
Male modeling headshots are essential for anyone aspiring to build a successful career in the modeling industry. These images serve as your first impression, showcasing your unique look, personality, and versatility. Whether you’re preparing your portfolio or applying for casting calls, your headshots can make or break your chances of standing out in a competitive market. Achieving the perfect male modeling headshots requires more than just a great camera. It’s about confidence, the right poses, styling, and understanding how to present yourself effectively.
This guide dives deep into the best practices for creating stunning male modeling headshots. By focusing on confidence, style, and professional tips, you can elevate your images to capture attention and make a lasting impression.

Understanding the Importance of Male Modeling Headshots
Male modeling headshots are the foundation of your portfolio. Casting directors, agencies, and clients rely on these images to evaluate your suitability for roles or campaigns. Unlike full-body shots, headshots emphasize your facial structure, expressions, and the ability to convey emotions.
A well-executed male modeling headshot communicates professionalism and opens doors to opportunities. It highlights your ability to embody different characters or moods, which is crucial for brands looking for versatility. From a sleek, polished look to a rugged, natural vibe, your headshots should reflect the range you bring as a model.

How to Build Confidence for Male Modeling Headshots
Confidence plays a significant role in male modeling headshots. Without it, even the best camera and lighting won’t be able to hide unease or nervousness. To exude confidence, preparation is key. Practice different facial expressions in front of a mirror to understand how your face looks from various angles. Familiarizing yourself with your best side ensures you’re comfortable during the shoot.
Breathing exercises before a shoot can help calm nerves and improve focus. Remember, confidence doesn’t mean forcing a smile or trying to look perfect—it’s about being natural and at ease. Male modeling headshots shine when you appear approachable, genuine, and self-assured.

Choosing the Right Poses for Male Modeling Headshots
Your pose can define the overall vibe of your male modeling headshots. The goal is to keep the poses relaxed yet impactful. Avoid rigid postures or over-the-top expressions, as these can distract from the image’s overall appeal. Start by tilting your head slightly to one side to add dimension to your face. A direct gaze into the camera exudes intensity, while a softer, off-camera look can add intrigue.
Pay attention to the positioning of your shoulders. Slightly angling them rather than facing the camera straight on adds depth to the shot. Experiment with subtle head tilts, raised eyebrows, or gentle smiles to find poses that showcase your personality and uniqueness.

The Role of Style in Male Modeling Headshots
Your choice of wardrobe and grooming directly affects the outcome of your male modeling headshots. Neutral tones and simple designs work best to keep the focus on your face. Avoid loud patterns or logos that might steal attention from your features. Consider the purpose of the headshot when choosing outfits. For instance, a sharp suit communicates professionalism, while a plain T-shirt can highlight a more casual and approachable side.
Grooming is equally critical. A well-trimmed beard or clean shave can dramatically impact your look. If your style includes facial hair, ensure it’s neatly groomed to complement your facial structure. For skin, a light moisturizer helps keep it hydrated and camera-ready.

Lighting and Backdrops for Male Modeling Headshots
The right lighting can elevate male modeling headshots by emphasizing your features and creating a polished finish. Soft, natural light works wonders for most shoots, while studio setups often use diffused lighting to eliminate harsh shadows. Discuss lighting preferences with your photographer to ensure your best angles are captured.
Backdrops should be clean and minimalist. Neutral colors like white, gray, or black are popular choices as they keep the focus entirely on you. Avoid busy or distracting backgrounds unless they’re intentionally chosen to complement a specific theme or concept.

Working with a Professional Photographer
Collaborating with an experienced photographer is one of the smartest investments for high-quality male modeling headshots. A professional understands how to direct poses, adjust lighting, and capture the perfect shot. During the shoot, communicate openly with your photographer about the style and mood you’re aiming for.
Don’t hesitate to ask for feedback during the session. Reviewing the images as you go helps ensure you’re achieving the desired look. Trust your photographer’s guidance, but also feel free to suggest your own ideas to make the session collaborative.

Expression Matters in Male Modeling Headshots
Expressions can make or break male modeling headshots. A great headshot is more than just a static image; it’s about telling a story or conveying an emotion. Whether it’s a soft smile, a serious stare, or a playful smirk, your expression should align with the purpose of the headshot.
Practicing in front of a mirror can help you discover which expressions suit you best. Focus on the eyes, as they are the most expressive part of your face. A confident gaze can draw viewers in, while a slight squint can add depth and intrigue. Experiment with subtle changes in expression to find what works best for different scenarios.
The Importance of Posture in Male Modeling Headshots
Posture plays a vital role in creating balanced and professional male modeling headshots. Slouching or stiff positioning can detract from your overall look. Stand or sit tall with your shoulders relaxed to convey poise and self-assurance.
For seated poses, keep your spine straight but not rigid. Leaning slightly forward can add engagement and make the shot feel more dynamic. Small adjustments in posture can make a big difference, so pay attention to how you position your neck, shoulders, and jawline.

Retouching and Final Touches for Male Modeling Headshots
Post-production editing enhances the final quality of your male modeling headshots. Subtle retouching can smooth skin, adjust lighting, and refine details without altering your natural features. Always aim for a balance between polished and realistic.
Discuss editing preferences with your photographer to ensure the final images align with your personal style. Over-retouching can make your photos appear unnatural, so prioritize authenticity while enhancing your best features.

Building a Portfolio with Male Modeling Headshots
Once you’ve captured stunning male modeling headshots, it’s time to showcase them effectively. Curate a portfolio that highlights your versatility by including headshots with varied expressions, lighting, and styles. Organize the portfolio to tell a story, starting with your strongest images.
Digital portfolios are ideal for sharing online, while printed versions work well for in-person meetings. Ensure your male modeling headshots are high-resolution and free from distractions to leave a strong impression.

Conclusion
Male modeling headshots are a cornerstone of any aspiring model’s career. They reflect your confidence, style, and ability to connect with the camera. By focusing on preparation, professional collaboration, and attention to detail, you can create headshots that stand out in the competitive modeling world.
Whether you’re new to modeling or looking to update your portfolio, following these best practices will help you make a lasting impact. Remember, your headshots are not just pictures—they’re your brand. Invest in them wisely and confidently step into the spotlight.


