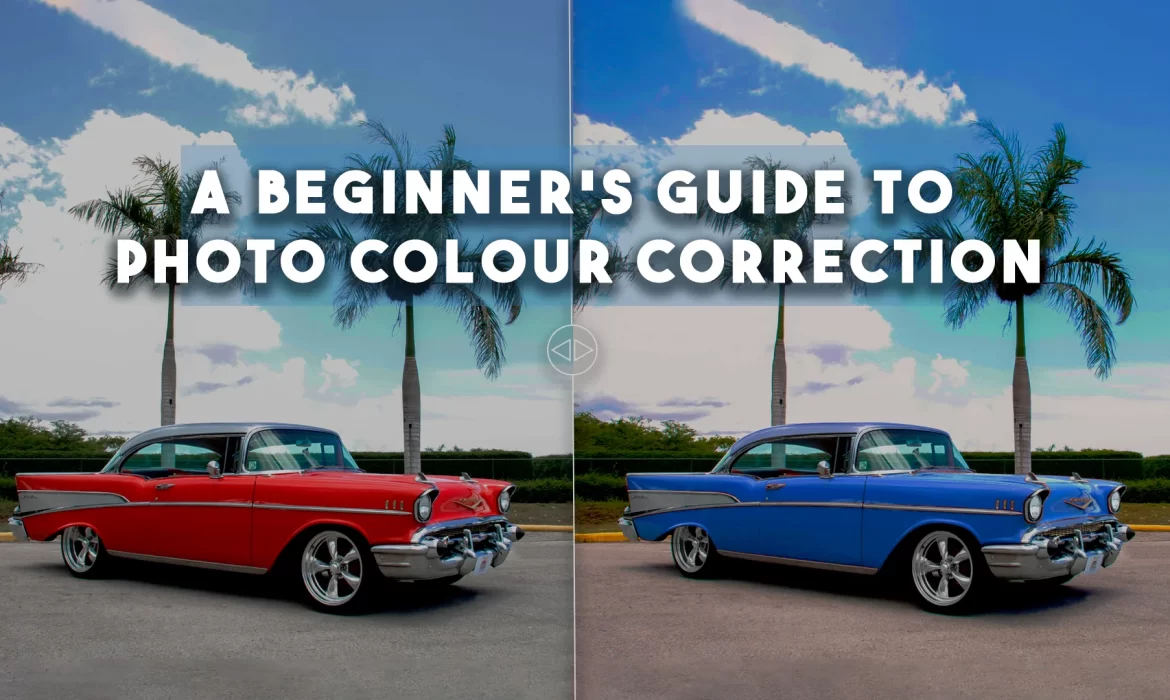
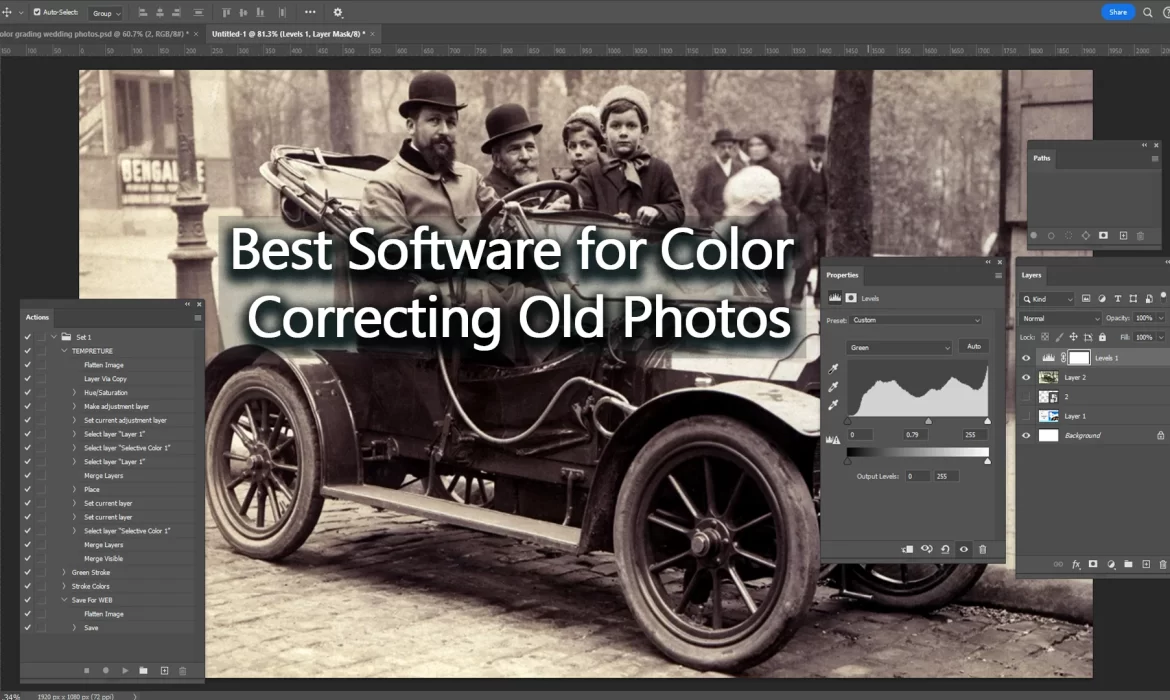
Best Software for Color Correcting Old Photos: A Comprehensive Review
Old photographs, whether cherished memories or historical records, often show signs of deterioration over time. From faded colors to yellowing edges, the passage of time can significantly affect the quality of these photos. Thankfully, modern technology has given us powerful tools to restore these memories, especially when it comes to color correction. Whether you’re a photographer, a history enthusiast, or someone simply looking to bring their family photos back to life, finding the right software to color correct old photos can make a world of difference.
In this comprehensive review, we will explore some of the best software available for color correcting old photos. These tools use advanced algorithms and AI technology to enhance color balance, remove discoloration, and bring back the vibrancy of your precious images. Whether you are a professional photographer or a hobbyist, this guide will help you compare and choose the best software for color correcting old photos to achieve flawless results.
Why Is Color Correction Important for Old Photos?
Before we dive into the software options, it’s essential to understand why color correcting old photos is so important. Over time, old photos can suffer from various issues, including fading, discoloration, and poor lighting. These problems are often caused by several factors, such as exposure to sunlight, humidity, and improper storage.
Color correcting old photos allows you to restore the original hues and brightness of your images. Whether it’s an old family portrait, a vintage landscape, or a historical photo, color correction helps to bring back details that might have been lost over time. It also allows you to adjust white balance, enhance contrast, and correct underexposed or overexposed areas, ensuring your images look as vibrant as the day they were taken.
For those who want to preserve and enhance their old photos, color correcting old photos can breathe new life into images that might otherwise have been left to fade into obscurity.

1. Adobe Photoshop – The Industry Standard for Color Correction
When it comes to color correcting old photos, Adobe Photoshop is arguably the most well-known and versatile tool available. As the industry standard for photo editing, Photoshop provides a wide array of advanced features that allow you to fine-tune every aspect of your photo, from exposure to color balance. For users looking to color correct old photos, Photoshop offers an extensive set of tools and capabilities.
One of the most powerful features for color correction is the Curves tool, which lets you adjust the color channels (red, green, and blue) individually. Photoshop also offers the Levels tool, which allows you to adjust the brightness and contrast, ensuring that faded colors are restored to their natural state. For more specific color correction, the Selective Color adjustment tool is perfect for fine-tuning the hues of particular areas in your image, while the Hue/Saturation sliders let you boost or reduce colors across the entire image.
Adobe Photoshop’s ability to work with layers also means that you can make non-destructive edits, allowing you to experiment with different color corrections and revert back to previous versions of your work.
However, Photoshop does come with a steeper learning curve, especially for beginners. If you are new to photo editing, you might find the vast array of tools overwhelming. Nevertheless, for professionals or those willing to invest the time to learn, Adobe Photoshop is undoubtedly one of the best options for color correcting old photos.
Adobe Photoshop is available on subscription, and it offers a free trial to get started.

2. Adobe Lightroom – An Easier Alternative for Color Correction
For those who find Photoshop too complex or overwhelming, Adobe Lightroom offers a more user-friendly approach to color correcting old photos. While Lightroom doesn’t offer the same level of control as Photoshop, it still provides a comprehensive set of tools to help users enhance their photos. Lightroom is especially effective for batch processing, making it a great choice if you have multiple old photos that need color correction.
Lightroom’s Basic panel includes sliders for exposure, contrast, and white balance, which are all essential for restoring the colors in old photos. The HSL/Color panel is perfect for adjusting the individual color channels, such as adjusting the reds, blues, or greens to restore the photo’s natural tones.
One of Lightroom’s standout features for color correcting old photos is the Auto Tone function. This tool automatically adjusts the exposure, contrast, highlights, shadows, and white balance, giving you a great starting point for further refinement. If you’re working with scanned photos, Lightroom also includes tools for reducing noise and correcting lens distortions, making it a well-rounded option for photo restoration.
While Lightroom might not offer all the detailed options that Photoshop does, its simplicity and ease of use make it a great choice for both beginners and those looking to color correct old photos in a fast, efficient manner. Adobe Lightroom is available on a subscription basis and offers a free trial for new users.

3. Skylum Luminar AI – AI-Powered Color Correction
Skylum Luminar AI is a newer player in the photo editing world, but it has quickly gained popularity for its powerful AI-driven tools. As the name suggests, Luminar AI leverages artificial intelligence to make photo editing simpler and faster, including for tasks like color correcting old photos. Unlike traditional photo editing tools, Luminar AI automatically analyzes your photo and suggests improvements based on its analysis of the image.
For color correcting old photos, Luminar AI offers the AI Accent tool, which intelligently adjusts the exposure, contrast, and color balance to restore your photo’s vibrancy. The software also includes the White Balance AI tool, which automatically corrects color temperature issues caused by age and exposure, helping to restore natural skin tones and overall color balance in your image.
One of the standout features of Luminar AI is its ability to fine-tune specific areas of the image. With the AI Skin Enhancer and AI Structure tools, you can adjust the details of certain elements of your photo without affecting the entire image. This is particularly useful for portraits or photos where you want to enhance specific colors or details while maintaining a natural look.
Skylum Luminar AI is an excellent choice for both beginners and professionals who want an easy, efficient way to color correct old photos without spending too much time learning complex software. It is available as a one-time purchase, with no subscription required, which can be a great advantage for users who want to avoid recurring costs.

4. Fotor – Quick and Simple Color Correction
If you’re looking for a quick, easy solution for color correcting old photos, Fotor is an excellent online option. Fotor’s intuitive interface makes it easy to upload and edit old photos, even for beginners with no prior photo editing experience. The app offers an array of AI-powered tools for enhancing color, including automatic color correction for photos with poor color balance.
Fotor’s Color Enhance tool automatically analyzes the image and adjusts the exposure, saturation, and contrast to restore a more vibrant look. It also includes a range of manual adjustments for users who prefer more control, such as adjusting the white balance and tone curves.
For users who need a quick and efficient way to color correct old photos without any complicated processes, Fotor is an excellent choice. It’s particularly useful for those who want a fast fix for faded photos without delving into complex photo editing software. Fotor is free to use, with premium options available for additional features.

5. DxO PhotoLab – Professional-Level Color Correction
For photographers looking for advanced tools to color correct old photos, DxO PhotoLab is an excellent choice. DxO PhotoLab is known for its powerful AI-based tools, including the DxO Smart Lighting feature, which automatically adjusts the exposure and brightness in your images. This feature is especially helpful for old photos that suffer from poor lighting or overexposure.
DxO PhotoLab’s Color Rendering tool also allows you to fine-tune the colors in your photos, restoring natural tones and correcting any color imbalances. The software provides a range of adjustments, such as exposure compensation, color temperature, and vibrancy, ensuring that your photos look more realistic and vibrant after color correction.
Another key feature of DxO PhotoLab is its advanced noise reduction, which is particularly useful for scanned old photos that may have unwanted grain or noise. With its professional-grade tools and precise AI-based adjustments, DxO PhotoLab is a fantastic option for serious photo restorers looking to color correct old photos with precision.
DxO PhotoLab is available through a subscription or one-time purchase, with a free trial for new users.

6. Image Work India – Professional Photo Editing Services for Color Correction
While AI-powered software can make color correction more accessible, sometimes you need expert-level restoration for your old photos. At Image Work India, we offer professional photo editing services that include color correcting old photos. Our team of skilled photo editors uses advanced tools, both AI-based and manual, to ensure your old photos are restored to their original glory.
We understand the challenges of color correcting old photos, whether it’s faded colors, discoloration, or any other issue caused by aging. Our experts can handle the most delicate restoration projects, ensuring your photos maintain their historical value while looking vibrant and true to their original colors.
If you’re looking for professional photo color correction that goes beyond what automated tools can offer, Image Work India is here to help. Whether you need minor color enhancements or full photo restoration, we are committed to delivering high-quality results.
Visit us at Image Work India to learn more about our services and how we can help you restore and color correct your old photos with care and precision.
Conclusion
When it comes to color correcting old photos, there are many tools available, ranging from beginner-friendly options like Fotor to professional-grade software like Adobe Photoshop and DxO PhotoLab. Each tool has its unique strengths and features, so choosing the right one depends on your needs, skill level, and the extent of color correction required.
For users looking for a simple, quick fix, Fotor and Luminar AI provide user-friendly interfaces and automated tools that make it easy to restore faded images. On the other hand, if you need advanced features and more control over the process, Adobe Photoshop and DxO PhotoLab are excellent options for professionals and those who want the best possible results.
At Image Work India, we offer professional image restoration services that include color correcting old photos, ensuring that your photos are not only restored but enhanced. Whether you want to bring life back to old family photos or preserve precious memories, we are here to help.
Explore our website for more information on how we can assist with all your photo restoration needs!
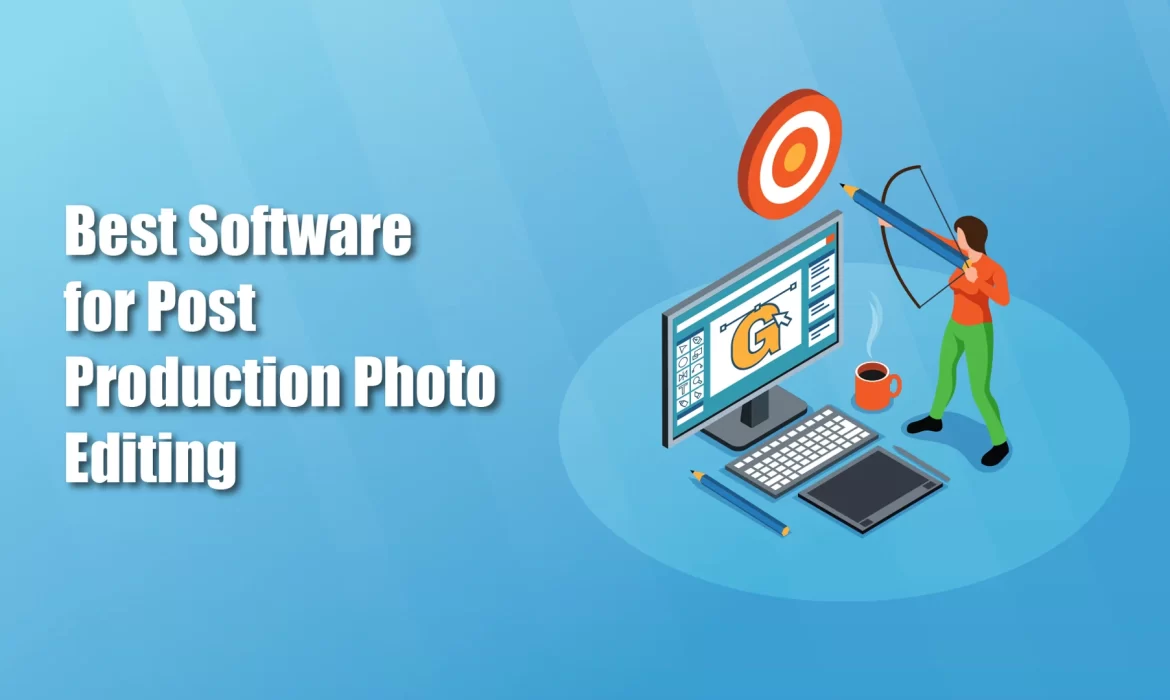
Best Software for Post Production Photo Editing
When you take a beautiful photo with your camera, the work does not stop there. The real magic often happens after the photo is captured — during the editing process. This is why post production photo editing software is so important for photographers, both professionals and beginners. If you want to make your photos look perfect, you need to choose the right post production photo editing software to help you. In this article, we will explore the best options available and explain how each one can help you turn simple photos into stunning works of art.
What Is Post Production Photo Editing Software?
Before we start talking about the best software, let’s understand what post production photo editing software actually means. After a photo is taken, photographers often need to adjust colors, brightness, contrast, remove unwanted objects, sharpen the image, or even apply creative effects. This process is called post production photo editing. To do this, photographers use special post production photo editing software that gives them all the tools they need to perfect their images.
With the right post production photo editing software, you can turn dull photos into professional-quality images that attract attention. Whether you are editing wedding photos, portraits, product photos, or landscapes, good software can make a huge difference.
Why Choosing the Best Post Production Photo Editing Software Matters
In today’s digital world, photos are everywhere — from social media to advertisements and magazines. If you want your photos to stand out, you need more than just a good camera. You need excellent post production photo editing software that gives you creative control over your images. High-quality editing software allows you to fix mistakes, enhance details, and even add your own artistic touch to every image.
There are many types of post production photo editing software available, but not all of them are suitable for every photographer. Some are very advanced and perfect for professionals, while others are simple and ideal for beginners. The right choice depends on your needs, your budget, and the type of photography you do.
Adobe Lightroom: A Powerful Choice for Post Production Photo Editing
One of the most popular post production photo editing software options is Adobe Lightroom. This software is known for its user-friendly design and powerful editing tools. Lightroom allows photographers to adjust exposure, contrast, colors, and sharpness quickly and easily. It also has amazing preset options, which allow you to apply a beautiful look to your photos in just one click.
Adobe Lightroom is especially useful for photographers who need to edit large batches of photos, like wedding or event photographers. Since it’s part of the Adobe Creative Cloud, Lightroom can also work well with other Adobe software, giving you more flexibility in your editing process. For both beginners and professionals, Lightroom is one of the top choices when it comes to post production photo editing software.
🖥️ Supported Platforms: Windows, macOS, iOS, Android, Web
💰 Pricing:
✨ Key Features:
- Easy-to-use editing tools
- Cloud storage and sync across devices
- Presets for quick edits
- Excellent color correction and tone adjustment
- Non-destructive editing
✅ Best for: Beginners, hobbyists, and professional photographers who want fast editing and cloud access.
Adobe Photoshop: Advanced Editing for Total Control
While Lightroom is great for quick adjustments, Adobe Photoshop is the ultimate tool for deep and creative editing. Photoshop offers advanced tools for retouching, removing objects, blending images, and creating complex photo compositions. Many professional photographers and digital artists use Photoshop for high-end retouching and advanced editing that requires precise control.
As one of the most powerful post production photo editing software options, Photoshop is perfect for photographers who want to push their creativity to the limit. However, it can be challenging for beginners due to its complexity. Still, for those willing to learn, Photoshop offers endless possibilities.
🖥️ Supported Platforms: Windows, macOS, iPad
💰 Pricing:
- Subscription only (Adobe Creative Cloud)
- Starts at $20.99 per month (or included in Photography Plan with Lightroom)
✨ Key Features:
- Advanced retouching and compositing tools
- Works with layers and masks
- Precise object removal and editing
- 3D editing and text tools
- Extensive plugin support
✅ Best for: Professional photographers, graphic designers, and artists who need complete creative control.
Capture One: A Professional’s Favorite for Raw Editing
Capture One is another top-quality post production photo editing software that is loved by many professional photographers. It is especially known for its excellent handling of RAW files, giving you stunning image quality right from the start. Capture One’s color grading tools are also highly praised, making it perfect for fashion and commercial photographers who need precise color control.
Although Capture One is slightly more expensive than other software, its powerful tools and high-quality results make it a great investment for serious photographers. Whether you shoot landscapes, portraits, or products, Capture One can help you achieve beautiful, professional-level editing results.
🖥️ Supported Platforms: Windows, macOS
💰 Pricing:
- Subscription: Starts at $14 per month (for single brand camera version)
- Perpetual license available (around $299 for full version)
✨ Key Features:
- Exceptional RAW file processing
- Advanced color grading tools
- Tethered shooting support
- Custom workspaces for workflow optimization
- Excellent sharpening and noise reduction
✅ Best for: Professional photographers, especially studio, fashion, and commercial photographers.
Skylum Luminar: Creative Editing with AI Power
If you want post production photo editing software that makes editing faster and more creative, Skylum Luminar is a great choice. This software uses artificial intelligence (AI) to make advanced edits with just a few clicks. For example, Luminar’s Sky Replacement tool can automatically replace a dull sky with a more dramatic one in seconds.
Luminar is great for photographers who want professional results without spending hours learning complex techniques. Its easy-to-use tools and AI-powered features make it a favorite among hobbyists and creative photographers. Whether you want to enhance landscapes, portraits, or travel photos, Luminar can make editing fun and creative.
🖥️ Supported Platforms: Windows, macOS
💰 Pricing:
- One-time purchase (starts around $99)
- Occasional bundles or special offers available
✨ Key Features:
- AI-powered tools for fast editing
- Sky replacement, portrait enhancement, and creative filters
- Non-destructive editing
- Easy interface with powerful tools
- Works as standalone software or plugin for Lightroom/Photoshop
✅ Best for: Photographers who want quick, creative edits with the help of AI and presets.
DxO PhotoLab: Excellent Image Quality with Smart Corrections
DxO PhotoLab is well-known for its ability to correct lens distortions and improve image quality automatically. This makes it a great choice for photographers who want high-quality images with minimal effort. As post production photo editing software, DxO PhotoLab offers excellent noise reduction, sharpness correction, and color adjustments.
DxO PhotoLab is especially useful for photographers who shoot in challenging lighting conditions, like low-light events or outdoor landscapes. Its smart tools analyze your image and apply corrections that improve the photo while keeping it natural and realistic.
🖥️ Supported Platforms: Windows, macOS
💰 Pricing
- One-time purchase (starts around $139)
- Optional paid upgrades for new versions
✨ Key Features:
- Smart automatic corrections based on camera and lens profiles
- Excellent noise reduction (DeepPRIME technology)
- RAW processing and local adjustments
- Advanced color and tone adjustments
- Works with Lightroom as a plugin
✅ Best for: Photographers who prioritize image quality and shoot in challenging lighting conditions.
Affinity Photo: Affordable and Powerful Alternative
For photographers who want professional tools without a subscription, Affinity Photo is a great option. This post production photo editing software offers advanced tools similar to Photoshop, including layers, masks, retouching tools, and creative filters. The best part is that Affinity Photo is available for a one-time payment, making it more affordable than subscription-based software.
Despite its lower price, Affinity Photo does not compromise on quality. It’s a powerful software that can handle everything from simple color corrections to complex composites, making it suitable for both hobbyists and professionals.
🖥️ Supported Platforms: Windows, macOS, iPad
💰 Pricing
- One-time purchase (around $69.99 for desktop, $18.49 for iPad)
✨ Key Features:
- Full layer-based editing
- Advanced retouching and compositing tools
- RAW processing
- Wide range of creative filters and effects
- No subscription fees
✅ Best for: Photographers and creatives who want powerful editing tools at an affordable price.
GIMP: Free and Open Source Editing
If you are looking for free post production photo editing software, GIMP is one of the best options. GIMP offers many of the same tools you find in paid software, including layers, masks, color adjustments, and retouching tools. While its interface is not as modern as Photoshop or Lightroom, it’s a great option for beginners who want to practice editing without spending money.
GIMP is also supported by a strong community, with plenty of tutorials and plugins available online. It’s not as polished as paid software, but for free editing software, GIMP offers impressive features.
🖥️ Supported Platforms: Windows, macOS, Linux
💰 Pricing
- Completely Free (Open Source)
✨ Key Features:
- Full layer-based editing
- Wide range of editing tools (selection, retouching, color adjustment)
- Supports plugins and scripts
- Supports almost all image formats
- Strong community support with many tutorials
✅ Best for: Beginners, hobbyists, and budget-conscious photographers who want free editing software with powerful features.

Conclusion
Choosing the best post production photo editing software is essential if you want your photos to stand out. Whether you are a beginner who wants simple tools or a professional looking for advanced editing options, there is software designed for you. Adobe Lightroom and Photoshop are the most popular choices, while Capture One and DxO PhotoLab offer professional quality. For creative editing, Luminar’s AI tools are amazing, and for budget-friendly options, Affinity Photo and GIMP are excellent. No matter which post production photo editing software you choose, the right tool can help you transform your photos into stunning works of art.
Frequently Asked Questions (FAQs)
What is post production photo editing software?
It is software used to edit photos after they are taken, allowing photographers to adjust colors, brightness, contrast, and apply creative effects.
Which is the best post production photo editing software for beginners?
Adobe Lightroom and Skylum Luminar are great for beginners because they are easy to use and offer excellent results with minimal learning.
Is post production photo editing software necessary for professional photographers?
Yes, professional photographers rely heavily on post production photo editing software to achieve the high-quality results their clients expect.
Is free post production photo editing software good enough?
Free software like GIMP can be useful for beginners, but paid software usually offers better tools, performance, and professional results.
Can AI tools replace manual editing in post production photo editing software?
AI tools can speed up editing, but manual adjustments are still important for complete creative control.
What is the easiest post production photo editing software to learn?
Adobe Lightroom and Skylum Luminar are often considered the easiest for beginners.
How AI is Revolutionizing Product Photo Editing
In today’s digital world, businesses need high-quality product images to attract customers and boost sales. But editing product photos manually is time-consuming, expensive, and requires advanced skills. This is where artificial intelligence (AI) is making a huge impact. AI-powered tools now make it possible to edit product photos quickly, efficiently, and professionally with minimal effort. With the help of AI, businesses can save time, reduce costs, and achieve stunning visuals without hiring a professional editor.
The Role of AI in Product Photo Editing
Artificial intelligence has completely transformed the way we edit product photos. Traditional editing requires manual adjustments in software like Photoshop, which can take hours. AI-powered tools, on the other hand, automate processes like background removal, color correction, lighting adjustments, and even object replacement. AI can analyze an image and make necessary enhancements in just seconds, ensuring high-quality results with minimal effort.
AI not only speeds up the process but also enhances creativity. Businesses can now edit product photos using AI-based tools that understand patterns, colors, and image composition. These tools provide smart recommendations, making it easier for users to create professional-looking images.
How AI Enhances Product Photo Editing
Automatic Background Removal and Replacement
AI-powered background removal enables seamless extraction of subjects from images, eliminating the need for manual editing. This tool precisely detects edges, ensuring a clean cutout. Once removed, the background can be replaced with solid colors, gradients, or customized scenes, perfect for e-commerce, marketing, and professional photography applications.
Smart Color Correction and Enhancement
Automatically adjust colors, contrast, and brightness to bring out the best in any image. AI-driven color correction analyzes tones and fixes imbalances while enhancing vibrancy. This feature ensures a natural, visually appealing look, improving product images, portraits, and landscape shots for consistent quality and professional-grade results.
AI-Powered Object Removal
Easily remove unwanted objects, people, or imperfections from images using AI-powered object removal. The algorithm intelligently fills in the missing areas with realistic textures and backgrounds, ensuring a seamless finish. This tool is ideal for cleaning up product photos, real estate images, or personal snapshots without extensive manual editing.
Consistent Editing for Bulk Images
Save time and maintain brand consistency with automated bulk image editing. AI applies uniform adjustments to multiple images, including color grading, cropping, and enhancements. This feature is perfect for e-commerce sellers, photographers, and marketers who need high-quality, cohesive images without manually editing each one individually.
Automatic Product Retouching
Enhance product images effortlessly with AI-driven retouching. This tool smooths surfaces, corrects lighting issues, removes dust or blemishes, and sharpens details while preserving a natural look. It ensures that e-commerce and promotional product photos look polished and professional, increasing their appeal to potential buyers.
Image Upscaling Without Quality Loss
AI-powered upscaling increases image resolution without introducing blurriness or distortion. The algorithm intelligently enhances details and textures, making small or low-resolution images suitable for high-quality printing, large displays, and digital marketing. This is a game-changer for restoring older photos or optimizing visuals for high-resolution screens.
Style Transfer and Creative Filters
Apply artistic styles and creative filters to images with AI-powered style transfer. Transform photos into paintings, sketches, or digital art inspired by famous artists or unique aesthetics. This feature is perfect for content creators, social media influencers, and designers looking to add a distinctive, creative touch to their visuals.
AI-Driven Product Mockups and Scene Creation
Generate realistic product mockups and customized scenes using AI. This tool places products in virtual environments, creating high-quality promotional images without the need for physical photoshoots. It’s ideal for e-commerce, advertising, and design projects where contextual visuals enhance customer engagement and marketing effectiveness.
Lighting and Shadow Correction
Automatically adjust lighting and shadow balance for a more natural, well-lit appearance. AI analyzes exposure levels, enhancing underexposed areas and refining shadows for depth and dimension. This tool improves product visibility in e-commerce photography, portrait images, and other creative projects where proper lighting is crucial.
Automatic Product Tagging and Metadata Generation
Streamline image organization with AI-driven automatic tagging and metadata generation. The system recognizes objects, colors, and contexts, assigning relevant keywords and descriptions. This feature enhances searchability, improves SEO for online stores, and speeds up content management for photographers and digital marketers.
Best AI Applications for Product Photo Editing
1.Remove.bg 🖼️
Product Description:
Remove.bg is an AI tool that quickly removes backgrounds from photos. It automatically detects the foreground, such as people or objects, and removes the background with precision. Perfect for e-commerce, content creators, and marketers needing clean images without complex editing skills.
🛠️ Key Features:
- Automatic background removal
- High-quality, fast output
- API access for integration
- Supports PNG, JPG, and other formats
- No manual editing required
👍 Pros:
- Very quick and easy to use
- High-quality background removal
- Free version with basic functionality
- Excellent for high-volume tasks
👎 Cons:
- Free plan limits image resolution
- Might struggle with intricate details like hair
- Limited editing options beyond background removal
🌟 Best For:
- E-commerce businesses
- Social media content creators
- Quick background removal for marketing materials
2. Canva AI Photo Editor 🎨
Product Description:
Canva’s AI-powered photo editor offers easy-to-use design tools for both beginners and professionals. It features automatic background removal, AI-enhanced design, and a variety of templates. It’s ideal for creating social media posts, posters, and presentations without needing advanced design skills.
🛠️ Key Features:
- AI-based background remover
- Pre-designed templates and elements
- Drag-and-drop interface
- Real-time collaboration tools
- Text-to-image generator
👍 Pros:
- User-friendly and intuitive
- Extensive library of templates and assets
- Free plan available with many features
- Great for team collaboration
👎 Cons:
- Advanced editing tools are behind a paywall
- Watermarks on some assets in free plan
- Limited photo manipulation features compared to other tools
🌟 Best For:
- Social media marketing
- Small businesses creating visual content
- Non-designers looking for easy-to-use design tools
3. Fotor AI Photo Editor 📸
Product Description:
Fotor is an AI-powered online photo editor offering tools for image enhancement, retouching, and background removal. It’s designed for users looking for an easy, fast solution for editing photos, creating designs, and generating social media content.
🛠️ Key Features:
- AI photo enhancement tools
- Background removal
- Portrait retouching (skin smoothing, blemish removal)
- Creative templates for design
- Batch processing support
👍 Pros:
- Easy to use for beginners
- High-quality photo enhancement tools
- Great for basic and advanced editing needs
- Free version with key features
👎 Cons:
- Advanced features are behind a paywall
- Limited speed on high-resolution images
- Can be slow on large batch processing
🌟 Best For:
- Content creators looking for quick photo edits
- Casual photographers
- Users who want a mix of basic and advanced tools
4. Let’s Enhance 🚀
Product Description:
Let’s Enhance is an AI-powered image upscaling and enhancement tool. It increases image resolution, reduces noise, and sharpens details, making it perfect for enlarging low-resolution images for professional use like prints or online product listings.
🛠️ Key Features:
- AI image upscaling
- Noise reduction
- Detail enhancement for better clarity
- Batch processing for multiple images
- Works with JPG, PNG, and TIFF files
👍 Pros:
- Excellent at enlarging images without loss of quality
- Simple to use with no editing skills required
- Fast batch processing
- Ideal for high-quality prints
👎 Cons:
- Limited features beyond upscaling
- Premium plan required for higher resolution downloads
- Less useful for general photo editing
🌟 Best For:
- Photographers and designers needing high-resolution images
- E-commerce businesses with low-res product photos
- Users needing professional-grade image upscaling
5. Deep Art Effects 🎭
Product Description:
Deep Art Effects transforms photos into artwork using AI. It applies various styles, including those of famous artists like Picasso and Van Gogh. Perfect for users looking to turn regular photos into unique artistic masterpieces for digital art or social media.
🛠️ Key Features:
- AI-powered art filter effects
- Multiple artistic styles (e.g., Van Gogh, Picasso)
- Customizable intensity levels for effects
- High-quality digital art generation
- Desktop and mobile apps available
👍 Pros:
- Unique artistic transformations for photos
- Wide variety of classic art styles
- High-quality output for digital art
- Available offline as a mobile app
👎 Cons:
- Limited to artistic effects (not general photo editing)
- Requires a subscription for high-quality outputs
- May not suit users seeking realistic photo edits
🌟 Best For:
- Artists and creatives looking for digital art effects
- Social media influencers needing standout content
- Users who want to turn photos into artistic representations
6. Pixlr AI Editor 🖥️
Product Description:
Pixlr is an AI-powered online photo editor offering robust features like background removal, image enhancements, and creative overlays. It’s perfect for users seeking both quick edits and more complex designs, with support for layers and PSD files.
🛠️ Key Features:
- AI background removal
- Layer-based editing for complex designs
- Creative filters, overlays, and effects
- Supports PSD files
- Mobile and desktop apps available
👍 Pros:
- Free version with essential tools
- Layer support for advanced editing
- Fast processing and editing
- User-friendly interface
👎 Cons:
- Ads present in free version
- Some advanced features only available in paid version
- Can be overwhelming for beginners
🌟 Best For:
- Graphic designers needing layer-based editing
- Social media content creators
- Users who want a powerful, flexible editing tool
7.PhotoRoom 📸
Product Description:
PhotoRoom is an intuitive photo editing app designed to help you create professional-quality images. With powerful tools like background removal, image enhancement, and customizable templates, it allows users to quickly transform ordinary photos into stunning visuals. Perfect for e-commerce, marketing, and social media content creation, PhotoRoom simplifies the editing process for everyone, no design skills needed.
📌 Key Features:
- Background removal tool
- Image enhancement options
- Customizable templates
- Resize and crop functionality
- AI-powered auto-editing
- Easy-to-use interface
👍 Pros:
- Fast and efficient editing
- Great for e-commerce photos
- User-friendly, no design skills needed
- High-quality output images
- Saves time with automated tools
👎 Cons:
- Limited features on free plan
- Requires internet connection
- Some advanced features locked behind a paywall
💼 Best For:
- E-commerce businesses
- Social media content creators
- Marketers and advertisers
- Anyone needing quick, professional photo edits
Conclusion
AI is changing the way we edit product photos, making it faster, easier, and more efficient. Businesses can now create high-quality images without spending hours on manual editing. AI-powered tools offer automated background removal, color correction, upscaling, and retouching, helping brands maintain a consistent and professional look. With the rise of AI applications, editing product photos AI-driven solutions are becoming essential for e-commerce, social media marketing, and branding.
Frequently Asked Questions (FAQs)
How does AI help in editing product photos?
AI helps by automating background removal, color correction, retouching, and upscaling, making editing faster and more efficient.
Are AI photo editing tools better than manual editing?
AI tools are great for speed and convenience, but manual editing offers more control. The best option depends on your needs.
Can AI completely replace human photo editors?
Not entirely. AI can automate many tasks, but human editors are still needed for creativity and complex edits.
What is the best AI tool for removing backgrounds?
Remove.bg is one of the best tools for automatic background removal.
Are AI photo editing tools expensive?
Many AI tools offer free versions, but advanced features often require a paid subscription.
Can AI enhance low-resolution product images?
Yes, AI-powered upscaling tools like Let’s Enhance can improve image quality without losing details.
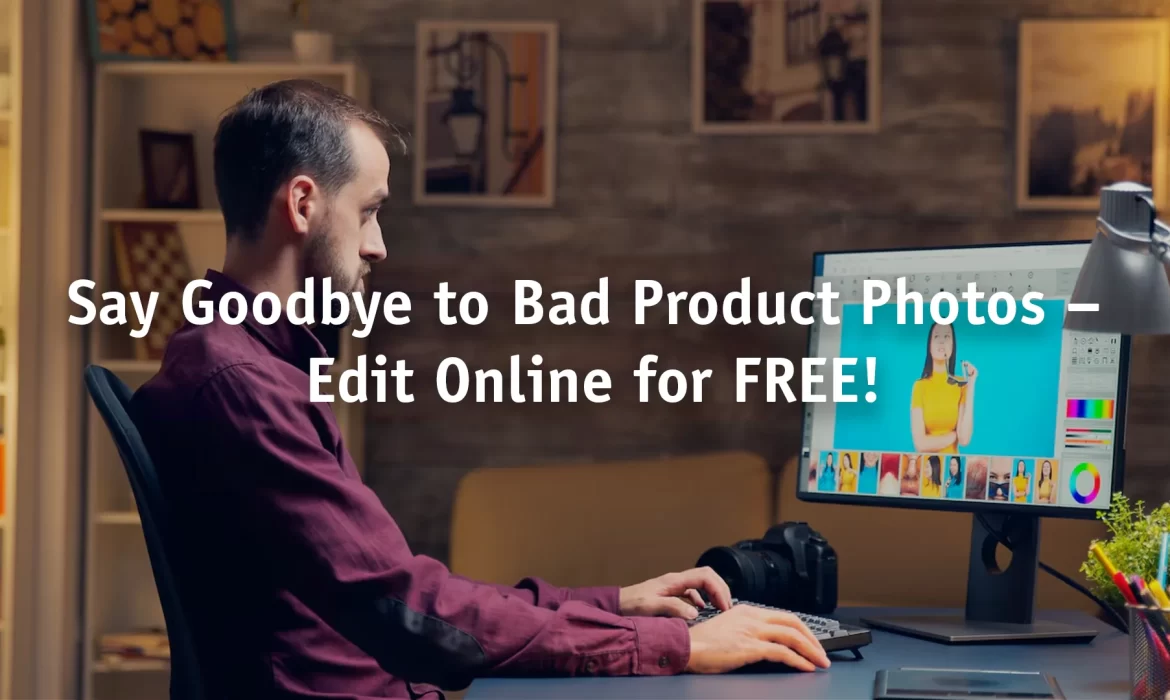
How to Edit Product Photos Online for Free
In the world of e-commerce, high-quality images are essential for attracting customers. A product with clear, vibrant, and professional-looking photos can significantly increase sales and customer trust. However, hiring a professional editor or buying expensive software may not always be an option, especially for small businesses and startups. The good news is that you can achieve stunning results with product photo editing online free tools. With the right approach, you can enhance your product images without spending a dime. In this guide, we will explore the best ways to edit product photos online for free, ensuring your images look polished and professional.
Why Product Photo Editing Matters
Before diving into the best ways to edit product photos online for free, it’s important to understand why editing is crucial. High-quality images make your products look more appealing and trustworthy. When customers browse online stores, they cannot touch or try products, so they rely on photos to make purchasing decisions. Editing helps remove imperfections, adjust lighting, and make colors pop, ensuring your products stand out from competitors.
A well-edited product image can create a positive first impression. Poor-quality photos may discourage potential buyers, while professionally edited ones can enhance the perceived value of a product. With product photo editing online free tools, you can achieve a polished look without any cost.
Best Free Online Tools for Product Photo Editing
Elevate your product photography with free online editing tools like Canva, Pixlr, Fotor, and Remove.bg. These platforms offer background removal, color correction, retouching, and enhancement features, making it easy to create stunning, professional-quality images without costly software or expertise.
Canva
Canva offers a free online photo editing service with an easy-to-use interface. It provides essential tools like background removal (premium), filters, text overlays, and templates. Perfect for product photography, Canva helps enhance images for social media and marketing. Its drag-and-drop design makes it accessible to beginners, allowing users to create professional-quality visuals without needing expensive or complicated software.
🖌️ Key Features:
- Drag-and-drop interface
- Templates, filters, and text overlays
- Background removal (premium)
- Customizable design elements
👍 Pros:
- Easy to use, no design experience needed
- Large selection of templates and assets
- Free and paid versions for different needs
👎 Cons:
- Background removal is only available in premium plans
- Limited advanced editing tools
💼 Best For:
- Beginners looking for quick and stylish product images
- Social media content creation
Fotor
Fotor is a free online photo editor with powerful features like one-click enhancements, filters, retouching tools, and background removal. Ideal for product photography, it simplifies image editing without requiring advanced skills. Fotor’s batch processing feature makes it efficient for handling multiple images at once. Whether adjusting brightness or adding effects, this free tool ensures high-quality product images with minimal effort.
🎨 Key Features:
- One-click enhancements
- Retouching and background removal tools
- Batch processing for multiple images
- Filters and creative effects
👍 Pros:
- User-friendly interface
- Fast and easy for beginners
- Free version offers essential editing tools
👎 Cons:
- Some features are locked behind the premium version
- Limited functionality compared to desktop software
💼 Best For:
- Quick and efficient product photo editing
- Social media and e-commerce visuals
Pixlr
Pixlr provides a free online photo editing service with AI-powered background removal, layers, filters, and retouching tools. Its Photoshop-like interface makes it great for detailed product photo enhancements. Pixlr X is perfect for beginners, while Pixlr E offers advanced editing. This free tool allows users to create stunning product visuals without investing in expensive software, making it a favorite among e-commerce sellers.
🖼️ Key Features:
- AI-powered background removal
- Advanced features like layers and masks
- Filters and retouching tools
- Supports various file formats
👍 Pros:
- Two versions for different skill levels (X and E)
- Free and powerful editing features
- Suitable for more advanced users
👎 Cons:
- Limited tools in the free version
- Some ads may be distracting
💼 Best For:
- Users needing advanced editing tools for product images
- E-commerce businesses looking for detailed photo manipulation
Lunapic
Lunapic is a completely free online photo editor packed with advanced features like background removal, artistic effects, and animations. It’s a great tool for enhancing product images with unique filters and retouching options. While its interface is basic, Lunapic’s powerful editing capabilities make it a useful free service for product photography, helping users create high-quality visuals effortlessly.
🎨 Key Features:
- Artistic effects and filters
- Background removal
- Animated effects and overlays
- Simple editing tools
👍 Pros:
- Free to use with no hidden charges
- Wide range of creative and artistic effects
- Great for turning product images into unique visuals
👎 Cons:
- Interface is outdated and can feel clunky
- Limited functionality for professional-grade edits
💼 Best For:
- Adding creative effects to product photos
- Users who need simple and quick editing
Remove.bg
Remove.bg is a free online tool that instantly removes backgrounds from images using AI technology. It’s perfect for e-commerce and marketing, allowing users to create clean, professional product photos within seconds. The free service provides high-accuracy background removal, making it easier to place products on different backgrounds without requiring complex manual editing.
🧹 Key Features:
- Automatic background removal powered by AI
- High-accuracy image processing
- Fast and easy-to-use
👍 Pros:
- Quick, one-click background removal
- High-quality output
- Works with various image formats
👎 Cons:
- Free version offers lower resolution images
- Premium options needed for higher-quality images
💼 Best For:
- E-commerce businesses needing fast and accurate background remova
- Creating clean, professional product visuals
Photopea
Photopea is a free online Photoshop alternative with advanced editing features, including layers, masks, and background removal. Supporting multiple file formats like PSD, it’s a great tool for detailed product photo editing. This free service allows users to retouch images, add effects, and optimize visuals without needing expensive software, making it perfect for professionals and beginners alike.
🖼️ Key Features:
- Advanced features like layers, masks, and filters
- Photoshop-like interface
- Supports PSD, JPG, PNG, and other formats
👍 Pros:
- Free alternative to Photoshop
- Ideal for advanced users with professional editing needs
- Can handle complex edits and retouching
👎 Cons:
- Interface may be overwhelming for beginners
- Ads can be distracting in the free version
💼 Best For:
- Professionals needing advanced editing tools without paying for software
- Product image retouching and complex design work
BeFunky
BeFunky offers a free online photo editing service with tools like background removal, filters, and one-click retouching. It’s an easy-to-use platform for enhancing product photos, making them look polished and professional. With additional features like collage makers and design templates, BeFunky is a great choice for creating high-quality visuals for marketing and social media.
🎨 Key Features:
- One-click enhancements
- Background removal and retouching tools
- Templates and design features
- Creative effects and filters
👍 Pros:
- Easy-to-use interface
- Free and premium versions available
- Great for beginners and intermediate users
👎 Cons:
- Some features are restricted to premium plans
- Ads in the free version
💼 Best For:
- Users wanting quick edits for product photos
- Social media content creation and marketing
Kapwing
Kapwing provides a free online editing service for photos and videos, offering background removal, text overlays, and filters. It’s ideal for product photography, allowing users to create engaging visuals for social media and e-commerce. The free version of Kapwing includes essential tools for enhancing product images quickly and efficiently, making it a great choice for brands and content creators.
🎥 Key Features:
- Background removal
- Video and photo editing tools
- Text and image overlays
- Simple collaboration options
👍 Pros:
- Free to use with solid basic features
- User-friendly and collaborative editing
- Works for both photo and video content
👎 Cons:
- Free version has watermark limitations
- Some advanced features require payment
💼 Best For:
- Users who need both photo and video editing
- Teams working on product content and social media
IMG2Go
IMG2Go is a free online photo editor that offers basic tools like cropping, resizing, and background removal. It’s a simple yet effective service for quick product photo enhancements. As a fully web-based tool, IMG2Go is accessible on any device, making it convenient for optimizing images for online stores, websites, and social media.
🖼️ Key Features:
- Basic photo editing tools like resizing and cropping
- Background removal
- File conversion and compression
👍 Pros:
- Simple and free to use
- Supports various file formats
- Quick edits for product images
👎 Cons:
- Limited advanced editing options
- Basic interface with fewer features
💼 Best For:
- Quick and easy product image optimizations
- E-commerce businesses needing simple, fast edits
Enhancing Product Images with Filters and Effects
Filters and effects can transform a dull product image into an eye-catching one. Many product photo editing online free platforms offer built-in filters that adjust colors, lighting, and contrast in just one click. Filters help create a consistent visual style, especially if you run an online store or social media business.
Applying color correction is another essential step in editing. Sometimes, product photos may appear too warm or cool due to improper lighting. Adjusting the white balance ensures the colors look accurate and natural. Adding a slight vignette effect can also make the product stand out by darkening the edges of the image, directing the viewer’s focus toward the center.
Using Text and Graphics to Improve Product Images
For businesses selling products online, adding text and graphics can enhance the overall presentation. Free editing tools allow you to include price tags, discount labels, and product descriptions directly on the image. This is especially useful for e-commerce stores and social media promotions. Canva and Fotor are excellent options for adding stylish text overlays and graphics to highlight product features.
Including branding elements such as logos and watermarks ensures product images remain unique and recognizable. Many product photo editing online free tools provide options to upload logos and place them strategically on images. This helps prevent unauthorized use of your product photos and enhances brand recognition.
Saving and Exporting Product Images
After editing, the final step is saving and exporting the image in the correct format. Most product photo editing online free tools support multiple file formats such as JPEG, PNG, and WebP. PNG is ideal for transparent backgrounds, while JPEG is best for web-optimized images with smaller file sizes.
Choosing the right resolution is crucial for maintaining image quality. For e-commerce websites, high-resolution images ensure customers can zoom in and see product details clearly. However, excessively large files may slow down website performance, so it’s important to balance quality and file size. Using an image compression tool can help optimize images for faster loading times without sacrificing clarity.
Conclusion
Editing product photos online for free is an excellent way to enhance your product images without the need for expensive software. With tools like Canva, Pixlr, and Fotor, you can achieve professional-quality results easily. Whether adjusting brightness, removing backgrounds, or adding filters, product photo editing online free platforms provide all the necessary features for creating stunning product images. By following these steps, businesses can improve their online presence and attract more customers with visually appealing product photos.
Frequently Asked Questions (FAQs)
What is the best free tool for product photo editing online?
Several great options are available, including Canva, Pixlr, Fotor, and Photopea. Each tool offers unique features, such as background removal, filters, and text overlays.
Can I remove backgrounds using free online tools?
Yes, many free tools provide AI-powered background removal features. Pixlr and Fotor allow users to easily erase backgrounds and replace them with transparent or plain color backgrounds.
How can I make my product images look more professional?
Adjusting brightness, contrast, sharpness, and white balance can enhance professionalism. Using free tools to remove imperfections, apply filters, and add shadows can also make a significant difference.
Will editing my product photos online reduce image quality?
Most free tools allow high-resolution exports without losing quality. However, compressing images too much may cause a loss of clarity. It’s essential to strike a balance between file size and resolution.
Can I use free editing tools for commercial purposes?
Yes, many product photo editing online free tools permit commercial use. However, some platforms may have restrictions on certain premium features, so it’s important to check their terms.
How can I optimize product images for my website?
Save images in web-friendly formats such as JPEG or WebP. Compress images to reduce file size while maintaining quality, and use SEO-friendly file names for better search rankings.
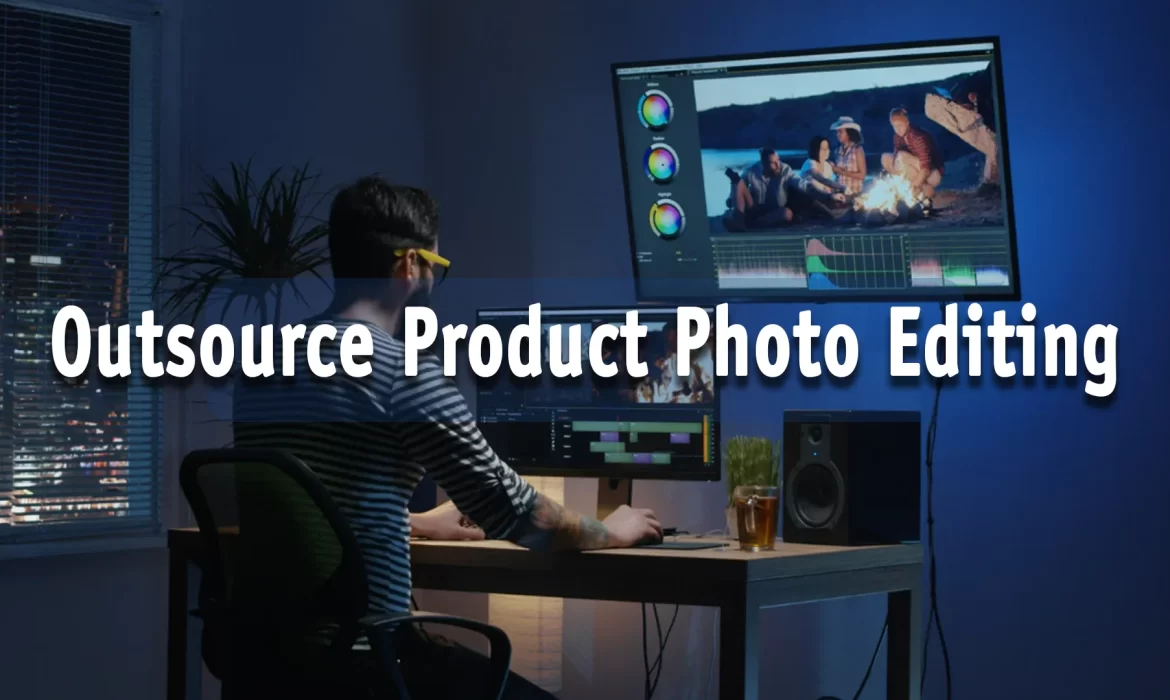
Why Outsourcing Product Photo Editing is a Game-Changer
In today’s competitive e-commerce world, high-quality product images are essential. A great photo can make the difference between a sale and a missed opportunity. But editing product photos to perfection is time-consuming, expensive, and requires technical expertise. This is where outsourcing product photo editing becomes a game-changer. Businesses can focus on sales and marketing while professionals handle their images. This article will explore why choosing to outsource product photo editing is one of the smartest decisions for businesses aiming for success.
The Growing Need for High-Quality Product Photos
In the world of e-commerce, first impressions matter. High-quality, well-edited product images are often the first thing potential customers notice when browsing online stores. These images can make or break a sale, as customers rely heavily on visuals to judge the quality and appeal of a product. That’s why outsourcing product photo editing is a vital step toward ensuring that your product images stand out.
While taking great photos is important, editing them to perfection is equally crucial. Professional photo editing enhances product details, fixes lighting issues, and makes images look polished. For businesses with large inventories, editing each photo manually can become time-consuming and overwhelming. Outsourcing product photo editing solves this problem by giving companies access to experts who specialize in creating flawless product images quickly and efficiently.

Saves Time and Increases Productivity
Editing product photos can take hours, especially for businesses with a large inventory. If you spend too much time refining images, it takes away from other essential tasks like product development, customer service, and marketing. When you outsource product photo editing, professionals handle the job quickly and efficiently. They have the skills, tools, and experience to edit images much faster than an in-house team. This allows businesses to speed up their workflow, meet deadlines, and focus on scaling their operations without being burdened by editing tasks.
Cost-Effective Solution
Hiring a full-time, in-house photo editing team requires a significant investment. Businesses must pay salaries, benefits, and provide expensive editing software. On the other hand, outsourcing product photo editing is a cost-effective alternative. Companies can access top-notch services at a fraction of the cost by paying only for the work they need. Many outsourcing providers offer flexible pricing models, allowing businesses to scale their editing needs based on demand. This makes it a budget-friendly solution for startups and established companies alike.

Access to Professional Expertise and High-Quality Editing
Professional photo editors have extensive experience and knowledge of the latest tools and techniques. They use advanced editing software like Adobe Photoshop and Lightroom to enhance images, adjust lighting, remove backgrounds, and ensure perfect color accuracy. When businesses outsource product photo editing, they gain access to high-quality editing that meets industry standards. This improves the overall appeal of product images, increasing customer trust and boosting conversions.
Enhances Brand Image and Credibility
Consistent, high-quality images help build a strong brand identity. Customers are more likely to trust a brand with well-edited, visually appealing product photos. When businesses outsource product photo editing, they ensure that their images are always professional and uniform. This consistency builds credibility and makes a brand stand out in a crowded market. Whether it’s an e-commerce store, fashion brand, or electronics retailer, outsourcing photo editing ensures that every image aligns with the company’s branding and marketing strategy.

Faster Turnaround Time
E-commerce businesses often operate on tight schedules. New products need to be uploaded quickly, and promotional campaigns require fresh, high-quality images. When companies outsource product photo editing, they benefit from fast turnaround times. Professional editing services work efficiently to meet deadlines, ensuring that businesses can launch products and campaigns without delays. This is especially beneficial during peak sales seasons when speed is crucial for maintaining competitiveness.
Scalability and Flexibility
Business needs fluctuate throughout the year. Some months may require heavy photo editing, while others may not. Hiring an in-house team means paying salaries even when there’s little editing work to do. Outsourcing product photo editing offers flexibility. Businesses can scale their editing requirements up or down as needed. Whether they need 100 images edited or 10,000, outsourcing companies can handle the workload efficiently. This level of scalability allows businesses to stay agile and adapt to changing market demands.
Focus on Core Business Functions
Running a successful business involves multiple aspects, including marketing, customer engagement, inventory management, and logistics. If business owners and teams spend excessive time on photo editing, they lose focus on these critical functions. By outsourcing product photo editing, companies free up time to concentrate on growing their business, developing new products, and improving customer experiences. This strategic move ensures that businesses remain competitive and productive in a fast-paced market.

Advanced Editing Techniques and Tools
Outsourcing providers have access to cutting-edge technology and advanced editing techniques. They use AI-powered tools, batch processing, and sophisticated retouching methods to achieve flawless results. Businesses that outsource product photo editing benefit from the latest industry innovations without having to invest in expensive software or training. This ensures that their images remain up-to-date with current trends and consumer expectations.
Competitive Advantage in the Market
In the digital age, customers have endless options when shopping online. To attract and retain buyers, businesses must present their products in the best possible light. High-quality images give companies a competitive edge. When businesses outsource product photo editing, they gain access to professional-grade visuals that make their products stand out. This can lead to higher engagement, increased conversions, and better overall sales performance.

Reduced Errors and Revisions
Inexperienced editing can lead to inconsistent images, poor color correction, and visible flaws. Fixing these mistakes requires time and effort. When businesses outsource product photo editing, they work with experts who ensure accuracy from the start. Professional editors follow strict quality control measures, reducing the chances of errors and revisions. This results in a smoother workflow and high-quality images ready for immediate use.
Conclusion
Outsourcing product photo editing is a game-changer for businesses looking to improve efficiency, save costs, and enhance their brand image. It allows companies to access professional expertise, achieve high-quality images, and maintain consistency across their product catalog. With faster turnaround times, scalability, and the ability to focus on core business functions, outsourcing becomes a strategic advantage in a highly competitive market. Businesses that embrace outsourcing product photo editing gain a significant edge in attracting customers and increasing sales.
Frequently Asked Questions (FAQs)
Why should I outsource product photo editing instead of hiring an in-house team?
Outsourcing product photo editing is cost-effective, provides access to expert services, and allows businesses to scale their editing needs without hiring full-time staff.
How do I choose the right outsourcing provider for product photo editing?
Look for providers with experience, positive reviews, fast turnaround times, and a strong portfolio. Ensure they use advanced editing tools and offer flexible pricing models.
Is outsourcing product photo editing safe for my business?
Yes, reputable outsourcing providers follow strict data security protocols. Always work with trusted companies that guarantee confidentiality and secure file transfers.
How much does it cost to outsource product photo editing?
Costs vary based on image complexity, volume, and turnaround time. Many providers offer flexible pricing, allowing businesses to pay only for the services they need.
Can outsourced editors match my brand’s editing style?
Yes, professional editors can follow brand guidelines to ensure consistency across all product images.
What types of edits can be outsourced?
Common outsourced edits include background removal, color correction, retouching, shadow enhancement, and image resizing.
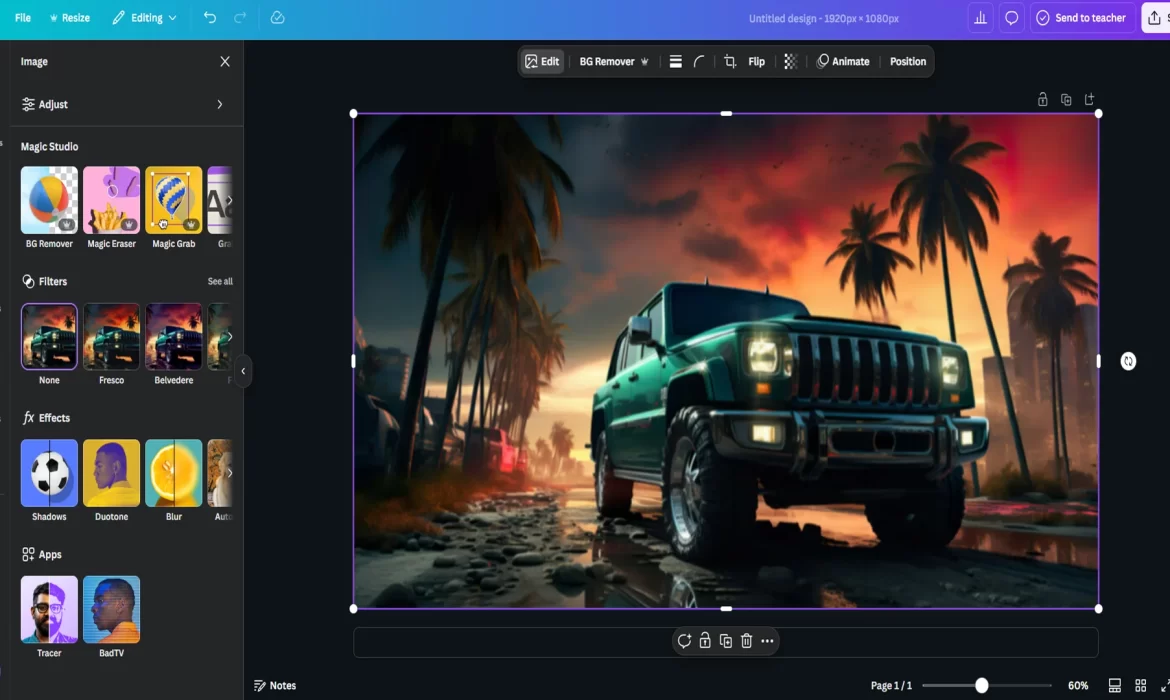
Editing Product Photos in Canva: A Complete Tutorial
Are you ready to take your product photos to the next level but don’t have professional editing skills or expensive software? You’re in the right place! In this easy-to-follow guide, we will show you how to edit product photos in Canva, a powerful and user-friendly design tool that’s perfect for beginners and seasoned professionals alike. Whether you’re an online business owner, a social media influencer, or someone looking to enhance your photos, Canva is the solution you’ve been looking for. Let’s dive into how to edit product photos in Canva and transform your images into eye-catching visuals that will impress your customers and followers.
Why Edit Product Photos in Canva?
Before we start, let’s talk about why Canva is such a fantastic tool for editing product photos. Canva is an online graphic design platform that offers a wide range of templates, tools, and features designed to make the editing process simple and effective. It doesn’t require any advanced skills, making it ideal for those who may not have experience with complex photo-editing software like Photoshop. Canva allows you to easily enhance your product photos by adjusting colors, backgrounds, adding text, and so much more.
Whether you want to brighten up your photos, remove unwanted objects, or add your branding to the image, Canva has everything you need. Now, let’s explore how to edit product photos in Canva, step by step.

Getting Started: Uploading Your Product Photo
The first step in learning how to edit product photos in Canva is to upload the image you want to work on. Start by logging into your Canva account. If you don’t have one, creating a free account is quick and easy. Once you’re logged in, click the “Create a Design” button on the homepage.
Next, choose a custom dimension or template depending on the platform where you’ll use the image (like Instagram, Etsy, or a website). After that, go to the “Uploads” section in the left sidebar and click on the “Upload Media” button. From here, you can choose to upload your product photo from your computer or any other device.
Once your photo is uploaded, simply drag and drop it onto your design canvas. This is where the magic happens! Now you’re ready to start editing your product photo in Canva.
How to Edit Product Photos in Canva: Basic Edits

Adjusting Brightness and Contrast
The first thing you might want to do is adjust the brightness and contrast of your product photo. This is an essential step, especially if your photo appears too dark or too light. To adjust the brightness, click on the image, and a toolbar will appear at the top of your screen. Select “Adjust,” and a panel with sliders will pop up.
Use the sliders to tweak the brightness, contrast, saturation, and more. If the photo seems too dull, increase the brightness or adjust the contrast to make your product pop. Experiment with these settings to achieve the best visual effect.

Cropping and Resizing
Sometimes, you may want to crop or resize your product photo to focus on a specific area or fit the aspect ratio of a particular platform. In Canva, cropping and resizing your photo is simple. Just click on your image and drag the corners to resize it. You can also crop your photo by clicking on the “Crop” button at the top and adjusting the frame to cut out any unnecessary parts of the image.

Removing the Background
A major feature of Canva that makes editing product photos easier is its Background Remover tool. This tool allows you to easily remove the background from your product photo and replace it with a clean, white, or transparent background. To use this feature, click on your photo, and in the top toolbar, select “Effects.” From there, click on the “Background Remover” button. Canva will automatically detect and remove the background, leaving you with just the product.
This feature is especially useful if you want to showcase your product on a clean, consistent background or if you’re working on a product catalog or online store.

Enhancing Colors and Saturation
Another great way to make your product photos stand out is by adjusting the colors and saturation. Canva offers an easy way to enhance your photo’s colors to give it a more vibrant and appealing look. After selecting your image, click on the “Adjust” option and use the “Saturation” slider to boost or reduce the color intensity.
If your product photo looks too flat or washed out, increasing the saturation will bring the colors to life. Conversely, if your photo looks too vibrant or harsh, you can decrease the saturation to make the colors more subtle.
How to Edit Product Photos in Canva: Advanced Edits

Adding Text and Logos
One of the best features of Canva is its ability to add text and logos to your product photos. Whether you want to add the name of your product, a catchy slogan, or your brand logo, Canva makes this process seamless. Click on the “Text” tab on the left sidebar and choose from a wide variety of font styles.
You can resize, adjust the color, and position the text anywhere on your image. Adding a logo is just as easy—upload your logo and place it in a corner or anywhere it fits well with your design. This step is essential if you want to create a branded product image for your website or social media.

Adding Filters and Effects
Canva offers a variety of filters and effects that can give your product photos a professional look. To apply a filter, simply click on your image and select “Filter” from the toolbar. Canva provides various preset filters that can adjust the tone and mood of your image, such as “Retro,” “Black & White,” or “Brighten.”
Additionally, if you want to add a creative touch, you can use the “Effects” option to apply artistic effects like “Pixelate,” “Glitch,” or “Duotone.” These filters can be great for making your photos stand out on social media or for special promotions.

Using Canva’s Elements and Icons
If you’re aiming to add some extra design elements, Canva has a wide variety of icons, shapes, and stickers that you can place over your product photos. Whether it’s a decorative border, an arrow pointing to your product, or an icon that emphasizes the benefits of your product, you can find many design elements in the “Elements” section.
You can drag and drop these elements directly onto your product photo, resize them, and position them wherever you like. Just make sure the elements enhance your product and don’t distract from it.

How to Edit Product Photos in Canva: Final Touches
Once you’ve made the necessary edits to your product photo, it’s time for the final touches. You’ll want to check the alignment of your product and any added text or design elements. Canva has a smart grid system that helps you center and align your design automatically, making sure everything looks polished.
Finally, after you’re satisfied with your photo, click on the “Download” button at the top right of the screen. Canva will give you the option to download your photo in various formats such as PNG, JPG, or PDF. Choose the format that works best for your needs and save it to your device.
Conclusion
Editing product photos in Canva is a simple and effective way to create stunning visuals that will help showcase your products in the best possible light. With its easy-to-use features, Canva is perfect for beginners who want to edit their photos without the need for complicated software. Now that you know how to edit product photos in Canva, you can take full advantage of this powerful tool to create professional-looking images that capture attention and drive sales. Happy designing!
Frequently Asked Questions (FAQs)
Can I edit product photos in Canva for free?
Yes, Canva offers a free version with many features that allow you to edit product photos effectively. However, some advanced tools, such as the Background Remover, are only available with a Canva Pro subscription. The free version still offers plenty of tools for basic edits, including cropping, adjusting brightness, adding text, and more.
How do I remove the background of my product photo in Canva?
To remove the background of a product photo in Canva, click on the image, select the “Effects” option from the toolbar, and then click on “Background Remover.” Canva will automatically remove the background. If you have a Canva Pro account, you can access this tool.
What file formats can I download my edited product photo in?
Canva allows you to download your edited product photo in several formats, including PNG, JPG, and PDF. PNG is best for high-quality images, especially if you need a transparent background, while JPG is suitable for web use with smaller file sizes.
Can I add my logo to product photos in Canva?
Yes! Canva makes it easy to upload and place your logo on your product photos. Simply upload your logo to Canva and drag it onto your photo. You can resize it, position it, and adjust its transparency to create a professional and branded look.
How can I make my product photos look more professional in Canva?
To make your product photos look more professional, focus on editing the image’s brightness, contrast, and saturation. Use Canvas Background Remover tool for a clean, white backdrop, and consider adding text or your logo to enhance branding. Filters and effects can also be used to make the image more visually appealing.
Is Canva suitable for product photography editing for an online store?
Absolutely! Canva is perfect for editing product photos for online stores. Whether you’re selling on Shopify, Etsy, or another platform, Canva allows you to create professional-looking product images that stand out. You can remove backgrounds, add descriptions or prices, and ensure your photos have a consistent and polished look.
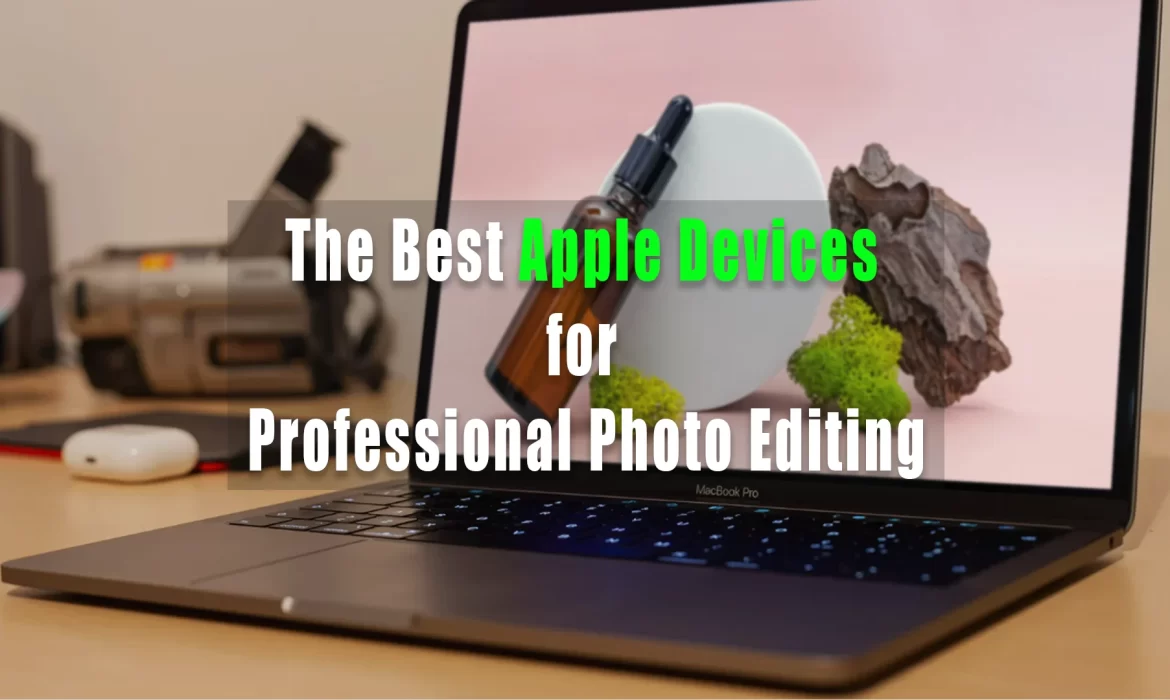
The Best Apple Devices for Professional Photo Editing
If you are a professional photographer or a creative artist, choosing the best Apple product for photo editing can significantly impact your workflow. Apple has built a reputation for offering high-quality devices with powerful performance, stunning displays, and optimized software that cater to photo editing needs. Whether you work with Lightroom, Photoshop, or Capture One, Apple devices offer seamless performance that enhances your creativity. But with so many options available, finding the best Apple product for photo editing can be overwhelming. In this guide, we will explore the top Apple devices that offer the best performance for editing photos and why they are ideal for professionals.
Why Choose Apple for Photo Editing?
Apple products have always been a favorite among photographers and designers. The main reason is their high-resolution Retina displays, powerful processors, and optimized software that work smoothly with photo editing applications. The macOS ecosystem is also designed for stability, making it a reliable choice for heavy creative workloads. Another key advantage of using an Apple device is the seamless integration between macOS and iOS, which allows professionals to edit images on multiple devices without any compatibility issues. Whether you are editing RAW images or making high-end retouches, choosing the best Apple product for photo editing will make your work more efficient and enjoyable.
The Best Apple Products for Photo Editing
Discover the best Apple products for photo editing, from the powerful MacBook Pro to the high-resolution iMac and portable iPad Pro. Explore top devices with stunning displays and advanced performance, perfect for professional photographers and creative artists.

MacBook Pro (M4, 2024)
The MacBook Pro (M4, 2024) takes performance to the next level with Apple’s cutting-edge M4 chip, delivering faster speeds, better efficiency, and incredible graphics. Available in 14-inch and 16-inch models, it features a stunning Liquid Retina XDR display, up to 64GB of unified memory, and longer battery life. Ideal for professionals, it supports advanced AI tasks, video editing, and gaming with ease. Its sleek aluminum design, enhanced cooling system, and upgraded connectivity options make it one of Apple’s most powerful laptops yet. Whether for work or creativity, the M4 MacBook Pro offers unmatched power and efficiency in a compact package.
✅ Key Features:
- M4 chip for fast processing and graphics
- 14-inch or 16-inch Liquid Retina XDR display
- Up to 64GB unified memory
- All-day battery life
- Thunderbolt 4, HDMI, and MagSafe charging
- Advanced AI processing
💚 Reasons to Buy:
- Incredible performance for pro-level tasks like video editing and gaming
- Stunning display with vibrant colors
- Long battery life even under heavy use
❌ Reasons to Avoid:
- Expensive for most users
- May be overkill for casual use
💰 Price: Starting at $2,499 (14-inch) / $3,139 (16-inch)
MacBook Pro M3 Max
The Apple MacBook Pro with M3 Max is built for demanding professionals needing top-tier performance. Powered by the M3 Max chip, it offers up to 16 CPU cores and 40 GPU cores, making it perfect for 3D rendering, video editing, and AI workloads. The Liquid Retina XDR display delivers stunning colors and HDR content, while up to 128GB of RAM ensures seamless multitasking. With all-day battery life, ProMotion technology, and an advanced cooling system, it handles intensive tasks effortlessly. Studio-quality speakers, enhanced connectivity, and a sleek aluminum build make it an ultimate pro-level MacBook.
✅ Key Features:
- M3 Max chip with 16-core CPU, up to 40-core GPU
- Liquid Retina XDR display with ProMotion
- Up to 128GB RAM
- Enhanced cooling system
- Studio-quality speakers and advanced connectivity
💚 Reasons to Buy:
- Top-tier performance for 3D rendering, AI, and video editing
- Incredible display and audio quality
- Long battery life for a powerful machine
❌ Reasons to Avoid:
- Extremely expensive
- Heavy for portability
💰 Price: Starting at $3,499
Apple Mac Studio with M2 Ultra
The Apple Mac Studio with M2 Ultra is a powerhouse desktop computer designed for creative professionals. With the M2 Ultra chip, it delivers unparalleled performance, featuring up to 24 CPU cores and 76 GPU cores, making it perfect for 3D rendering, video production, and AI workloads. It supports up to 192GB of unified memory and features high-speed Thunderbolt 4 ports, HDMI, and a powerful cooling system. The compact yet robust design ensures space efficiency while providing desktop-class performance. Ideal for filmmakers, designers, and engineers, the Mac Studio with M2 Ultra is the ultimate workstation for demanding workflows.
✅ Key Features:
- M2 Ultra chip with 24-core CPU, up to 76-core GPU
- Supports up to 192GB unified memory
- Multiple Thunderbolt 4, USB-C, and HDMI ports
- Advanced cooling system
💚 Reasons to Buy:
- Supercharged performance for professional workflows
- Compact desktop design with powerful capabilities
- Great for creative and engineering tasks
❌ Reasons to Avoid:
- No built-in screen or accessories
- Expensive for casual users
💰 Price: Starting at $1,899

MacBook Pro 14 (M3, 2023)
The MacBook Pro 14 (M3, 2023) delivers powerful performance in a compact, lightweight design. Powered by the M3 chip, it features faster processing, improved efficiency, and advanced graphics. The 14-inch Liquid Retina XDR display provides vibrant colors and ProMotion technology for smooth visuals. With up to 24GB of RAM, all-day battery life, and upgraded thermal management, this MacBook Pro is perfect for professionals handling photo editing, coding, and video rendering. Enhanced with studio-quality speakers, advanced connectivity, and MagSafe charging, the M3 MacBook Pro 14-inch is a great choice for creatives and professionals on the go.
✅ Key Features:
- M3 chip with 8-core CPU, 10-core GPU
- 14-inch Liquid Retina XDR display
- Up to 24GB unified memory
- Enhanced thermal performance
- ProMotion and HDR support
💚 Reasons to Buy:
- Compact, powerful, and great for creatives
- Stunning display with vivid colors
- All-day battery life
❌ Reasons to Avoid:
- More expensive than the MacBook Air
- Not the top-tier option for extreme workflows
💰 Price: Starting at $1,999

MacBook Air 15.3-inch (M3, 2024)
The MacBook Air 15.3-inch (M3, 2024) combines ultra-slim portability with powerful performance. Featuring the Apple M3 chip, it delivers faster speeds, improved graphics, and longer battery life. The 15.3-inch Liquid Retina display offers vivid colors and sharp details, perfect for entertainment and productivity. With a fanless design, it runs silent yet efficiently while offering up to 24GB of RAM for smooth multitasking. MagSafe charging, a 1080p webcam, and a premium aluminum design make it an excellent laptop for students, professionals, and everyday users who need a lightweight yet capable device.
✅ Key Features:
- M3 chip with 8-core CPU, 10-core GPU
- 15.3-inch Liquid Retina display
- Up to 24GB RAM
- Fanless design for silent operation
- MagSafe charging
💚 Reasons to Buy:
- Larger screen in a lightweight design
- Ideal for casual work, students, and content creators
- Excellent battery life
❌ Reasons to Avoid:
- Not powerful enough for heavy tasks
- Lacks high-end display features
💰 Price: Starting at $1,499

MacBook Air (M2, 2022)
The MacBook Air (M2, 2022) remains a lightweight and powerful option with the M2 chip, offering faster performance, improved power efficiency, and an elegant redesign. The 13.6-inch Liquid Retina display provides rich colors and sharp visuals, perfect for productivity and streaming. Featuring a fanless design, it runs cool and silent, while the 1080p webcam, MagSafe charging, and all-day battery life enhance user experience. Weighing just 2.7 lbs, it’s ultra-portable, making it an excellent choice for students, remote workers, and everyday users looking for a reliable and stylish MacBook.
✅ Key Features:
- M2 chip with 8-core CPU, up to 10-core GPU
- 13.6-inch Liquid Retina display
- Up to 24GB unified memory
- Fanless, ultra-lightweight design
💚 Reasons to Buy:
- Affordable and compact
- Impressive battery life for its size
- Perfect for light work and everyday tasks
❌ Reasons to Avoid:
- No ProMotion or HDR features
- Outdated compared to newer models
💰 Price: Starting at $799
Choosing the Right Apple Device for Your Needs
When selecting the best Apple product for photo editing, consider your specific needs. If you require portability, the MacBook Pro or iPad Pro are excellent choices. If you need extreme power for handling high-resolution images and complex edits, the Mac Studio or iMac will serve you best. Budget-conscious photographers can opt for the Mac Mini while still enjoying powerful editing capabilities. No matter which device you choose, Apple’s advanced hardware and optimized software ensure a smooth and efficient photo editing experience.

Conclusion
Choosing the best Apple product for photo editing depends on your specific needs, workflow, and budget. Whether you need a high-performance MacBook Pro, a powerful Mac Studio, a budget-friendly Mac Mini, or a portable iPad Pro, Apple offers a variety of options that cater to photographers and creative professionals. Investing in the right device will not only enhance your photo editing process but also improve your overall productivity. With Apple’s exceptional hardware and software integration, you can achieve professional-quality edits with ease.
Frequently Asked Questions (FAQs)
What is the best Apple product for photo editing on the go?
The best Apple product for photo editing on the go is the MacBook Pro 16-inch or the iPad Pro 12.9-inch. Both devices offer excellent portability and powerful performance for editing photos anywhere.
Is the Mac Mini good for professional photo editing?
Yes, the Mac Mini with an M3 chip provides powerful performance for photo editing at an affordable price. It is an excellent option for professionals who already have a high-quality external monitor.
Do I need an Apple Pencil for photo editing on the iPad Pro?
While not mandatory, the Apple Pencil 2nd generation is highly recommended for precise retouching and detailed edits on the iPad Pro.
Which Apple device has the best display for photo editing?
The MacBook Pro 16-inch and iMac 24-inch feature Liquid Retina XDR and 4.5K Retina displays, respectively, making them the best options for color accuracy and high-quality visuals.
Is macOS better than Windows for photo editing?
Many professional photographers prefer macOS due to its stability, optimized software, and excellent display quality. However, the choice depends on personal preference and workflow needs.
Can I use external storage with Apple devices for photo editing?
Yes, all Apple devices support external SSDs and Thunderbolt drives, making it easy to expand storage and manage large photo libraries efficiently.
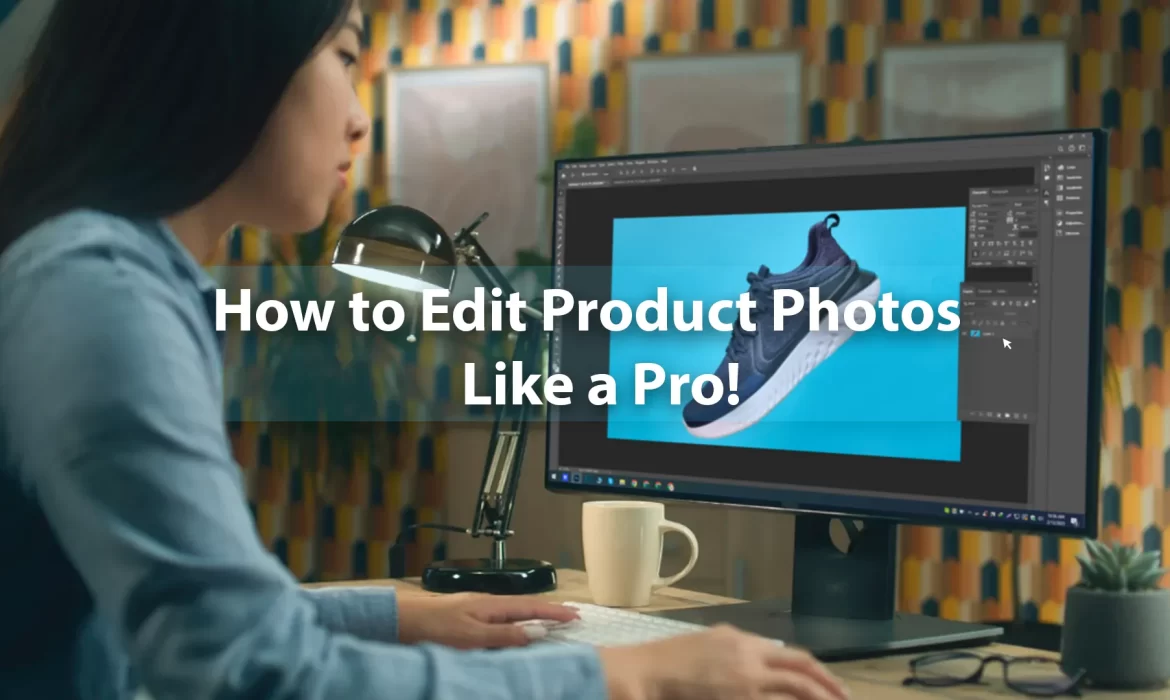
The Ultimate Guide: How to Edit Product Photos Like a Pro
Have you ever looked at a product photo and wondered how it looks so polished and professional? It’s not magic—it’s the result of careful editing. If you’re selling products online, mastering how to edit product photos can make a huge difference in attracting customers and boosting sales. In this guide, we’ll take you step by step through the process, showing you how to edit product photos like a pro and giving you insider tips to make your images stand out. Whether you’re a beginner or have some editing experience, this guide will equip you with the skills you need to enhance your photos and take them to the next level.
Why Product Photos Matter
Before diving into how to edit product photos, it’s important to understand why they matter so much. In today’s digital age, first impressions count, and your product photos are often the first thing potential customers will see. High-quality, well-edited product photos can increase trust, highlight the features of your product, and ultimately influence purchasing decisions. On the flip side, poor-quality photos can turn customers away and hurt your brand’s reputation.
To get the most out of your product images, learning how to edit product photos properly is key. This guide will help you do just that.

Getting Started: Tools You’ll Need to Edit Product Photos
Before we dive into the editing techniques, it’s important to understand the tools available to you. There are many photo editing software options out there, but some of the most popular choices for product photography editing include:
Adobe Photoshop: Known as the industry standard, Photoshop offers a wide range of powerful tools to edit product photos. However, it comes with a learning curve and requires a subscription.
Lightroom: If you need simpler edits and color corrections, Lightroom is a fantastic choice. It’s also great for organizing and managing large batches of photos.
Canva: For beginners or those on a budget, Canva provides an easy-to-use platform with plenty of templates and editing tools to adjust brightness, contrast, and saturation.
GIMP: A free alternative to Photoshop, GIMP offers a variety of features for more advanced editing, but it can be challenging to learn at first.
Once you’ve chosen your software, it’s time to learn how to edit product photos to get the best results.

Step 1: Start with a Clean Image
The first step in learning how to edit product photos is ensuring that you start with a clean, high-quality image. This means your product should be properly lit and captured in a way that shows it in the best possible light. Ideally, you should shoot in a well-lit space or use a lightbox to eliminate shadows and harsh lighting. Avoid busy backgrounds or distracting elements that could take away from the product itself.
If you’ve already taken your product photos and they’re a bit rough around the edges, don’t worry. Editing can still improve their quality significantly.

Step 2: Crop and Straighten Your Image
One of the simplest edits you can make when learning how to edit product photos is cropping. Cropping helps to eliminate any unnecessary space around the product and focus attention solely on it. Make sure to follow the rule of thirds or use your software’s crop tools to create a balanced composition.
In addition to cropping, you may need to straighten your photo if your product looks off-center or tilted. Most photo editing programs have automatic straighten tools that can help you align the image perfectly.

Step 3: Adjust Exposure and Brightness
Getting the exposure and brightness right is crucial when you’re learning how to edit product photos. Exposure refers to how light or dark your photo is, and adjusting it can make your product look more vibrant and true to life.
If your product looks too dark, try increasing the exposure or brightness. On the other hand, if the photo is too bright, you might want to decrease the exposure or add contrast to bring out the details. A good rule of thumb is to adjust the exposure so that the product is clearly visible but not washed out.

Step 4: White Balance and Color Correction
Proper white balance is essential when learning how to edit product photos, as it ensures that the colors in your image are accurate and true to the product. If your photo has a yellow or blue tint, it can make your product look unnatural. Most photo editing software has a white balance tool that lets you adjust the temperature and tint of your image.
Once you’ve set the white balance, take a look at the colors in your image. Sometimes, product photos can appear overly saturated or lack vibrancy. Use the saturation, vibrance, and hue tools to fine-tune the colors so that they match the real-life product as closely as possible. Remember, the goal is to make the product look appealing while staying true to its actual appearance.

Step 5: Remove Imperfections and Blemishes
If your product image has distracting elements, such as dust particles, smudges, or background clutter, removing them can make a huge difference. Most editing programs allow you to use tools like the healing brush or clone stamp to erase imperfections.
For instance, if you’re editing a clothing product and there’s a small stain or wrinkle, you can use these tools to clean up the image and present a flawless product. If you’re selling jewelry or cosmetics, it’s important to remove any unwanted reflections or background objects to keep the focus solely on the product.

Step 6: Sharpening and Detailing
When you’re learning how to edit product photos like a pro, sharpening is an important step to ensure your product looks crisp and detailed. Depending on the product type, you may want to sharpen the edges to make them stand out more.
However, be careful not to overdo it. Too much sharpening can create a harsh or artificial look, especially for smoother surfaces. Use the sharpening tool sparingly, and zoom in to check how it affects the details in your photo.

Step 7: Background Removal or Replacement
One of the most common edits in product photography is background removal. A clean, white background is often ideal for online product listings because it makes the product stand out. Fortunately, many editing tools have automatic background removal features. If you’re editing your photos manually, you can use the selection tools to carefully outline your product and remove the background.
Once the background is removed, you can replace it with a solid color, gradient, or even a lifestyle image that matches your brand. Just be sure that the new background complements the product and doesn’t distract from it.

Step 8: Final Touches: Adding Shadows or Reflections
If you’re aiming for a high-end look, you may want to add a shadow or reflection underneath the product. Adding a shadow gives the product depth and makes it appear more three-dimensional, as if it’s sitting on a surface. A subtle reflection can also create a professional, polished look.
Be careful not to overdo these effects, as they should enhance the product’s appearance, not overpower it. Keep the shadows and reflections soft and minimal to maintain a natural, professional feel.
Conclusion
Learning how to edit product photos like a pro can significantly enhance your online presence and improve your sales. By following the steps outlined in this guide, you can transform your product images into eye-catching photos that showcase your items in the best light possible. Remember, practice makes perfect, so take the time to experiment with different editing techniques and find the style that works best for your products. With the right tools and skills, you’ll be able to create professional-quality product photos that stand out and attract customers.
Frequently Asked Questions (FAQs)
What is the best app for editing product photos?
The best app for editing product photos depends on your needs and experience level. Adobe Photoshop and Lightroom are popular choices for professionals, while Canva is great for beginners or those who need simple edits. GIMP is a free alternative that also offers advanced features.
How can I make my product photos look professional?
To make your product photos look professional, focus on lighting, composition, and editing. Start by shooting in a well-lit environment, keep the background simple, and edit the photos to adjust exposure, white balance, and remove imperfections.
Can I edit product photos on my phone?
Yes, many photo editing apps like Snapseed, Lightroom Mobile, and Canva allow you to edit product photos directly on your phone. These apps offer a range of editing tools, such as cropping, color correction, and retouching.
How do I remove the background from product photos?
You can remove the background from product photos using software like Photoshop or free online tools like remove.bg. These tools use AI to detect the subject of the image and automatically remove the background, saving you time and effort.
How do I ensure my product photos are true to color?
To ensure your product photos are true to color, make sure your white balance is set correctly. You can also use a color calibration tool to adjust your monitor’s display to match real-world colors.
Should I use filters on product photos?
While filters can be fun for social media posts, it’s best to avoid using heavy filters on product photos, as they can alter the appearance of your product. Instead, focus on adjusting the exposure, contrast, and colors to make the product look its best without compromising its true appearance.
Top Free Apps to Edit Product Photos Like a Pro
In today’s digital age, great product photos can make or break an online business. Whether you’re a seasoned e-commerce seller or just starting your side hustle, ensuring your product images look sharp and professional is crucial. But here’s the good news: You don’t need an expensive photo editing software or a graphic designer to get those polished images. With the best free app for editing product photos, you can transform your product images into stunning visuals without breaking the bank. This article will dive into the top free apps for editing product photos like a pro, giving you the tools you need to enhance your images with ease.
What Makes the Best Free App for Editing Product Photos?
Not all editing apps are created equal. When choosing the best free app for editing product photos, consider the following features:
- Background Removal: Many products look better with a clean, white, or transparent background.
- Color Correction: Adjusting brightness, contrast, and saturation helps make product colors pop.
- Retouching Tools: Removing imperfections, dust, or wrinkles can improve product presentation.
- Filters and Effects: Adding subtle enhancements can make images more appealing.
- Text and Overlays: Branding elements like logos or promotional text can be added for marketing purposes.
- Easy-to-Use Interface: A simple and intuitive interface saves time and effort.
The Best Free Apps for Editing Product Photos
Discover the best free apps for editing product photos to enhance your images effortlessly. These powerful tools offer background removal, color correction, and professional effects to make your product photos stand out.
Snapseed: A Powerful Free App with Pro-Level Features
Snapseed is one of the most popular photo editing apps and arguably the best free app for editing product photos. Developed by Google, Snapseed offers a comprehensive suite of tools that can help you improve your product photos, making it perfect for both beginners and professionals. Whether you want to adjust the exposure, sharpen details, or apply filters, Snapseed offers all of that and more.
The app provides a wide range of editing features such as a healing tool to remove imperfections, a lens blur effect for depth, and precise control over brightness, contrast, and saturation. Moreover, Snapseed allows you to work in a non-destructive editing environment, meaning that you can always revert to your original image at any time. Its advanced features, like the selective adjust tool, give you the flexibility to focus on specific parts of the photo for more detailed edits.
For those seeking a best free app for editing product photos, Snapseed is an excellent choice due to its wide array of professional-level features, all for free.
Adobe Photoshop Express: A Trusted Name in Photo Editing
Adobe is a well-known name in the world of design and photo editing, and their free app, Photoshop Express, is no exception. If you’re looking for the best free app for editing product photos, Adobe Photoshop Express offers a powerful and user-friendly platform that will help you enhance your product images effortlessly.
The app comes with an intuitive interface that’s easy to navigate. It offers features such as auto-fix, which automatically corrects common photo issues like lighting and color. You can also fine-tune your images by adjusting sharpness, contrast, exposure, and even reduce noise in your photos for a clean and polished look. Another great feature is the ability to remove blemishes or imperfections in your product photos, which is essential for showcasing products in the best light.
Adobe Photoshop Express gives you the freedom to crop, rotate, and straighten your photos. Plus, you can create custom filters and save them for future use, making it a time-saving tool for businesses with a consistent visual aesthetic.
Canva: Edit Product Photos with Ease
Canva is a popular design platform known for its simplicity and versatility, and it also offers excellent tools for editing product photos. If you’re looking for the best free app for editing product photos that’s beginner-friendly yet powerful, Canva is a great choice. While Canva is often associated with graphic design, its photo editing tools are robust enough to handle a variety of editing needs.
With Canva, you can easily adjust the brightness, contrast, saturation, and other important settings for your product photos. One standout feature is its vast library of templates, which allow you to create professional-looking designs for your product photos without needing a graphic design background. Additionally, Canva offers a wide range of text options, icons, and stickers that can help you add context to your product images or create promotional banners.
Canva’s drag-and-drop functionality makes it incredibly easy to use, even for those with little to no photo editing experience. Whether you’re working on a simple product photo or creating an entire social media post, Canva is the best free app for editing product photos if you want ease of use combined with high-quality results.
Pixlr: A Free App for Detailed 14d and Quick Edits
Pixlr is another solid contender for the best free app for editing product photos. It’s a versatile and fast app that offers both beginner-friendly features and advanced editing options, allowing you to take full control over your product images. Pixlr’s user interface is clean and intuitive, making it easy to apply quick edits like cropping, rotating, and adjusting brightness.
What sets Pixlr apart is its range of filters and overlays, which can give your product photos a unique touch. You can also use the app’s advanced tools like the healing tool to remove unwanted objects, and the clone tool to replicate areas of the photo. Pixlr also supports layers, which means you can combine different images and effects in one project, making it ideal for more complex edits.
Pixlr’s cloud-based saving feature ensures that your progress is always saved, even if you switch devices, making it a convenient option for business owners on the go. If you’re looking for a flexible, free app to fine-tune your product photos, Pixlr is one of the best free apps for editing product photos.
Fotor: Ideal for Quick Enhancements
Fotor is another great option if you’re in search of the best free app for editing product photos. Known for its quick and straightforward photo editing tools, Fotor is perfect for businesses that need to make fast yet effective improvements to their product images. The app offers a variety of filters, effects, and retouching tools to make your photos stand out in a crowded market.
One of the most useful features of Fotor is its batch processing tool, which allows you to edit multiple photos at once. This can save a lot of time if you have a large number of product images that need similar adjustments. You can easily adjust the exposure, add text or labels to the image, or remove blemishes.
If you’re new to photo editing, Fotor’s interface is user-friendly and easy to navigate, making it the perfect choice for small business owners who want professional-looking product photos without the learning curve of more complex software. For those looking to quickly improve their product photos, Fotor is one of the best free apps for editing product photos.
VSCO: Great for Adding Creative Effects
If you’re looking for a more creative touch for your product photos, VSCO is a fantastic choice. While it is best known for its filters, VSCO also provides powerful editing tools that can help elevate your product images. The app is perfect for businesses that want their product photos to stand out with a unique style or mood.
VSCO offers a range of presets and filters that can give your product photos a stylish, polished look. You can also manually adjust the image’s exposure, contrast, and saturation to fine-tune your edits. Another great feature of VSCO is its ability to add subtle textures or grain to your photos, which can make your product images feel more artistic and engaging.
While the free version of VSCO offers a solid set of editing tools, upgrading to the premium version gives you access to even more filters and advanced editing options. But even without the premium version, VSCO is one of the best free apps for editing product photos when you want to add a little extra flair to your images.
GIMP: The Open-Source Giant for Advanced Editing
GIMP (GNU Image Manipulation Program) is one of the most well-known free photo editing programs and stands as a strong contender for the best free app for editing product photos. It’s an open-source program, which means it’s completely free, and it’s packed with features that rival professional software like Adobe Photoshop.
GIMP offers advanced tools such as layers, masks, and advanced retouching techniques, making it ideal for users who want more control over their product photos. You can crop, resize, and adjust various aspects of your photos, including sharpness, contrast, and exposure. One standout feature of GIMP is its ability to edit images in high detail, which is perfect for product photos that require precise adjustments.
While GIMP does have a steeper learning curve compared to some other apps, it is incredibly powerful once you get the hang of it. If you’re willing to invest a bit of time into learning the software, GIMP is one of the best free apps for editing product photos.
Desygner: Simple Yet Powerful for Beginners
Desygner is another best free app for editing product photos that’s particularly beginner-friendly. While it’s often compared to design tools like Canva, Desygner also provides solid photo editing capabilities. This app is perfect for users who need to make quick edits or create appealing promotional images for their products without getting bogged down by complex features.
With Desygner, you can easily adjust brightness, contrast, and saturation. It also offers a variety of filters and effects, which can help bring a professional touch to your photos. One of its most appealing features is the large selection of templates, making it easier to create product images that fit your brand’s style and vision.
For business owners who want an easy-to-use photo editor with a wide array of pre-designed templates, Desygner is a great choice among the best free apps for editing product photos.
PhotoScape X: A Versatile Editing Tool for All
If you’re looking for a free app with a blend of both basic and advanced features, PhotoScape X is an excellent option. It’s easy to use yet packed with powerful tools, making it a versatile choice for the best free app for editing product photos. Whether you want to make simple adjustments or perform more complex edits, PhotoScape X can handle it.
The app includes features like resizing, cropping, and adding text, which are essential for editing product photos. It also offers a range of filters and special effects to enhance the look of your images. One of its unique features is the ability to work with multiple photos simultaneously, which is a huge time-saver for businesses with lots of products.
PhotoScape X is ideal for those who want an all-in-one photo editing solution that is both easy to use and comprehensive, making it one of the best free apps for editing product photos.
Photos Pos Pro: A Robust Photo Editor with Detailed Features
Photos Pos Pro is another excellent option if you’re searching for the best free app for editing product photos. While it may not be as widely known as some of the other apps on this list, Photos Pos Pro offers a range of professional editing tools that can enhance the quality of your product photos.
The app comes with advanced features such as layers, filters, and effects, which allow you to manipulate your photos in great detail. Whether you need to remove a background, adjust colors, or add text to your images, Photos Pos Pro can do it all. It’s also a great tool for creating product catalogs or promotional images with added design elements.
While Photos Pos Pro can take a bit of time to master, it’s one of the best free apps for editing product photos for users who want to take their editing skills to the next level.
InPixio: Perfect for Quick and Easy Edits
InPixio is a user-friendly photo editor that’s ideal for those looking for a free app for editing product photos that’s fast and simple to use. The app specializes in quick fixes and easy edits, making it perfect for business owners who want to improve their product images without spending too much time on complex editing.
InPixio offers essential tools such as cropping, rotating, and enhancing the brightness and contrast of your photos. It also provides a background remover tool, which is incredibly useful if you need to create clean, professional-looking product images with transparent backgrounds.
What makes InPixio stand out is its ability to perform quick edits while maintaining image quality, making it one of the top free apps for product photo editing, especially when you need fast results.
Conclusion
Finding the best free app for editing product photos doesn’t have to be complicated. With the right tools, you can easily enhance your product images to attract more customers and increase sales. Apps like Snapseed, Canva, Adobe Photoshop Express, and Fotor all offer powerful features that allow you to improve your product photos without spending a dime. By using these free tools, you can ensure that your product photos look professional and polished, giving your online store a competitive edge. So, what are you waiting for? Start editing today and watch your product photos shine!
Frequently Asked Questions (FAQs)
What’s the best free app for editing product photos for beginners?
If you’re a beginner, Canva is an excellent choice. It’s easy to use and provides all the basic tools you need to enhance your product photos. Plus, the app includes templates and design elements that can help make your photos look professional without needing extensive experience.
Can I remove backgrounds from product photos using a free app?
Yes! Snapseed and Pixlr both have tools that allow you to remove or adjust backgrounds. If you need to create a clean, white background for your product images, these apps offer easy-to-use solutions.
How do I make my product photos look more professional with a free app?
Use the editing tools available in apps like Snapseed, Adobe Photoshop Express, or Canva to adjust the exposure, contrast, and sharpness of your photos. You can also remove imperfections or enhance details to make your product images look more polished.
Which app offers the best filters for product photos?
VSCO is the best free app for editing product photos if you’re looking for creative filters. Its presets and filters allow you to easily add a stylish, unique touch to your product images, making them stand out.
Can I edit multiple product photos at once with a free app?
Yes, Fotor allows you to batch process multiple images at once, which is a huge time-saver if you need to make similar edits across a large set of product photos.
Are these free apps suitable for businesses with a large number of product photos?
Yes, many of the apps mentioned, such as Pixlr and Fotor, support batch editing or cloud storage, which makes them ideal for businesses that need to edit and store a large volume of product photos.
Outdoor Furniture Photography: A Complete Guide
Imagine walking into a beautiful outdoor space, where cozy furniture pieces are surrounded by lush greenery, and the sun is gently casting its warm light over the setting. It’s a perfect scene, and if you’re a photographer, capturing that image through the lens can be quite the rewarding experience. But here’s the thing – taking stunning photographs of outdoor furniture isn’t as simple as snapping a few pictures. Outdoor Furniture Photography is an art that requires careful attention to detail, an understanding of lighting, composition, and the ability to showcase the furniture in a way that highlights its design and functionality. In this guide, we’ll dive deep into the world of outdoor furniture photography, offering tips, techniques, and insights that will help you master the art of capturing beautiful outdoor furniture shots.
Why is Outdoor Furniture Photography Important?
Before jumping into the techniques and tips, it’s important to understand why Outdoor Furniture Photography matters. Whether you’re a professional photographer hired to create catalog images or a homeowner trying to showcase your outdoor furniture collection, the quality of the photos can make or break the sale. Good photography highlights the durability, aesthetics, and comfort of the furniture, while poor photography might cause potential buyers to overlook it. In fact, in today’s digital age, most buyers are likely to make a decision based on how the furniture looks online. So, mastering the art of outdoor furniture photography can truly make a difference in how successful your sales or personal photos are.
The Basics of Outdoor Furniture Photography
Outdoor Furniture Photography might seem straightforward, but there are several elements that go into creating a high-quality image. The main objective is to capture the furniture in a setting that emphasizes its design and its suitability for outdoor spaces. Whether it’s a comfortable lounge chair, a dining set, or a stylish bench, every piece of furniture needs to be presented in a way that showcases its features and makes it desirable for the viewer.

Lighting: The Key to Perfect Outdoor Furniture Photography
One of the most important elements in Outdoor Furniture Photography is lighting. Natural light is often the best choice because it brings out the colors and textures of the furniture, making it appear vibrant and inviting. However, the timing of the shoot plays a significant role in how the light will interact with the scene. Early morning and late afternoon are ideal times because the light is softer and more diffused, reducing harsh shadows and highlights.
Midday sunlight can be very intense, creating stark shadows and bright spots that can make the furniture look unappealing. If you’re shooting on a sunny day, consider using reflectors to bounce the light and soften the shadows. Alternatively, you can wait for cloudy days when the light is more even and diffused, which is perfect for creating balanced, natural-looking images.
Composition: Framing the Perfect Shot
In Outdoor Furniture Photography, composition is just as important as lighting. You want to highlight the furniture, but also showcase the surroundings to give context. Start by thinking about the space as a whole and how the furniture fits within that space. For example, a sectional sofa might look great in the center of a large patio surrounded by greenery, while a small bistro table might be best placed near a decorative garden feature or pool.
When composing your shots, consider different angles. A high angle can give a great overall view of the furniture arrangement, while a low angle can emphasize the furniture’s design and create a more dramatic effect. Don’t be afraid to experiment with the background as well. Sometimes a blurred background (achieved through shallow depth of field) can make the furniture stand out even more, while other times you might want to include more of the environment to give the photo a relaxed, lifestyle feel.

Styling: Adding the Right Accessories
Styling plays an essential role in Outdoor Furniture Photography. Accessories like throw pillows, blankets, candles, or even plants can add life to your photos. Just be careful not to overcrowd the scene. The idea is to enhance the look of the furniture, not distract from it. A few well-placed items can make the space feel lived-in and inviting without overwhelming the main subject – the furniture itself.
Consider the materials and colors of the furniture when choosing accessories. For example, if you’re photographing a wicker outdoor sofa, pairing it with light-colored pillows or a woven blanket might complement the natural texture of the wicker. For modern metal or teak furniture, bold and vibrant accessories can help add contrast and make the furniture pop.
Tips for Shooting Outdoor Furniture Photography
Now that we’ve covered the basics, let’s dive into some practical tips that will help you get the most out of your outdoor furniture photography sessions.

Choosing the Right Equipment for Outdoor Furniture Photography
While a high-end camera can improve image quality, outdoor furniture photography does not necessarily require expensive gear. A good DSLR or mirrorless camera with a sharp lens is a great starting point. Wide-angle lenses can be useful for capturing entire outdoor setups, while a prime lens can provide sharper details. A tripod is essential for stability, especially for long exposure shots or when shooting in low light. Additionally, using reflectors and diffusers can help control shadows and harsh lighting, ensuring a balanced and professional look.
Best Time of Day for Outdoor Furniture Photography
Lighting plays a crucial role in outdoor furniture photography. The best times to shoot are during the golden hours—shortly after sunrise and just before sunset. These times provide soft, warm lighting that enhances the textures and colors of the furniture. Midday sunlight can be harsh and create unwanted shadows, so if you must shoot at noon, look for shaded areas or use diffusers to soften the light. Cloudy days can also be ideal, as they provide even lighting and reduce the risk of overexposed highlights or deep shadows.
Setting Up the Perfect Outdoor Scene
The background and surroundings play a vital role in outdoor furniture photography. A cluttered or distracting background can take attention away from the furniture, so it’s important to choose a clean and visually appealing setting. Natural elements such as greenery, flowers, and water features can enhance the aesthetic appeal of outdoor furniture. Ensure the furniture is clean and well-arranged to showcase its best features. Adding decorative elements such as cushions, table settings, or outdoor lighting can also help create a more inviting and realistic atmosphere.
Mastering Composition Techniques
Composition is key in outdoor furniture photography. The rule of thirds is a fundamental technique that helps create balanced and visually pleasing images. Placing the furniture slightly off-center can make the shot more dynamic. Leading lines, such as pathways or fences, can guide the viewer’s eye toward the furniture. Shooting from different angles can highlight unique design elements and textures. Low angles can make furniture appear more grand and imposing, while high angles provide a comprehensive view of the setup.

Managing Shadows and Reflections
One of the biggest challenges in outdoor furniture photography is dealing with shadows and reflections. Harsh sunlight can create strong shadows that obscure details. Using reflectors to bounce light onto shaded areas can help balance the exposure. A polarizing filter can be useful in reducing glare and reflections, especially on glass or metal surfaces. Shooting in RAW format allows for better control over shadows and highlights during post-processing.
Post-Processing for Professional Results
Editing plays a crucial role in outdoor furniture photography. Adjusting brightness, contrast, and saturation can enhance the overall look of the images. Cropping and straightening can help improve composition, while retouching tools can remove unwanted distractions. Using software like Adobe Lightroom or Photoshop allows for fine-tuning details and achieving a polished final image. However, it’s important to maintain a natural look and avoid excessive editing that may distort the true appearance of the furniture.

Capturing Close-Up and Detail Shots
Detail shots are just as important as wide-angle images in outdoor furniture photography. Close-up shots highlight the texture of materials, stitching patterns, and unique design features. Zooming in on specific elements, such as the weave of a rattan chair or the grain of a wooden table, adds depth and variety to the photography collection. These shots provide a more immersive experience for viewers, allowing them to appreciate the craftsmanship and quality of the furniture.
Showcasing Seasonal Changes and Lifestyle Elements
Outdoor furniture is often used in different seasons, so capturing images that reflect various weather conditions can be highly beneficial. Photos of furniture surrounded by autumn leaves, under a clear blue sky, or covered in a light layer of snow can create a stronger emotional connection with viewers. Lifestyle shots featuring people using the furniture can also enhance relatability and help potential buyers envision how they might enjoy the products in their own outdoor spaces.
Maintaining Consistency in Style and Branding
For businesses and brands, maintaining a consistent style in outdoor furniture photography is essential. Using similar lighting, color tones, and composition styles helps create a cohesive look across all images. This consistency strengthens brand identity and makes the photos more recognizable. Whether for a website, social media, or marketing materials, a unified photography style enhances professionalism and visual appeal.

Conclusion
Mastering outdoor furniture photography requires an understanding of lighting, composition, and the right equipment. Whether for business or personal projects, capturing high-quality images of outdoor furniture can greatly enhance their appeal. By considering factors like the best time of day, background selection, and post-processing techniques, anyone can create visually compelling photographs that showcase outdoor furniture in its best light. With practice and attention to detail, outdoor furniture photography can become an enjoyable and rewarding skill that delivers stunning results.
Frequently Asked Questions (FAQs)
What is the best camera setting for outdoor furniture photography?
The best settings depend on lighting conditions. A low ISO (100-200) keeps images clear, while an aperture between f/5.6 and f/11 provides a good depth of field. Shutter speed should be adjusted based on the amount of available light.
How do I prevent harsh shadows in outdoor furniture photography?
Shooting during golden hours, using diffusers, and positioning furniture in shaded areas can help prevent harsh shadows. Reflectors can also be used to balance lighting.
What background is best for outdoor furniture photography?
A natural, uncluttered background works best. Greenery, gardens, patios, and neutral-colored walls complement outdoor furniture without overwhelming the main subject.
How can I make outdoor furniture photography look more professional?
Using high-quality equipment, maintaining proper lighting, focusing on composition, and post-processing images can significantly improve the professionalism of outdoor furniture photography.
Is it necessary to edit outdoor furniture photos?
Editing is essential for enhancing colors, adjusting lighting, and refining details. However, edits should be subtle to maintain a natural and realistic look.
How do I capture outdoor furniture in different seasons?
Plan shoots during various times of the year to capture different seasonal elements. Incorporating props like blankets for winter or vibrant plants for summer can help reflect seasonal changes.


